
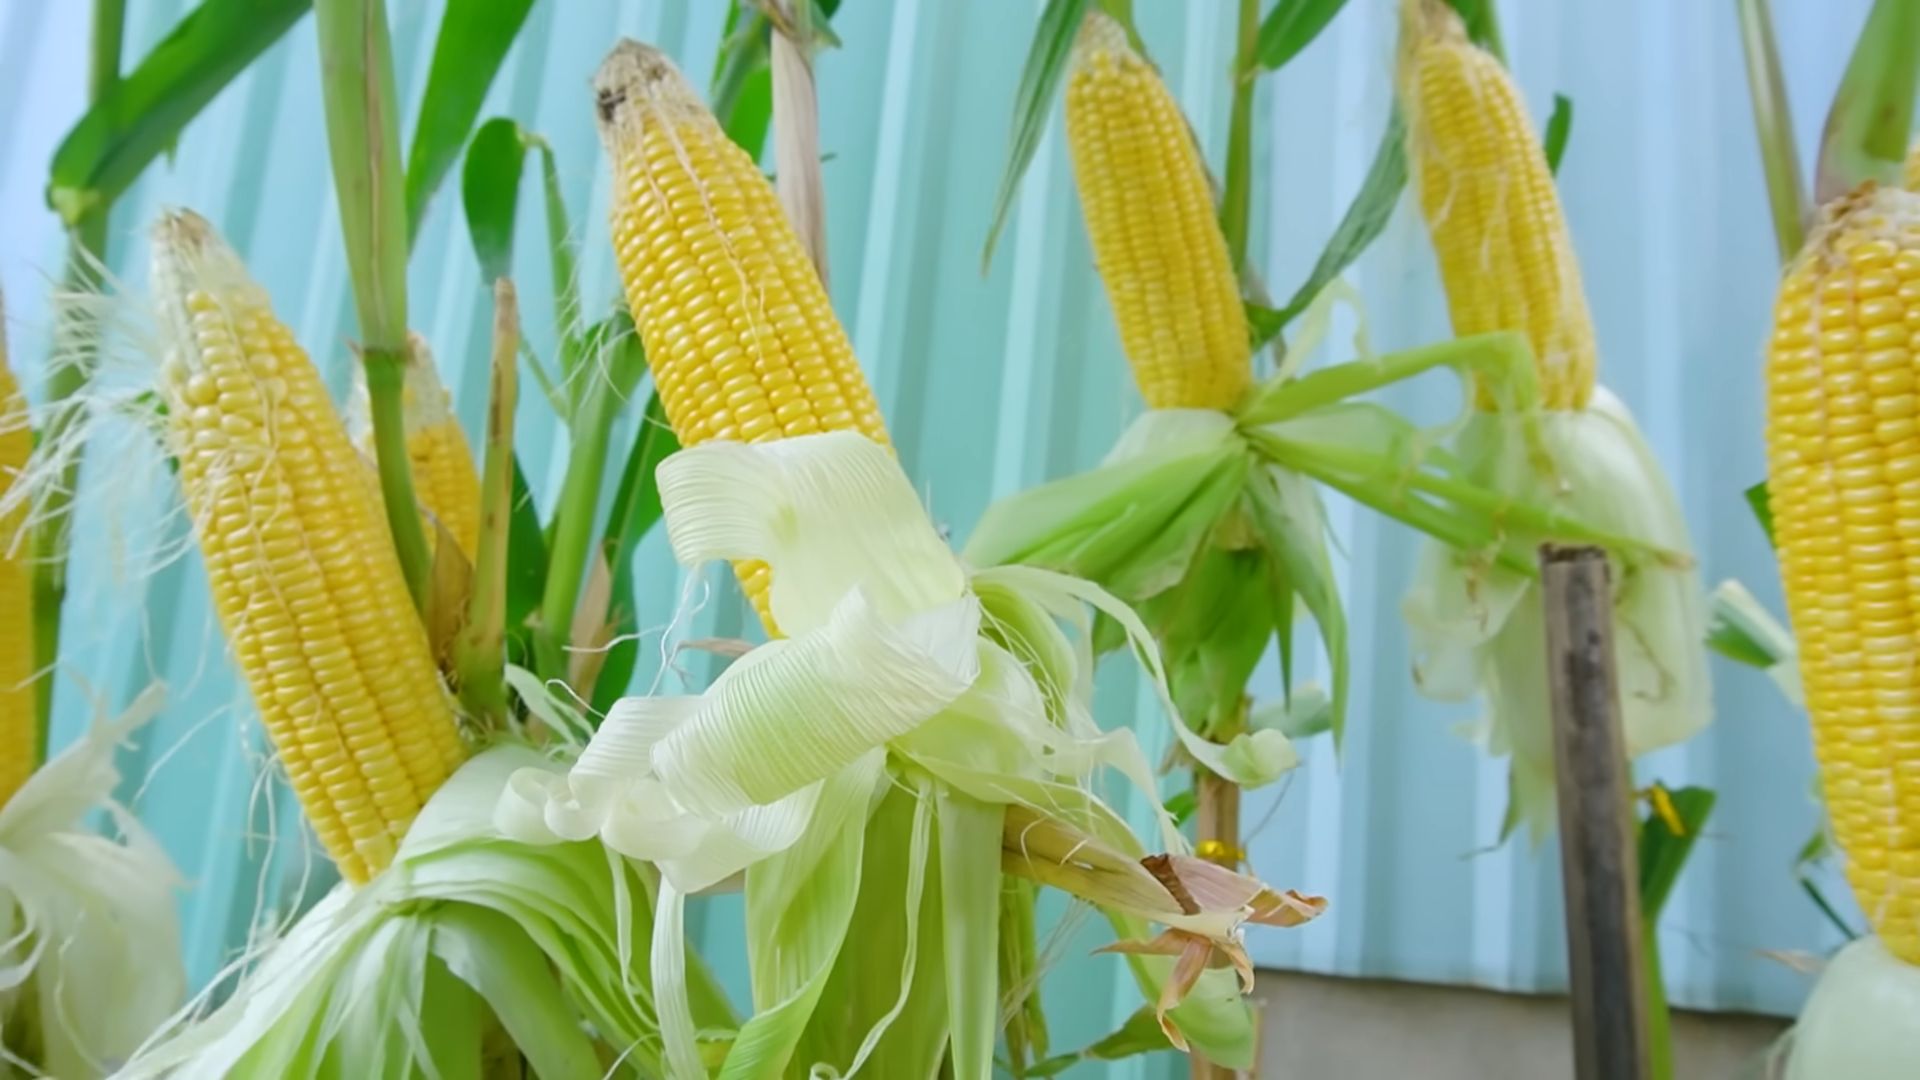
Bigger Corn Harvest Soil Bags – that’s the dream, isn’t it? Imagine sinking your teeth into sweet, juicy corn on the cob, knowing you grew it yourself, right in your backyard! But sometimes, despite our best efforts, our corn yields are… well, less than impressive. I’ve been there, staring at stalks that promised so much, only to deliver disappointingly small ears.
Growing corn at home has a rich history, dating back thousands of years to its origins in Mesoamerica. It’s a crop that has sustained civilizations and continues to be a staple in diets worldwide. But you don’t need to be an expert farmer to enjoy a bountiful corn harvest. That’s where these DIY tricks come in!
Let’s face it, store-bought corn can be expensive and often lacks the fresh, vibrant flavor of homegrown. Plus, there’s something incredibly satisfying about nurturing a plant from seed to table. But many of us are limited by space or less-than-ideal soil conditions. That’s why I’m so excited to share these simple, yet effective, DIY hacks for creating bigger corn harvest soil bags. These methods will help you maximize your yield, even in small spaces, and ensure you’re enjoying the sweetest, most flavorful corn imaginable. Get ready to transform your gardening game and impress your friends and family with your impressive corn crop!
DIY: Supercharge Your Corn Harvest with Soil Bag Expansion!
Hey there, fellow gardeners! Are you dreaming of a bumper corn harvest but limited by space or soil quality? I’ve got a fantastic DIY hack that’ll help you maximize your yield using something you probably already have: soil bags! We’re going to expand those bags to give our corn roots more room to thrive, resulting in bigger, healthier plants and, ultimately, more delicious corn on the cob. Let’s get started!
What You’ll Need:
Before we dive in, let’s gather our supplies. This project is relatively simple and doesn’t require a ton of fancy equipment.
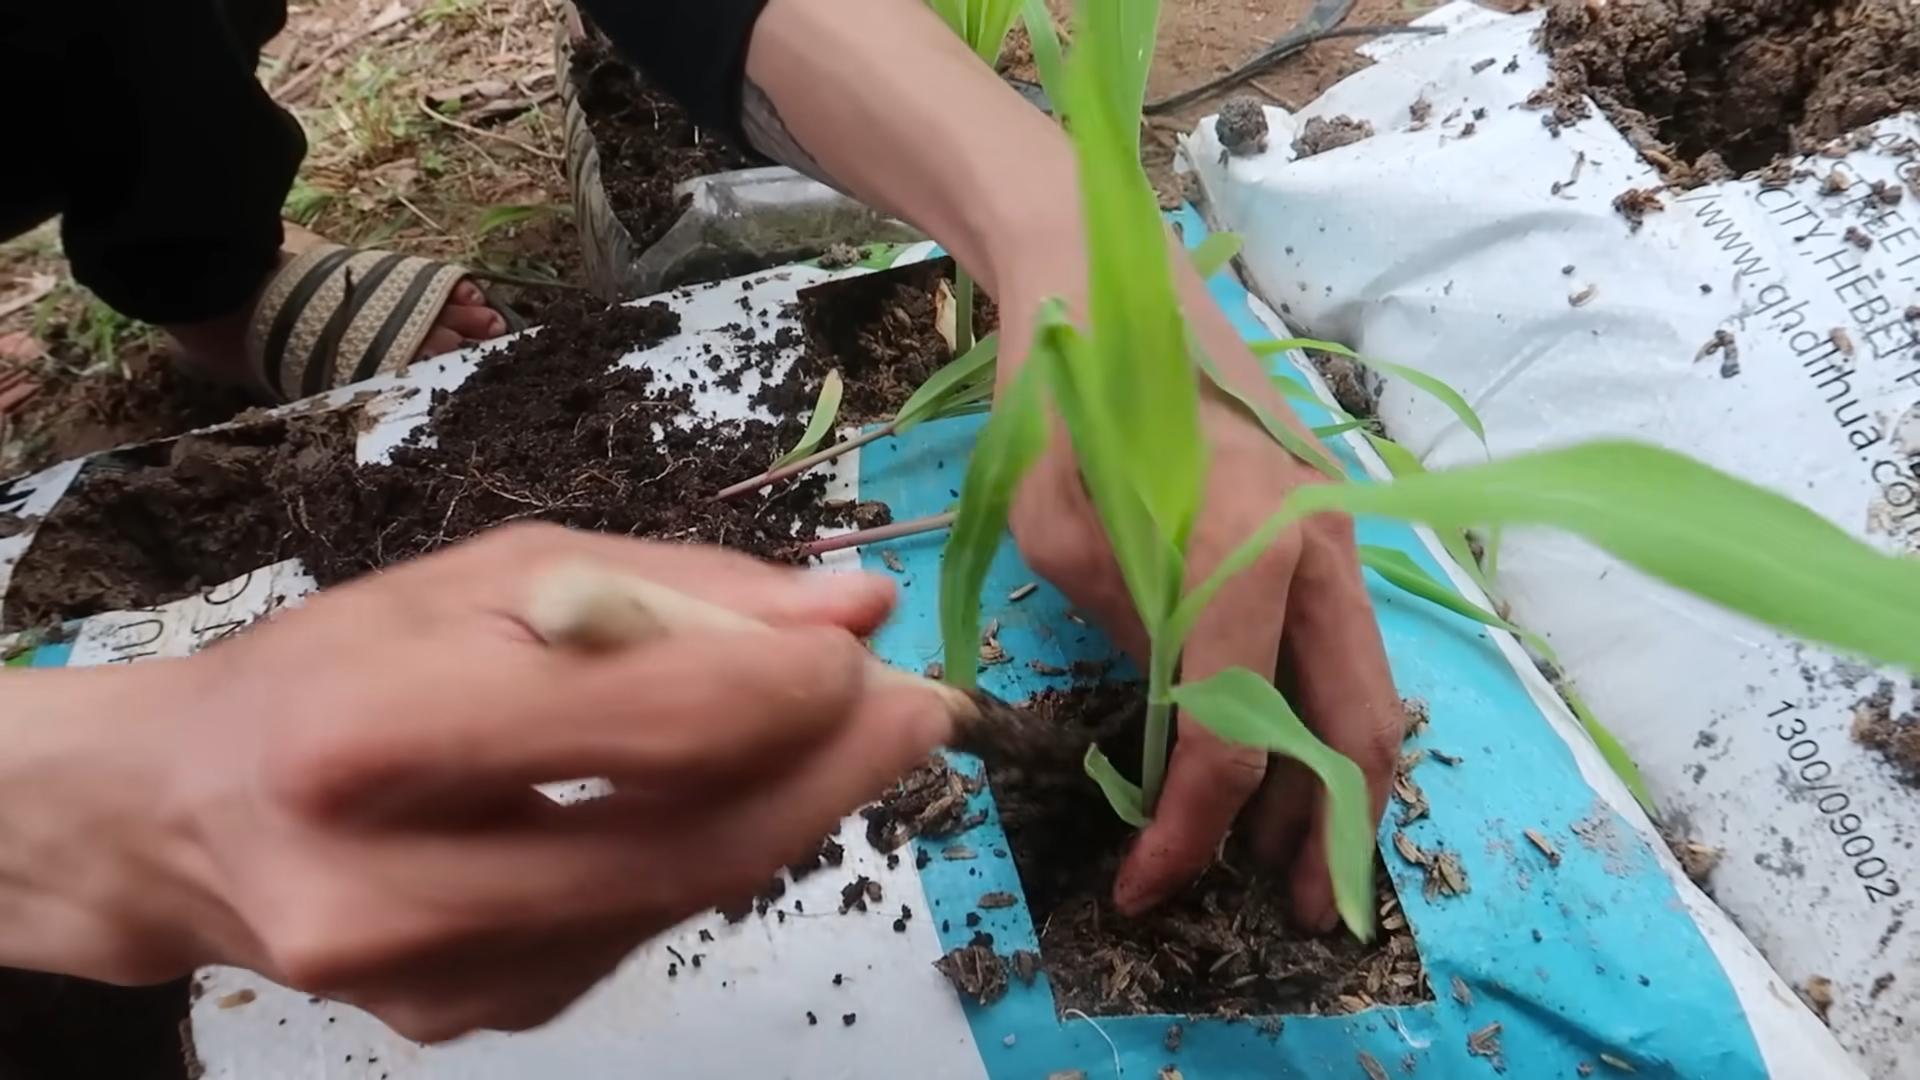
* **Soil Bags with Corn Seedlings:** Obviously, you’ll need soil bags that already have your corn seedlings planted. Make sure they’re healthy and have a good start.
* **Heavy-Duty Utility Knife or Scissors:** A sharp blade is essential for making clean cuts in the soil bags. Safety first!
* **Duct Tape (Heavy-Duty):** This will be our primary tool for reinforcing the expanded bags. Choose a strong, weather-resistant duct tape.
* **Extra Potting Soil:** You’ll need extra soil to fill the expanded space. Use a good quality potting mix that’s suitable for corn.
* **Measuring Tape or Ruler:** This will help you make accurate cuts and ensure consistent expansion.
* **Gloves:** Protect your hands from dirt and potential cuts.
* **Optional: Landscape Fabric or Burlap:** For added reinforcement and a more aesthetically pleasing look, you can use landscape fabric or burlap to wrap the expanded bags.
* **Optional: Staple Gun:** If you’re using landscape fabric or burlap, a staple gun will make securing it much easier.
Understanding the Goal: Root Expansion is Key!
The secret to a bigger corn harvest lies in providing ample space for the roots to grow. Corn plants are heavy feeders and need a robust root system to absorb nutrients and water. By expanding the soil bags, we’re essentially creating a larger container for the roots to spread out and flourish. This leads to stronger, healthier plants that can produce more corn.
Step-by-Step Guide to Expanding Your Soil Bags:
Okay, let’s get our hands dirty! Follow these steps carefully to expand your soil bags and give your corn plants the room they need to thrive.
1. **Assess Your Soil Bags:** Take a good look at your soil bags and the corn seedlings growing in them. Note the size of the bags and the health of the plants. This will help you determine how much you can realistically expand the bags. I usually aim to double the volume of the original bag.
2. **Prepare Your Workspace:** Find a flat, stable surface to work on. This could be a patio, driveway, or even a large piece of cardboard on the grass. Make sure you have enough space to maneuver around the soil bags.
3. **Measure and Mark the Cut Lines:** Using your measuring tape or ruler, determine how much you want to expand the bag. I recommend adding at least 6-8 inches to the height of the bag. Mark the cut lines on the bag with a permanent marker or pen. Make sure the lines are straight and even. This is important for a stable and aesthetically pleasing expansion.
4. **Make the Cuts:** Carefully use your utility knife or scissors to cut along the marked lines. **Be extremely careful not to cut into the root ball of the corn plants.** It’s best to make shallow cuts at first and then gradually deepen them. You’ll essentially be cutting the bag open to create more vertical space.
5. **Fold Down the Existing Bag:** Gently fold down the top portion of the existing soil bag, creating a cuff around the base of the corn plants. This will help to support the plants and prevent the soil from spilling out.
6. **Add Extra Potting Soil:** Now, carefully add extra potting soil to the expanded space. Fill the bag up to the desired level, leaving a few inches of space at the top for watering. Gently pat down the soil to remove any air pockets.
7. **Reinforce the Expanded Bag with Duct Tape:** This is the most crucial step! Use heavy-duty duct tape to reinforce the expanded bag. Start by taping the cut edges together, creating a strong seam. Then, apply additional strips of duct tape around the entire bag, both horizontally and vertically, to provide extra support. Make sure the tape is securely attached to the bag. Overlap the tape strips for maximum strength. I like to use multiple layers of duct tape, especially around the bottom of the bag, to prevent it from tearing under the weight of the soil.
8. **Optional: Wrap with Landscape Fabric or Burlap:** For added reinforcement and a more attractive look, you can wrap the expanded bag with landscape fabric or burlap. Cut a piece of fabric or burlap that’s large enough to completely cover the bag. Wrap it tightly around the bag and secure it with a staple gun or duct tape. This will not only protect the bag from the elements but also give it a more polished appearance.
9. **Water Thoroughly:** After expanding the bag and adding extra soil, water the corn plants thoroughly. This will help to settle the soil and encourage the roots to grow into the new space.
10. **Monitor and Maintain:** Keep an eye on your corn plants and water them regularly, especially during hot weather. Fertilize them as needed to provide them with the nutrients they need to thrive. Check the duct tape regularly and repair any tears or damage.
Troubleshooting Tips:
Even with careful planning, you might encounter a few challenges along the way. Here are some troubleshooting tips to help you overcome common problems:
* **Bag Tearing:** If the soil bag tears during the expansion process, don’t panic! Simply reinforce the tear with duct tape. Use multiple layers of tape and make sure it’s securely attached to the bag.
* **Soil Spillage:** If soil spills out of the bag, simply scoop it back in. You can also use landscape fabric or burlap to create a barrier and prevent further spillage.
* **Plant Stress:** If your corn plants show signs of stress after the expansion, such as wilting or yellowing leaves, don’t worry. This is normal and usually temporary. Water the plants thoroughly and provide them with some shade for a few days. They should recover quickly.
* **Uneven Expansion:** If the bag expands unevenly, simply adjust the soil and duct tape until it’s more balanced. You can also use stakes or supports to help stabilize the bag.
Benefits of Expanding Your Soil Bags:
So, why go through all this effort? Here are the key benefits of expanding your soil bags for corn:
* **Increased Root Space:** As we discussed, more root space means healthier, stronger plants.
* **Improved Nutrient Uptake:** With a larger root system, your corn plants can absorb more nutrients from the soil, leading to faster growth and higher yields.
* **Better Water Retention:** Expanded soil bags hold more water, which is especially important during hot, dry weather.
* **Reduced Stress:** By providing ample space for the roots to grow, you’ll reduce stress on the plants, making them more resistant to pests and diseases.
* **Higher Yields:** Ultimately, expanding your soil bags will result in a bigger and better corn harvest!
Alternative Methods and Considerations:
While this duct tape method is my go-to, there are a few other ways you can approach expanding your soil bags:
* **Using Old Tires:** You can cut the top off an old tire and place it around the existing soil bag, filling the tire with extra soil. This provides a sturdy and durable expansion.
* **Creating a Wooden Frame:** You can build a simple wooden frame around the soil bag to provide support and create more space.
* **Transplanting to Larger Containers:** If you have the space, you can simply transplant the corn seedlings to larger containers.
Consider the cost and availability of materials when choosing your method. The duct tape method is generally the most affordable and convenient, but the other options may be more durable or aesthetically pleasing.
Final Thoughts: Enjoy Your Bountiful Harvest!
Expanding your soil bags is a simple and effective way to boost your corn harvest. With a little effort and some basic materials, you can create a thriving environment for your corn plants and enjoy a bountiful crop of delicious corn on the cob. So, get out there, get your hands dirty, and start expanding those soil bags! Happy gardening! Remember to always prioritize safety when using sharp tools. And most importantly, have fun! There’s nothing quite like the satisfaction of growing your own food. I hope this guide helps you achieve your best corn harvest yet!
Conclusion
So, there you have it! Transforming ordinary soil bags into mini-gardens for a bigger corn harvest is not just a clever gardening hack; it’s a game-changer. We’ve explored how this simple DIY trick can unlock a bountiful yield, even in limited spaces, and provide a cost-effective alternative to traditional gardening methods. The benefits are undeniable: improved drainage, enhanced soil warming, reduced weed competition, and the sheer portability that allows you to chase the sun or shelter your precious corn from unexpected frosts.
But why is this a must-try? Because it empowers you, the home gardener, to take control of your harvest. You’re no longer limited by the constraints of your existing garden bed or the expense of raised garden beds. You’re creating a personalized growing environment perfectly tailored to the needs of your corn. Imagine the satisfaction of harvesting plump, juicy ears of corn, knowing that you nurtured them from seedling to table using this ingenious method.
Don’t be afraid to experiment! While we’ve focused on corn, this technique is incredibly versatile. Consider using it for other heavy feeders like tomatoes, peppers, or even potatoes. You can also adjust the soil mix to suit the specific needs of your chosen crop. For example, adding more compost will give your plants an extra boost of nutrients.
Ready to get your hands dirty? We wholeheartedly encourage you to try this DIY soil bag gardening trick for a bigger corn harvest. It’s easy, affordable, and incredibly rewarding. And remember, gardening is all about learning and adapting. Don’t be discouraged if your first attempt isn’t perfect. Every season is a new opportunity to refine your technique and achieve even greater success.
We’re confident that you’ll be amazed by the results. But more importantly, we want to hear about your experience! Share your photos, tips, and stories in the comments below. Let’s build a community of gardeners who are passionate about maximizing their harvests and sharing their knowledge. Together, we can unlock the secrets to a more abundant and sustainable food future, one soil bag at a time. So go ahead, grab those soil bags, and get growing! You’ll be enjoying fresh, homegrown corn before you know it.
Frequently Asked Questions (FAQ)
What kind of soil bags should I use?
Ideally, you should use high-quality potting mix or garden soil bags. Avoid using bags filled with just topsoil, as it tends to compact and doesn’t provide adequate drainage or nutrients for optimal corn growth. Look for bags that specify they are suitable for container gardening or raised beds. The size of the bag depends on how many corn stalks you want to plant in each bag. A standard 20-40 pound bag is generally sufficient for 2-3 corn plants.
How many holes should I cut in the bag for drainage?
A good rule of thumb is to cut at least 4-6 drainage holes in the bottom of the bag. These holes should be approximately ½ inch in diameter. You can also cut a few small slits along the sides of the bag near the bottom to further improve drainage. Proper drainage is crucial to prevent root rot and ensure healthy corn growth.
What kind of fertilizer should I use for corn grown in soil bags?
Corn is a heavy feeder, so it requires a fertilizer rich in nitrogen, phosphorus, and potassium (NPK). A balanced fertilizer with an NPK ratio of 10-10-10 or 14-14-14 is a good starting point. You can also supplement with a nitrogen-rich fertilizer, such as blood meal or fish emulsion, during the early stages of growth to promote leafy green growth. Follow the instructions on the fertilizer packaging carefully to avoid over-fertilizing, which can damage your plants. Consider using a slow-release fertilizer to provide a steady supply of nutrients throughout the growing season.
How often should I water corn grown in soil bags?
Watering frequency depends on several factors, including the weather, the size of the bag, and the stage of growth. Generally, you should water deeply whenever the top inch of soil feels dry to the touch. During hot, dry weather, you may need to water daily or even twice a day. Avoid overwatering, as this can lead to root rot. A good way to check if your corn needs water is to stick your finger into the soil. If the soil feels dry an inch or two below the surface, it’s time to water.
Can I reuse the soil from the bags after the growing season?
Yes, you can reuse the soil, but it’s important to amend it before planting again. Corn depletes the soil of nutrients, so you’ll need to replenish them. Add compost, aged manure, or other organic matter to improve the soil’s fertility and structure. You may also want to add a slow-release fertilizer to provide a boost of nutrients for the next crop. Consider rotating crops in the soil bags to prevent the buildup of pests and diseases.
What if I don’t have a sunny spot in my yard?
Corn requires at least 6-8 hours of direct sunlight per day to thrive. If you don’t have a sunny spot in your yard, you can try using grow lights. Place the grow lights a few inches above the plants and provide them with 14-16 hours of light per day. You can also try moving the soil bags around to different locations throughout the day to maximize their exposure to sunlight.
How do I prevent pests and diseases from affecting my corn?
Regularly inspect your corn plants for signs of pests or diseases. Common corn pests include corn earworms, aphids, and spider mites. You can control these pests with insecticidal soap, neem oil, or other organic pesticides. To prevent diseases, ensure good air circulation around the plants and avoid overwatering. Remove any diseased leaves or stalks promptly to prevent the spread of infection. Consider companion planting with herbs like basil or marigolds, which can help repel pests.
Can I grow different varieties of corn in soil bags?
Yes, you can grow different varieties of corn in soil bags. However, it’s important to choose varieties that are well-suited to container gardening and have similar growing requirements. Consider planting dwarf or compact varieties that don’t require as much space. Be sure to provide adequate spacing between plants to allow for proper air circulation and sunlight penetration.
How do I know when my corn is ready to harvest?
Corn is typically ready to harvest when the silks turn brown and dry, and the kernels are plump and milky. You can test for ripeness by peeling back a portion of the husk and piercing a kernel with your fingernail. If the liquid that comes out is milky, the corn is ready to harvest. If the liquid is clear, the corn needs more time to ripen.
What are some variations I can try with this DIY soil bag method?
* Vertical Gardening: Stack the soil bags on top of each other to create a vertical garden. This is a great way to maximize space in small areas.
* Companion Planting: Plant companion plants like beans or squash alongside your corn in the soil bags. This can help improve soil fertility and deter pests.
* Self-Watering System: Create a self-watering system by placing a water reservoir at the bottom of the soil bag. This can help reduce the need for frequent watering.
* Different Soil Amendments: Experiment with different soil amendments like vermicompost, bone meal, or rock phosphate to see how they affect corn growth.
* Colored Soil Bags: Use colored soil bags to add visual appeal to your garden.
We hope these FAQs have answered your questions and inspired you to try this DIY soil bag gardening trick for a bigger corn harvest. Happy gardening!
Leave a Comment