
Grow Celery Indoors Easily? Absolutely! Imagine fresh, crisp celery stalks just steps away, ready to be added to your soups, salads, or enjoyed as a healthy snack. No more last-minute grocery store runs when you need that essential ingredient. I’m here to tell you, cultivating your own celery indoors is not only possible, but surprisingly rewarding, and I’m excited to share some simple DIY tricks to make it a breeze.
Celery, with its crunchy texture and subtle flavor, has been enjoyed for centuries. Originating in the Mediterranean, it was initially valued for its medicinal properties before becoming a culinary staple. Now, you can bring this historical vegetable right into your home!
Why should you learn to grow celery indoors easily? Well, for starters, you gain control over the growing process, ensuring your celery is free from harmful pesticides. Plus, it’s a fantastic way to reduce food waste by regrowing celery from the base you’d normally discard. But most importantly, it’s incredibly satisfying to nurture a plant from scraps to a thriving, edible crop. So, let’s dive into these easy DIY tricks and hacks that will have you harvesting your own indoor celery in no time!
Growing Butternut Squash: A Beginner’s Guide to a Bountiful Harvest
Hey there, fellow gardening enthusiasts! I’m so excited to share my experience growing butternut squash. It’s surprisingly easy, incredibly rewarding, and nothing beats the taste of homegrown squash in the fall. This guide will walk you through everything you need to know, from seed to table.
Choosing the Right Butternut Squash Variety
Before we dive in, let’s talk varieties. While ‘Waltham’ is a classic and reliable choice, there are other options to consider depending on your space and preferences.
* **Waltham:** The standard, known for its consistent size and excellent flavor.
* **Butterscotch PMR:** A smaller variety, perfect for smaller gardens or containers, and resistant to powdery mildew.
* **Early Butternut:** Matures earlier than other varieties, ideal for shorter growing seasons.
* **Honey Nut:** A miniature butternut squash with a sweeter, nuttier flavor.
I personally love ‘Waltham’ for its size and versatility, but feel free to experiment!
Getting Started: Planting Your Butternut Squash
Butternut squash needs a long growing season (around 90-100 days), so starting seeds indoors is often the best approach, especially if you live in a cooler climate.
Starting Seeds Indoors (Optional)
1. **Gather Your Supplies:** You’ll need seed starting trays or small pots, seed starting mix (not regular potting soil!), butternut squash seeds, and a spray bottle.
2. **Sow the Seeds:** Fill your trays or pots with seed starting mix. Make a small hole (about 1 inch deep) in the center of each cell or pot. Place 2-3 seeds in each hole. This increases your chances of germination.
3. **Cover and Water:** Gently cover the seeds with more seed starting mix and lightly water with a spray bottle. You want the soil to be moist, not soggy.
4. **Provide Warmth and Light:** Butternut squash seeds need warmth to germinate. A heat mat can be helpful, but a warm spot in your house will also work. Once the seedlings emerge, they need plenty of light. A sunny windowsill or grow lights are essential.
5. **Thin the Seedlings:** Once the seedlings have their first true leaves (the second set of leaves that appear after the initial seed leaves), thin them to one strong seedling per cell or pot. Snip off the weaker seedlings at the soil line with scissors. Don’t pull them out, as this can disturb the roots of the remaining seedling.
6. **Harden Off the Seedlings:** About a week before you plan to transplant your seedlings outdoors, you need to “harden them off.” This gradually acclimates them to outdoor conditions. Start by placing them outside in a sheltered spot for an hour or two each day, gradually increasing the time they spend outdoors. Protect them from strong winds and direct sunlight at first.
Direct Sowing (If Your Climate Allows)
If you have a long growing season and warm soil, you can direct sow butternut squash seeds directly into the garden.
1. **Prepare the Soil:** Choose a sunny spot with well-drained soil. Butternut squash are heavy feeders, so amend the soil with plenty of compost or well-rotted manure.
2. **Create Mounds:** Butternut squash plants are vining and need space. Create mounds of soil about 2-3 feet apart.
3. **Sow the Seeds:** Plant 3-4 seeds per mound, about 1 inch deep.
4. **Water Gently:** Water the mounds gently to avoid washing away the seeds.
5. **Thin the Seedlings:** Once the seedlings emerge, thin them to the strongest 1-2 plants per mound.
Transplanting Your Seedlings (If You Started Indoors)
Once the danger of frost has passed and the soil has warmed up, it’s time to transplant your butternut squash seedlings into the garden.
1. **Choose a Sunny Location:** Butternut squash needs at least 6-8 hours of sunlight per day.
2. **Prepare the Soil:** As with direct sowing, amend the soil with plenty of compost or well-rotted manure.
3. **Dig Holes:** Dig holes that are slightly larger than the root balls of your seedlings, spacing them 2-3 feet apart.
4. **Gently Remove the Seedlings:** Carefully remove the seedlings from their trays or pots, being careful not to damage the roots.
5. **Plant the Seedlings:** Place the seedlings in the holes and gently backfill with soil.
6. **Water Thoroughly:** Water the seedlings thoroughly after planting.
7. **Mulch:** Apply a layer of mulch around the plants to help retain moisture, suppress weeds, and regulate soil temperature. Straw, wood chips, or shredded leaves work well.
Caring for Your Butternut Squash Plants
Once your butternut squash plants are established, they’re relatively easy to care for.
* **Watering:** Butternut squash needs consistent watering, especially during hot, dry weather. Water deeply at the base of the plants, avoiding getting the leaves wet, which can encourage fungal diseases.
* **Fertilizing:** Butternut squash are heavy feeders and benefit from regular fertilization. Use a balanced fertilizer or side-dress with compost every few weeks.
* **Weeding:** Keep the area around your butternut squash plants free of weeds. Weeds compete with the plants for nutrients and water.
* **Pest Control:** Keep an eye out for common pests like squash bugs, squash vine borers, and aphids. Handpicking pests, using insecticidal soap, or covering the plants with row covers can help control infestations.
* **Pollination:** Butternut squash plants have separate male and female flowers. Bees are essential for pollination. If you’re not seeing many bees in your garden, you may need to hand-pollinate the flowers. To do this, use a small paintbrush to transfer pollen from the male flowers to the female flowers. Female flowers have a small squash at the base of the flower.
Dealing with Common Problems
Even with the best care, you might encounter some problems while growing butternut squash. Here are a few common issues and how to address them:
* **Powdery Mildew:** This fungal disease appears as a white, powdery coating on the leaves. Improve air circulation by pruning some of the leaves, and use a fungicide if necessary. Some varieties, like ‘Butterscotch PMR,’ are resistant to powdery mildew.
* **Squash Bugs:** These pests suck the sap from the leaves, causing them to wilt and die. Handpick the bugs and their eggs (which are laid on the undersides of the leaves), and use insecticidal soap.
* **Squash Vine Borers:** These pests bore into the stems of the plants, causing them to wilt and die. Wrap the base of the stems with aluminum foil to prevent the borers from entering. You can also inject Bacillus thuringiensis (Bt) into the stems to kill the borers.
* **Blossom End Rot:** This condition causes the blossom end of the squash to rot. It’s usually caused by calcium deficiency or inconsistent watering. Ensure the soil is well-drained and water consistently. You can also add calcium to the soil.
Harvesting Your Butternut Squash
The moment you’ve been waiting for! Knowing when to harvest butternut squash is key to getting the best flavor and storage life.
1. **Check the Color:** The skin should be a deep tan color and hard to the touch.
2. **Check the Stem:** The stem should be dry and corky.
3. **Tap the Squash:** A ripe butternut squash will sound hollow when tapped.
4. **Harvest Before Frost:** Harvest your butternut squash before the first frost.
5. **Cut the Stem:** Use a sharp knife or pruning shears to cut the stem, leaving about 2-3 inches attached to the squash. This helps prevent rot.
Curing and Storing Your Butternut Squash
Curing butternut squash after harvesting helps to harden the skin and improve its storage life.
1. **Cure the Squash:** Place the harvested squash in a warm, dry, well-ventilated place for 1-2 weeks. A sunny porch or garage works well.
2. **Store the Squash:** Store the cured squash in a cool, dry place (around 50-60°F) with good ventilation. A basement or root cellar is ideal. Properly cured and stored butternut squash can last for several months.
Enjoying Your Homegrown Butternut Squash
Now for the best part – eating your delicious homegrown butternut squash! There are endless ways to enjoy it.
* **Roasted:** Simply cut the squash in half, scoop out the seeds, and roast it in the oven with olive oil, salt, and pepper.
* **Soup:** Butternut squash soup is a classic fall dish.
* **Pie:** Butternut squash pie is a delicious alternative to pumpkin pie.
* **Risotto:** Add roasted butternut squash to risotto for a creamy and flavorful dish.
* **Mashed:** Mash cooked butternut squash with butter, cream, and spices for a comforting side dish.
I hope this
Conclusion
So, there you have it! Growing celery indoors easily is not just a whimsical gardening project; it’s a practical, rewarding, and sustainable way to enjoy fresh, crisp celery whenever you desire. Forget those limp, store-bought stalks that have traveled miles and lost their vibrancy. Imagine the satisfaction of snipping off exactly what you need, knowing it’s packed with flavor and nutrients, grown right in your own home.
This DIY trick is a must-try for several compelling reasons. First, it’s incredibly simple. You don’t need a green thumb or extensive gardening knowledge. With just a celery base, some water, and a sunny spot, you’re well on your way to a continuous supply of this versatile vegetable. Second, it’s cost-effective. Think about how often you buy celery, only to use a few stalks and let the rest wither away. This method eliminates waste and saves you money in the long run. Third, it’s environmentally friendly. By growing your own celery, you reduce your reliance on commercially grown produce, which often involves pesticides, long-distance transportation, and excessive packaging.
But the benefits don’t stop there. Growing celery indoors can be a fun and educational activity for the whole family. It’s a great way to teach children about plant life cycles, responsibility, and the importance of healthy eating. Plus, it adds a touch of greenery and freshness to your indoor space, creating a more inviting and vibrant atmosphere.
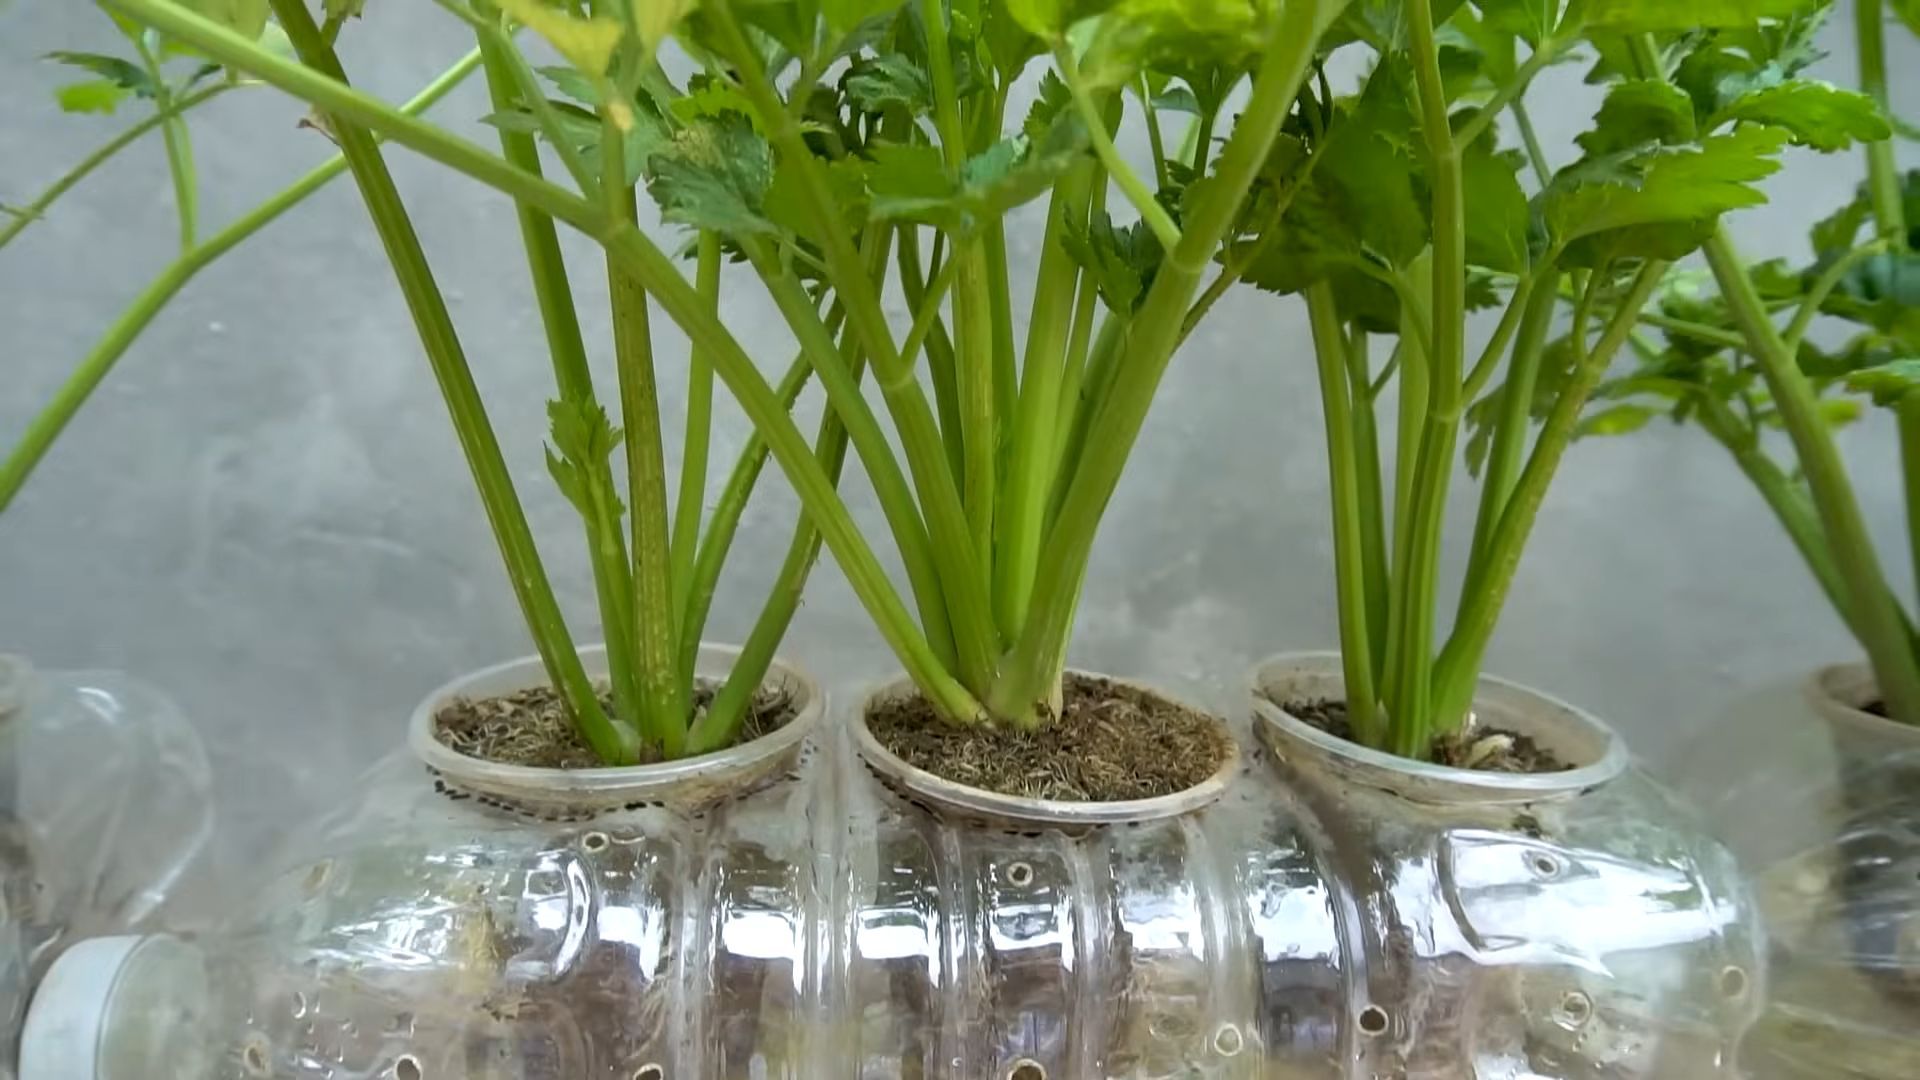
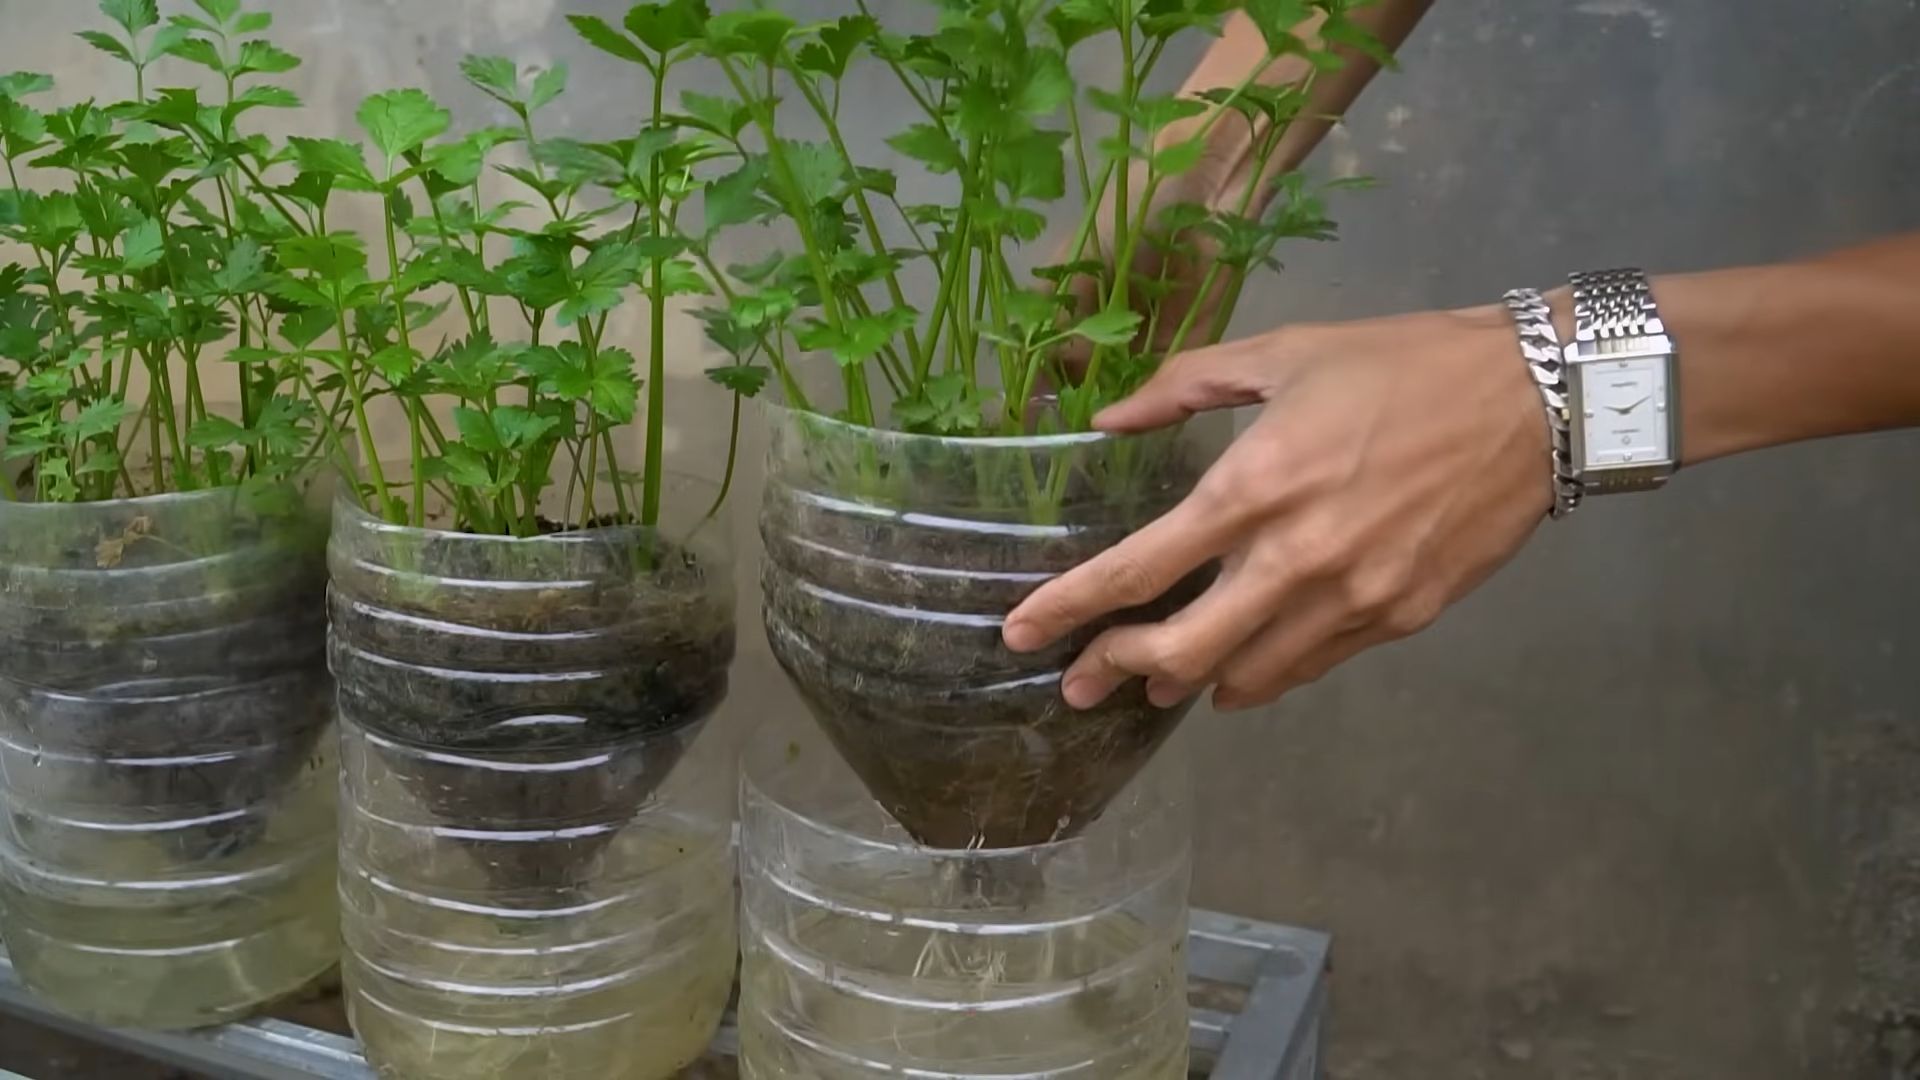
Now, let’s talk about variations. While the basic method of regrowing celery from the base is straightforward, you can experiment with different techniques to optimize your results. For example, try using a rooting hormone to encourage faster root development. You can also experiment with different types of containers, from simple glass jars to more decorative pots. Consider adding a small amount of liquid fertilizer to the water every few weeks to provide your celery with extra nutrients.
Another exciting variation is to try growing different varieties of celery. While the standard green celery is the most common, you can also find varieties with different colors and flavors, such as golden celery or red celery. These varieties may require slightly different growing conditions, so be sure to do your research before you start.
Don’t be afraid to get creative and personalize your celery-growing experience. You can even try companion planting, placing your celery alongside other herbs or vegetables that thrive in similar conditions. This can help to create a more balanced and productive indoor garden.
We wholeheartedly encourage you to give this DIY trick a try. It’s a simple, rewarding, and sustainable way to enjoy fresh celery whenever you want. Once you’ve experienced the joy of growing your own celery, you’ll never look at store-bought stalks the same way again.
And most importantly, we want to hear about your experience! Share your photos, tips, and stories with us in the comments below. Let us know what worked for you, what challenges you faced, and any creative variations you tried. Together, we can create a community of indoor celery growers and inspire others to embrace this simple and sustainable practice. So, grab a celery base, find a sunny spot, and get growing! You’ll be amazed at how easy and rewarding it is to grow celery indoors easily.
Frequently Asked Questions (FAQ)
How long does it take to regrow celery from the base?
The time it takes to regrow celery from the base can vary depending on several factors, including the temperature, sunlight, and water quality. Generally, you should start to see new growth within a few days to a week. Small leaves will begin to sprout from the center of the base. After about 2-3 weeks, you can transplant the celery into a pot with soil. It will take several months to grow a full-sized celery stalk.
What kind of water should I use?
It’s best to use filtered or dechlorinated water for regrowing celery. Tap water often contains chlorine and other chemicals that can inhibit root growth. If you don’t have filtered water, you can let tap water sit out for 24 hours to allow the chlorine to evaporate. Change the water every 1-2 days to prevent bacteria growth and keep the celery base healthy.
How much sunlight does the celery need?
Celery needs plenty of sunlight to thrive. Place the celery base in a location that receives at least 6-8 hours of direct sunlight per day. If you don’t have a sunny windowsill, you can use a grow light to supplement the natural light. Rotate the celery base regularly to ensure that all sides receive equal exposure to sunlight.
What kind of soil should I use when transplanting?
When transplanting the celery base into a pot, use a well-draining potting mix that is rich in organic matter. A mixture of potting soil, compost, and perlite is ideal. Make sure the pot has drainage holes to prevent waterlogging. Gently remove the celery base from the water and plant it in the soil, burying the roots but leaving the top of the base exposed.
How often should I water the transplanted celery?
After transplanting, water the celery regularly to keep the soil moist but not soggy. Check the soil moisture level daily and water when the top inch of soil feels dry to the touch. Avoid overwatering, as this can lead to root rot. During hot weather, you may need to water more frequently.
Can I grow celery indoors year-round?
Yes, you can grow celery indoors year-round, as long as you provide it with adequate light, water, and nutrients. During the winter months, you may need to supplement the natural light with a grow light. Keep the celery away from drafts and cold temperatures.
How do I harvest the celery?
You can harvest the celery stalks as needed, starting with the outer stalks. Simply cut the stalks off at the base with a sharp knife. The celery will continue to produce new stalks as long as you leave the base intact. You can also harvest the entire plant by cutting it off at the base.
What are some common problems when growing celery indoors?
Some common problems when growing celery indoors include yellowing leaves, stunted growth, and root rot. Yellowing leaves can be caused by a lack of nutrients or overwatering. Stunted growth can be caused by a lack of sunlight or poor soil quality. Root rot is caused by overwatering and can be prevented by using well-draining soil and avoiding overwatering.
Can I use the celery leaves?
Yes, the celery leaves are edible and can be used in salads, soups, and other dishes. They have a slightly stronger flavor than the stalks. You can also dry the leaves and use them as a seasoning.
How can I prevent pests and diseases?
To prevent pests and diseases, keep the celery clean and free of debris. Regularly inspect the plant for signs of pests or diseases. If you find any pests, you can try washing them off with soapy water or using an insecticidal soap. To prevent diseases, avoid overwatering and ensure good air circulation.
Leave a Comment