
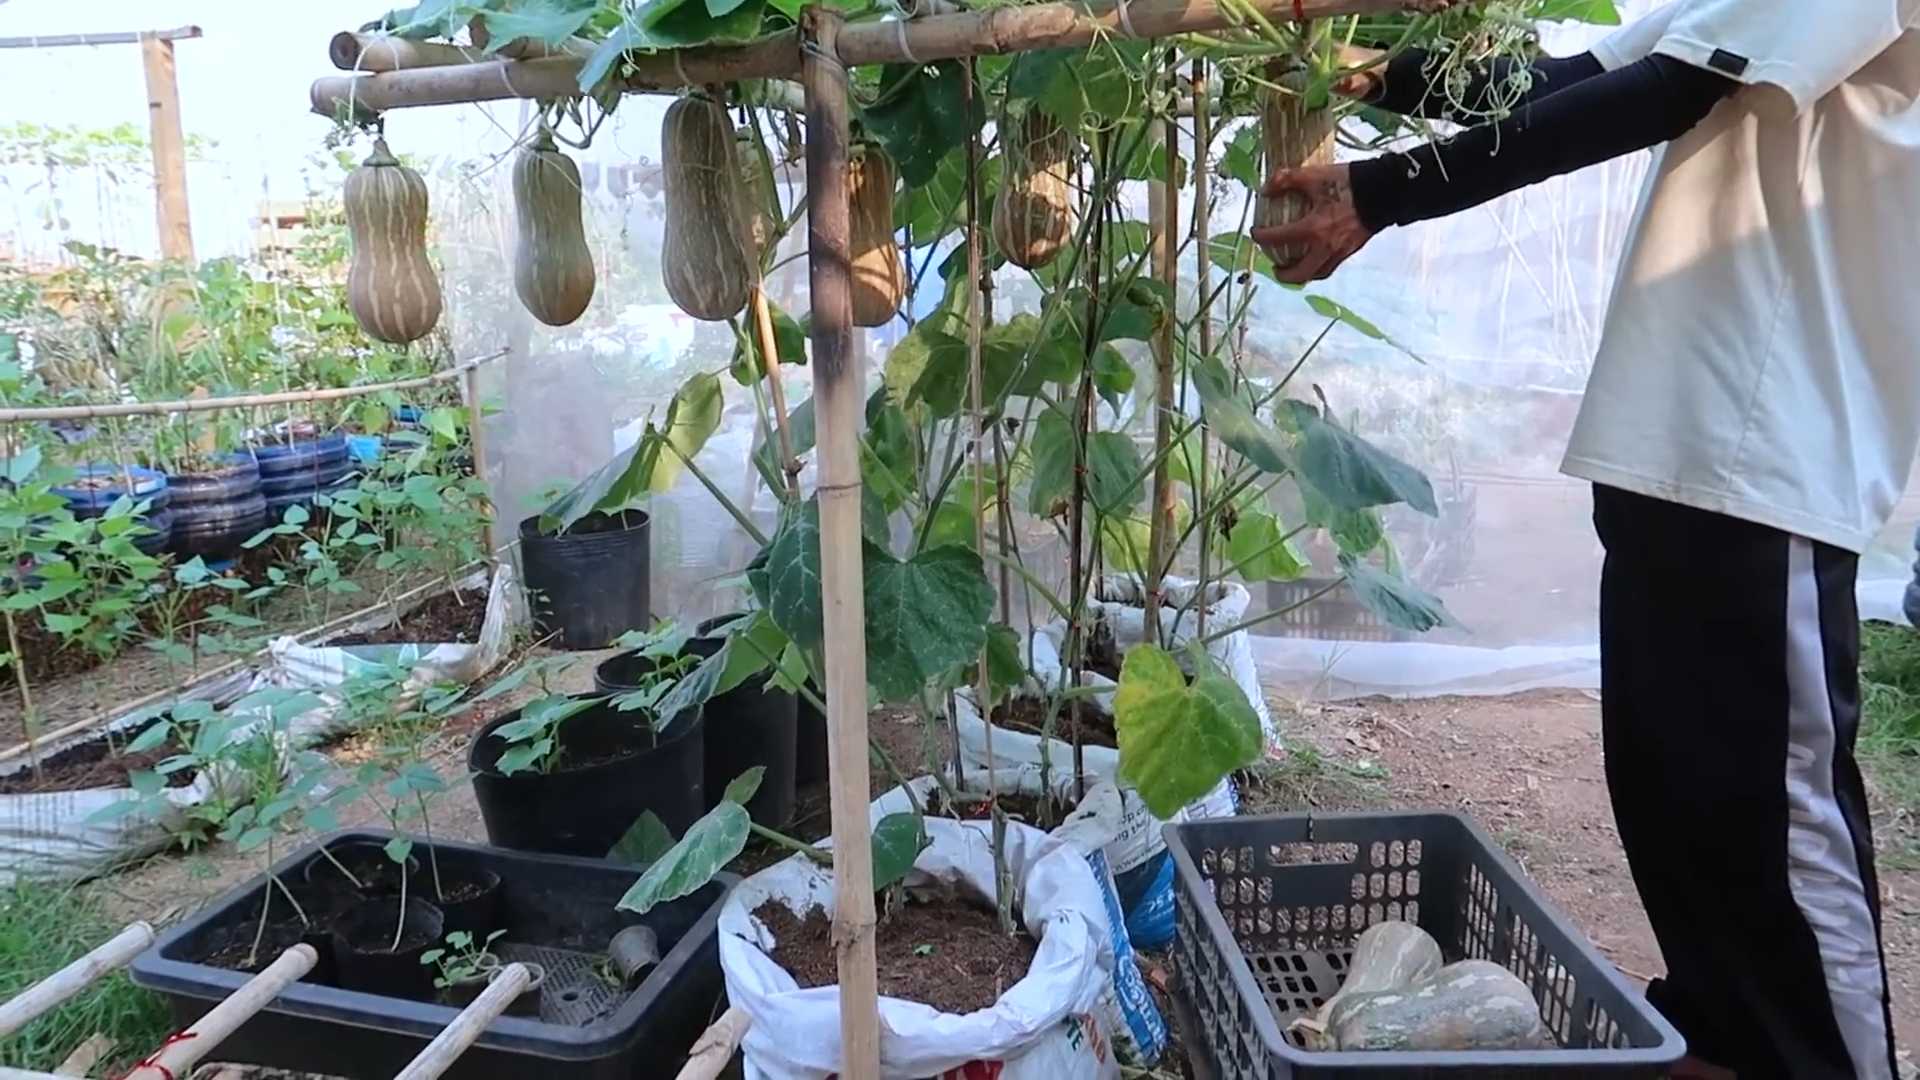
Grow Butternut Squash Home – imagine harvesting your own creamy, sweet butternut squash right from your backyard! It’s easier than you think, and I’m here to share some simple DIY tricks and hacks that will transform your garden into a butternut bounty. For centuries, squash has been a staple crop for indigenous communities in the Americas, providing nourishment and playing a vital role in cultural traditions. Now, you can connect with that history and enjoy the satisfaction of growing your own food.
Let’s face it, store-bought butternut squash can be expensive and sometimes lacks that fresh, vibrant flavor. But with a little know-how, you can grow butternut squash home and enjoy a harvest that’s both delicious and budget-friendly. This article is packed with practical tips, from choosing the right variety to dealing with common pests, all designed to help you succeed, even if you’re a beginner gardener. I’ll walk you through each step, making sure you have all the information you need to cultivate healthy, thriving butternut squash plants. Get ready to roll up your sleeves and discover the joy of homegrown goodness!
Supercharge Your Scrub Daddy: Genius Cleaning Hacks You Need to Know!
Okay, friends, let’s talk Scrub Daddy. We all love that smiley-faced sponge, right? But did you know you can unlock even MORE cleaning power with a few simple hacks? I’m going to share some of my favorite ways to get the most out of your Scrub Daddy, making cleaning faster, easier, and even a little bit fun!
Hack #1: The Microwave Sanitization Station
Let’s be honest, sponges get gross. But instead of tossing your Scrub Daddy every week, you can easily sanitize it in the microwave! This is a game-changer for keeping your sponge fresh and bacteria-free.
What you’ll need:
* Your trusty Scrub Daddy
* A microwave-safe bowl
* Water
* White vinegar (optional, but recommended)
Step-by-step instructions:
1. Rinse Thoroughly: Start by giving your Scrub Daddy a good rinse under running water to remove any loose food particles or debris.
2. Prepare the Bowl: Fill the microwave-safe bowl with about one cup of water.
3. Vinegar Boost (Optional): Add a tablespoon or two of white vinegar to the water. Vinegar is a natural disinfectant and helps to eliminate odors. I always add it!
4. Submerge the Sponge: Place your Scrub Daddy in the bowl, making sure it’s completely submerged in the water.
5. Microwave Magic: Microwave the bowl on high for 1-2 minutes. The water should be boiling vigorously. Be careful when removing the bowl, as it will be hot!
6. Cool Down: Let the bowl cool down for a few minutes before carefully removing the Scrub Daddy. You can use tongs to avoid burning yourself.
7. Squeeze and Dry: Squeeze out any excess water from the Scrub Daddy and let it air dry.
Why this works: The microwave’s heat kills bacteria and germs that accumulate in the sponge. The vinegar helps to disinfect and deodorize.
Hack #2: The Freezer Freshener
Did you know you can use your Scrub Daddy to freshen up your garbage disposal? This is a super simple hack that will leave your kitchen smelling clean and fresh.
What you’ll need:
* Your Scrub Daddy
* Water
* Lemon or lime juice (optional, but adds a nice scent)
* A freezer-safe bag or container
Step-by-step instructions:
1. Saturate the Sponge: Thoroughly wet your Scrub Daddy with water.
2. Scent Boost (Optional): Add a few drops of lemon or lime juice to the sponge for a refreshing scent.
3. Freeze It: Place the wet Scrub Daddy in a freezer-safe bag or container and freeze it solid. This usually takes a few hours.
4. Garbage Disposal Refresh: Once frozen, remove the Scrub Daddy from the bag or container and drop it into your garbage disposal.
5. Turn it On: Turn on the garbage disposal and let the frozen Scrub Daddy work its magic. The ice will help to scrub away any built-up grime and debris, while the lemon or lime juice will leave a pleasant scent.
6. Rinse and Repeat: After the ice has melted, rinse the garbage disposal with water. You can repeat this process as needed to keep your disposal fresh and clean.
Why this works: The frozen Scrub Daddy acts as a natural abrasive, scrubbing away food particles and grime from the garbage disposal blades and walls. The cold temperature also helps to kill bacteria and eliminate odors.
Hack #3: The Stubborn Stain Scrubber
Scrub Daddy is already great for scrubbing, but you can enhance its stain-fighting power with a little baking soda paste. This is perfect for tackling tough stains on countertops, sinks, and even oven doors.
What you’ll need:
* Your Scrub Daddy
* Baking soda
* Water
* A small bowl
Step-by-step instructions:
1. Make the Paste: In a small bowl, mix baking soda with a little water to create a thick paste. The consistency should be similar to toothpaste.
2. Apply the Paste: Apply the baking soda paste to the stained area.
3. Scrub Away: Wet your Scrub Daddy and use it to scrub the stained area in a circular motion. Apply gentle pressure and let the baking soda work its magic.
4. Rinse Thoroughly: Rinse the area with water to remove the baking soda paste and any loosened stain residue.
5. Repeat if Necessary: If the stain is particularly stubborn, you may need to repeat the process.
Why this works: Baking soda is a mild abrasive that helps to lift stains without scratching surfaces. It’s also a natural deodorizer, so it can help to eliminate any lingering odors.
Hack #4: The Grout Guru
Cleaning grout can be a real pain, but your Scrub Daddy can make it a lot easier! Its shape and texture are perfect for getting into those narrow grout lines.
What you’ll need:
* Your Scrub Daddy
* Grout cleaner (store-bought or homemade)
* A spray bottle (if using a liquid grout cleaner)
* Water
Step-by-step instructions:
1. Apply the Cleaner: Apply your chosen grout cleaner to the grout lines. If using a liquid cleaner, spray it directly onto the grout. If using a paste cleaner, apply it with a small brush or your finger.
2. Let it Sit: Allow the grout cleaner to sit on the grout lines for the recommended amount of time (usually a few minutes). This will give it time to loosen the dirt and grime.
3. Scrub with Daddy: Wet your Scrub Daddy and use it to scrub the grout lines. Use the edges and corners of the sponge to get into those tight spaces.
4. Rinse Thoroughly: Rinse the area with water to remove the grout cleaner and any loosened dirt and grime.
5. Dry with a Towel: Dry the area with a clean towel to prevent water spots.
Why this works: The Scrub Daddy’s unique texture and shape allow you to effectively scrub grout lines without damaging the surrounding tiles. The cleaner helps to loosen the dirt and grime, making it easier to remove.
Hack #5: The Veggie Washer
Believe it or not, your Scrub Daddy can also be used to wash fruits and vegetables! Just make sure it’s a brand new, unused sponge.
What you’ll need:
* A brand new, unused Scrub Daddy
* Water
* Vegetable wash (optional)
Step-by-step instructions:
1. Rinse the Produce: Rinse your fruits and vegetables under running water to remove any loose dirt or debris.
2. Gentle Scrubbing: Wet the Scrub Daddy and gently scrub the surface of the produce. Be careful not to apply too much pressure, especially on delicate fruits and vegetables.
3. Vegetable Wash (Optional): If desired, you can add a few drops of vegetable wash to the water.
4. Rinse Again: Rinse the produce thoroughly under running water to remove any remaining dirt, debris, or vegetable wash.
5. Dry and Enjoy: Dry the produce with a clean towel and enjoy!
Why this works: The Scrub Daddy’s texture helps to remove dirt, pesticides, and other contaminants from the surface of fruits and vegetables.
Hack #6: The Soap Saver
This is a simple one, but it can save you money in the long run!
What you’ll need:
* Your Scrub Daddy
* A bar of soap
Step-by-step instructions:
1. Wet the Daddy: Wet your Scrub Daddy.
2. Rub the Soap: Rub the bar of soap onto the Scrub Daddy. The texture of the sponge will help to create a rich lather.
3. Clean Away: Use the soapy Scrub Daddy to clean dishes, countertops, or anything else that needs a good scrub.
Why this works: The Scrub Daddy helps to distribute the soap evenly and create a rich lather, so you use less soap overall.
Hack #7: The Smelly Sink Solution
If your sink is starting to smell a little funky, your Scrub Daddy can help!
What you’ll need:
* Your Scrub Daddy
* Baking soda
* Hot water
Step-by-step instructions:
1. Sprinkle Baking Soda: Sprinkle a generous amount of baking soda down the drain.
2. Wet the Daddy: Wet your Scrub Daddy with hot water.
3. Scrub the Drain: Use the Scrub Daddy to scrub around the drain opening, pushing the baking soda down into the drain.
4. Flush with Hot Water: Flush the
Conclusion
So, there you have it! Growing butternut squash at home is not only achievable, but it’s also incredibly rewarding. Forget those bland, mass-produced squashes from the grocery store. Imagine sinking your teeth into a vibrant, flavorful butternut squash that you nurtured from seed to harvest, knowing exactly where it came from and how it was grown. The difference in taste and texture is simply undeniable.
This DIY approach to growing butternut squash offers a multitude of benefits. You’ll save money, reduce your carbon footprint by avoiding transportation costs, and gain a deeper connection to the food you eat. Plus, it’s a fantastic way to get some exercise and fresh air while enjoying the beauty of your own garden.
But the best part? You have complete control over the growing process. You can choose organic methods, avoiding harmful pesticides and herbicides. You can select specific varieties of butternut squash that suit your taste preferences and growing conditions. And you can tailor your growing techniques to maximize yield and flavor.
Don’t be afraid to experiment! Try different companion plants to deter pests and improve soil health. Consider succession planting to extend your harvest season. And explore various methods of curing and storing your butternut squash to enjoy its deliciousness throughout the winter months.
Ready to take your butternut squash game to the next level? Here are a few variations to consider:
* Vertical Growing: If you’re short on space, try growing your butternut squash vertically on a trellis or fence. This will not only save space but also improve air circulation and reduce the risk of fungal diseases.
* Heirloom Varieties: Explore the world of heirloom butternut squash varieties. These often have unique flavors and textures that you won’t find in commercially available squashes.
* Grafted Plants: For faster growth and increased disease resistance, consider grafting your butternut squash onto a more vigorous rootstock.
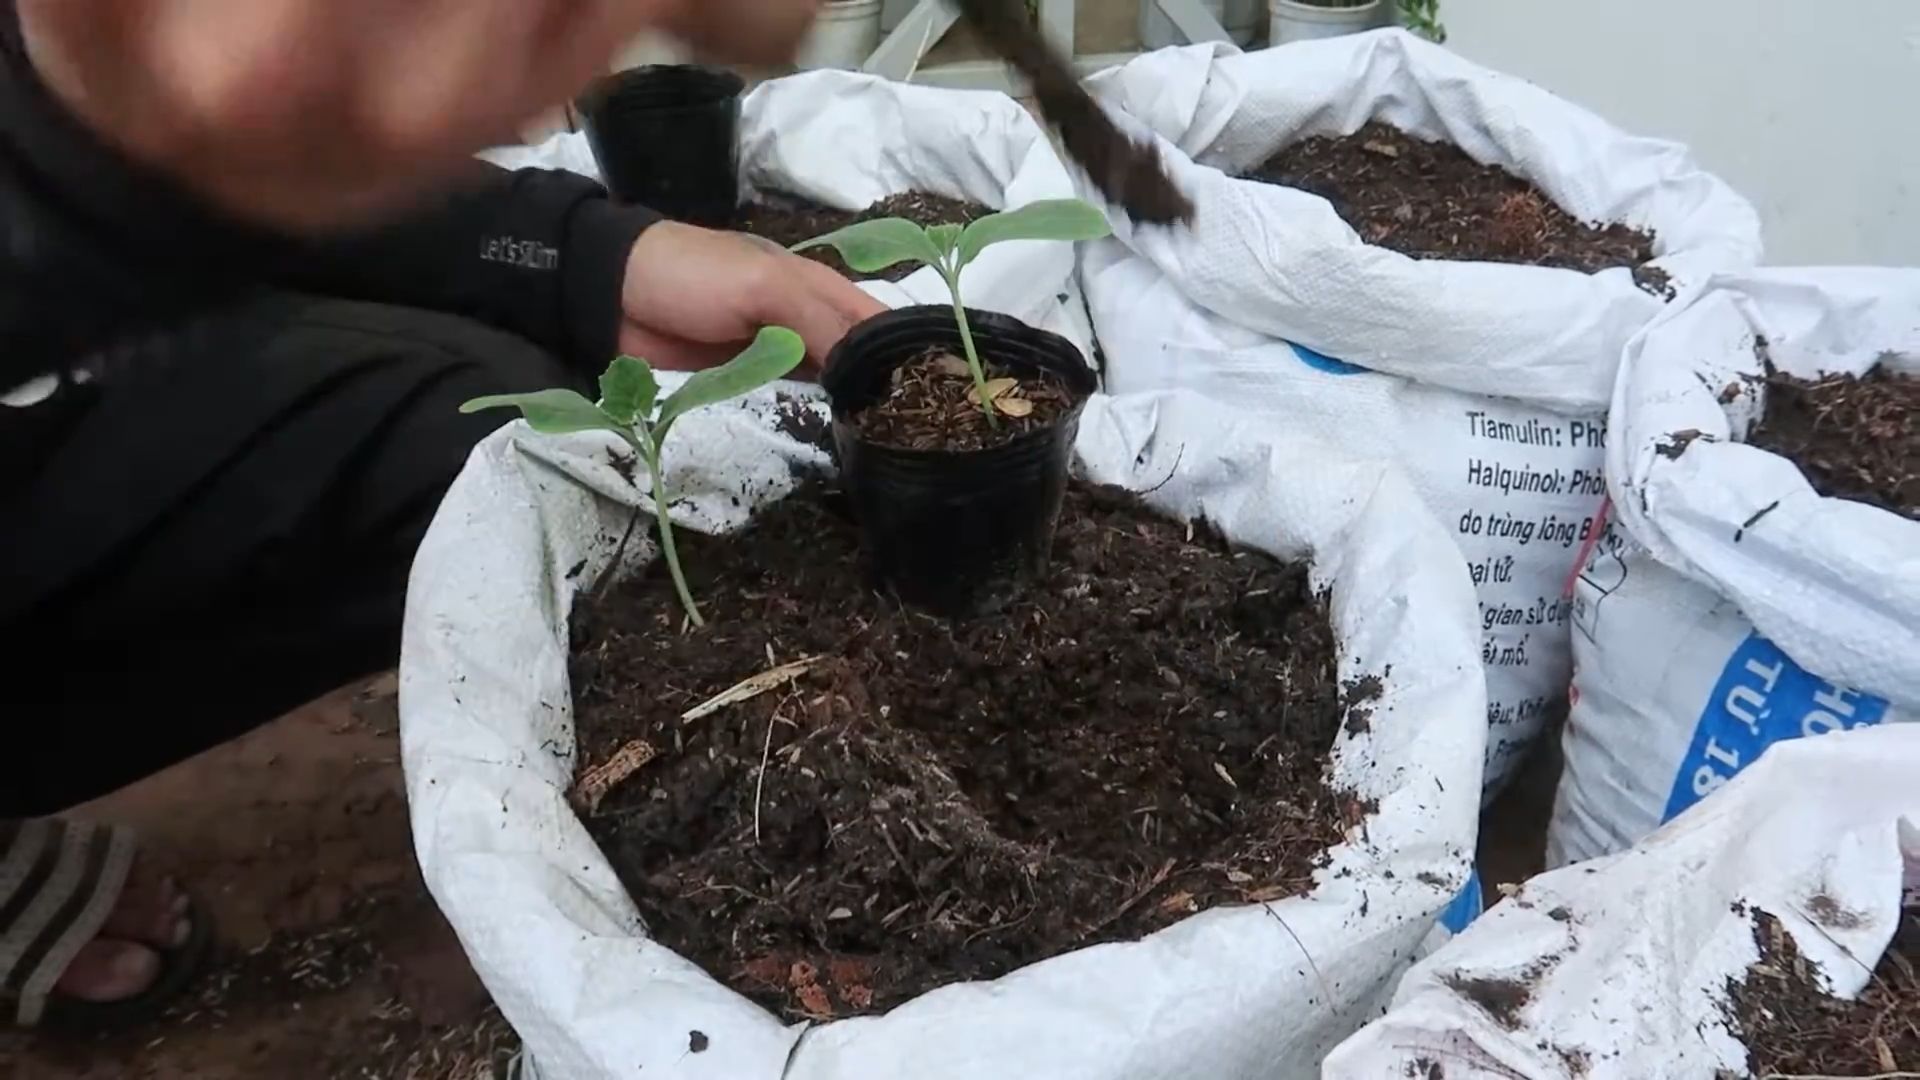
* Container Gardening: While butternut squash plants are large, certain compact varieties can thrive in large containers. Ensure adequate drainage and provide support for the vines.
Growing butternut squash at home is a journey of discovery and learning. There will be challenges along the way, but the rewards are well worth the effort. The satisfaction of harvesting your own homegrown butternut squash and sharing it with family and friends is truly unparalleled.
We encourage you to give this DIY trick a try. Start small, learn from your mistakes, and don’t be afraid to ask for help. There are countless resources available online and in your local community to support you on your growing journey.
And most importantly, we want to hear about your experience! Share your photos, tips, and stories with us in the comments below. Let’s create a community of butternut squash enthusiasts and inspire others to grow their own food. What are you waiting for? Get your hands dirty and start growing butternut squash at home today! You’ll be amazed at what you can achieve.
Frequently Asked Questions (FAQ)
What is the best time to start growing butternut squash?
The ideal time to start growing butternut squash depends on your climate. In general, you should start seeds indoors about 3-4 weeks before the last expected frost. If you live in a warmer climate with a longer growing season, you can direct sow seeds outdoors after the last frost. Check your local frost dates to determine the best time to plant in your area.
How much space does a butternut squash plant need?
Butternut squash plants are vining plants that require a significant amount of space. Each plant needs at least 6-8 square feet of growing area. If you’re growing multiple plants, space them 2-3 feet apart in rows that are 6-8 feet apart. Consider vertical growing on a trellis to save space.
What kind of soil is best for growing butternut squash?
Butternut squash thrives in well-drained, fertile soil that is rich in organic matter. Amend your soil with compost or aged manure before planting to improve its fertility and drainage. A soil pH of 6.0 to 7.0 is ideal.
How often should I water my butternut squash plants?
Butternut squash plants need consistent moisture, especially during fruit development. Water deeply and regularly, providing about 1-2 inches of water per week. Avoid overhead watering, as this can lead to fungal diseases. Use a soaker hose or drip irrigation to water at the base of the plants.
What are some common pests and diseases that affect butternut squash?
Common pests that affect butternut squash include squash bugs, squash vine borers, and aphids. Common diseases include powdery mildew, downy mildew, and blossom-end rot. Monitor your plants regularly for signs of pests and diseases and take appropriate action, such as using insecticidal soap or fungicide. Good air circulation and proper watering practices can help prevent many diseases.
How do I know when my butternut squash is ripe?
Butternut squash is typically ready to harvest about 90-100 days after planting. The skin should be hard and tough, and the color should be a deep tan. The stem should be dry and corky. You can also tap the squash; a ripe squash will sound hollow.
How do I cure and store butternut squash?
Curing butternut squash helps to harden the skin and improve its storage life. To cure, harvest the squash with about 2-3 inches of stem attached. Place the squash in a warm, dry, well-ventilated area for 10-14 days. After curing, store the squash in a cool, dry place with good air circulation. Properly cured and stored butternut squash can last for several months.
Can I grow butternut squash in containers?
Yes, you can grow butternut squash in containers, but you’ll need a large container (at least 20 gallons) and a compact variety. Ensure the container has good drainage and provide support for the vines. Water and fertilize regularly.
What are some good companion plants for butternut squash?
Good companion plants for butternut squash include marigolds, nasturtiums, and radishes, which can help deter pests. Corn and beans can also be beneficial, providing support for the vines and fixing nitrogen in the soil, respectively. Avoid planting butternut squash near potatoes or other members of the cucurbit family (such as cucumbers and melons), as they can compete for resources and attract similar pests and diseases.
How can I prevent blossom-end rot in my butternut squash?
Blossom-end rot is caused by a calcium deficiency, often due to inconsistent watering. Ensure your plants receive consistent moisture and amend your soil with calcium-rich amendments, such as bone meal or crushed eggshells. Avoid over-fertilizing with nitrogen, as this can interfere with calcium uptake.

Leave a Comment