
Calendula Pot Growing Tips: Unlock the secrets to vibrant blooms and a thriving garden, even in the smallest of spaces! Have you ever dreamt of having a burst of sunshine right on your balcony or patio? Imagine stepping outside to snip fresh, cheerful calendula petals for your salads, teas, or even homemade skincare. Well, dream no more! This DIY guide is your passport to cultivating these golden beauties in pots, regardless of your gardening experience.
Calendula, also known as pot marigold, boasts a rich history, dating back to ancient civilizations where it was revered for its medicinal properties and vibrant color. From Roman gardens to medieval apothecaries, calendula has been a trusted companion. But you don’t need to be a historian or herbalist to appreciate its charm.
In today’s busy world, many of us lack the space for sprawling gardens. That’s where calendula pot growing tips become invaluable. I’m here to show you how to maximize your yield and enjoy the benefits of this versatile flower, all within the confines of a container. Whether you’re a seasoned gardener or a complete beginner, these simple hacks will empower you to create a flourishing calendula haven, adding a touch of beauty and practicality to your life. Let’s get started!

Grow Your Own Sunshine: A Beginner’s Guide to Calendula in Pots
Hey there, fellow plant enthusiasts! I’m so excited to share my love for calendula with you. These cheerful, sunny flowers aren’t just beautiful; they’re also incredibly useful in homemade skincare, teas, and even as a natural dye. And the best part? They’re super easy to grow in pots, even if you don’t have a garden! Let’s dive into how you can cultivate your own little patch of sunshine.
Choosing the Right Pot and Soil
First things first, we need to set the stage for our calendula to thrive. This means picking the perfect pot and soil.
* Pot Size: Calendula plants can get a bit bushy, so I recommend a pot that’s at least 12 inches in diameter and 12 inches deep. This gives their roots plenty of room to spread out and keeps them happy. If you’re planning on growing multiple plants in one pot, go even bigger!
* Drainage: This is crucial! Calendula doesn’t like soggy feet. Make sure your pot has drainage holes at the bottom. If it doesn’t, you can drill some yourself (carefully, of course!).
* Pot Material: Terracotta, plastic, or even repurposed containers work well. Terracotta pots are porous, which helps with drainage, but they can dry out faster. Plastic pots retain moisture better, but you need to be extra careful not to overwater. I personally love using terracotta because I think they look so charming!
* Soil: Forget garden soil! It’s usually too heavy and doesn’t drain well enough for pots. Instead, opt for a good quality potting mix. Look for one that’s specifically formulated for containers. You can also amend it with some compost for extra nutrients. I like to add about 20% compost to my potting mix.
Planting Your Calendula Seeds or Seedlings
Now for the fun part – getting those calendula plants started! You have two options: starting from seed or buying seedlings. Both are perfectly fine, and I’ve had success with both methods.
* Starting from Seed: This is the most economical option, and it’s so rewarding to watch your plants grow from tiny seeds.
* Timing: You can start calendula seeds indoors 6-8 weeks before the last expected frost, or direct sow them outdoors after the danger of frost has passed. I usually direct sow because I’m a bit impatient!
* Sowing: Fill your pot with potting mix, leaving about an inch of space at the top. Moisten the soil gently. Sprinkle the calendula seeds evenly over the surface of the soil. Cover them with a thin layer of soil (about ¼ inch).
* Watering: Gently water the soil with a watering can or spray bottle. Keep the soil consistently moist but not soggy.
* Germination: Calendula seeds usually germinate in 5-10 days. Once they sprout, make sure they get plenty of sunlight.
* Thinning: If you sowed your seeds densely, you’ll need to thin them out once they have a few sets of true leaves. This means removing some of the seedlings so that the remaining ones have enough space to grow. I usually aim for about 6-8 inches between plants.
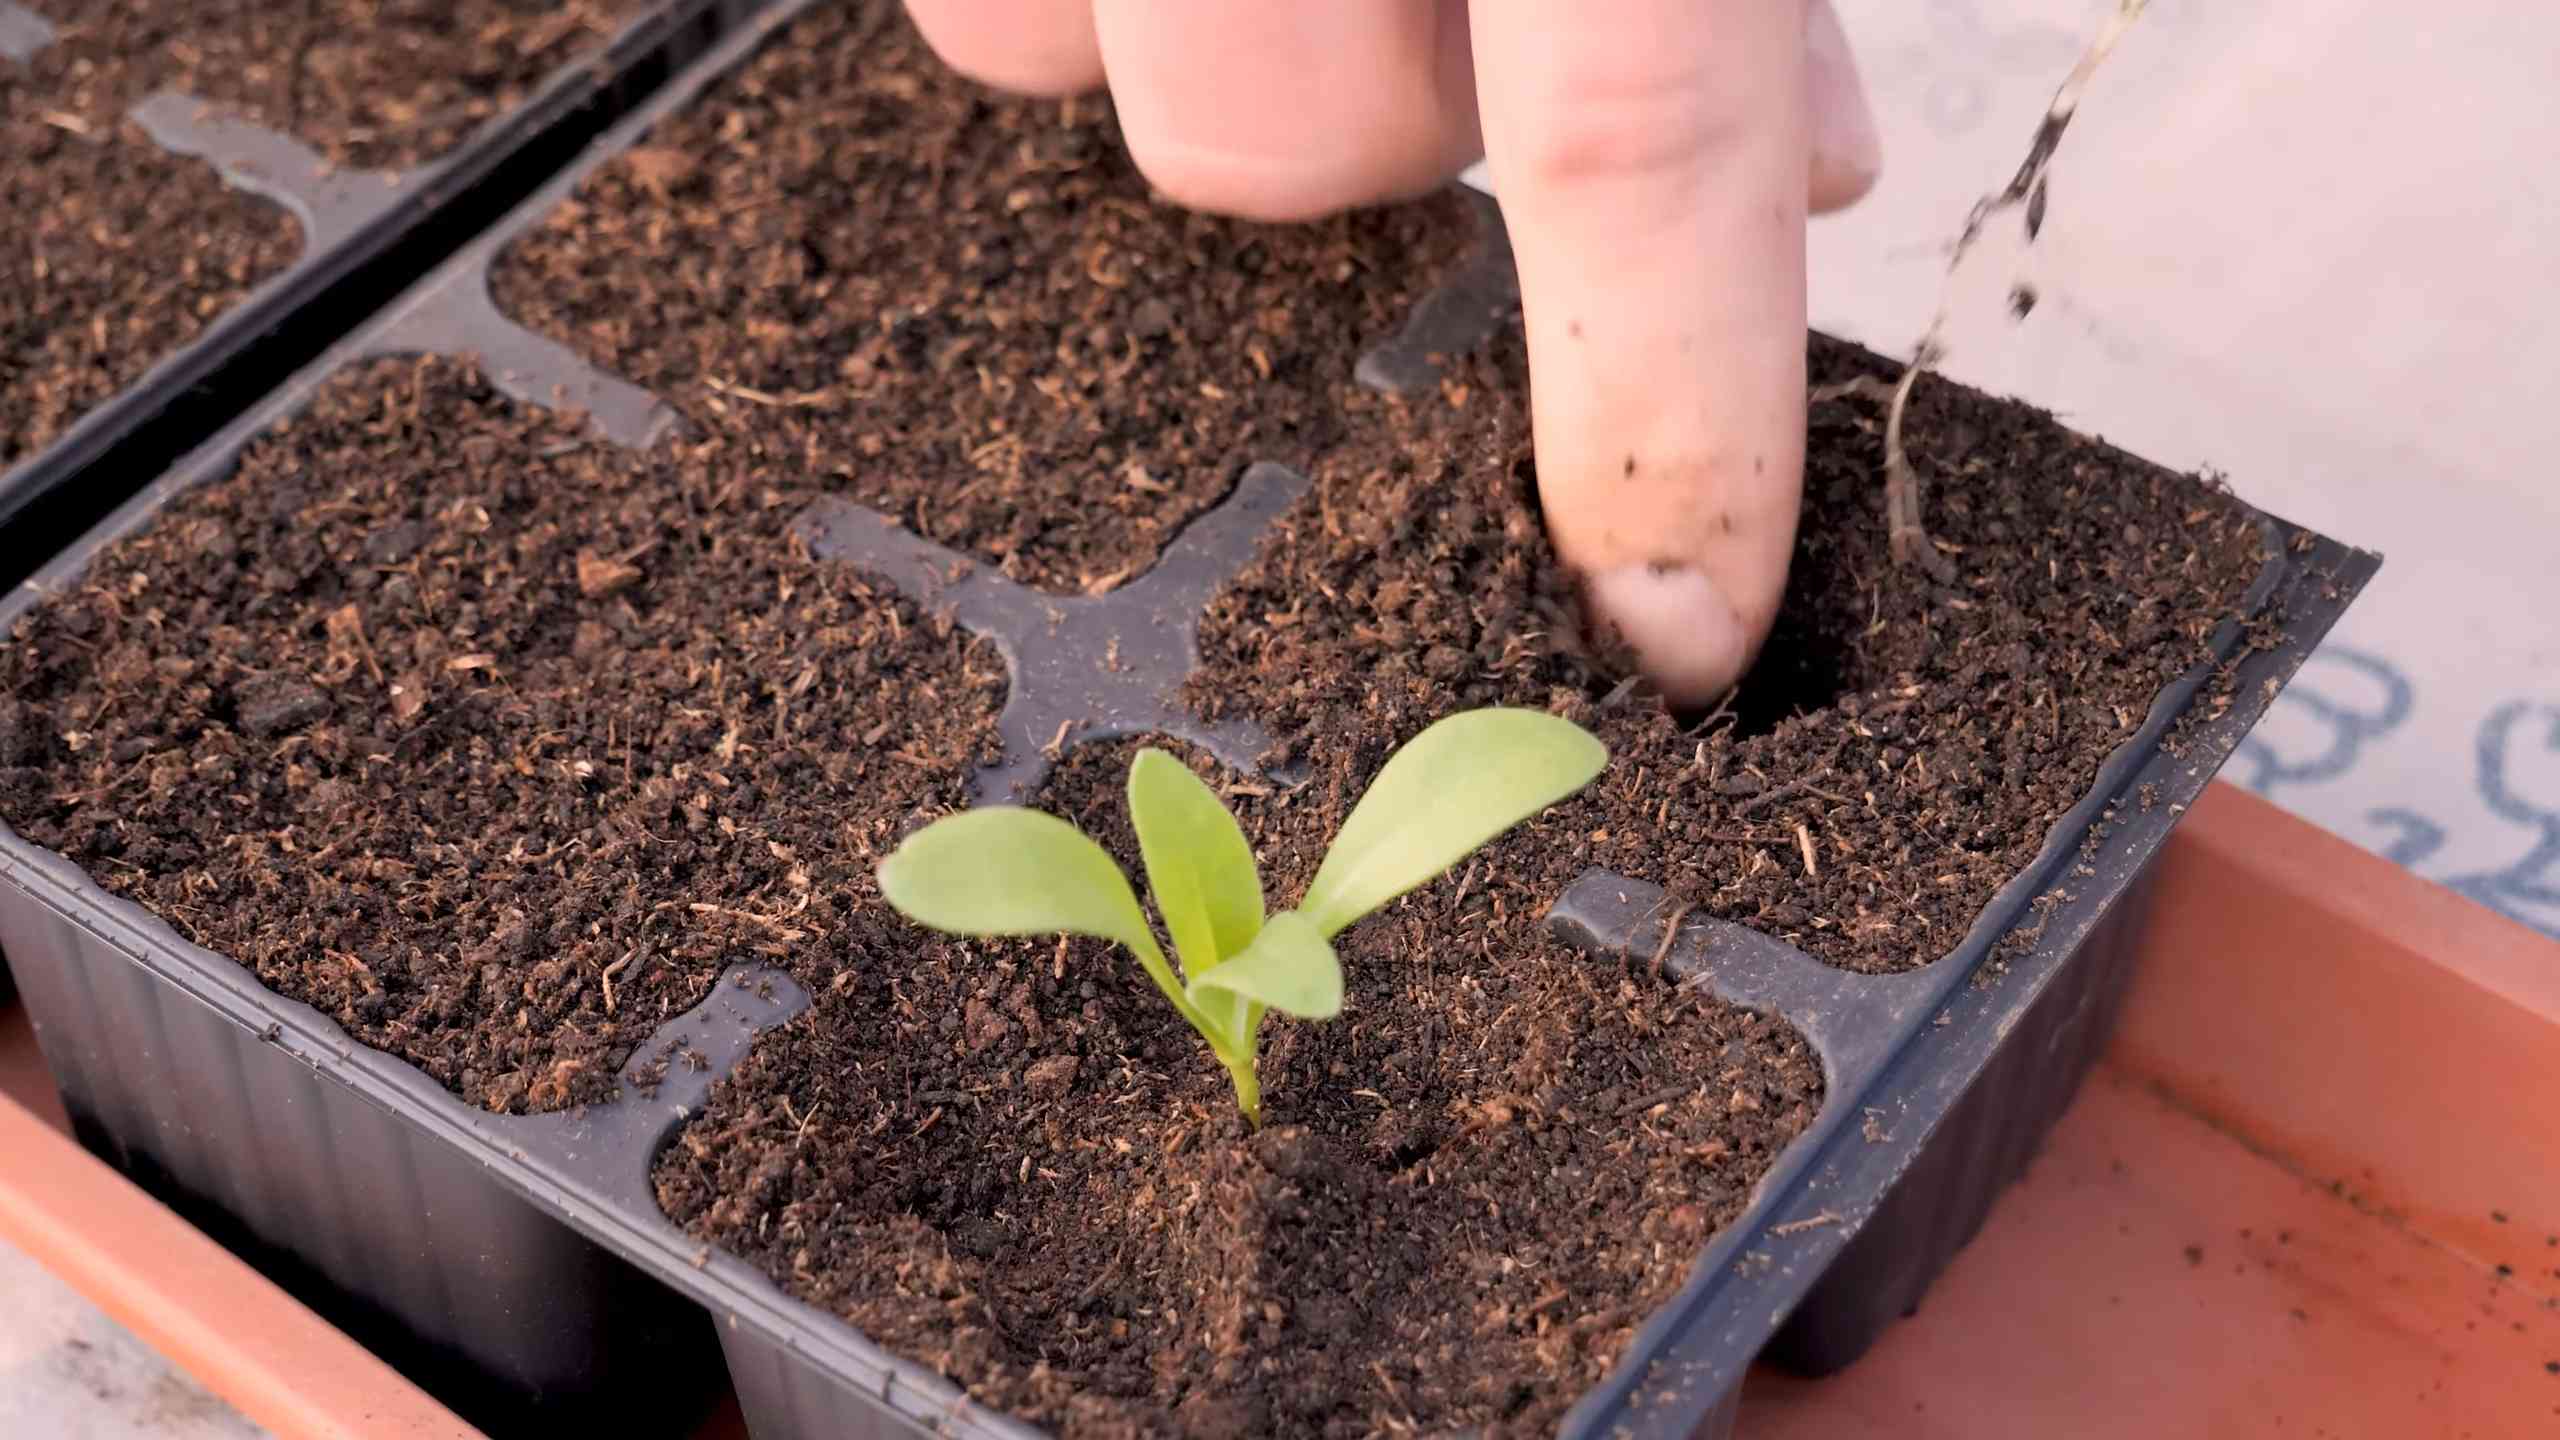
* Planting Seedlings: If you’re short on time or just want a head start, buying seedlings is a great option.
* Choosing Seedlings: Look for healthy seedlings with vibrant green leaves and sturdy stems. Avoid plants that are leggy (tall and spindly) or have yellowing leaves.
* Planting: Gently remove the seedlings from their containers. Loosen the roots a bit with your fingers. Dig a hole in the potting mix that’s large enough to accommodate the root ball. Place the seedling in the hole and backfill with soil. Gently firm the soil around the base of the plant.
* Watering: Water the seedlings thoroughly after planting.
Caring for Your Calendula Plants
Once your calendula plants are established, they’re relatively low-maintenance. But here are a few things to keep in mind to keep them happy and blooming:
* Sunlight: Calendula loves sunshine! Aim for at least 6 hours of direct sunlight per day. If you live in a hot climate, some afternoon shade can be beneficial.
* Watering: Water your calendula plants when the top inch of soil feels dry to the touch. Avoid overwatering, as this can lead to root rot. I usually water deeply, allowing the excess water to drain out of the bottom of the pot.
* Fertilizing: Calendula isn’t a heavy feeder, but a little fertilizer can help them bloom more profusely. I like to use a balanced liquid fertilizer diluted to half strength every few weeks. You can also amend the soil with compost or worm castings.
* Deadheading: This is key to keeping your calendula plants blooming! Deadheading means removing the spent flowers. This encourages the plant to produce more blooms instead of putting its energy into seed production. Simply snip off the flower heads just below the flower.
* Pest Control: Calendula is generally pest-resistant, but occasionally aphids or spider mites can be a problem. If you notice any pests, you can try spraying them with a strong stream of water or using an insecticidal soap. I prefer to use natural methods whenever possible.
* Disease Prevention: Good air circulation is important for preventing fungal diseases. Make sure your plants aren’t overcrowded and that they have plenty of space to breathe. Avoid watering the foliage, as this can create a humid environment that encourages fungal growth.
Harvesting Your Calendula Flowers
Now for the best part – harvesting your beautiful calendula flowers!
* Timing: Harvest the flowers when they are fully open and the petals are dry. I usually harvest in the morning after the dew has dried.
* Method: Simply snip off the flower heads with scissors or your fingers.
* Drying: You can use the flowers fresh, but they’re also easy to dry for later use. There are a few different ways to dry calendula flowers:
* Air Drying: Spread the flowers out on a screen or tray in a cool, dry, and well-ventilated place. Turn them occasionally to ensure even drying. This can take several days to a week.
* Oven Drying: Spread the flowers out on a baking sheet and dry them in a low oven (around 170°F) for a few hours. Keep a close eye on them to make sure they don’t burn.
* Dehydrator: If you have a dehydrator, you can use it to dry the flowers according to the manufacturer’s instructions.
* Storage: Once the flowers are completely dry, store them in an airtight container in a cool, dark place. They should last for up to a year.
Using Your Calendula Flowers
Okay, so you’ve grown and harvested your calendula flowers – now what? There are so many amazing things you can do with them!
* Skincare: Calendula is known for its soothing and anti-inflammatory properties. You can use it to make infused oils, salves, creams, and lotions. I love using calendula-infused oil to soothe dry skin and minor irritations.
* Tea: Calendula tea is a gentle and calming beverage. It’s said to have anti-inflammatory and immune-boosting properties. Simply steep a teaspoon of dried calendula flowers in a cup of hot water for 10-15 minutes.
* Natural Dye: Calendula flowers can be used to create a natural yellow dye. You can use it to dye fabrics, yarns, or even food.
* Culinary Uses: Calendula petals are edible and can be used to add color and flavor to salads, soups, and other dishes. They have a slightly peppery taste.
* Companion Planting: Calendula is a great companion plant for many vegetables and herbs. It attracts beneficial insects and repels pests. I like to plant it near my tomatoes, peppers, and basil.
Troubleshooting Common Problems
Even with the best care, sometimes things can go wrong. Here are a few common problems you might encounter with your calendula plants and how to fix them:
* Leggy Plants: This usually means your plants aren’t getting enough sunlight. Move them to a sunnier location.
* Yellowing Leaves: This could be a sign of overwatering, underwatering, or nutrient deficiency. Check the soil moisture and adjust your watering accordingly. You can also try fertilizing your plants.
* Powdery Mildew: This is a fungal disease that appears as a white powdery coating on the leaves. Improve air circulation and avoid watering the foliage. You can also try spraying the plants with a fungicide.
* Aphids: These tiny pests can suck the sap from your plants. Spray them with a strong stream of water or
Conclusion
So, there you have it! Growing calendula in pots is not only achievable but also incredibly rewarding. We’ve walked through the simple steps, from selecting the right pot and soil to nurturing your plants for a vibrant bloom. But why is this DIY trick a must-try? Because it unlocks a world of benefits, bringing the sunshine of calendula’s cheerful flowers and potent medicinal properties right to your doorstep, even if you lack a traditional garden.
Imagine stepping outside and snipping fresh calendula petals to infuse into oils, balms, or teas. Think of the joy of watching these bright orange and yellow blossoms attract beneficial pollinators to your patio or balcony. And consider the satisfaction of knowing you’ve cultivated something beautiful and useful with your own hands. This isn’t just about growing a plant; it’s about connecting with nature, embracing self-sufficiency, and adding a touch of magic to your everyday life.
Beyond the basic method, there are countless ways to personalize your calendula pot growing experience. For example, try companion planting! Basil, thyme, and rosemary are excellent choices to deter pests and enhance the overall health of your calendula. You could also experiment with different varieties of calendula. ‘Pacific Beauty’ offers a mix of colors, while ‘Bronzed Beauty’ boasts unique copper-toned petals. Or, if you’re feeling adventurous, why not try growing calendula from seed saved from your own plants? This is a fantastic way to perpetuate your favorite varieties and become even more self-reliant.
Another variation to consider is the type of pot you use. While terracotta pots are classic and allow for good drainage, you could also use recycled containers like old buckets or even repurposed tires (just be sure to drill drainage holes!). The key is to ensure the pot is large enough to accommodate the plant’s root system and provides adequate drainage to prevent root rot.
Don’t be afraid to experiment with different soil mixes as well. While a standard potting mix works well, you can enrich it with compost or worm castings to provide extra nutrients. You can also add perlite or vermiculite to improve drainage and aeration.
The beauty of growing calendula in pots is its flexibility. You can move your plants around to follow the sun, protect them from harsh weather, or simply rearrange your outdoor space to create a new look. This makes it an ideal option for renters, apartment dwellers, or anyone with limited gardening space.
We are confident that with a little care and attention, you’ll be enjoying a profusion of calendula blooms in no time. So, grab a pot, some soil, and a packet of calendula seeds, and get started today! We encourage you to try this DIY trick and share your experiences with us. What varieties did you choose? What challenges did you encounter? What successes did you celebrate? We can’t wait to hear your stories and learn from your insights. Share your photos and tips on social media using #CalendulaPotGrowing and let’s create a community of thriving calendula gardeners! Embrace the joy of growing your own calendula and discover the many benefits this amazing plant has to offer. Remember, even a small pot of calendula can make a big difference in your life.
FAQ
What is the best size pot for growing calendula?
A pot that is at least 12 inches in diameter and 12 inches deep is generally recommended for growing calendula. This size provides enough space for the plant’s root system to develop properly and allows for adequate drainage. However, if you plan to grow multiple calendula plants in the same pot, you may need a larger container. Consider a pot that is 18-24 inches in diameter for multiple plants. The key is to ensure that each plant has enough room to grow without being overcrowded.
How often should I water my potted calendula?
Watering frequency depends on several factors, including the weather, the type of pot you’re using, and the soil composition. As a general rule, water your calendula when the top inch of soil feels dry to the touch. During hot, dry weather, you may need to water daily, while during cooler, wetter periods, you may only need to water every few days. Avoid overwatering, as this can lead to root rot. Ensure that your pot has adequate drainage holes to allow excess water to escape. A good way to check if your plant needs water is to lift the pot. If it feels light, it’s likely time to water. When you do water, water deeply, until water drains out of the bottom of the pot.
What kind of soil is best for calendula in pots?
Calendula thrives in well-draining soil that is rich in organic matter. A standard potting mix amended with compost or worm castings is an excellent choice. You can also add perlite or vermiculite to improve drainage and aeration. Avoid using heavy clay soil, as this can retain too much moisture and lead to root rot. A slightly acidic to neutral pH (around 6.0 to 7.0) is ideal. You can test the pH of your soil using a soil testing kit available at most garden centers.
How much sunlight does calendula need?
Calendula prefers full sun, which means at least 6 hours of direct sunlight per day. However, it can also tolerate partial shade, especially in hot climates. If you live in an area with intense summer heat, providing some afternoon shade can help prevent the plants from scorching. When growing calendula in pots, you can easily move the plants around to ensure they receive the optimal amount of sunlight. Observe your plants closely and adjust their location as needed.
How do I harvest calendula flowers?
Harvest calendula flowers in the morning, after the dew has dried, but before the sun gets too hot. This is when the flowers are at their peak potency. Simply snip the flower heads off the stem using scissors or pruning shears. You can harvest the entire flower head or just the petals. Regular harvesting encourages the plant to produce more flowers. Deadhead spent blooms to prevent the plant from going to seed and to prolong the flowering period.
Can I grow calendula indoors?
While calendula prefers to be outdoors, it can be grown indoors if you provide it with enough light. Place the pot near a sunny window that receives at least 6 hours of direct sunlight per day. You may also need to supplement with artificial light, such as a grow light. Ensure that the plant has good air circulation to prevent fungal diseases. Indoor-grown calendula may not bloom as prolifically as outdoor-grown plants, but you can still enjoy its cheerful flowers and medicinal properties.
Are there any common pests or diseases that affect calendula?
Calendula is generally a hardy plant, but it can be susceptible to certain pests and diseases. Aphids, spider mites, and whiteflies are common pests that can infest calendula. These pests can be controlled with insecticidal soap or neem oil. Powdery mildew is a fungal disease that can affect calendula, especially in humid conditions. To prevent powdery mildew, ensure that the plants have good air circulation and avoid overhead watering. If powdery mildew does occur, treat it with a fungicide. Regularly inspect your plants for signs of pests or diseases and take action promptly to prevent them from spreading.
Can I use calendula flowers for medicinal purposes?
Calendula flowers have been used for centuries for their medicinal properties. They are known for their anti-inflammatory, antiseptic, and wound-healing properties. Calendula can be used to treat skin irritations, burns, cuts, and bruises. It can also be used to soothe sore throats and mouth ulcers. You can use calendula flowers to make infused oils, balms, teas, and tinctures. However, it is important to consult with a healthcare professional before using calendula for medicinal purposes, especially if you are pregnant, breastfeeding, or taking any medications.
How do I save calendula seeds?
Saving calendula seeds is a simple process. Allow some of the flowers to dry on the plant. Once the flower heads are completely dry and brown, you can harvest the seeds. The seeds are small, crescent-shaped, and brown. Gently rub the flower heads between your fingers to release the seeds. Collect the seeds and store them in a cool, dry place in an airtight container. Label the container with the date and variety of calendula. Calendula seeds can remain viable for several years if stored properly.

Leave a Comment