
Growing chili peppers in bottles might sound like something out of a sci-fi movie, but trust me, it’s a surprisingly simple and incredibly rewarding DIY project! Have you ever dreamed of harvesting fiery peppers right from your windowsill, even if you don’t have a sprawling garden? Well, get ready to turn that dream into reality! This guide will unlock the secrets to cultivating these spicy gems in repurposed bottles, adding a touch of green and a whole lot of flavor to your life.
Chili peppers have a rich history, dating back thousands of years to South America, where they were not only a culinary staple but also held significant cultural and medicinal value. From ancient Aztec rituals to modern-day culinary adventures, these fiery fruits have captivated palates and cultures worldwide. Now, you can participate in this legacy by growing chili peppers in bottles, bringing a piece of that history into your home.
Why should you try this DIY trick? Because it’s perfect for apartment dwellers, balcony gardeners, or anyone looking for a fun and sustainable way to grow their own food. Plus, it’s a fantastic way to recycle those empty bottles! Imagine the satisfaction of adding your own homegrown chili peppers to your favorite dishes, knowing you nurtured them from tiny seedlings to fiery fruits. Let’s dive in and discover how easy it is to create your own miniature chili pepper paradise!
Chili-Anzucht im Upcycling-Stil: So machst du’s in PET-Flaschen!
Hey Leute, habt ihr auch genug von teuren Anzuchttöpfen und wollt euren grünen Daumen auf nachhaltige Weise beweisen? Dann seid ihr hier genau richtig! Ich zeige euch, wie ihr aus alten PET-Flaschen super praktische und stylische Anzuchttöpfe für eure Chili-Pflänzchen basteln könnt. Das ist nicht nur gut für die Umwelt, sondern auch total einfach und macht Spaß!
Was du brauchst:
* PET-Flaschen (am besten 1,5 oder 2 Liter)
* Ein scharfes Messer oder eine Schere
* Anzuchterde
* Chili-Samen (je nach Geschmack, von mild bis feurig!)
* Wasser
* Optional: Sprühflasche
* Optional: Permanentmarker (zum Beschriften)
* Optional: Kleine Steine oder Blähtonkugeln (für die Drainage)
Die Vorbereitung: Flaschen schneiden und vorbereiten
1. Flaschen reinigen: Bevor wir loslegen, spült die PET-Flaschen gründlich mit warmem Wasser und etwas Spülmittel aus. So entfernt ihr alle Rückstände und sorgt für eine saubere Umgebung für eure kleinen Chili-Babys.
2. Flaschen schneiden: Jetzt kommt der spannende Teil! Nehmt euch eine Flasche und schneidet sie mit dem Messer oder der Schere in zwei Teile. Die Höhe, in der ihr schneidet, hängt davon ab, wie tief ihr die Chili-Samen einpflanzen wollt. Ich empfehle, die Flasche etwa ein Drittel vom Boden entfernt zu teilen. So habt ihr genügend Platz für die Erde und die Wurzeln.
3. Drainagelöcher bohren: Damit das Wasser gut ablaufen kann und eure Chili-Pflänzchen nicht in Staunässe ertrinken, bohrt ihr mit dem Messer oder der Schere ein paar kleine Löcher in den Boden des unteren Flaschenteils. Achtet darauf, dass die Löcher nicht zu groß sind, damit die Erde nicht herausfällt.
4. Optional: Drainage-Schicht einfüllen: Um die Drainage noch weiter zu verbessern, könnt ihr eine Schicht kleine Steine oder Blähtonkugeln auf den Boden des unteren Flaschenteils geben. Das verhindert, dass die Erde die Drainagelöcher verstopft.
Die Aussaat: Chili-Samen in die Erde bringen
1. Erde vorbereiten: Füllt den oberen Flaschenteil mit Anzuchterde. Drückt die Erde leicht an, aber nicht zu fest. Sie sollte locker und luftig sein, damit die Chili-Samen gut keimen können.
2. Samen säen: Macht mit dem Finger oder einem Stift kleine Mulden in die Erde, etwa 0,5 bis 1 cm tief. Legt in jede Mulde ein bis zwei Chili-Samen.
3. Samen bedecken: Bedeckt die Samen vorsichtig mit Erde und drückt sie leicht an.
4. Gießen: Gießt die Erde vorsichtig mit Wasser. Am besten verwendet ihr eine Sprühflasche, damit die Samen nicht weggespült werden. Die Erde sollte feucht, aber nicht nass sein.
5. Flaschen zusammenfügen: Stellt den oberen Flaschenteil mit der Erde und den Samen in den unteren Flaschenteil. So entsteht ein kleines Mini-Gewächshaus, das die Keimung der Samen fördert.
Die Pflege: Chili-Pflänzchen zum Wachsen bringen
1. Standort wählen: Stellt eure Chili-Flaschen an einen hellen und warmen Ort. Ein Fensterbrett mit Südausrichtung ist ideal. Die Chili-Samen brauchen viel Licht und Wärme, um zu keimen.
2. Feuchtigkeit kontrollieren: Achtet darauf, dass die Erde immer feucht bleibt. Gießt regelmäßig, aber vermeidet Staunässe. Am besten kontrolliert ihr die Feuchtigkeit mit dem Finger. Wenn sich die Erde trocken anfühlt, ist es Zeit zum Gießen.
3. Lüften: Um Schimmelbildung zu vermeiden, solltet ihr die Chili-Flaschen regelmäßig lüften. Nehmt dazu einfach den oberen Flaschenteil ab und lasst die Luft zirkulieren.
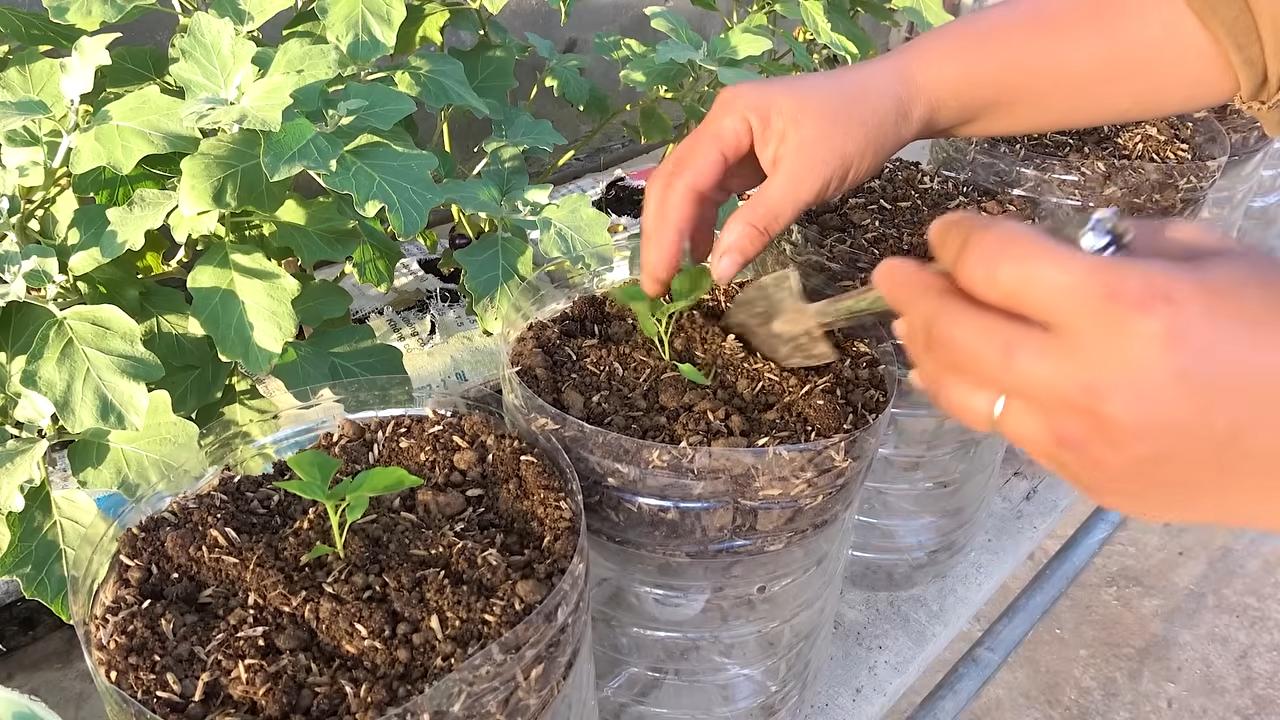
4. Pikieren: Sobald die Chili-Pflänzchen ein paar Blätter haben, ist es Zeit zum Pikieren. Das bedeutet, dass ihr die Pflänzchen in größere Töpfe umpflanzt, damit sie genügend Platz zum Wachsen haben.
* Nehmt die Pflänzchen vorsichtig aus der Erde und achtet darauf, die Wurzeln nicht zu beschädigen.
* Pflanzt jedes Pflänzchen in einen eigenen Topf mit frischer Erde.
* Gießt die Pflänzchen gut an und stellt sie an einen hellen Ort.
5. Düngen: Damit eure Chili-Pflänzchen kräftig wachsen und viele Früchte tragen, solltet ihr sie regelmäßig düngen. Verwendet dazu einen speziellen Chili-Dünger oder einen organischen Dünger.
6. Umpflanzen ins Freie: Sobald die Temperaturen steigen und keine Frostgefahr mehr besteht, könnt ihr eure Chili-Pflänzchen ins Freie umpflanzen. Wählt einen sonnigen und geschützten Standort.
Zusätzliche Tipps und Tricks:
* Beschriftung: Beschriftet die Flaschen mit einem Permanentmarker, damit ihr wisst, welche Chili-Sorte ihr ausgesät habt.
* Sortenvielfalt: Probiert verschiedene Chili-Sorten aus, von mild bis feurig. So findet ihr eure Lieblingssorte.
* Schneckenabwehr: Wenn ihr eure Chili-Pflänzchen ins Freie umpflanzt, solltet ihr sie vor Schnecken schützen. Es gibt verschiedene Möglichkeiten, Schnecken abzuwehren, zum Beispiel Schneckenkorn oder Schneckenzäune.
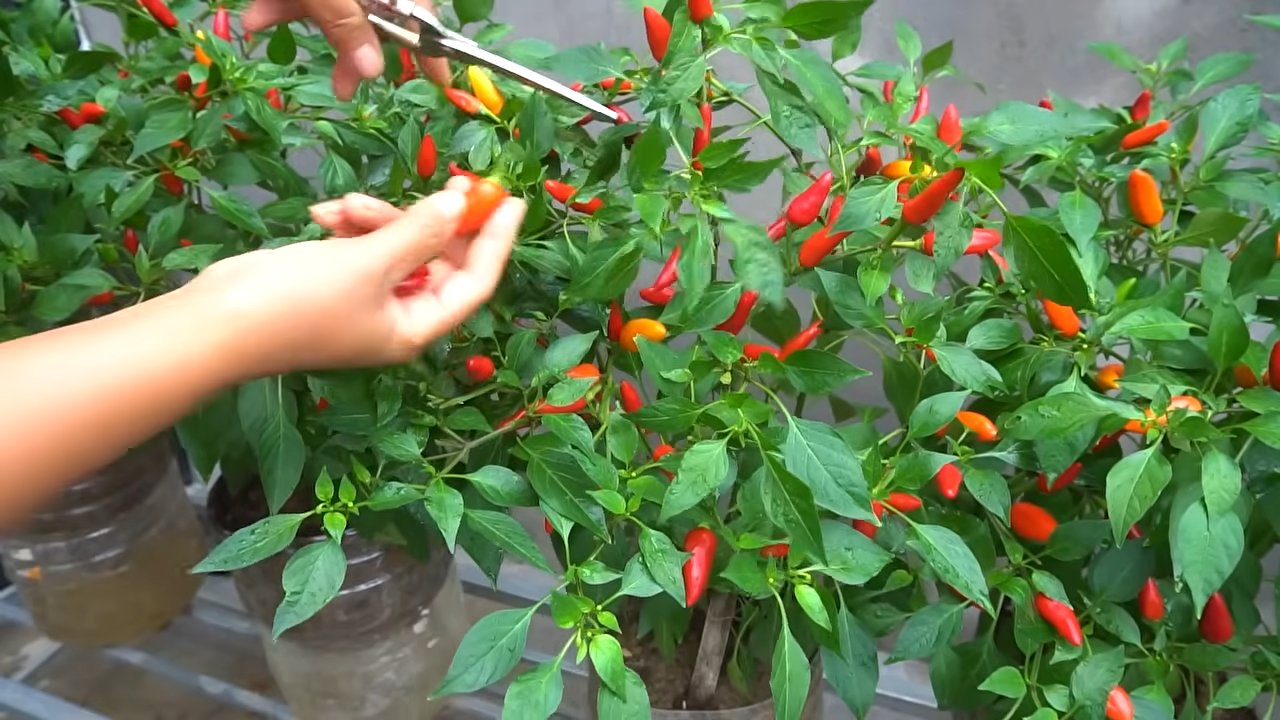
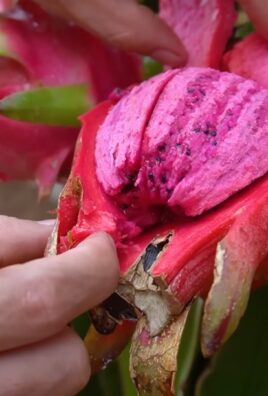
* Ernte: Die Chili-Früchte sind reif, wenn sie ihre endgültige Farbe erreicht haben. Erntet die Früchte vorsichtig mit einer Schere oder einem Messer.
* Trocknen: Wenn ihr zu viele Chili-Früchte habt, könnt ihr sie trocknen. Dazu hängt ihr die Früchte an einem luftigen Ort auf oder legt sie in den Backofen bei niedriger Temperatur.
* Samen gewinnen: Wenn ihr eure eigenen Chili-Samen gewinnen wollt, lasst ihr die reifen Früchte an der Pflanze trocknen. Dann könnt ihr die Samen herausnehmen und für die nächste Saison aufbewahren.
Noch ein paar Gedanken zum Schluss:
Ich finde, die Chili-Anzucht in PET-Flaschen ist eine super Möglichkeit, um alte Plastikflaschen wiederzuverwerten und gleichzeitig leckere Chilis anzubauen. Es ist ein tolles Projekt für Anfänger und Fortgeschrittene und macht einfach Spaß! Probiert es aus und lasst mich wissen, wie es euch gefällt! Und vergesst nicht: Mit Liebe und Geduld wächst alles besser! Viel Erfolg bei eurer Chili-Anzucht!
Conclusion
So, there you have it! Growing chili peppers in bottles isn’t just a quirky gardening experiment; it’s a genuinely effective and rewarding way to cultivate these fiery fruits, especially if you’re short on space or looking for a unique gardening project. We’ve explored the step-by-step process, from selecting the right bottle and preparing the soil to nurturing your chili plants and harvesting your spicy bounty.
But why is this DIY trick a must-try? Firstly, it’s incredibly space-efficient. Apartment dwellers, balcony gardeners, and anyone with limited outdoor space can easily participate. Secondly, it’s a fantastic way to recycle plastic bottles, turning potential waste into a thriving mini-garden. Thirdly, the controlled environment of a bottle can offer some protection against pests and diseases, leading to healthier and more productive plants. Finally, let’s be honest, it’s just plain cool! A wall of chili peppers growing out of repurposed bottles is a conversation starter and a testament to your resourcefulness.
Don’t be afraid to experiment with variations! Try using different types of bottles – larger water bottles, soda bottles, or even repurposed juice containers. Just ensure they are clean and have adequate drainage. You can also explore different chili pepper varieties. Start with easier-to-grow types like jalapeños or serranos, and then branch out to more exotic and hotter varieties as you gain experience. Consider adding companion plants like basil or marigolds to your bottle gardens to deter pests and attract pollinators. You can even paint the bottles to add a splash of color and personality to your vertical garden. Remember to research the specific needs of the chili pepper variety you choose, as sunlight and watering requirements can vary.
The key to successful bottle gardening is consistent care. Regularly check the soil moisture and water as needed, ensuring proper drainage to prevent root rot. Provide adequate sunlight, ideally at least six hours per day. Fertilize your plants regularly with a balanced fertilizer to promote healthy growth and abundant fruit production. And don’t forget to protect your plants from extreme weather conditions, such as frost or excessive heat.
We are confident that you’ll find growing chili peppers in bottles a fun, fulfilling, and ultimately delicious experience. It’s a fantastic way to connect with nature, reduce waste, and enjoy fresh, homegrown chilies right at your fingertips. So, gather your bottles, prepare your soil, and get ready to embark on this exciting gardening adventure!
We encourage you to try this DIY trick and share your experience with us! Post photos of your bottle gardens on social media using [Your Hashtag Here] and let us know what chili pepper varieties you’re growing. We’d love to see your creative setups and hear about your successes (and any challenges you encounter along the way). Your feedback will help us refine this guide and inspire others to embrace the joys of bottle gardening. Happy growing! Remember, the secret to a successful harvest lies in patience, observation, and a little bit of love for your plants. Now go forth and create your own miniature chili pepper paradise! This method of growing chili peppers is a great way to start your gardening journey.
Frequently Asked Questions (FAQ)
What type of bottles are best for growing chili peppers?
The best bottles for growing chili peppers are those made of durable plastic, such as PET (polyethylene terephthalate) bottles commonly used for water and soda. These bottles are lightweight, readily available, and relatively easy to cut and modify. Avoid using bottles made of brittle or easily degradable plastic, as they may not withstand the weight of the soil and plants or the effects of sunlight and weather. The size of the bottle will depend on the chili pepper variety you choose. Smaller varieties like Thai chilies can thrive in smaller bottles (1-2 liters), while larger varieties like bell peppers may require larger bottles (3-5 liters). Ensure the bottles are clean and free of any residue before using them.
How do I ensure proper drainage in my bottle garden?
Proper drainage is crucial for preventing root rot and ensuring the health of your chili pepper plants. To ensure adequate drainage, create several drainage holes at the bottom of the bottle. You can use a drill, a hot nail, or a sharp knife to make these holes. A good rule of thumb is to create at least four to five holes, each about ¼ inch in diameter. In addition to drainage holes, you can also add a layer of gravel or small stones at the bottom of the bottle to further improve drainage. This layer will help prevent the soil from clogging the drainage holes and ensure that excess water can escape freely.
What type of soil should I use for growing chili peppers in bottles?
The ideal soil for growing chili peppers in bottles is a well-draining potting mix that is rich in organic matter. Avoid using garden soil, as it can be too heavy and compact, leading to poor drainage and root problems. A good potting mix will typically contain a blend of peat moss, perlite, and vermiculite, which provide good aeration and water retention. You can also amend your potting mix with compost or other organic matter to improve its fertility and drainage. A slightly acidic to neutral pH (around 6.0 to 7.0) is ideal for chili peppers.
How often should I water my chili pepper plants in bottles?
The frequency of watering will depend on several factors, including the size of the bottle, the type of soil, the climate, and the stage of growth of the plants. As a general rule, water your chili pepper plants when the top inch of soil feels dry to the touch. Avoid overwatering, as this can lead to root rot. When watering, water thoroughly until water drains out of the drainage holes. During hot and dry weather, you may need to water more frequently, while during cooler and wetter weather, you may need to water less frequently. Monitor your plants closely and adjust your watering schedule accordingly.
How much sunlight do chili pepper plants need when grown in bottles?
Chili pepper plants need at least six hours of direct sunlight per day to thrive. Choose a location for your bottle garden that receives plenty of sunlight throughout the day. If you are growing your plants indoors, you may need to supplement with artificial lighting, such as grow lights. Rotate your bottles regularly to ensure that all sides of the plants receive adequate sunlight. Insufficient sunlight can lead to leggy growth, reduced flowering, and lower fruit production.
How do I fertilize my chili pepper plants in bottles?
Chili pepper plants are heavy feeders and require regular fertilization to produce abundant fruit. Use a balanced fertilizer with an NPK ratio (nitrogen, phosphorus, potassium) of around 10-10-10 or 14-14-14. You can use either a liquid fertilizer or a slow-release granular fertilizer. Follow the instructions on the fertilizer package for application rates and frequency. Fertilize your plants every two to four weeks during the growing season. Avoid over-fertilizing, as this can lead to nutrient burn.
How do I protect my chili pepper plants from pests and diseases when growing in bottles?
While the controlled environment of a bottle can offer some protection against pests and diseases, it’s still important to take preventative measures. Regularly inspect your plants for signs of pests or diseases, such as aphids, spider mites, or fungal infections. If you detect any problems, treat them promptly with appropriate organic pesticides or fungicides. You can also use companion plants like basil or marigolds to deter pests. Ensure good air circulation around your plants to prevent fungal diseases. Avoid overwatering, as this can create a favorable environment for fungal growth.
When can I harvest my chili peppers from my bottle garden?
The time it takes for chili peppers to mature will depend on the variety. Generally, chili peppers are ready to harvest when they have reached their mature size and color. The color will vary depending on the variety, ranging from green to red, yellow, or orange. The peppers should also be firm to the touch. Use a sharp knife or scissors to cut the peppers from the plant, leaving a small stem attached. Harvest your peppers regularly to encourage continued fruit production.
Can I grow chili peppers in bottles indoors year-round?
Yes, you can grow chili peppers in bottles indoors year-round, provided you provide them with adequate light, warmth, and humidity. Use grow lights to supplement natural sunlight, especially during the winter months. Maintain a consistent temperature of around 70-80°F (21-27°C). Increase humidity by misting your plants regularly or using a humidifier. Pollinate your plants manually by gently shaking the flowers or using a small paintbrush to transfer pollen from one flower to another.
Leave a Comment