
Clorox cleaning tips and tricks – who knew these three words could unlock a world of sparkling surfaces and germ-free bliss? Let’s be honest, cleaning isn’t usually anyone’s favorite pastime. But what if I told you that with a few clever hacks and the power of Clorox, you could transform your cleaning routine from a chore into a satisfying, almost therapeutic experience?
For generations, Clorox has been a household staple, synonymous with cleanliness and hygiene. Its history stretches back to the early 20th century, when it was first used as a commercial bleach. Over time, its applications expanded, becoming an indispensable tool in homes worldwide. Think about it – our grandmothers and great-grandmothers likely relied on Clorox to keep their homes clean and healthy, passing down their own unique cleaning secrets. Now, it’s our turn to carry on that tradition, armed with even more knowledge and innovative ways to use this versatile product.
In today’s fast-paced world, we’re all looking for ways to simplify our lives and save time. That’s where these Clorox cleaning tips and tricks come in. Whether you’re battling stubborn stains, tackling grimy surfaces, or simply aiming for a more hygienic home, these DIY solutions will empower you to achieve sparkling results with minimal effort. I’m excited to share some of my favorite hacks that will not only make your cleaning routine easier but also help you create a healthier and happier living space. Let’s dive in and discover the magic of Clorox!
DIY Cleaning Powerhouse: Unleashing the Magic of Clorox
Hey there, fellow cleaning enthusiasts! I’m about to share some amazing DIY cleaning hacks using Clorox bleach that will seriously transform your cleaning routine. We’re going beyond just laundry here; get ready to discover how Clorox can tackle grime, disinfect surfaces, and even revive tired household items. Just remember, safety first! Always wear gloves and eye protection, and ensure proper ventilation when working with bleach. And never, ever mix bleach with ammonia or other cleaning products – that’s a recipe for disaster!
Understanding Clorox: A Quick Chemistry Lesson (Kind Of!)
Before we dive in, let’s quickly understand what makes Clorox so effective. The active ingredient is sodium hypochlorite, a powerful oxidizing agent. This means it breaks down stains and kills germs by disrupting their chemical structure. It’s this oxidizing power that makes it so versatile, but also why we need to be careful when using it.
General Safety Guidelines When Using Clorox
* Ventilation is Key: Always work in a well-ventilated area. Open windows and doors to ensure fresh air circulation.
* Protective Gear: Wear rubber gloves to protect your skin from irritation. Eye protection, like safety glasses or goggles, is also a good idea.
* Dilution is Important: Always dilute Clorox according to the instructions provided in each hack. Using too much can damage surfaces and create harmful fumes.
* Avoid Mixing: Never mix Clorox with ammonia, vinegar, or other cleaning products. This can create toxic gases.
* Test in an Inconspicuous Area: Before applying any Clorox solution to a large surface, test it in a small, hidden area to ensure it doesn’t cause discoloration or damage.
* Rinse Thoroughly: After cleaning with Clorox, rinse the treated surface thoroughly with clean water to remove any residue.
* Storage: Store Clorox in a cool, dry place, away from children and pets. Keep it in its original container, tightly sealed.
Hack 1: The Sparkling Bathroom Savior
This hack will leave your bathroom gleaming! We’re talking about tackling mildew, soap scum, and general grime.
Materials You’ll Need:
* Clorox bleach
* Spray bottle
* Water
* Cleaning cloths or sponges
* Rubber gloves
* Eye protection
Step-by-Step Instructions:
1. Prepare the Solution: In your spray bottle, mix 1 part Clorox bleach with 10 parts water. This is a good general-purpose dilution for bathroom cleaning.
2. Spray and Wait: Spray the solution onto surfaces like your shower walls, bathtub, sink, and toilet bowl (inside and out). Let it sit for about 5-10 minutes to allow the bleach to work its magic.
3. Scrub and Rinse: Using a cleaning cloth or sponge, scrub the surfaces to loosen any stubborn grime. Pay special attention to areas with mildew or soap scum.
4. Rinse Thoroughly: Rinse all surfaces thoroughly with clean water. Make sure to remove all traces of the bleach solution.
5. Dry and Admire: Dry the surfaces with a clean towel or let them air dry. Step back and admire your sparkling clean bathroom!
Hack 2: Kitchen Countertop Disinfectant
Kitchen countertops are breeding grounds for bacteria. This hack will help you keep them clean and sanitized.
Materials You’ll Need:
* Clorox bleach
* Water
* Spray bottle
* Clean cloths or paper towels
* Rubber gloves
Step-by-Step Instructions:
1. Prepare a Diluted Solution: Mix 1 tablespoon of Clorox bleach with 1 gallon of water in your spray bottle. This is a weaker solution suitable for food preparation surfaces.
2. Spray and Wipe: Spray the solution lightly onto your countertops.
3. Wait Briefly: Let the solution sit for about 1 minute to disinfect the surface.
4. Wipe Clean: Wipe the countertops clean with a damp cloth or paper towel.
5. Rinse with Water: Rinse the countertops thoroughly with clean water to remove any bleach residue.
6. Dry the Surface: Dry the countertops with a clean towel or let them air dry.
Hack 3: Reviving Dingy White Laundry
This is a classic, but it’s worth revisiting! Clorox can work wonders on dingy white clothes.
Materials You’ll Need:
* Clorox bleach
* Laundry detergent
* Washing machine
Step-by-Step Instructions:
1. Sort Your Laundry: Separate your white clothes from your colored clothes. This is crucial to prevent color bleeding.
2. Load the Washing Machine: Load your white clothes into the washing machine.
3. Add Detergent: Add your regular laundry detergent to the dispenser.
4. Add Clorox Bleach: Add Clorox bleach to the bleach dispenser, following the instructions on the bottle. Usually, this is about ¾ cup for a standard-sized washing machine.
5. Start the Wash Cycle: Start the washing machine on a normal cycle with hot water.
6. Dry as Usual: Once the wash cycle is complete, dry your clothes as usual.
Hack 4: Mold and Mildew Removal from Shower Curtains
Shower curtains can get pretty gross with mold and mildew. Here’s how to give them a new lease on life.
Materials You’ll Need:
* Clorox bleach
* Washing machine
* Laundry detergent
* Towels
Step-by-Step Instructions:
1. Remove the Shower Curtain: Take down your shower curtain and liner.
2. Load the Washing Machine: Place the shower curtain and liner in the washing machine along with a few old towels (the towels will help scrub the curtain).
3. Add Detergent and Bleach: Add your regular laundry detergent and about ½ cup of Clorox bleach to the dispensers.
4. Wash on Gentle Cycle: Wash the shower curtain and liner on a gentle cycle with warm water.
5. Hang to Dry: Hang the shower curtain and liner to dry. Avoid putting them in the dryer, as the heat can damage them.
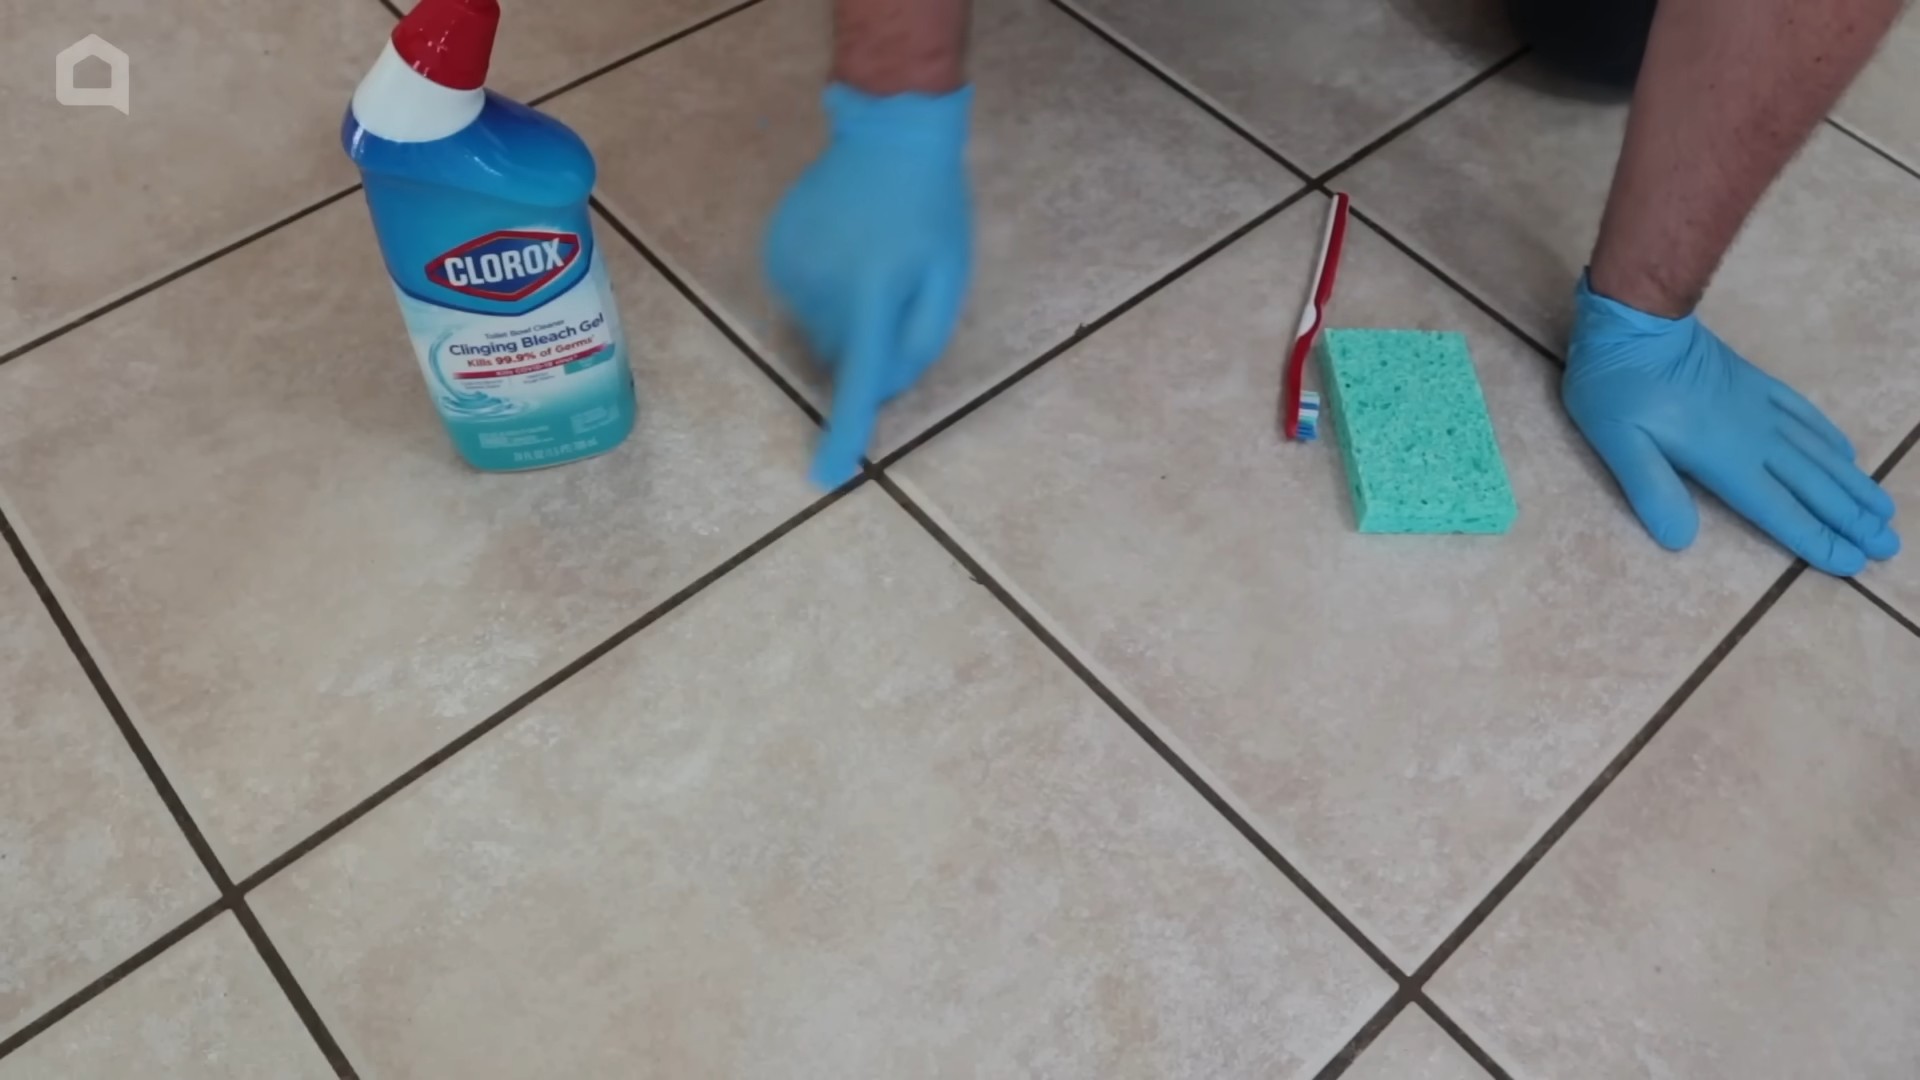
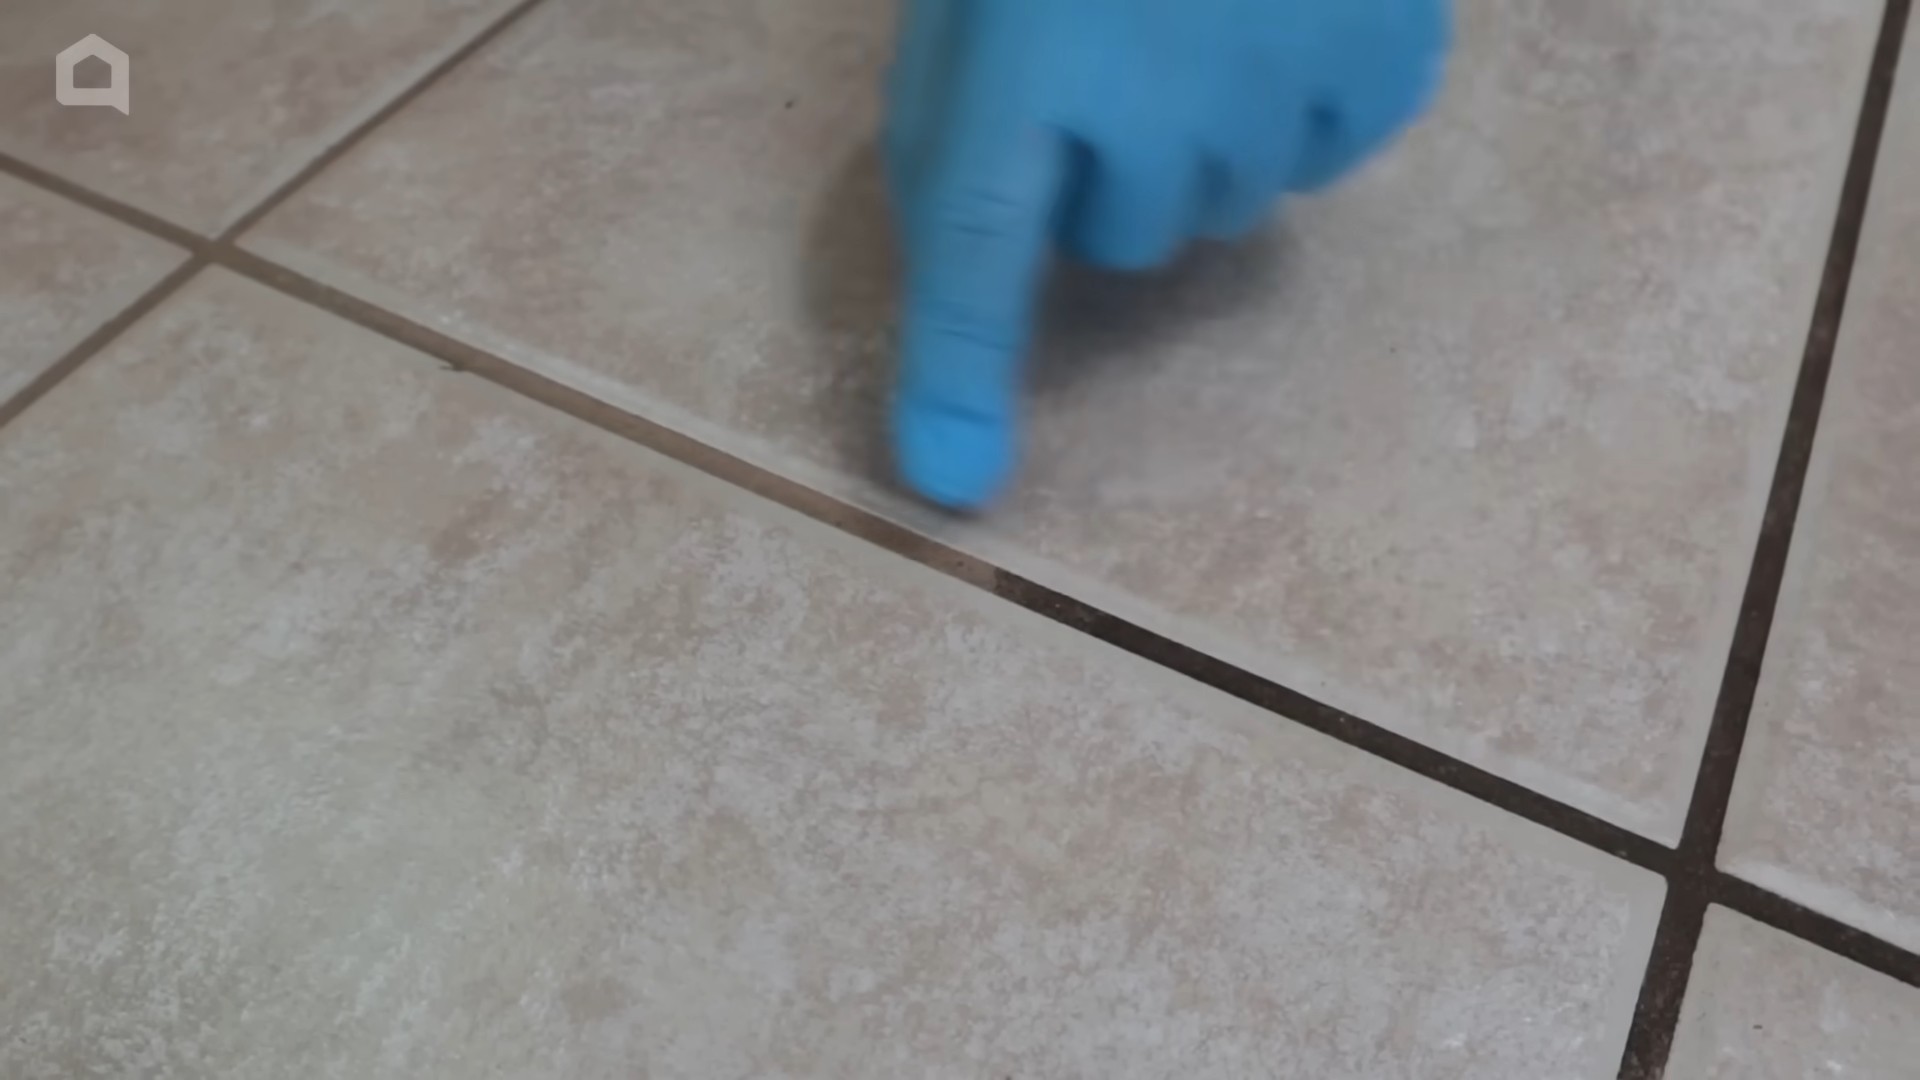
Hack 5: Cleaning Grout Like a Pro
Grout can be a real pain to clean. This hack will make it much easier.
Materials You’ll Need:
* Clorox bleach
* Water
* Spray bottle or small container
* Old toothbrush or grout brush
* Rubber gloves
* Eye protection
Step-by-Step Instructions:
1. Prepare the Solution: Mix equal parts Clorox bleach and water in your spray bottle or small container.
2. Apply the Solution: Spray or apply the solution directly onto the grout lines.
3. Let it Sit: Let the solution sit for about 10-15 minutes to allow the bleach to penetrate the grout.
4. Scrub the Grout: Using an old toothbrush or grout brush, scrub the grout lines to loosen any dirt and grime.
5. Rinse Thoroughly: Rinse the grout thoroughly with clean water.
6. Dry and Admire: Dry the grout with a clean towel or let it air dry. You’ll be amazed at the difference!
Hack 6: Disinfecting Cutting Boards
Cutting boards, especially wooden ones, can harbor bacteria. This hack will help you keep them safe for food preparation.
Materials You’ll Need:
* Clorox bleach
* Water
* Clean cloth or sponge
Step-by-Step Instructions:
1. Wash the Cutting Board: Wash the cutting board thoroughly with soap and water to remove any food particles.
2. Prepare the Solution: Mix 1 tablespoon of Clorox bleach with 1 gallon of water.
3. Apply the Solution: Apply the solution to the cutting board, ensuring it covers the entire surface.
4. Let it Sit: Let the solution sit for about 2 minutes to disinfect the cutting board.
5. Rinse Thoroughly: Rinse the cutting board thoroughly with clean water.
6. Dry the Cutting Board: Dry the cutting board with a clean towel or let it air dry completely before using it again.
Hack 7: Outdoor Furniture Revival
Give your outdoor furniture a refresh with this simple cleaning trick.
Materials You’ll Need:
* Clorox bleach
* Water
* Bucket
* Scrub brush
* Garden hose
* Rubber gloves
* Eye protection
Step-by-Step Instructions:
1. Prepare the Solution: In a bucket, mix ¼
Conclusion
So, there you have it! Mastering these DIY Clorox cleaning tips and tricks is a game-changer for anyone looking to achieve a sparkling clean home without breaking the bank or resorting to harsh, expensive chemicals. We’ve explored how to harness the power of Clorox bleach in creative and effective ways, from tackling stubborn stains on your laundry to disinfecting high-touch surfaces throughout your house.
The beauty of these methods lies in their simplicity and adaptability. You’re not locked into rigid formulas; feel free to experiment and adjust the ratios to suit your specific needs and the severity of the cleaning challenge. For instance, if you’re dealing with a particularly grimy bathroom tile grout, you might want to increase the concentration of Clorox in your cleaning solution. Conversely, for more delicate surfaces, err on the side of caution and dilute the bleach further.
Consider these variations to personalize your cleaning routine:
* **Scent Boost:** Add a few drops of your favorite essential oil (like lemon, lavender, or eucalyptus) to your diluted Clorox solution for a more pleasant aroma. Just be sure the essential oil is compatible with bleach and won’t create harmful fumes. Always test in an inconspicuous area first.
* **Targeted Cleaning:** For small, hard-to-reach areas like faucet crevices or shower door tracks, use an old toothbrush dipped in your Clorox solution for precise cleaning.
* **Color-Safe Bleach Alternative:** While we’ve focused on traditional Clorox bleach, remember that Clorox also offers color-safe alternatives. These are excellent for brightening colored fabrics without the risk of fading. Always follow the product instructions carefully.
* Mold and Mildew Prevention: After cleaning mold and mildew with a Clorox solution, ensure the area is thoroughly dried. Proper ventilation is key to preventing future growth. Consider using a dehumidifier in damp areas like bathrooms.
Ultimately, the goal is to create a cleaning regimen that works for you, your home, and your lifestyle. These DIY Clorox cleaning tips and tricks provide a solid foundation, but don’t be afraid to tweak and refine them to achieve optimal results.
We’re confident that once you try these methods, you’ll be amazed by the cleaning power and cost-effectiveness of Clorox. It’s a versatile and reliable cleaning agent that, when used properly, can transform your home into a sparkling sanctuary.
Now, it’s your turn! We encourage you to put these DIY Clorox cleaning tips and tricks to the test. Share your experiences, successes, and any variations you discover in the comments below. We’re eager to hear how these methods have worked for you and any insights you can offer to fellow readers. Let’s build a community of clean-home enthusiasts, one Clorox-powered tip at a time!
FAQ
Frequently Asked Questions About DIY Clorox Cleaning
Is it safe to mix Clorox bleach with other cleaning products?
Absolutely not! Mixing Clorox bleach with certain chemicals, especially ammonia or acids (like vinegar or lemon juice), can create dangerous and potentially deadly gases. Always use Clorox bleach by itself, diluted with water according to the instructions. Never mix it with other cleaning products. This is paramount for your safety and the safety of those around you.
What surfaces can I safely clean with Clorox bleach?
Clorox bleach is generally safe for use on non-porous surfaces like tile, porcelain, sealed grout, stainless steel, and some plastics. However, it’s crucial to test a small, inconspicuous area first to ensure it doesn’t cause discoloration or damage. Avoid using Clorox bleach on natural stone (like marble or granite), wood, painted surfaces, or fabrics that are not bleach-safe. Always read the manufacturer’s instructions for both the Clorox product and the surface you’re cleaning.
How do I properly dilute Clorox bleach for cleaning?
The dilution ratio depends on the specific cleaning task. For general disinfecting, a common recommendation is to mix 1/3 cup of Clorox bleach with 1 gallon of water. For tougher stains or mold removal, you might use a slightly stronger solution, but always follow the instructions on the Clorox bottle. Never use undiluted Clorox bleach, as it can damage surfaces and pose a health risk. Always use cold water for dilution, as hot water can cause the bleach to break down and become less effective.
How long should I leave Clorox bleach on a surface to disinfect it?
For effective disinfection, allow the Clorox bleach solution to remain on the surface for at least 10 minutes. This contact time is necessary to kill bacteria and viruses. After 10 minutes, rinse the surface thoroughly with clean water and allow it to air dry.
Can I use Clorox bleach to clean my laundry?
Yes, Clorox bleach can be used to whiten and disinfect laundry. However, it’s essential to use it correctly to avoid damaging your clothes. Always check the care label of your garments to ensure they are bleach-safe. If they are, add the recommended amount of Clorox bleach to your washing machine’s bleach dispenser, following the manufacturer’s instructions. For colored clothes, use Clorox color-safe bleach to prevent fading.
How do I get rid of the strong smell of Clorox bleach after cleaning?
The strong smell of Clorox bleach is a sign that it’s working, but it can be unpleasant. To minimize the odor, ensure proper ventilation by opening windows and doors while cleaning. After cleaning, rinse the surfaces thoroughly with clean water. You can also use an air freshener or simmer a pot of water with citrus peels or spices to help neutralize the smell.
Is Clorox bleach safe for septic systems?
In small amounts, Clorox bleach is generally considered safe for septic systems. However, excessive use of bleach can disrupt the beneficial bacteria in the septic tank, which are essential for breaking down waste. To minimize the impact on your septic system, use Clorox bleach sparingly and avoid pouring large amounts of undiluted bleach down the drain.
What precautions should I take when using Clorox bleach?
Always wear gloves and eye protection when handling Clorox bleach to protect your skin and eyes from irritation. Work in a well-ventilated area to avoid inhaling the fumes. Keep Clorox bleach out of reach of children and pets. If you accidentally get Clorox bleach on your skin or in your eyes, rinse immediately with plenty of water. If you experience any adverse reactions, seek medical attention.
Can I use Clorox bleach to clean my pet’s food and water bowls?
Yes, Clorox bleach can be used to disinfect pet food and water bowls. However, it’s crucial to rinse the bowls thoroughly with clean water after disinfecting to remove any traces of bleach. Even small amounts of bleach can be harmful to pets if ingested. Ensure the bowls are completely dry before refilling them with food or water.
How should I store Clorox bleach?
Store Clorox bleach in a cool, dry place away from direct sunlight and heat. Keep it in its original container, tightly sealed, and out of reach of children and pets. Do not transfer Clorox bleach to other containers, as this could lead to accidental ingestion or misuse.

Leave a Comment