
Grow Taro at Home? Absolutely! Imagine harvesting your own creamy, nutty-flavored taro root, right from your backyard. Forget those expensive trips to specialty stores – with a few simple tricks, you can cultivate this tropical delight yourself. I know it sounds intimidating, but trust me, it’s easier than you think!
Taro, also known as kalo in Hawaiian culture, has a rich history spanning thousands of years. It’s more than just a food source; it’s a symbol of sustenance, family, and connection to the land. For generations, communities across Asia and the Pacific Islands have relied on taro as a staple crop, using every part of the plant from the root to the leaves.
But why should you bother to grow taro at home? Well, besides the satisfaction of growing your own food, taro is incredibly nutritious, packed with fiber, vitamins, and minerals. Plus, it’s a fantastic conversation starter! More importantly, learning how to grow your own food gives you more control over what you eat, ensuring it’s free from harmful pesticides and chemicals. This DIY guide will provide you with the essential tips and tricks to successfully cultivate taro, even if you have limited space or experience. So, let’s get our hands dirty and embark on this rewarding gardening adventure together!
Growing Taro at Home: A Beginner’s Guide
Hey there, fellow plant enthusiasts! Ever thought about growing your own taro? It might seem a little exotic, but trust me, it’s totally doable, even if you don’t have a sprawling tropical garden. I’m going to walk you through everything you need to know to cultivate this fascinating plant right in your own home or backyard. Let’s get started!
Choosing Your Taro Variety
First things first, you need to decide which type of taro you want to grow. There are many different varieties, each with its own unique characteristics. Some are better suited for certain climates, and some have different flavor profiles. Here are a few popular options:
* Bun Long: This is a common variety, known for its large corms and good flavor. It’s relatively easy to grow and adapts well to different conditions.
* Dasheen: Another widely cultivated variety, Dasheen produces smaller corms but is still a great choice for home gardeners.
* Eddoe: Eddoe taro produces smaller, more numerous corms compared to Dasheen. It’s often grown for its leaves as well.
* Black Magic: If you’re looking for something visually striking, consider Black Magic taro. Its dark purple leaves add a dramatic touch to any garden.
Once you’ve chosen your variety, you’ll need to source your taro corms or slips (small shoots). You can usually find these at local nurseries, Asian markets, or online retailers. Make sure to choose healthy-looking corms that are firm and free from any signs of rot or disease.
Preparing Your Taro for Planting
Before you can plant your taro, you’ll need to prepare it properly. This involves a few simple steps:
1. Inspect the Corm: Carefully examine the corm for any signs of damage or disease. Discard any corms that are soft, mushy, or have visible mold.
2. Sprouting (Optional): While not strictly necessary, sprouting your taro corm before planting can give it a head start. To do this, place the corm in a shallow dish of water, making sure that the top of the corm is exposed to air. Keep the dish in a warm, bright location, and change the water every day. After a few days or weeks, you should see small shoots emerging from the corm.
3. Cutting the Corm (Optional): If your corm is very large, you can cut it into smaller pieces, each with at least one eye (bud). This can help you propagate more plants from a single corm. Be sure to let the cut surfaces callous over for a day or two before planting to prevent rot.
Planting Your Taro
Now comes the fun part – planting your taro! Here’s what you need to do:
1. Choose Your Planting Location: Taro thrives in warm, humid environments with plenty of sunlight. If you live in a cooler climate, you can grow taro in containers and bring them indoors during the winter months.
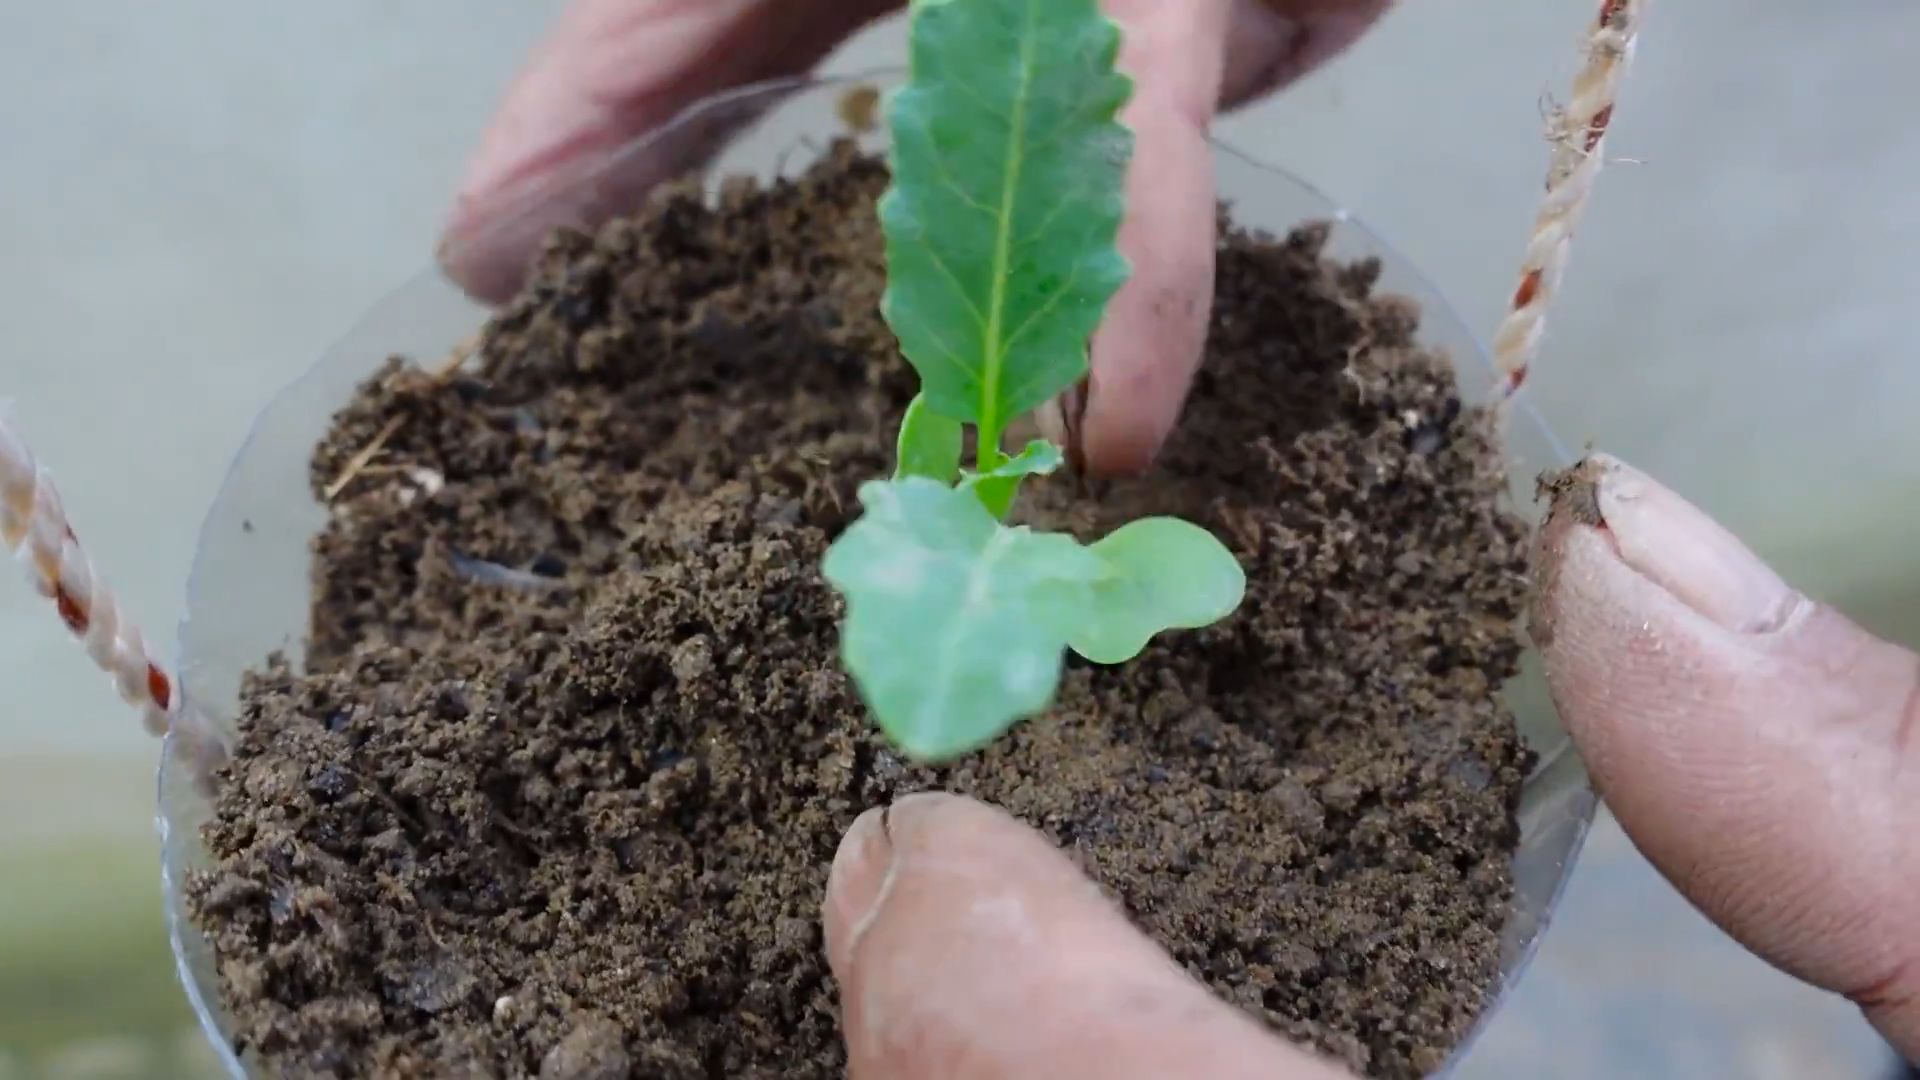
2. Prepare the Soil: Taro prefers rich, well-draining soil that is high in organic matter. You can improve your soil by adding compost, aged manure, or other organic amendments. The ideal soil pH for taro is between 5.5 and 6.5.
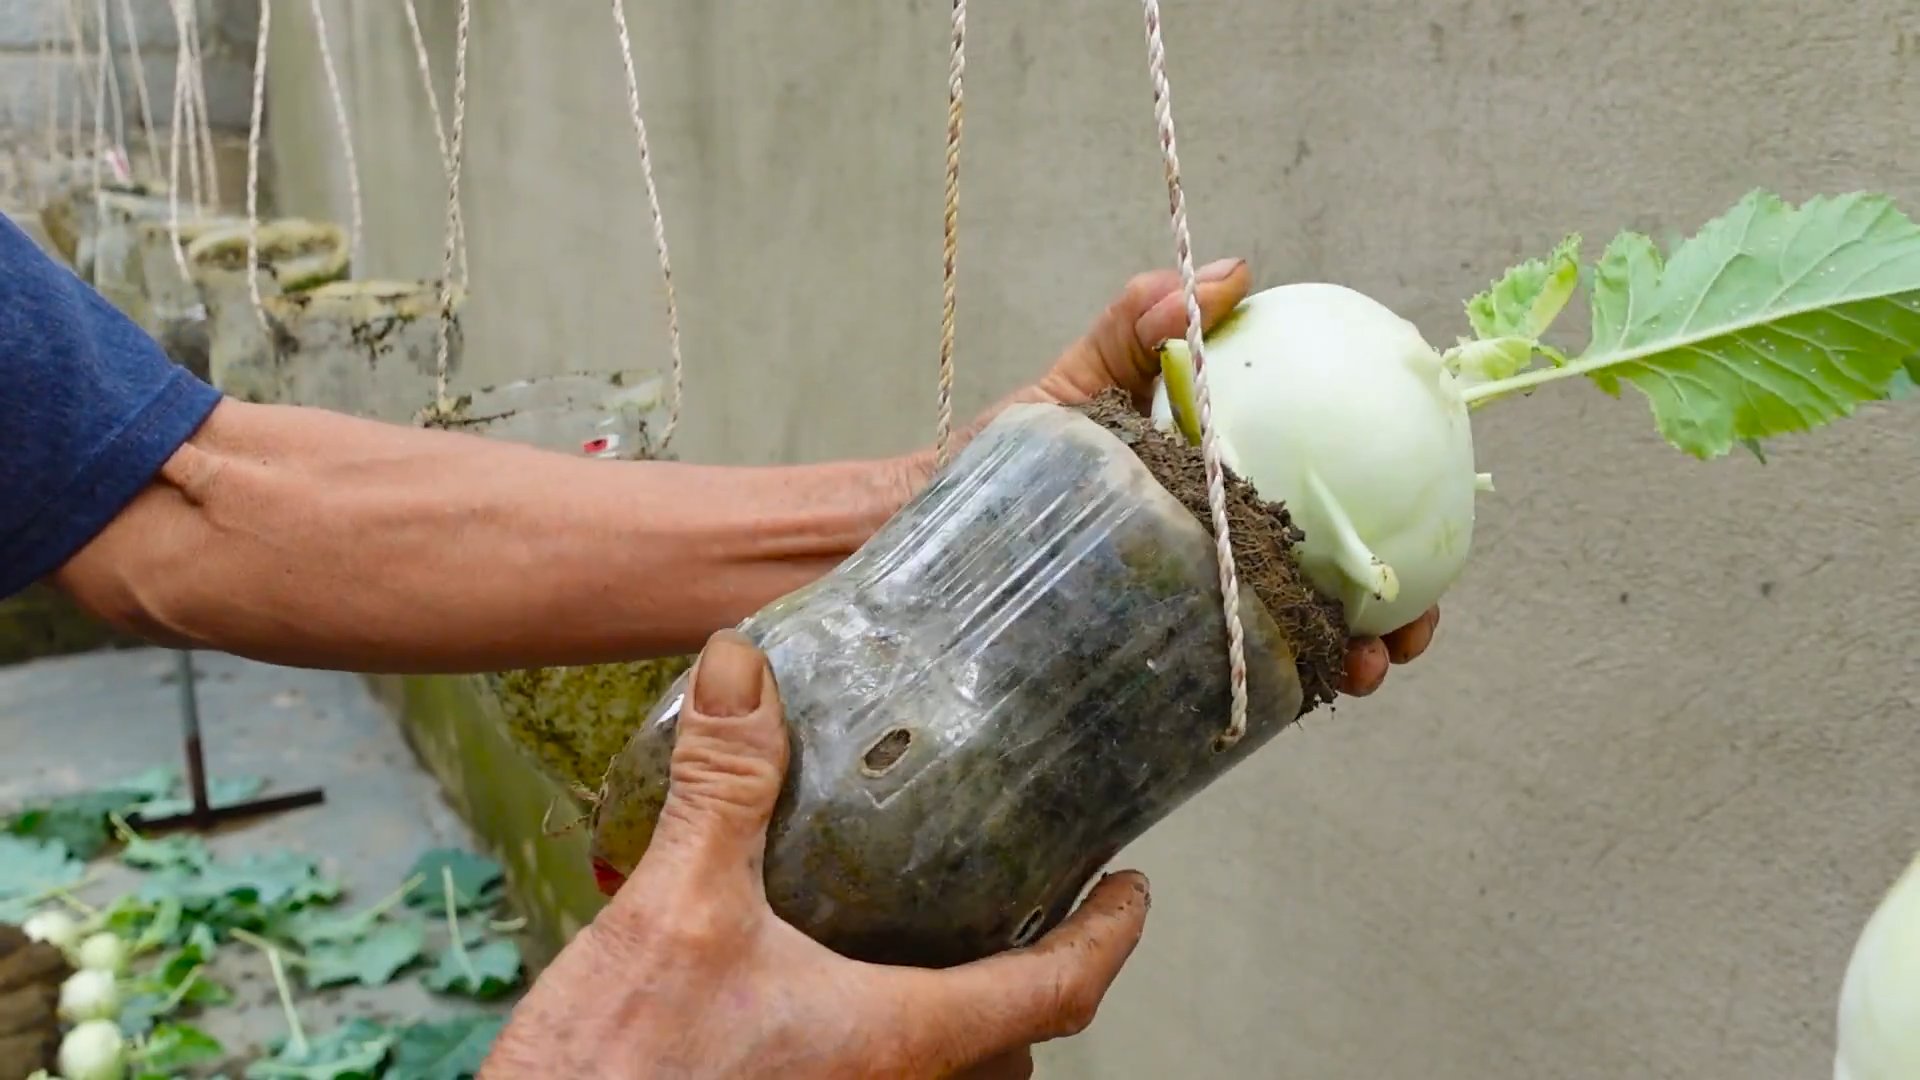
3. Planting in the Ground: If you’re planting your taro directly in the ground, dig a hole that is about twice the size of the corm. Place the corm in the hole with the top (where the shoots are emerging) facing upwards. Cover the corm with soil and gently pat it down. Water thoroughly after planting.
4. Planting in Containers: If you’re planting your taro in a container, choose a pot that is at least 12 inches in diameter. Fill the pot with a well-draining potting mix and plant the corm as described above.
5. Spacing: When planting multiple taro plants, space them about 2-3 feet apart to allow for adequate growth.
Caring for Your Taro
Once your taro is planted, it’s important to provide it with the proper care to ensure healthy growth. Here are some key things to keep in mind:
* Watering: Taro loves water, so keep the soil consistently moist, especially during the growing season. Water deeply whenever the top inch of soil feels dry to the touch. If you’re growing taro in a container, make sure the pot has drainage holes to prevent waterlogging.
* Fertilizing: Taro is a heavy feeder, so it benefits from regular fertilization. Use a balanced fertilizer (e.g., 10-10-10) every 4-6 weeks during the growing season. You can also supplement with organic fertilizers like compost tea or fish emulsion.
* Sunlight: Taro needs at least 6 hours of sunlight per day to thrive. If you’re growing taro indoors, place it near a sunny window or provide supplemental lighting.
* Humidity: Taro prefers high humidity levels. If you live in a dry climate, you can increase humidity by misting the leaves regularly or placing a humidifier near the plant.
* Weeding: Keep the area around your taro plants free from weeds, which can compete for nutrients and water.
* Pest and Disease Control: Taro is generally resistant to pests and diseases, but it can occasionally be affected by aphids, spider mites, or fungal infections. Inspect your plants regularly for any signs of trouble and take appropriate action if necessary. Insecticidal soap or neem oil can be used to control aphids and spider mites, while fungicides can be used to treat fungal infections.
Harvesting Your Taro
The time it takes for taro to mature depends on the variety and growing conditions, but it typically takes around 7-12 months. You’ll know your taro is ready to harvest when the leaves start to turn yellow and die back.
1. Harvesting the Corms: To harvest the corms, carefully dig around the base of the plant and lift it out of the ground. Remove the corms from the roots and wash them thoroughly.
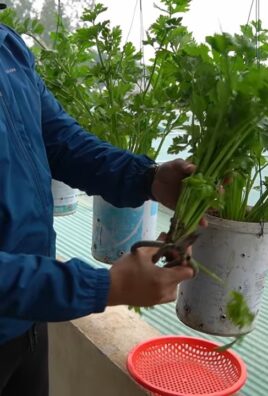
2. Harvesting the Leaves: Taro leaves can also be harvested and eaten, but they must be cooked properly to remove calcium oxalate crystals, which can cause irritation. To harvest the leaves, simply cut them off at the base of the plant. Choose young, tender leaves for the best flavor.
3. Storage: Taro corms can be stored in a cool, dry place for several weeks. Taro leaves should be used fresh or frozen for later use.
Cooking with Taro
Taro is a versatile ingredient that can be used in a variety of dishes. The corms can be boiled, steamed, baked, or fried, and they have a slightly sweet, nutty flavor. Taro leaves can be used in soups, stews, and stir-fries.
Important Note: Always cook taro corms and leaves thoroughly before eating. Raw taro contains calcium oxalate crystals, which can cause irritation to the mouth and throat. Cooking breaks down these crystals and makes the taro safe to eat.
Troubleshooting
Even with the best care, you might encounter some challenges when growing taro. Here are a few common problems and how to address them:
* Yellowing Leaves: Yellowing leaves can be caused by a variety of factors, including overwatering, underwatering, nutrient deficiencies, or pest infestations. Check the soil moisture, fertilize your plants, and inspect them for pests.
* Slow Growth: Slow growth can be caused by insufficient sunlight, poor soil, or cool temperatures. Make sure your taro plants are getting enough sunlight, amend the soil with organic matter, and provide supplemental heat if necessary.
* Root Rot: Root rot is a fungal disease that can occur in waterlogged soil. To prevent root rot, make sure your soil is well-draining and avoid overwatering. If you suspect root rot, remove the affected plants from the soil and treat them with a fungicide.
* Pest Infestations: Aphids, spider mites, and other pests can sometimes attack taro plants. Inspect your plants regularly for signs of infestation and take appropriate action if necessary. Insecticidal soap or neem oil can be used to control these pests.
Propagating Taro
If you want to expand your taro collection, you can propagate new plants from corms or slips.
* From Corms: As mentioned earlier, you can cut large taro corms into smaller pieces, each with at least one eye (bud). Let the cut surfaces callous over for a day or two before planting.
* From Slips: Slips are small shoots that emerge from the base of the taro plant. To propagate from slips, carefully separate them from the main plant and plant them in individual pots filled with well-draining potting mix. Keep the soil moist and provide plenty of sunlight.
Enjoying Your Homegrown Taro
Growing taro at home can be a rewarding experience. Not only will you have a beautiful and unique plant to admire, but you’ll also have a delicious and nutritious food
Conclusion
So, there you have it! Growing taro at home is not only achievable but also incredibly rewarding. Forget the store-bought varieties; imagine harvesting your own fresh, organically grown taro, knowing exactly where it came from and how it was nurtured. This DIY project is a must-try for several compelling reasons.
First, the taste difference is undeniable. Homegrown taro boasts a richer, more nuanced flavor that simply can’t be matched by commercially grown options. You’ll be amazed at the depth of earthy sweetness that your own taro will possess.
Second, you’re in complete control of the growing process. No harmful pesticides or herbicides are necessary. You can cultivate your taro using organic methods, ensuring a healthy and sustainable harvest for you and your family. This is particularly important if you are health-conscious or have dietary restrictions.
Third, it’s a fantastic learning experience. Gardening, in general, is a therapeutic and educational activity. Growing taro specifically will teach you about plant propagation, soil composition, water management, and the fascinating life cycle of this unique root vegetable. It’s a hands-on lesson in botany that you can share with children or anyone interested in learning more about the natural world.
Fourth, it’s a conversation starter! How many of your friends can say they grow their own taro? This is a unique and impressive feat that will undoubtedly spark curiosity and admiration. Be prepared to share your knowledge and inspire others to embark on their own gardening adventures.
Finally, and perhaps most importantly, growing taro at home is incredibly satisfying. There’s a profound sense of accomplishment that comes from nurturing a plant from a small cutting or corm to a thriving, edible crop. It’s a connection to the earth and a reminder of the simple pleasures in life.
Variations and Suggestions:
Don’t be afraid to experiment! Try different varieties of taro to discover your favorite flavor profile. Some varieties are better suited for specific dishes, so research which ones are popular in your region.
Consider growing taro in containers if you have limited space. This allows you to control the soil conditions and move the plants indoors during colder months. Just make sure the containers are large enough to accommodate the root system.
Explore different growing mediums. While taro thrives in moist soil, you can also experiment with hydroponics or aquaponics for a more unconventional approach.
Think about companion planting. Certain plants can help deter pests or improve the soil quality for your taro. Research which plants are beneficial companions and incorporate them into your garden.
Once you’ve harvested your taro, get creative in the kitchen! Taro can be used in a wide variety of dishes, from savory stews and curries to sweet desserts and snacks. Experiment with different recipes and discover new ways to enjoy your homegrown taro.
We encourage you to take the plunge and try growing taro at home. It’s a rewarding experience that will connect you with nature, improve your culinary skills, and provide you with a delicious and healthy food source. Don’t be intimidated by the process; with a little patience and care, you’ll be harvesting your own taro in no time.
Share your experiences with us! We’d love to hear about your successes, challenges, and favorite taro recipes. Post photos of your taro plants and dishes on social media using #HomegrownTaro and inspire others to join the movement. Let’s build a community of taro enthusiasts and celebrate the joys of growing our own food.
Frequently Asked Questions (FAQ)
What is the best time of year to plant taro?
The ideal time to plant taro is during the late spring or early summer, after the last frost has passed. Taro thrives in warm temperatures and requires a long growing season to mature. If you live in a region with mild winters, you may be able to plant taro year-round. However, in colder climates, it’s best to start the plants indoors and transplant them outdoors when the weather warms up. Starting them indoors gives them a head start and protects them from potential frost damage.
What kind of soil does taro need?
Taro prefers rich, well-draining soil that is high in organic matter. The soil should be slightly acidic to neutral, with a pH between 6.0 and 7.0. Amend your soil with compost, aged manure, or other organic materials to improve its fertility and drainage. If you’re growing taro in containers, use a high-quality potting mix that is specifically formulated for root vegetables. Avoid heavy clay soils, as they can become waterlogged and inhibit root growth. Good drainage is crucial to prevent root rot.
How much water does taro need?
Taro requires consistent moisture to thrive. Water the plants regularly, especially during hot and dry weather. The soil should be kept consistently moist but not waterlogged. Avoid allowing the soil to dry out completely, as this can stress the plants and reduce their yield. Mulching around the plants can help retain moisture in the soil and suppress weed growth. In very hot climates, you may need to water your taro plants daily.
How much sunlight does taro need?
Taro prefers partial shade to full sun. In hotter climates, it’s best to provide some afternoon shade to protect the plants from scorching. In cooler climates, taro can tolerate full sun. Observe your plants closely and adjust their location as needed to ensure they are receiving the optimal amount of sunlight. Insufficient sunlight can result in leggy growth and reduced yields.
How long does it take for taro to mature?
Taro typically takes 7 to 12 months to mature, depending on the variety and growing conditions. You’ll know the taro is ready to harvest when the leaves begin to turn yellow and die back. The corms (the edible root vegetables) should be firm and well-developed. Gently dig around the base of the plant to harvest the corms, being careful not to damage them.
Are taro leaves edible?
Yes, taro leaves are edible, but they must be cooked thoroughly to remove calcium oxalate crystals, which can cause irritation to the mouth and throat. Boiling the leaves for at least 30 minutes will neutralize these crystals. Taro leaves are a popular ingredient in many cuisines, particularly in Polynesian and Asian dishes. They can be used in stews, soups, and stir-fries.
What are some common pests and diseases that affect taro?
Taro can be susceptible to pests such as aphids, spider mites, and taro hornworms. These pests can be controlled with insecticidal soap or neem oil. Taro can also be affected by diseases such as root rot and leaf blight. To prevent these diseases, ensure good drainage, avoid overwatering, and provide adequate air circulation. If you notice signs of disease, remove the affected leaves or plants immediately.
Can I grow taro indoors?
Yes, you can grow taro indoors, but it requires a large container, plenty of light, and consistent moisture. Choose a sunny location near a window or provide supplemental lighting with grow lights. Keep the soil consistently moist and fertilize regularly. Indoor taro plants may not grow as large as outdoor plants, but they can still provide a decorative and edible addition to your home.
How do I store taro after harvesting?
After harvesting, store taro corms in a cool, dry, and well-ventilated place. They can be stored for several weeks or even months if properly stored. Avoid storing taro in the refrigerator, as this can cause them to become mushy. You can also freeze taro corms after they have been cooked.
Is growing taro at home difficult?
No, growing taro at home is not particularly difficult, but it does require some attention and care. With the right conditions and a little patience, you can successfully grow your own taro and enjoy its delicious and nutritious corms and leaves. The key is to provide the plants with adequate moisture, sunlight, and nutrients, and to protect them from pests and diseases. Don’t be afraid to experiment and learn from your experiences.
Leave a Comment