
Grow Pineapples at Home? Absolutely! Imagine plucking a juicy, sun-ripened pineapple straight from your own backyard. Sounds like a tropical dream, right? Well, it’s more achievable than you might think, and I’m here to show you how with some simple DIY magic!
Pineapples, symbols of hospitality and luxury, have a fascinating history. Originating in South America, they were once so prized that they were rented out as status symbols at parties! While we might not be renting them out these days, the allure of this exotic fruit remains strong. But why spend a fortune at the grocery store when you can cultivate your own little slice of paradise?
In today’s world, where sustainability and knowing where our food comes from are increasingly important, grow pineapples at home is a fantastic way to connect with nature and enjoy fresh, delicious fruit. Plus, it’s a rewarding project that’s surprisingly easy to get started with. I’ll guide you through the process with easy-to-follow steps and helpful tips, so you can enjoy the sweet taste of success – and homegrown pineapple – in no time!
Grow Your Own Tropical Delight: A Step-by-Step Guide to Growing Pineapples at Home
Okay, so you’re dreaming of fresh, juicy pineapple, but the grocery store prices are making you wince? I get it! The good news is, you can actually grow your own pineapple right at home, even if you don’t live in a tropical paradise. It’s a surprisingly simple and rewarding project. Trust me, there’s nothing quite like the taste of a pineapple you’ve nurtured from start to finish. Let’s dive in!
What You’ll Need
Before we get started, let’s gather our supplies. This is a pretty low-cost project, which is always a win in my book!
* A Fresh Pineapple: Look for one that’s ripe and healthy-looking. The leaves should be green and firm, not brown or wilted. The fruit itself should have a sweet, fragrant smell.
* A Sharp Knife: A good, sturdy knife is essential for cleanly removing the top of the pineapple.
* Potting Soil: Use a well-draining potting mix. A mix designed for cacti or succulents works great.
* A Pot: Choose a pot that’s at least 6 inches in diameter. A larger pot (8-10 inches) is even better, as it will give the roots more room to grow. Make sure it has drainage holes!
* Watering Can or Spray Bottle: For gentle watering.
* Optional: Rooting Hormone: This can help speed up the rooting process, but it’s not strictly necessary.
* Optional: Gloves: Pineapple leaves can be a bit prickly, so gloves can protect your hands.
Preparing the Pineapple Top
This is the most crucial step, so pay close attention! We’re essentially turning the pineapple top into a new plant.
1. Twist or Cut Off the Top: Hold the pineapple firmly and twist the leafy top off. If it doesn’t twist easily, use your sharp knife to carefully cut it off, leaving about an inch of fruit attached.
2. Remove Excess Fruit: This is important to prevent rotting. Carefully slice away any remaining fruit from the base of the pineapple top. You want to expose the stem where the roots will eventually emerge. Don’t be afraid to remove a few of the lower leaves to reveal more of the stem.
3. Peel Back the Lower Leaves: Gently peel back a few of the lower leaves from the base of the pineapple top. This will further expose the stem and encourage root growth. You should be able to see small root buds (tiny brown bumps) on the stem.
4. Let it Dry (Cure): This is a crucial step to prevent rot. Place the pineapple top in a cool, dry place for 3-7 days. This allows the cut end to callous over, which will protect it from fungal infections. I usually just leave mine on a paper towel on the kitchen counter.
Planting the Pineapple Top
Now that our pineapple top is prepped and ready, it’s time to get it planted!
1. Fill the Pot with Potting Soil: Fill your chosen pot with the well-draining potting mix, leaving about an inch of space at the top.
2. Make a Hole: Create a hole in the center of the soil that’s large enough to accommodate the pineapple top.
3. Plant the Pineapple Top: Place the pineapple top in the hole, making sure the base of the leaves is just above the soil line. Gently press the soil around the base to secure it.
4. Water Thoroughly: Water the soil thoroughly until water drains out of the drainage holes. This will help settle the soil and encourage root growth.
Caring for Your Pineapple Plant
This is where patience comes in! It can take several weeks or even months for the pineapple top to root.
1. Water Sparingly: Pineapples don’t like to be waterlogged. Water only when the soil feels dry to the touch. Overwatering is a common mistake that can lead to rot. I usually water mine about once a week, but it depends on the climate and humidity.
2. Provide Bright, Indirect Sunlight: Pineapples need plenty of sunlight, but direct sunlight can scorch the leaves. Place your pineapple plant in a location that receives bright, indirect sunlight for at least 6 hours a day. An east-facing window is often ideal.
3. Maintain Warm Temperatures: Pineapples thrive in warm temperatures, ideally between 65°F and 85°F (18°C and 29°C). Avoid exposing your plant to temperatures below 60°F (15°C).
4. Fertilize Regularly: Once the pineapple plant has rooted (you’ll know this when you see new growth), fertilize it every 2-3 months with a balanced liquid fertilizer. Follow the instructions on the fertilizer label.
5. Check for Rooting: After a few weeks, gently tug on the pineapple top. If it feels firmly rooted, congratulations! If it still feels loose, it hasn’t rooted yet. Be patient and continue to care for it as described above.
Encouraging Fruiting
This is the exciting part! It can take 2-3 years for a pineapple plant grown from a top to produce fruit. But don’t worry, it’s worth the wait!
1. Ensure Maturity: Your plant needs to be mature enough to produce fruit. This means it should have a healthy, well-developed root system and plenty of leaves.
2. Ethephon Treatment (Optional): This is a common method used by commercial pineapple growers to induce flowering. However, it’s not readily available to home gardeners and can be tricky to use. I personally haven’t used it, and my pineapple eventually fruited on its own.
3. Apple Trick (My Preferred Method): This is a natural and easy way to encourage fruiting. Place a ripe apple, cut in half, upside down on top of the pineapple plant. Cover the plant and apple with a large plastic bag to trap the ethylene gas released by the apple. Ethylene gas is a natural plant hormone that promotes flowering. Leave the apple in place for about a week, then remove it and the bag.
4. Be Patient: It may take several months after the apple treatment for a flower to appear. Be patient and continue to care for your plant as usual.
Harvesting Your Pineapple
The moment you’ve been waiting for!
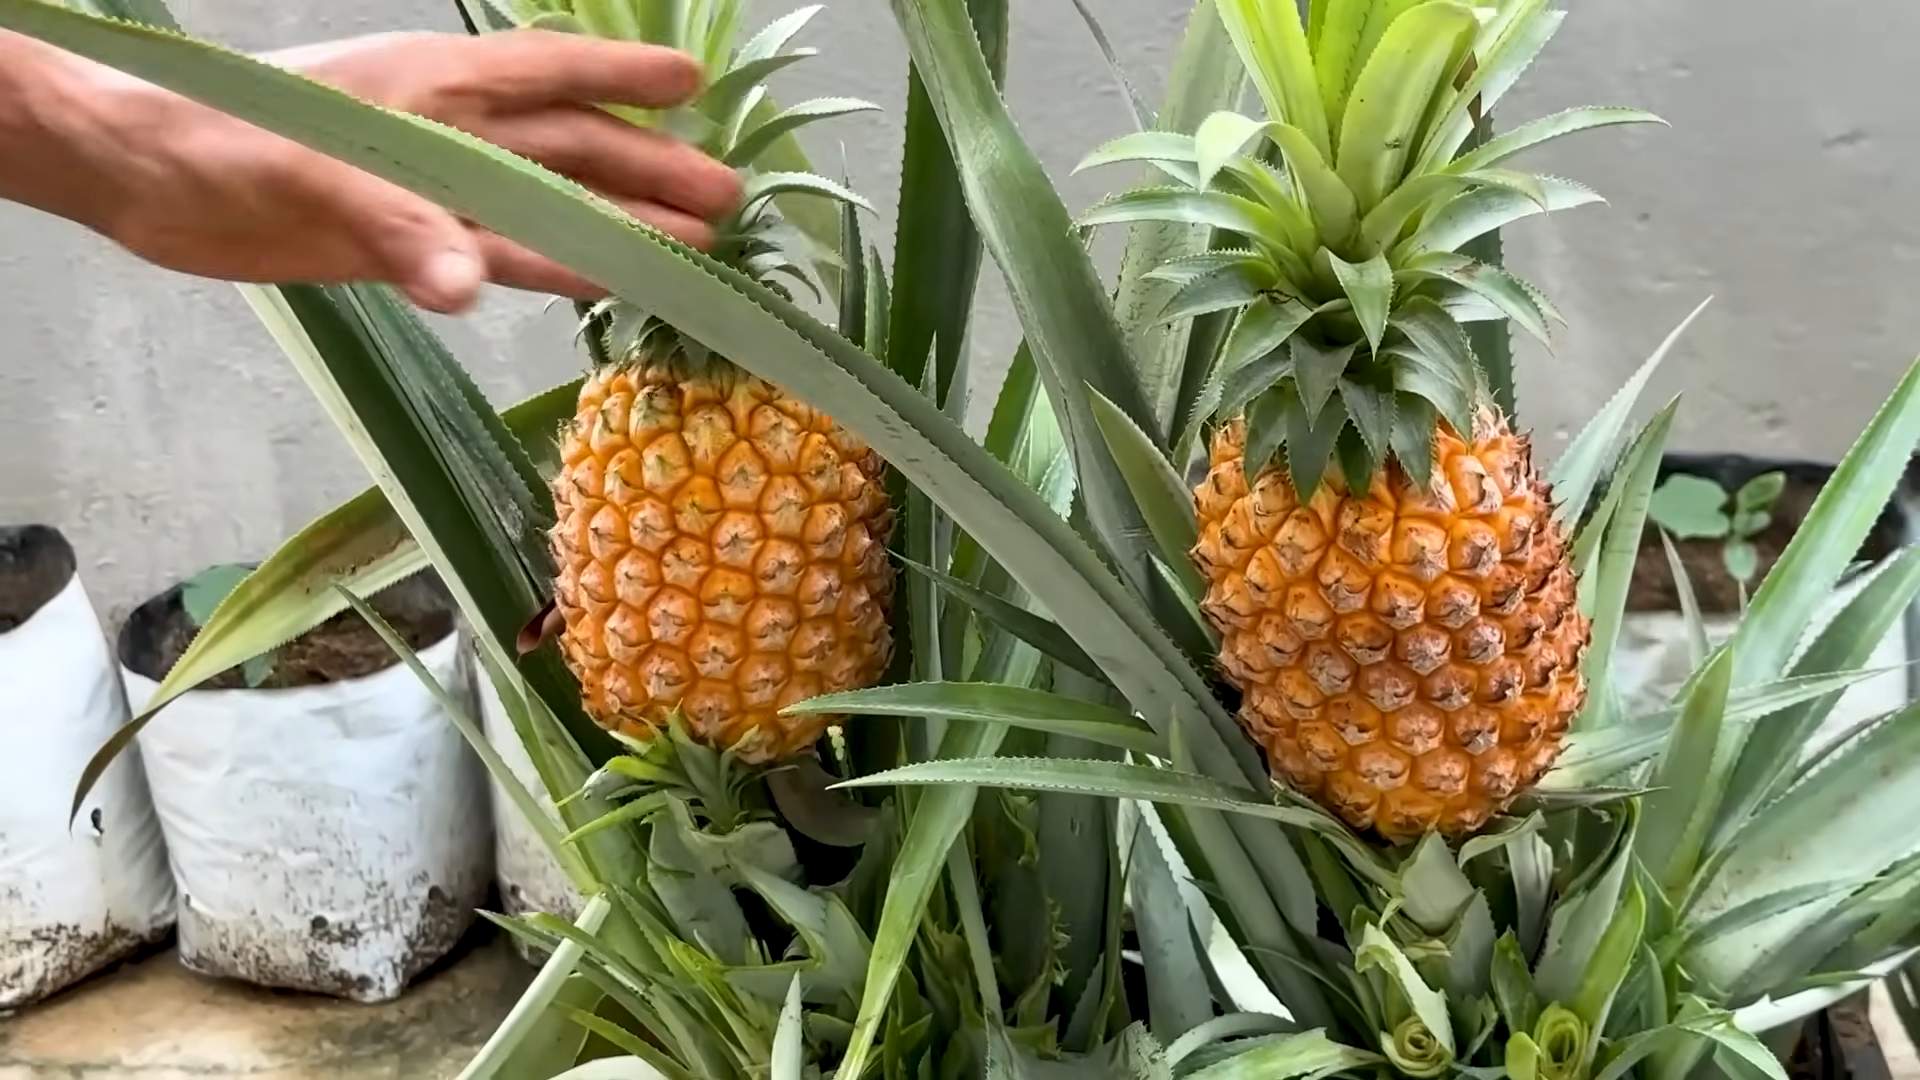
1. Watch for Ripening: The pineapple will start to turn from green to yellow or golden brown as it ripens. It will also develop a sweet, fragrant smell.
2. Check for Softness: Gently squeeze the pineapple. It should feel slightly soft to the touch.
3. Harvest Carefully: Use a sharp knife to cut the pineapple from the plant. Leave a few inches of stem attached.
4. Enjoy Your Homegrown Pineapple! There’s nothing quite like the taste of a pineapple you’ve grown yourself. Slice it up and enjoy it fresh, or use it in your favorite recipes.
Troubleshooting
Even with the best care, you might encounter some challenges along the way. Here are a few common problems and how to address them:
* Rotting: This is usually caused by overwatering or poor drainage. Make sure your pot has drainage holes and water only when the soil feels dry to the touch. If you see signs of rot, remove the affected areas and repot the plant in fresh soil.
* Yellowing Leaves: This can be caused by a variety of factors, including underwatering, overwatering, nutrient deficiencies, or pests. Check the soil moisture and adjust your watering accordingly. Fertilize regularly with a balanced fertilizer. Inspect the plant for pests and treat as needed.
* Lack of Fruiting: As mentioned earlier, it can take several years for a pineapple plant to fruit. Be patient and continue to care for your plant. Try the apple trick to encourage flowering.
Final Thoughts
Growing your own pineapple is a fun and rewarding project that anyone can do. It requires a little patience and care, but the results are well worth the effort. Imagine serving up a delicious, homegrown pineapple to your friends and family! So, grab a pineapple, follow these steps, and get ready to enjoy the taste of the tropics right in your own home. Good luck, and happy growing!
Conclusion
So, there you have it! Growing pineapples at home, while it might seem like a tropical dream reserved for professional farmers, is surprisingly achievable with a little patience and the right approach. This DIY trick isn’t just about saving money on store-bought fruit; it’s about experiencing the unique satisfaction of nurturing a plant from a simple pineapple top to a thriving, fruit-bearing beauty. It’s about connecting with nature, learning about plant life cycles, and ultimately, enjoying a pineapple that tastes all the sweeter because you grew it yourself.
Why is this a must-try? Because it’s more than just a recipe for growing fruit; it’s a recipe for a rewarding experience. Imagine the look on your friends’ faces when you tell them you grew your own pineapple! Think of the delicious cocktails and desserts you can create with your homegrown bounty. And consider the sheer joy of watching your pineapple plant flourish, a testament to your green thumb and dedication.
But the fun doesn’t stop there! Feel free to experiment with different varieties of pineapples. Try using organic pineapples to ensure a pesticide-free start. You can also explore different potting mixes to see what works best in your climate. Some gardeners swear by adding a bit of bone meal to the soil to encourage root growth, while others prefer a slightly acidic mix. Don’t be afraid to adjust the watering schedule based on your local weather conditions – remember, the goal is to keep the soil consistently moist but not waterlogged.
Consider these variations to personalize your pineapple-growing journey:
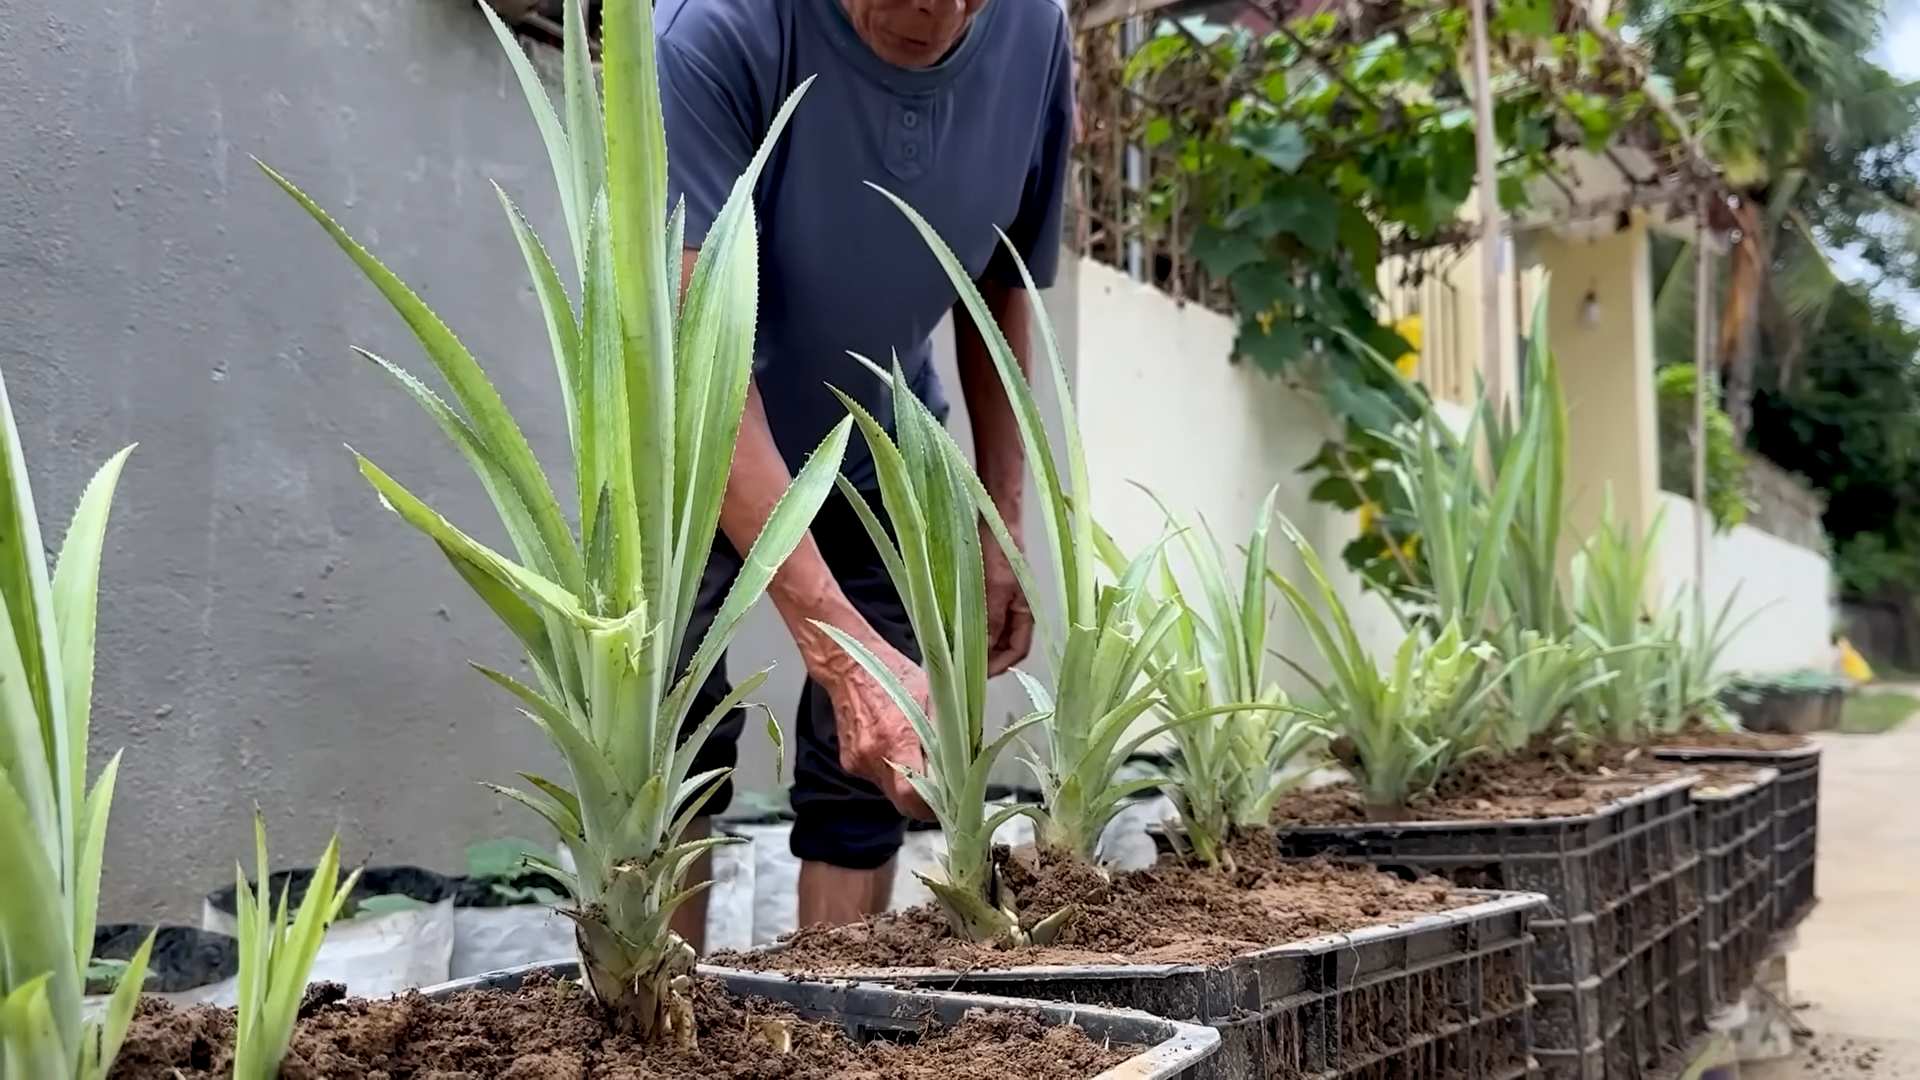
* Container Size: While we recommend a 10-12 inch pot to start, you might find that your pineapple thrives in a larger container. Experiment with different sizes to see what works best for your plant.
* Fertilizer: We suggested a balanced liquid fertilizer, but you can also use slow-release fertilizer pellets for a more hands-off approach. Just be sure to follow the instructions on the package carefully.
* Microclimates: If you live in a cooler climate, consider creating a microclimate for your pineapple by placing it near a south-facing wall or using a cloche to trap heat.
We are confident that you can successfully grow pineapples at home. This DIY project is not only fun and educational but also a sustainable way to enjoy fresh, delicious fruit. So, grab a pineapple, follow our simple steps, and get ready to embark on a tropical adventure right in your own backyard (or balcony!).
We wholeheartedly encourage you to try this DIY trick and share your experience with us! Post pictures of your pineapple plants on social media using #HomegrownPineapple and let us know how it goes. We’re eager to see your progress, hear about any challenges you encounter, and celebrate your successes. Together, let’s spread the joy of growing pineapples at home and inspire others to connect with nature in a meaningful way. Remember, the sweetest rewards often come from the fruits of our own labor. Happy growing!
Frequently Asked Questions (FAQ)
How long does it really take to grow a pineapple from a top?
Patience is key! It typically takes anywhere from 2 to 3 years for a pineapple plant grown from a top to produce fruit. The exact timeframe depends on several factors, including climate, sunlight exposure, soil quality, and the specific variety of pineapple. Don’t get discouraged if you don’t see fruit right away. Consistent care and attention will eventually pay off.
What if my pineapple top rots instead of rooting?
Rotting is a common problem, especially if the pineapple top is kept too wet. To prevent this, make sure to let the cut end of the pineapple top dry out for several days before planting. This allows a callus to form, which helps protect against rot. Also, avoid overwatering the pineapple top after planting. The soil should be moist but not soggy. If you notice any signs of rot, such as a foul odor or mushy texture, remove the affected leaves and allow the top to dry out further before replanting in fresh soil. Using a rooting hormone can also help speed up the rooting process and reduce the risk of rot.
My pineapple plant is growing, but it’s not producing fruit. What can I do?
There are a few reasons why your pineapple plant might not be fruiting. First, ensure it’s getting enough sunlight. Pineapples need at least 6 hours of direct sunlight per day to thrive and produce fruit. Second, check the soil pH. Pineapples prefer slightly acidic soil, with a pH between 4.5 and 6.5. You can test the soil pH using a home testing kit and amend it if necessary.
Another trick to encourage fruiting is to expose the plant to ethylene gas. You can do this by placing a ripe apple or banana near the plant and covering it with a plastic bag for a few days. The ethylene gas released by the fruit can stimulate flowering. Be careful not to overdo it, as too much ethylene can damage the plant.
What kind of fertilizer should I use for my pineapple plant?
A balanced liquid fertilizer with an NPK ratio of 10-10-10 or 14-14-14 is a good choice for pineapple plants. Apply the fertilizer every 2-3 months during the growing season (spring and summer). Follow the instructions on the fertilizer package carefully to avoid over-fertilizing, which can burn the plant. You can also supplement with organic fertilizers like compost tea or fish emulsion.
Can I grow a pineapple indoors?
Yes, you can grow a pineapple indoors, but it requires some extra effort. You’ll need to provide the plant with plenty of bright, indirect sunlight. A south-facing window is ideal. You may also need to supplement with artificial light, especially during the winter months. Indoor pineapple plants may also require more frequent watering and fertilization than outdoor plants. Be sure to monitor the soil moisture and adjust your watering schedule accordingly.
What are some common pests and diseases that affect pineapple plants?
Pineapple plants can be susceptible to pests like mealybugs, scale, and spider mites. These pests can suck the sap from the plant, causing it to weaken and eventually die. Inspect your plant regularly for signs of infestation, such as sticky residue, cottony masses, or webbing. If you find any pests, you can treat them with insecticidal soap or neem oil.
Pineapple plants can also be affected by diseases like root rot and heart rot. These diseases are caused by fungal pathogens that thrive in wet conditions. To prevent these diseases, avoid overwatering and ensure that the soil is well-draining. If you notice any signs of disease, such as wilting leaves or a foul odor, remove the affected parts of the plant and treat it with a fungicide.
How do I know when my pineapple is ripe?
Determining when a pineapple is ripe can be tricky, but there are a few telltale signs to look for. First, the pineapple should have a strong, sweet aroma. Second, the skin should be a golden-yellow color. Third, the “eyes” of the pineapple should be relatively flat. Finally, the pineapple should feel slightly soft to the touch. You can also try gently pulling on one of the leaves. If it comes out easily, the pineapple is likely ripe.
Can I grow pineapples in cold climates?
Growing pineapples in cold climates is possible, but it requires extra care and attention. You’ll need to grow the pineapple in a container so that you can move it indoors during the winter months. Provide the plant with plenty of sunlight and warmth. You may also need to use a grow light to supplement the natural light. Be sure to protect the plant from frost and freezing temperatures. With proper care, you can successfully grow pineapples even in cold climates.
What do I do with the pineapple after I harvest it?
Congratulations on harvesting your homegrown pineapple! Now it’s time to enjoy the fruits of your labor. You can eat the pineapple fresh, grill it, add it to smoothies, or use it in desserts. The possibilities are endless! You can also save the top of the pineapple to start a new plant, continuing the cycle of growing your own delicious fruit.

Leave a Comment