
Growing Broccoli at Home can seem daunting, but trust me, with a few simple tricks and a little DIY spirit, you can harvest your own delicious, nutrient-packed florets right in your backyard! Forget those bland, overpriced heads at the grocery store. Imagine the satisfaction of serving up a vibrant, homegrown broccoli dish, knowing exactly where it came from and how it was grown.
Broccoli’s journey from the Mediterranean to our plates is a fascinating one. Cultivated for centuries, it was a prized vegetable in ancient Rome, valued for its health benefits and unique flavor. Today, the desire to connect with our food sources and embrace sustainable living has fueled a resurgence in home gardening, and growing broccoli at home is a fantastic way to participate.
Why should you try this DIY project? Well, for starters, you’ll save money! Plus, you’ll have access to fresher, more flavorful broccoli than you can typically find in stores. More importantly, you’ll be in control of what goes into your food, avoiding harmful pesticides and chemicals. I’m excited to share some easy-to-follow tips and tricks that will help you succeed, even if you’re a complete beginner. Let’s get our hands dirty and start growing!
Growing Broccoli at Home: A Beginner’s Guide
Okay, so you want to grow your own broccoli? Awesome! It’s totally doable, even if you don’t have a huge garden. I’ve grown broccoli in everything from raised beds to large containers, and let me tell you, there’s nothing quite like the taste of homegrown broccoli. This guide will walk you through everything you need to know, from choosing the right variety to harvesting your delicious, green bounty.
Choosing Your Broccoli Variety
First things first, let’s talk broccoli varieties. There are tons of options out there, and the best one for you will depend on your climate and how much space you have. Here are a few popular choices:
* ‘Waltham 29’: This is a classic, reliable variety that produces large, dark green heads. It’s a good choice for beginners.
* ‘Packman’: A fast-maturing variety, perfect if you’re impatient (like me!). It produces smaller heads, but they’re still delicious.
* ‘DiCicco’: Another early variety that produces a large main head followed by lots of smaller side shoots, giving you a longer harvest.
* ‘Romanesco’: If you’re feeling adventurous, try Romanesco broccoli. It has a unique, fractal-like appearance and a slightly nutty flavor.
* ‘Purple Sprouting’: This variety produces lots of small, purple florets. It’s more cold-hardy than other types, making it a good choice for cooler climates.
When choosing, consider your local climate. Some varieties are more heat-tolerant than others. Also, think about how much space you have. If you’re growing in containers, you’ll want to choose a variety that doesn’t get too big.
Starting Your Broccoli Seeds
You can either start your broccoli seeds indoors or direct sow them in your garden. I usually prefer to start them indoors, especially if I want an early start.
Starting Seeds Indoors:
1. Gather Your Supplies: You’ll need seed starting trays or small pots, seed starting mix (not regular potting soil!), broccoli seeds, a spray bottle, and a grow light (optional, but highly recommended).
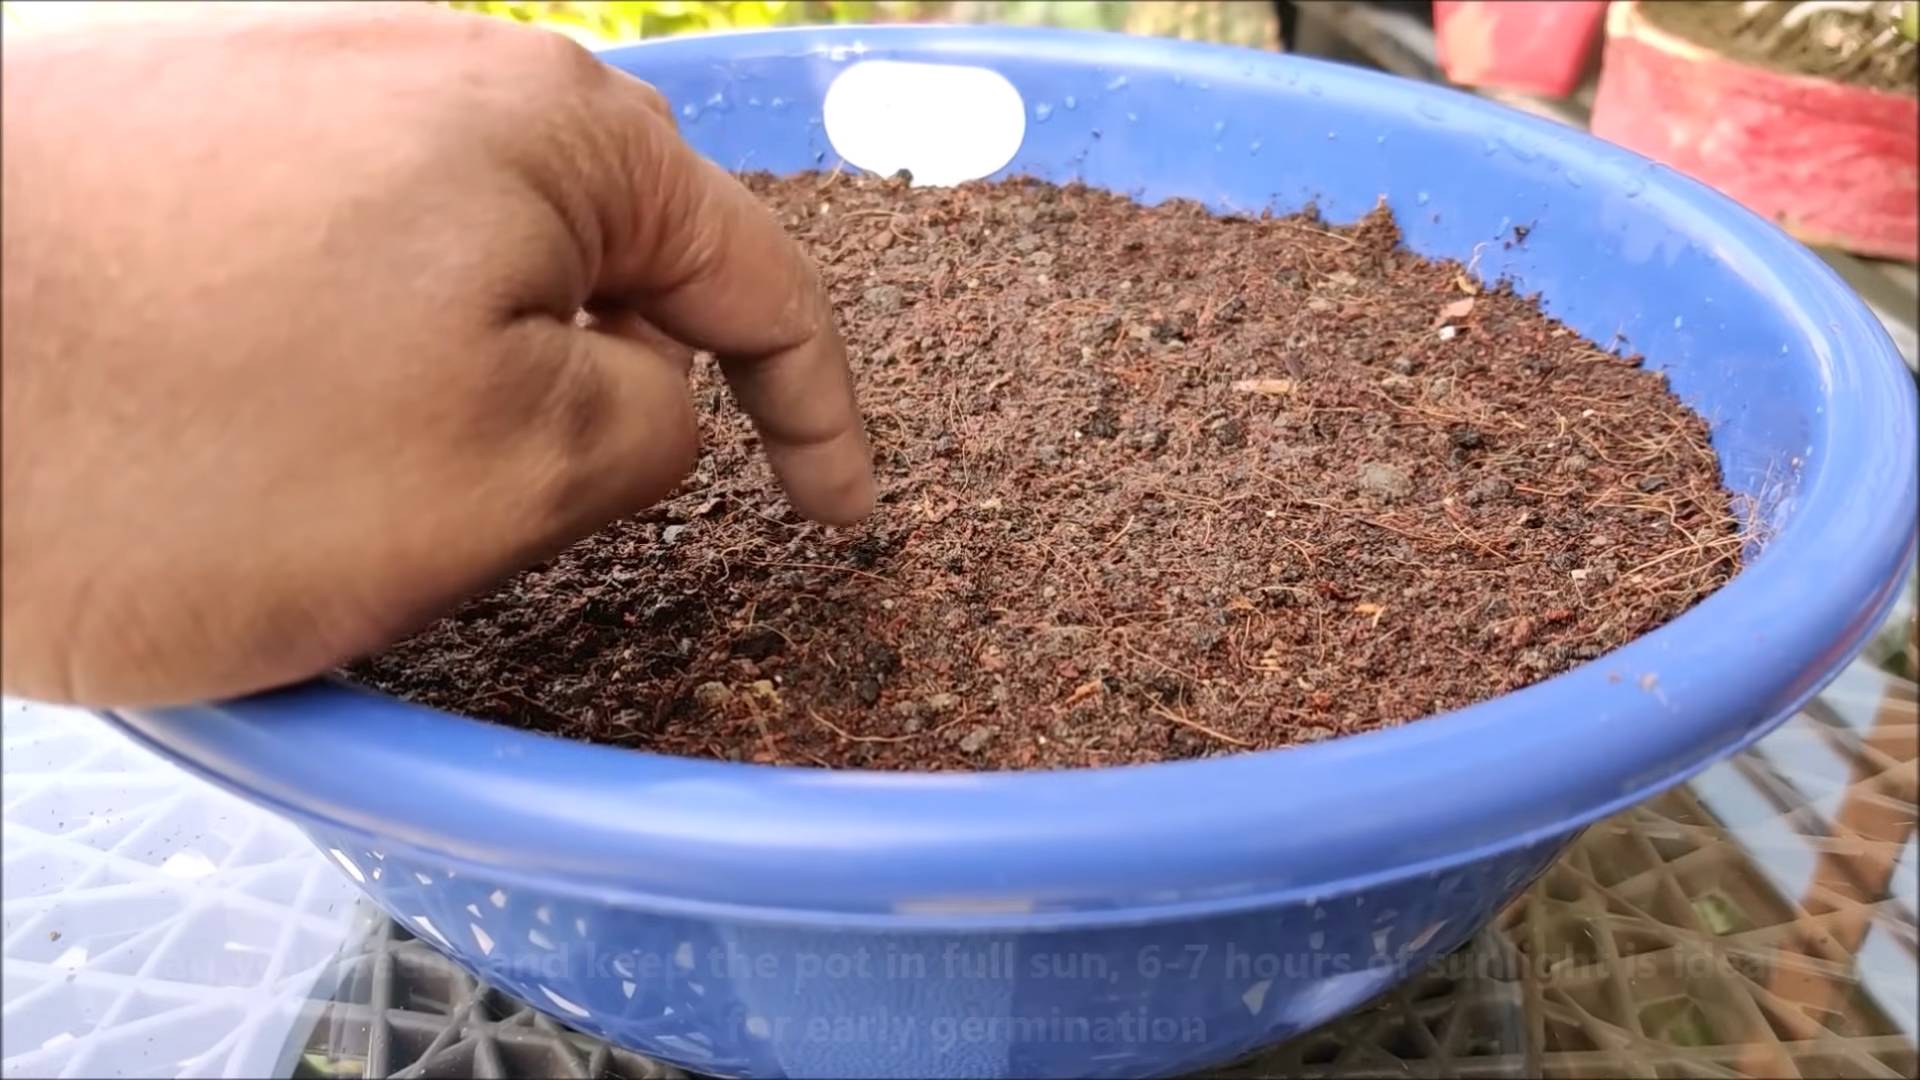
2. Sow the Seeds: Fill your trays or pots with seed starting mix. Moisten the mix with the spray bottle – you want it damp, not soggy. Plant 2-3 broccoli seeds per cell or pot, about 1/4 inch deep.
3. Provide Light and Warmth: Place the trays or pots in a warm location (around 70-75°F is ideal). If you’re using a grow light, position it a few inches above the trays. If not, place them in a sunny window.
4. Keep the Soil Moist: Water gently with the spray bottle whenever the soil surface feels dry. Be careful not to overwater, as this can lead to damping off (a fungal disease that kills seedlings).
5. Thin the Seedlings: Once the seedlings have their first true leaves (the leaves that appear after the initial seed leaves), thin them to one seedling per cell or pot. Snip off the weaker seedlings at the soil line with scissors. Don’t pull them out, as this can disturb the roots of the remaining seedling.
6. Harden Off the Seedlings: About a week before you plan to transplant the seedlings outdoors, you’ll need to “harden them off.” This means gradually exposing them to outdoor conditions so they can adjust. Start by placing them outside in a sheltered location for an hour or two each day, gradually increasing the amount of time they spend outdoors. Protect them from direct sunlight and strong winds.
Direct Sowing Seeds:
1. Prepare the Soil: Choose a sunny spot in your garden with well-drained soil. Amend the soil with compost or other organic matter to improve its fertility and drainage.
2. Sow the Seeds: Sow the seeds about 1/2 inch deep and 18-24 inches apart.
3. Water Gently: Water the soil gently after sowing.
4. Thin the Seedlings: Once the seedlings emerge, thin them to one plant every 18-24 inches.
Transplanting Your Broccoli Seedlings
Whether you started your seeds indoors or direct sowed them, you’ll eventually need to transplant your broccoli seedlings to their final growing location.
1. Choose a Sunny Location: Broccoli needs at least 6 hours of sunlight per day.
2. Prepare the Soil: Again, make sure the soil is well-drained and amended with compost or other organic matter. Broccoli is a heavy feeder, so it needs nutrient-rich soil.
3. Dig Holes: Dig holes that are slightly larger than the root balls of your seedlings, spacing them 18-24 inches apart.
4. Transplant the Seedlings: Gently remove the seedlings from their trays or pots and place them in the holes. Make sure the top of the root ball is level with the surrounding soil.
5. Fill the Holes: Fill the holes with soil and gently pat it down.
6. Water Thoroughly: Water the seedlings thoroughly after transplanting.
Caring for Your Broccoli Plants
Once your broccoli plants are in the ground, they’ll need regular care to thrive.
* Watering: Broccoli needs consistent moisture, especially during hot weather. Water deeply whenever the soil feels dry to the touch. Aim for about 1-1.5 inches of water per week.
* Fertilizing: Broccoli is a heavy feeder, so you’ll need to fertilize it regularly. Use a balanced fertilizer (like 10-10-10) or a fertilizer specifically formulated for vegetables. Follow the instructions on the fertilizer package. I like to side-dress my broccoli plants with compost every few weeks as well.
* Weeding: Keep the area around your broccoli plants free of weeds. Weeds compete with broccoli for water and nutrients.
* Mulching: Apply a layer of mulch around your broccoli plants to help retain moisture, suppress weeds, and regulate soil temperature. Straw, wood chips, or shredded leaves are all good choices.
* Pest Control: Broccoli is susceptible to several pests, including cabbage worms, aphids, and flea beetles. Check your plants regularly for signs of infestation.
* Cabbage Worms: These green caterpillars can quickly devour broccoli leaves. Handpick them off the plants or use a biological insecticide like Bacillus thuringiensis (Bt).
* Aphids: These tiny insects suck the sap from broccoli leaves, causing them to curl and yellow. Spray them off with a strong stream of water or use insecticidal soap.
* Flea Beetles: These small, jumping beetles chew tiny holes in broccoli leaves. Cover your plants with row covers to prevent flea beetles from reaching them.
Harvesting Your Broccoli
The moment you’ve been waiting for! Knowing when to harvest your broccoli is key to getting the best flavor and texture.
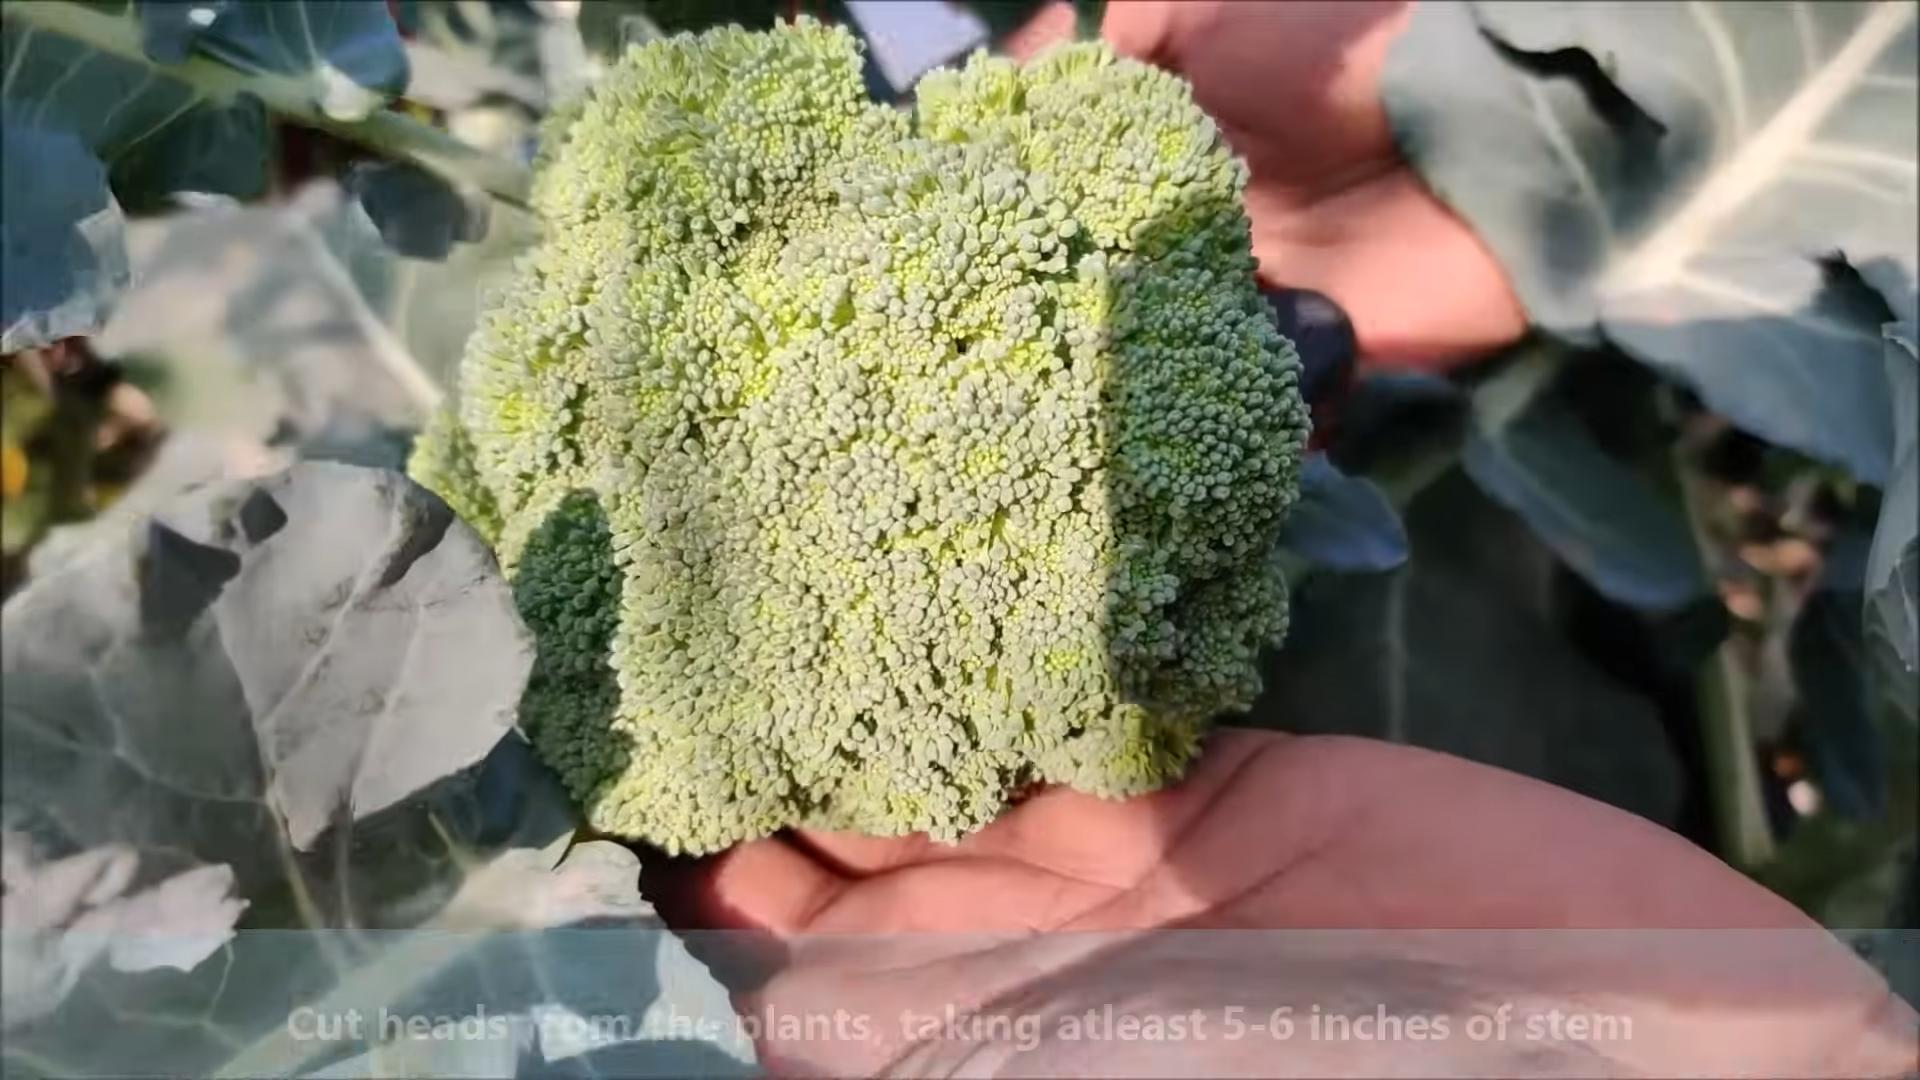
1. Check the Head: The main head of broccoli is ready to harvest when the flower buds are tight and compact. If the buds start to open and show yellow flowers, it’s time to harvest immediately.
2. Cut the Head: Use a sharp knife to cut the head off the plant, leaving about 6 inches of stem.
3. Harvest Side Shoots: After you harvest the main head, your broccoli plant will likely produce smaller side shoots. These can be harvested as they mature.
4. Enjoy Your Harvest: Freshly harvested broccoli is best eaten right away. You can also store it in the refrigerator for up to a week.
Troubleshooting
Even with the best care, you might encounter some problems while growing broccoli. Here are a few common issues and how to address them:
* Buttoning: This is when broccoli plants produce small, premature heads. It’s often caused by stress, such as lack of water or nutrients. Make sure your plants are getting enough water and fertilizer.
* Bolting: This is when broccoli plants start to flower prematurely. It’s usually caused by hot weather. Choose heat-tolerant varieties and provide shade during the hottest part of the day.
* Clubroot: This is a soilborne disease that causes swollen, distorted roots. It can be prevented by improving soil drainage and rotating crops. If your soil is infected, you can try raising the soil pH by adding lime.
Growing Broccoli in Containers
Don’t have a garden? No problem! You can still grow broccoli in containers.
1. Choose the Right Container: Select a container that is at least 12 inches in diameter and 12 inches deep.
2. Use a Good Quality Potting Mix: Don’t use garden soil in containers, as it can become compacted and poorly drained. Use a good quality potting mix that is specifically formulated for containers.
3. Plant One Plant Per Container: Don’t overcrowd your broccoli plants. Plant
Conclusion
So, there you have it! Growing broccoli at home, while it might seem daunting at first, is an incredibly rewarding experience. Forget those bland, overpriced heads from the grocery store. Imagine biting into crisp, vibrant, and intensely flavorful broccoli that you nurtured from seed to harvest. The difference is truly remarkable, and once you taste homegrown broccoli, you’ll understand why this DIY project is an absolute must-try.
Beyond the superior taste, growing your own broccoli offers a host of other benefits. You have complete control over what goes into your plants, ensuring they’re free from harmful pesticides and chemicals. Plus, it’s a fantastic way to connect with nature, get some exercise, and teach children about where their food comes from. It’s a win-win-win!
But the best part? The possibilities are endless! Experiment with different varieties of broccoli to find your favorite. Try growing Romanesco broccoli for its stunning fractal patterns, or perhaps some purple sprouting broccoli for a splash of color in your garden. You can also adjust your planting schedule to extend your harvest season, ensuring a steady supply of fresh broccoli throughout the year. Consider companion planting with herbs like rosemary or thyme to deter pests and enhance the flavor of your broccoli.
Don’t be afraid to get creative and personalize your growing experience. Maybe you want to try container gardening if you have limited space, or perhaps you’ll build a raised bed for better drainage. The key is to have fun and learn along the way. Every gardener, even the most experienced, started somewhere.
We’ve provided you with the essential knowledge and tips to successfully cultivate your own broccoli patch. Now, it’s time to put those green thumbs to work! We are confident that you will find the process enjoyable and the results delicious.
We encourage you to embark on this exciting gardening adventure and discover the joys of growing your own broccoli. And most importantly, we want to hear about your experiences! Share your successes, your challenges, and your tips with us in the comments below. Let’s build a community of home broccoli growers and inspire others to join the fun. Happy gardening!
Frequently Asked Questions (FAQ)
What is the best time of year to plant broccoli?
The timing for planting broccoli depends largely on your climate. Broccoli thrives in cool weather, so the ideal planting times are typically in the spring and fall. For a spring harvest, start seeds indoors 6-8 weeks before the last expected frost. Transplant seedlings outdoors 2-3 weeks before the last frost. For a fall harvest, start seeds indoors in mid-summer and transplant seedlings outdoors in late summer or early fall, about 8-10 weeks before the first expected frost. In warmer climates, you can often grow broccoli throughout the winter. Check your local extension office for specific recommendations for your region.
How much sunlight does broccoli need?
Broccoli requires at least 6 hours of direct sunlight per day to thrive. More sunlight is even better. Choose a location in your garden that receives full sun for optimal growth and head development. If you are growing broccoli indoors under grow lights, ensure the lights are positioned close enough to the plants and provide sufficient intensity.
What kind of soil is best for growing broccoli?
Broccoli prefers well-drained, fertile soil that is rich in organic matter. The ideal soil pH is between 6.0 and 7.0. Before planting, amend your soil with compost or well-rotted manure to improve drainage, fertility, and water retention. You can also add a balanced fertilizer to provide essential nutrients. If your soil is heavy clay, consider adding sand or other amendments to improve drainage.
How often should I water broccoli plants?
Broccoli needs consistent moisture to grow properly. Water deeply and regularly, especially during dry periods. Aim to keep the soil consistently moist but not waterlogged. A good rule of thumb is to water when the top inch of soil feels dry to the touch. Mulching around your broccoli plants can help retain moisture and suppress weeds.
What are some common pests and diseases that affect broccoli?
Broccoli is susceptible to several pests and diseases, including cabbage worms, aphids, flea beetles, clubroot, and downy mildew. To prevent pest problems, consider using row covers to protect your plants. Regularly inspect your plants for signs of pests and diseases and take action promptly. Organic pest control methods, such as insecticidal soap or neem oil, can be effective for controlling many common pests. To prevent diseases, ensure good air circulation, avoid overhead watering, and practice crop rotation.
How do I know when my broccoli is ready to harvest?
Broccoli is ready to harvest when the central head is firm, tight, and a deep green color. The individual florets should be tightly closed. If the florets start to open and turn yellow, it’s a sign that the broccoli is overripe. Use a sharp knife to cut the head from the plant, leaving a few inches of stem. After harvesting the central head, side shoots may develop, providing additional smaller heads for harvesting.
Can I grow broccoli in containers?
Yes, you can successfully grow broccoli in containers, especially if you have limited garden space. Choose a large container that is at least 12 inches in diameter and depth. Use a high-quality potting mix that is well-draining and rich in nutrients. Ensure the container has drainage holes to prevent waterlogging. Water regularly and fertilize as needed. Place the container in a location that receives at least 6 hours of direct sunlight per day.
How can I prevent broccoli from bolting (going to seed)?
Bolting occurs when broccoli plants are exposed to prolonged periods of hot weather. To prevent bolting, choose heat-tolerant varieties, plant at the appropriate time of year, and provide shade during the hottest part of the day. Water regularly to keep the soil cool and moist. Mulching around your plants can also help regulate soil temperature.
What are some good companion plants for broccoli?
Companion planting can help improve the health and yield of your broccoli plants. Good companion plants for broccoli include herbs like rosemary, thyme, and sage, which can deter pests. Other beneficial companion plants include marigolds, nasturtiums, and onions. Avoid planting broccoli near strawberries or tomatoes, as they can compete for nutrients or attract pests.
How do I store harvested broccoli?
To store harvested broccoli, wrap it loosely in a damp paper towel and place it in a plastic bag in the refrigerator. Broccoli can typically be stored for up to a week in the refrigerator. You can also freeze broccoli for longer storage. To freeze broccoli, blanch it in boiling water for 3-5 minutes, then plunge it into ice water to stop the cooking process. Drain the broccoli thoroughly and store it in freezer bags or containers.

Leave a Comment