
Growing Brussel Sprouts Containers might seem daunting, but trust me, it’s totally achievable, even if you’re short on space! Have you ever dreamt of strolling into your backyard and harvesting fresh, vibrant Brussel sprouts for dinner? It’s a rewarding experience, and I’m here to show you how to make that dream a reality.
For centuries, Brussel sprouts have been a staple in European cuisine, with evidence suggesting their cultivation dates back to 13th-century Belgium. They were particularly favored for their hardiness and ability to provide sustenance during the colder months. Now, you can bring that same resilience and fresh flavor to your own home, regardless of your garden size!
In today’s fast-paced world, knowing where your food comes from and having control over its quality is more important than ever. Plus, let’s be honest, store-bought Brussel sprouts can sometimes be a bit… underwhelming. Growing Brussel Sprouts Containers allows you to enjoy the freshest, most flavorful sprouts imaginable, right from your own patio or balcony. This DIY guide will provide you with simple, effective tricks and hacks to successfully cultivate these miniature cabbages in containers, ensuring a bountiful harvest and a healthier, more sustainable lifestyle. Let’s get started!
Growing Brussels Sprouts in Containers: A Comprehensive Guide
Hey there, fellow gardening enthusiasts! I’m so excited to share my experience with growing Brussels sprouts in containers. It’s totally doable, even if you don’t have a sprawling garden. I’ve learned a few tricks along the way, and I’m here to guide you through the entire process, from choosing the right container to harvesting those delicious little sprouts. Let’s get started!
Choosing the Right Container and Soil
First things first, let’s talk about the foundation of our Brussels sprouts success: the container and the soil.
* Container Size: Brussels sprouts need room to grow, both above and below the soil. I recommend a container that’s at least 12 inches in diameter and 12 inches deep. A 5-gallon bucket or a large grow bag works perfectly. Bigger is generally better, as it gives the roots more space to spread out and access nutrients.
* Drainage: This is absolutely crucial! Brussels sprouts hate sitting in soggy soil. Make sure your container has plenty of drainage holes at the bottom. If it doesn’t, you can easily drill some yourself.
* Material: Plastic, terracotta, or even fabric grow bags are all suitable options. I personally prefer grow bags because they allow for excellent drainage and aeration.
* Soil: Forget using garden soil straight from the ground. It’s often too heavy and doesn’t drain well in containers. Instead, opt for a high-quality potting mix. Look for a mix that’s specifically formulated for vegetables or contains a good balance of peat moss, perlite, and vermiculite. I also like to amend my potting mix with compost for added nutrients and drainage.
Planting Your Brussels Sprouts
Now that we’ve got our container and soil sorted, it’s time to get planting! You can either start your Brussels sprouts from seeds or purchase transplants from a local nursery. I’ve done both, and honestly, transplants are a bit easier, especially if you’re a beginner.
* Starting from Seeds: If you’re starting from seeds, sow them indoors about 4-6 weeks before the last expected frost. Plant the seeds about ½ inch deep in seed-starting trays or small pots filled with seed-starting mix. Keep the soil moist and warm (around 70-75°F). Once the seedlings have developed a few sets of true leaves, you can transplant them into your container.
* Using Transplants: When choosing transplants, look for healthy plants with sturdy stems and vibrant green leaves. Avoid plants that are yellowing, wilting, or have signs of pests or diseases.
Here’s the step-by-step planting process:
1. Fill the Container: Fill your chosen container with the potting mix, leaving about an inch or two of space at the top.
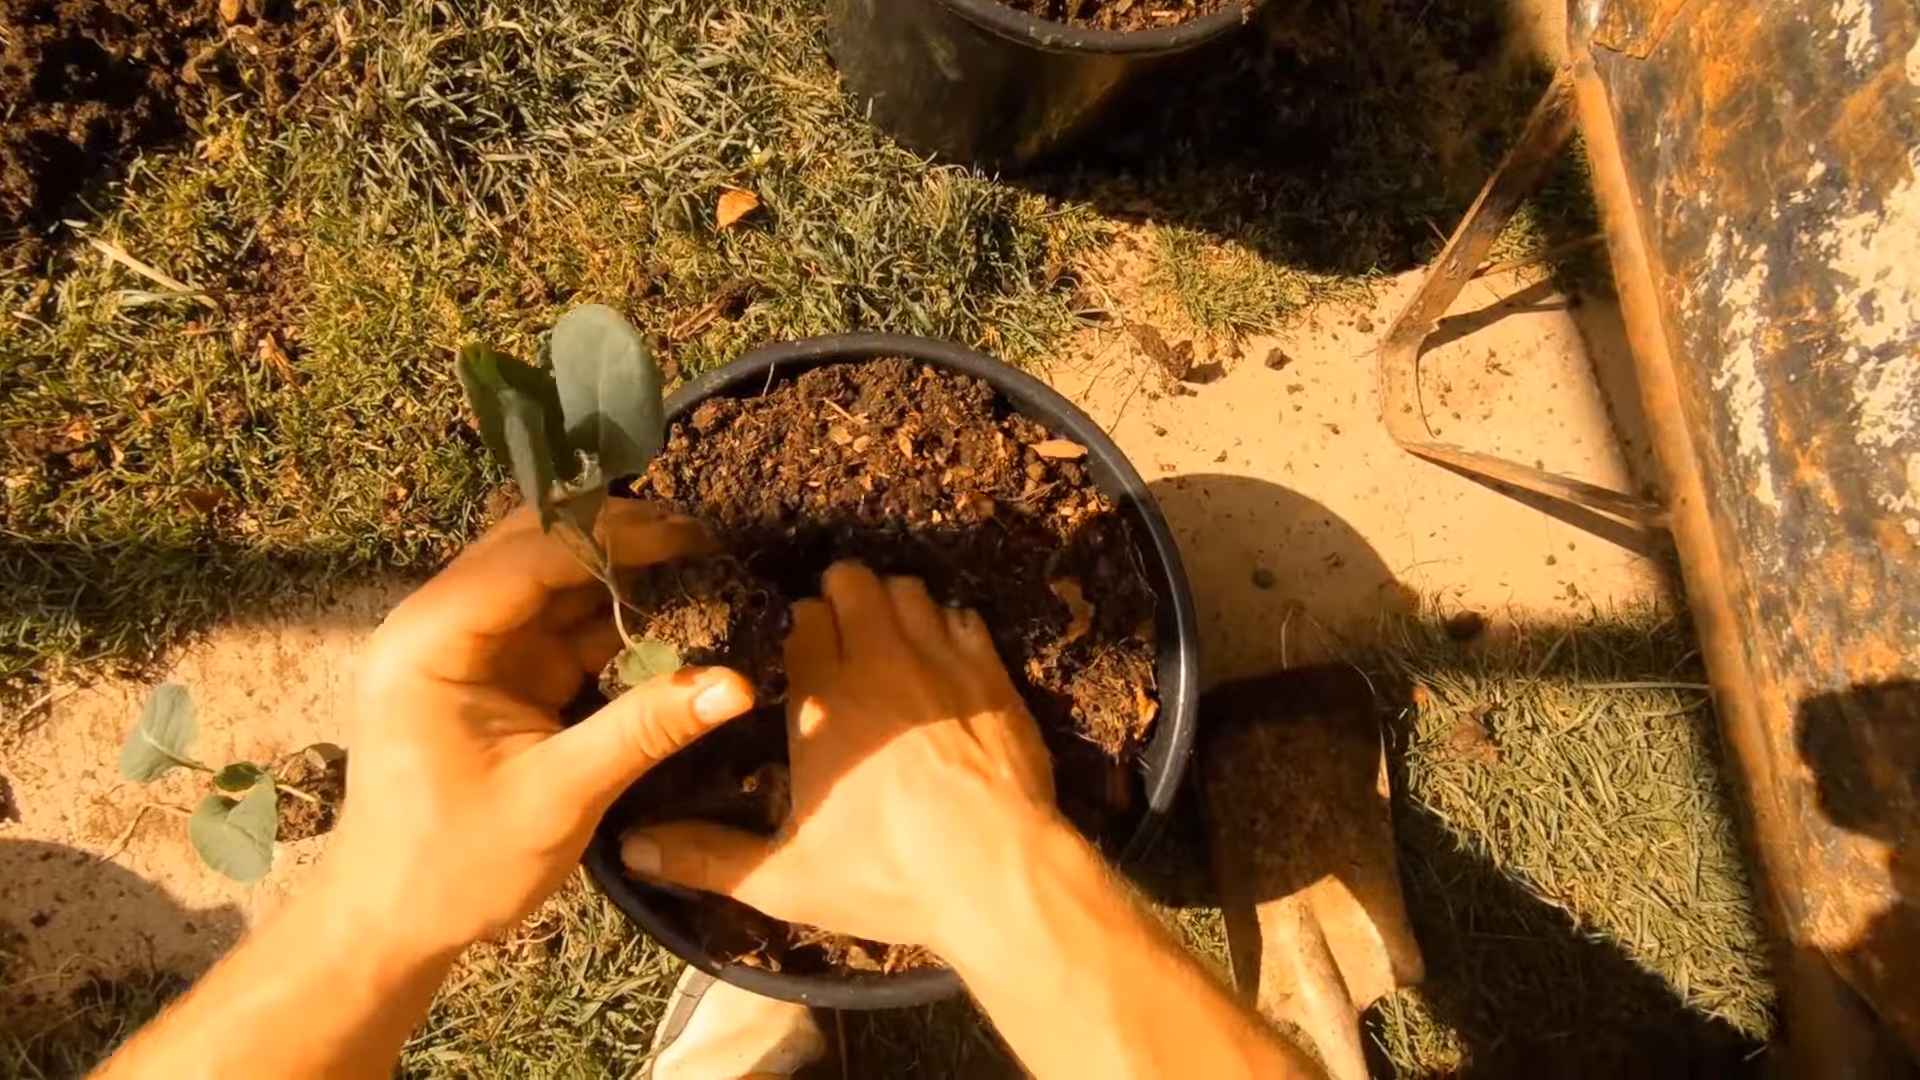
2. Create a Hole: Dig a hole in the center of the container that’s large enough to accommodate the root ball of your transplant.
3. Gently Remove the Transplant: Carefully remove the transplant from its nursery pot, gently loosening the roots if they’re tightly bound.
4. Place the Transplant: Place the transplant in the hole, making sure the top of the root ball is level with the soil surface.
5. Fill and Water: Fill in the hole with potting mix, gently firming the soil around the plant. Water thoroughly until water drains out of the bottom of the container.
Caring for Your Brussels Sprouts
Once your Brussels sprouts are planted, it’s time to provide them with the care they need to thrive.
* Sunlight: Brussels sprouts need at least 6 hours of direct sunlight per day. Place your container in a sunny spot in your yard or on your balcony.
* Watering: Water regularly, especially during hot, dry weather. The soil should be consistently moist but not waterlogged. Check the soil moisture by sticking your finger about an inch into the soil. If it feels dry, it’s time to water.
* Fertilizing: Brussels sprouts are heavy feeders, so they need regular fertilization. I like to use a balanced liquid fertilizer every 2-3 weeks. You can also amend the soil with compost or aged manure.
* Pest Control: Keep an eye out for common pests like aphids, cabbage worms, and flea beetles. You can control these pests with insecticidal soap, neem oil, or by hand-picking them off the plants.
* Support: As your Brussels sprouts grow taller, they may need some support to prevent them from falling over. You can use stakes or a tomato cage to provide support.
Dealing with Common Problems
Even with the best care, you might encounter a few problems along the way. Here are some common issues and how to address them:
* Yellowing Leaves: This can be caused by a variety of factors, including nutrient deficiencies, overwatering, or underwatering. Check the soil moisture and fertilize if necessary.
* Aphids: These tiny pests can suck the sap from your plants, causing them to weaken and yellow. Spray them with insecticidal soap or neem oil.
* Cabbage Worms: These green caterpillars can devour the leaves of your Brussels sprouts. Hand-pick them off the plants or use Bacillus thuringiensis (Bt), a natural insecticide.
* Clubroot: This fungal disease can cause the roots of your plants to swell and become distorted. Prevent clubroot by ensuring good drainage and avoiding planting Brussels sprouts in the same spot year after year.
Harvesting Your Brussels Sprouts
The moment we’ve all been waiting for: harvesting those delicious Brussels sprouts!
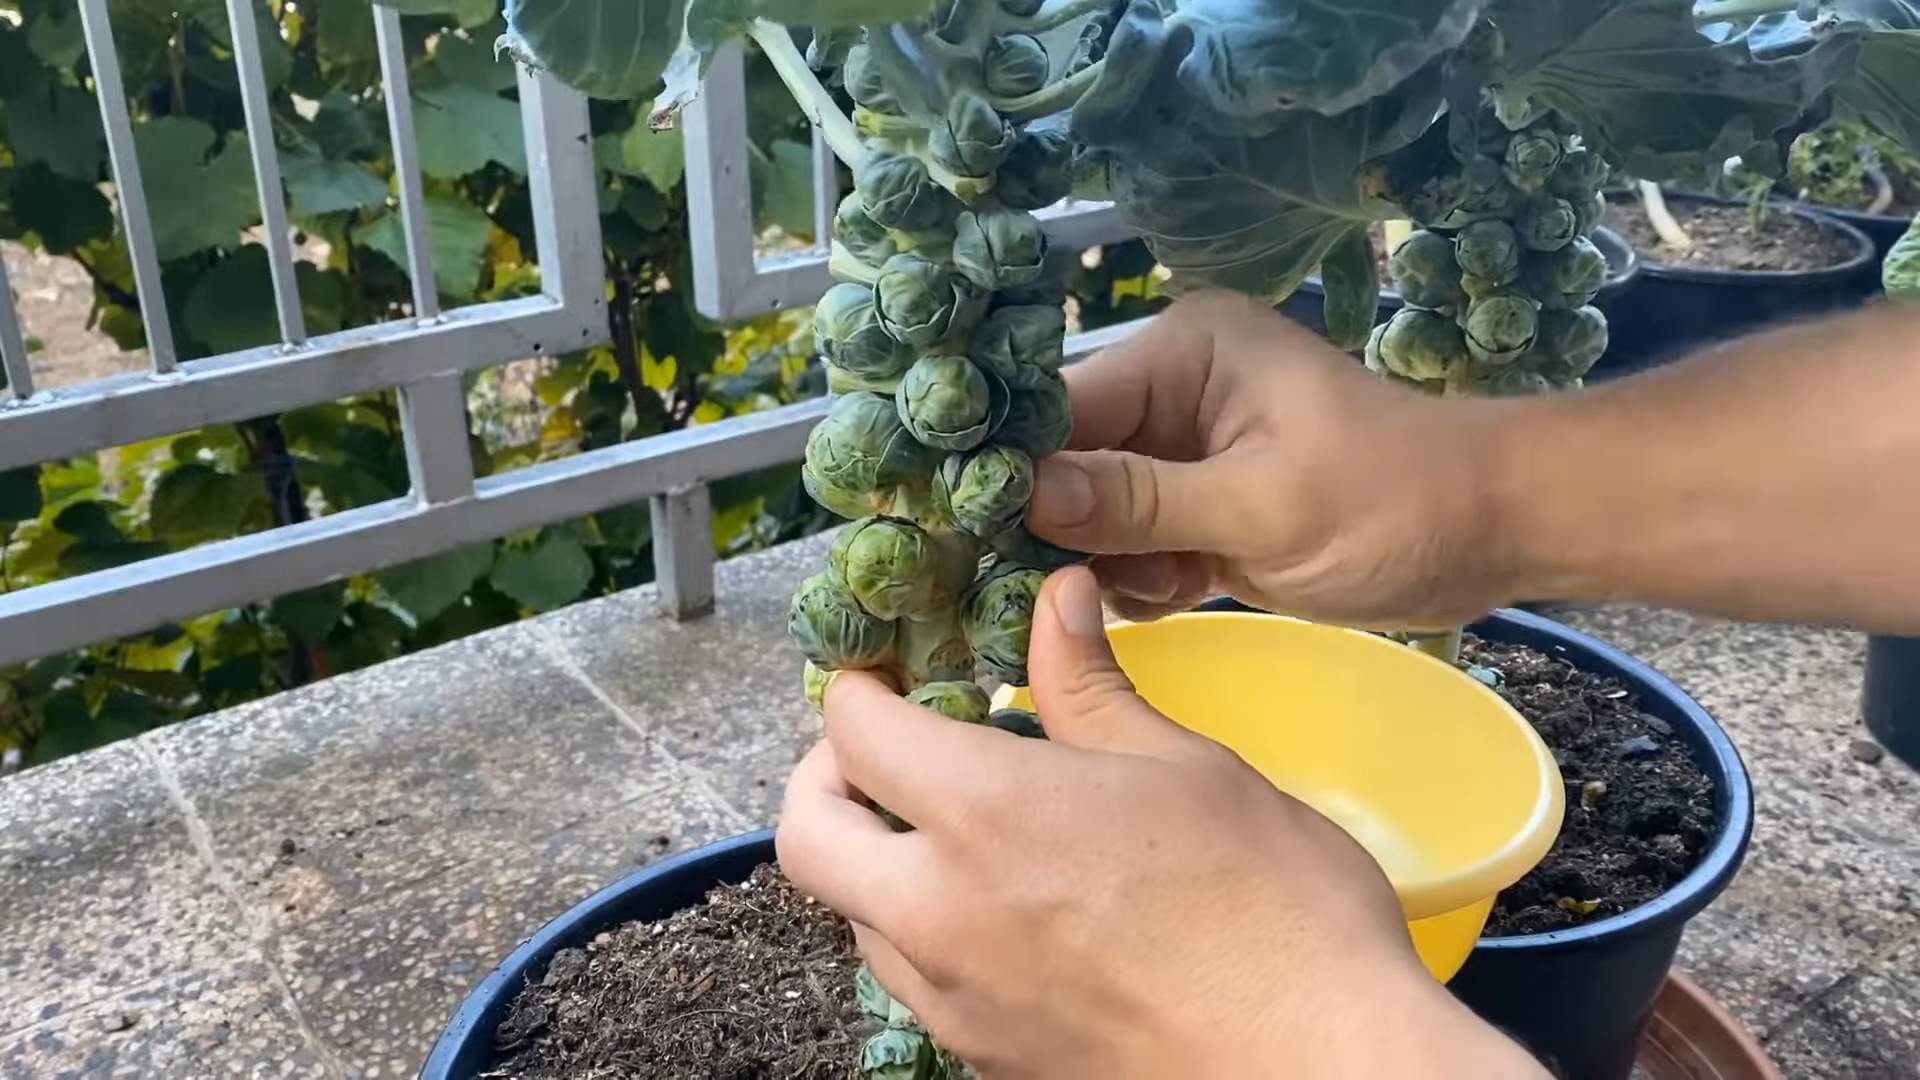
* Timing: Brussels sprouts are typically ready to harvest in the fall or early winter, after they’ve been exposed to a few light frosts. The sprouts should be firm, green, and about 1-2 inches in diameter.
* Harvesting Technique: Start harvesting from the bottom of the plant, working your way up. Twist the sprouts off the stem, leaving the leaves attached. You can harvest the entire plant at once, or you can harvest the sprouts gradually as they mature.
* Storage: Brussels sprouts can be stored in the refrigerator for up to a week. For longer storage, you can freeze them.
Step-by-Step Guide: A Detailed Breakdown
Let’s break down the entire process into a detailed, step-by-step guide:
1. Choose Your Container: Select a container that’s at least 12 inches in diameter and 12 inches deep, with plenty of drainage holes.
2. Prepare Your Soil: Fill the container with a high-quality potting mix, amended with compost or aged manure.
3. Plant Your Brussels Sprouts: If starting from seeds, sow them indoors 4-6 weeks before the last frost. If using transplants, choose healthy plants with sturdy stems. Plant the seedlings or transplants in the container, ensuring the top of the root ball is level with the soil surface.
4. Water Thoroughly: Water the plants thoroughly after planting, until water drains out of the bottom of the container.
5. Provide Sunlight: Place the container in a sunny spot that receives at least 6 hours of direct sunlight per day.
6. Water Regularly: Water the plants regularly, keeping the soil consistently moist but not waterlogged.
7. Fertilize Every 2-3 Weeks: Fertilize with a balanced liquid fertilizer every 2-3 weeks.
8. Monitor for Pests and Diseases: Keep an eye out for common pests and diseases, and take action to control them as needed.
9. Provide Support: As the plants grow taller, provide support with stakes or a tomato cage.
10. Harvest in the Fall or Winter: Harvest the Brussels sprouts in the fall or early winter, after they’ve been exposed to a few light frosts. Twist the sprouts off the stem, starting from the bottom of the plant.
Extra Tips for Success
Here are a few extra tips that I’ve found helpful:
* Choose the Right Variety: Some Brussels sprouts varieties are better suited for container growing than others. Look for compact varieties like ‘Jade Cross’ or ‘Long Island Improved’.
* Rotate Your Crops: Avoid planting Brussels sprouts in the same container year after year. This can help prevent the buildup of pests and diseases in the soil.
* Mulch the Soil: Mulching the soil around your Brussels sprouts can help retain moisture, suppress weeds, and regulate soil temperature.
* Pinch Off the Top: About a month before you want to harvest, pinch off the top of the plant. This will encourage the sprouts to mature more quickly.
* Don’t Give Up! Growing Brussels sprouts can be a bit challenging, but it’s definitely worth the effort. Don’t be discouraged if you encounter a few setbacks along the way. Just keep learning and experimenting, and you’ll eventually be rewarded with a bountiful harvest of delicious, homegrown Brussels sprouts.
Troubleshooting Guide
Let’s dive deeper
Conclusion
So, there you have it! Growing Brussel sprouts in containers isn’t just a possibility; it’s a rewarding and surprisingly accessible project for any gardener, regardless of experience level. We’ve walked through the steps, from selecting the right container and soil to nurturing your plants and harvesting those delicious, miniature cabbages. But why should you take the plunge and try this DIY trick?
First and foremost, container gardening offers unparalleled flexibility. Whether you have a sprawling backyard or a tiny balcony, you can cultivate your own fresh Brussel sprouts. This is especially beneficial for those with limited space or poor soil conditions, as you have complete control over the growing environment. Imagine the satisfaction of harvesting your own organic Brussel sprouts, knowing exactly where they came from and what went into their growth.
Beyond the practical benefits, growing Brussel sprouts in containers is a fantastic way to connect with nature and learn about the growing process. It’s a hands-on experience that can be incredibly therapeutic and educational, especially for children. Watching your plants thrive from tiny seedlings to mature, sprout-laden stalks is a truly fulfilling experience.
But the real magic lies in the taste. Homegrown Brussel sprouts, picked at their peak ripeness, offer a flavor that far surpasses anything you’ll find in the grocery store. They’re sweeter, more tender, and bursting with fresh, earthy goodness. And the best part? You can customize your growing experience to suit your preferences.
Consider these variations to elevate your container gardening game:
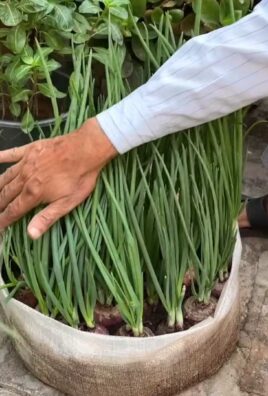
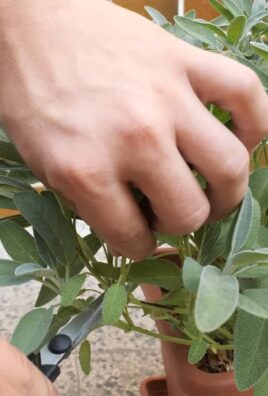
* **Companion Planting:** Plant herbs like rosemary or thyme alongside your Brussel sprouts to deter pests and enhance flavor. Marigolds are also excellent companions, adding a splash of color and repelling nematodes.
* **Succession Planting:** Stagger your planting times to ensure a continuous harvest throughout the growing season. Plant a new batch of seedlings every few weeks to extend your supply of fresh Brussel sprouts.
* **Variety Selection:** Experiment with different varieties of Brussel sprouts to discover your favorites. ‘Long Island Improved’ is a classic choice, while ‘Redarling’ offers a beautiful red hue and a slightly sweeter flavor. ‘Jade Cross’ is known for its disease resistance.
* Vertical Gardening: If space is truly limited, explore vertical gardening options. While Brussel sprouts get quite large, creative trellising or stacking containers can maximize your yield in a small area.
Don’t be intimidated by the prospect of growing your own Brussel sprouts. With a little planning and effort, you can enjoy a bountiful harvest of these nutritious and delicious vegetables. The key is to provide your plants with the right conditions – plenty of sunlight, well-draining soil, and consistent watering.
So, what are you waiting for? Grab a container, some soil, and a packet of Brussel sprout seeds, and embark on this exciting gardening adventure. We’re confident that you’ll be amazed by the results. And most importantly, don’t forget to share your experience with us! We’d love to hear about your successes, challenges, and any creative variations you try. Share your photos and stories on social media using [Your Hashtag Here] and let’s inspire others to discover the joy of growing their own food. This DIY trick is a game changer for fresh produce!
Frequently Asked Questions (FAQ)
What size container do I need for growing Brussel sprouts?
A crucial factor for successful container gardening with Brussel sprouts is selecting the right size container. Brussel sprouts require ample space for their root systems to develop properly. A minimum of 15-20 gallons is recommended per plant. The container should also be at least 12-18 inches deep and wide. Smaller containers will restrict root growth, leading to stunted plants and reduced yields. Consider using large pots, half wine barrels, or even repurposed containers like large plastic bins with drainage holes drilled in the bottom. Remember, bigger is generally better when it comes to container size for Brussel sprouts.
What type of soil is best for growing Brussel sprouts in containers?
Brussel sprouts thrive in well-draining, nutrient-rich soil. A good potting mix is essential for container gardening. Avoid using garden soil, as it can become compacted in containers and hinder drainage. Instead, opt for a high-quality potting mix specifically formulated for vegetables. You can also create your own mix by combining equal parts of compost, peat moss (or coconut coir), and perlite or vermiculite. Compost provides essential nutrients, peat moss or coconut coir helps retain moisture, and perlite or vermiculite improves drainage. The ideal soil pH for Brussel sprouts is between 6.0 and 7.5. You can test your soil pH using a soil testing kit and amend it accordingly with lime (to raise pH) or sulfur (to lower pH).
How often should I water my container-grown Brussel sprouts?
Watering is critical for the health and productivity of your Brussel sprout plants. Container-grown plants tend to dry out more quickly than those grown in the ground, so regular watering is essential. Check the soil moisture daily, especially during hot or windy weather. Water deeply whenever the top inch of soil feels dry to the touch. Avoid overwatering, as this can lead to root rot. Ensure that your container has adequate drainage holes to prevent water from accumulating at the bottom. A good rule of thumb is to water until excess water drains out of the bottom of the container. During periods of heavy rain, you may need to reduce watering frequency.
How much sunlight do Brussel sprouts need?
Brussel sprouts require at least 6-8 hours of direct sunlight per day to thrive. Choose a location for your container garden that receives ample sunlight throughout the day. If you live in a particularly hot climate, some afternoon shade may be beneficial to prevent the plants from overheating. If you don’t have access to a sunny location, you can supplement with grow lights. Position the grow lights a few inches above the plants and provide 12-14 hours of light per day. Rotate your containers regularly to ensure that all sides of the plants receive adequate sunlight.
How do I fertilize my container-grown Brussel sprouts?
Brussel sprouts are heavy feeders and require regular fertilization to produce a bountiful harvest. Start by incorporating a slow-release fertilizer into the potting mix at planting time. This will provide a steady supply of nutrients for the first few weeks. After that, supplement with a liquid fertilizer every 2-3 weeks. Choose a fertilizer that is high in nitrogen, phosphorus, and potassium (NPK). Follow the instructions on the fertilizer label carefully to avoid over-fertilizing. You can also use organic fertilizers such as compost tea or fish emulsion. Avoid fertilizing during periods of extreme heat or drought, as this can stress the plants.
What are common pests and diseases that affect Brussel sprouts, and how can I prevent them?
Brussel sprouts are susceptible to several pests and diseases, including aphids, cabbage worms, clubroot, and downy mildew. To prevent pest infestations, inspect your plants regularly for signs of damage. Handpick any pests you find or use insecticidal soap or neem oil. Cover your plants with row covers to prevent cabbage moths from laying eggs. To prevent diseases, ensure that your plants have good air circulation and avoid overhead watering. Rotate your crops each year to prevent soilborne diseases from building up. If you notice signs of disease, remove the affected leaves or plants immediately. You can also use organic fungicides to control fungal diseases.
When and how do I harvest my Brussel sprouts?
Brussel sprouts are typically ready to harvest 90-100 days after planting. The sprouts should be firm, green, and about 1-2 inches in diameter. Start harvesting from the bottom of the stalk, as these sprouts will mature first. To harvest, simply twist the sprouts off the stalk. You can also cut the entire stalk and hang it upside down in a cool, dark place to extend the harvest period. Harvest your Brussel sprouts before they turn yellow or start to open up. The flavor of Brussel sprouts improves after a light frost.
Leave a Comment