
Growing Watermelons at Home might seem like a challenge reserved for seasoned farmers, but I’m here to tell you it’s absolutely achievable, even in your own backyard! Forget those grocery store watermelons that lack that true, sun-ripened sweetness. Imagine biting into a juicy, crimson watermelon you nurtured from seed to fruit – the taste of summer doesn’t get much better than that!
Watermelons have a rich history, dating back thousands of years to Africa, where they originated. They were even found in King Tut’s tomb! Over centuries, different varieties have been cultivated, each with unique flavors and characteristics. But the core appeal remains: a refreshing, hydrating treat perfect for hot weather.
Why should you try growing watermelons at home? Well, for starters, you control everything – from the soil quality to the watering schedule. This means you can avoid harmful pesticides and ensure you’re enjoying a truly organic treat. Plus, let’s be honest, there’s a huge sense of accomplishment in harvesting something you’ve grown yourself. In this article, I’ll share my favorite DIY tricks and hacks to help you successfully cultivate these delicious fruits, regardless of your gardening experience. Get ready to impress your friends and family with your homegrown watermelon bounty!
Growing Watermelons at Home: A Sweet DIY Project
Hey there, fellow gardening enthusiasts! Ever dreamt of biting into a juicy, homegrown watermelon on a hot summer day? Well, guess what? You can absolutely make that dream a reality, even if you don’t have acres of land. Growing watermelons at home is a rewarding and surprisingly achievable DIY project. I’m going to walk you through everything you need to know, from choosing the right variety to harvesting your sweet reward. Let’s get started!
Choosing Your Watermelon Variety
Before we get our hands dirty, let’s talk about watermelon varieties. Not all watermelons are created equal, and some are better suited for home gardens than others. Consider these factors:
* Size: Do you want a giant watermelon that will feed a crowd, or a smaller, personal-sized melon? Smaller varieties like ‘Sugar Baby’ or ‘Bush Sugar Baby’ are perfect for smaller gardens and containers.
* Days to Maturity: This is the number of days it takes from planting to harvest. Choose a variety that fits your growing season. Shorter season varieties are ideal for cooler climates.
* Disease Resistance: Look for varieties that are resistant to common watermelon diseases like Fusarium wilt and Anthracnose.
* Seedless vs. Seeded: Seedless watermelons are popular, but they require a pollinator variety to produce fruit. Seeded varieties are generally easier to grow for beginners.
Some popular and reliable varieties include:
* ‘Sugar Baby’: A classic, small, and sweet watermelon.
* ‘Crimson Sweet’: A larger, oblong watermelon with excellent flavor.
* ‘Black Diamond’: A very large, dark green watermelon.
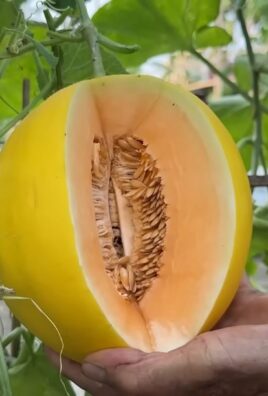
* ‘Yellow Crimson’: A unique watermelon with yellow flesh.
* ‘Bush Sugar Baby’: A compact variety perfect for containers.
Once you’ve chosen your variety, it’s time to gather your supplies!
Gathering Your Supplies
Here’s what you’ll need to get started:
* Watermelon Seeds or Seedlings: Purchase high-quality seeds or seedlings from a reputable source.
* Potting Soil (for starting seeds indoors): Use a well-draining potting mix.
* Garden Soil: Watermelons need rich, well-drained soil. Amend your garden soil with compost or aged manure.
* Compost or Aged Manure: This will enrich the soil and provide essential nutrients.
* Fertilizer: A balanced fertilizer (e.g., 10-10-10) or a fertilizer specifically formulated for melons.
* Watering Can or Hose: Watermelons need consistent watering, especially during fruit development.
* Trowel or Shovel: For planting and amending the soil.
* Mulch: Straw or black plastic mulch to help retain moisture and suppress weeds.
* Row Covers (optional): To protect young plants from pests and frost.
* Gardening Gloves: To keep your hands clean and protected.
* Measuring Tape: To space plants properly.
Starting Watermelon Seeds Indoors (Optional)
Starting seeds indoors gives you a head start on the growing season, especially in cooler climates. Here’s how:
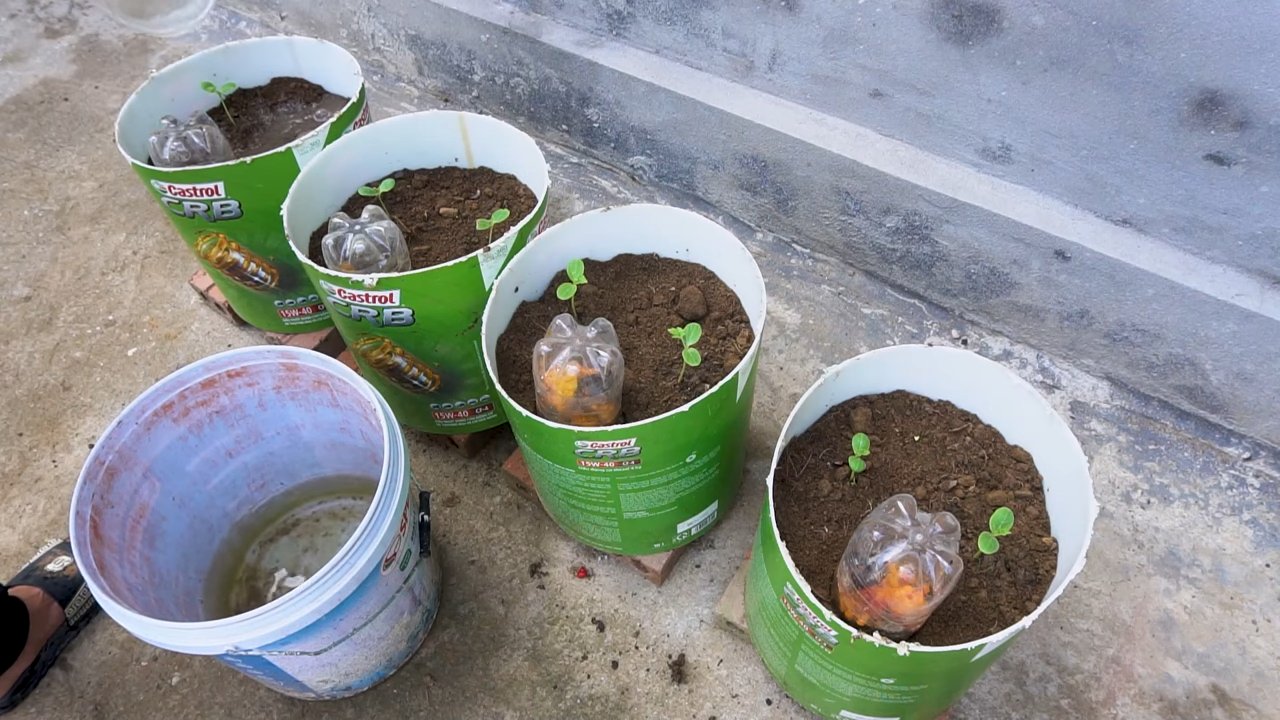
1. Sow Seeds: Fill small pots or seed trays with potting mix. Plant 2-3 watermelon seeds per pot, about 1 inch deep.
2. Water Gently: Water the soil gently until it’s moist but not soggy.
3. Provide Warmth: Watermelon seeds need warmth to germinate. Place the pots in a warm location, such as on top of a refrigerator or on a heat mat. The ideal temperature is between 70-85°F (21-29°C).
4. Keep Moist: Keep the soil consistently moist, but not waterlogged.
5. Provide Light: Once the seedlings emerge (usually in 5-10 days), move them to a sunny location or under grow lights.
6. Thin Seedlings: Once the seedlings have a few true leaves, thin them to one strong seedling per pot.
7. Harden Off: Before transplanting the seedlings outdoors, you need to harden them off. This means gradually exposing them to outdoor conditions over a period of 7-10 days. Start by placing them in a sheltered location for a few hours each day, gradually increasing the amount of time they spend outdoors.
Preparing Your Garden Bed
Watermelons need plenty of space and sunshine. Choose a location that gets at least 6-8 hours of direct sunlight per day.
1. Choose a Sunny Location: As I mentioned, watermelons are sun-loving plants.
2. Prepare the Soil: Watermelons thrive in well-drained, fertile soil with a pH between 6.0 and 6.8. Amend the soil with plenty of compost or aged manure. This will improve drainage, add nutrients, and help retain moisture.
3. Create Mounds or Rows: Watermelons grow best on slightly raised mounds or rows. This helps with drainage and warms the soil. Create mounds that are about 1-2 feet wide and 6-12 inches high.
4. Space Plants Properly: Watermelons need plenty of space to spread out. Space plants 2-3 feet apart in rows that are 6-8 feet apart. For bush varieties, you can space plants closer together.
5. Add Fertilizer: Incorporate a balanced fertilizer into the soil before planting. Follow the instructions on the fertilizer package.
Planting Watermelon Seedlings or Seeds
Now comes the fun part – planting!
1. Wait for Warm Weather: Watermelons are very sensitive to frost. Wait until the soil has warmed to at least 70°F (21°C) before planting. This is usually a few weeks after the last frost.
2. Plant Seedlings: If you started seeds indoors, carefully transplant the seedlings into the prepared garden bed. Dig a hole that is slightly larger than the root ball of the seedling. Gently remove the seedling from the pot and place it in the hole. Backfill with soil and water thoroughly.
3. Plant Seeds Directly: If you’re planting seeds directly into the garden, sow them about 1 inch deep. Plant 2-3 seeds per hill and thin to one strong seedling after they emerge.
4. Water Thoroughly: Water the newly planted seedlings or seeds thoroughly.
5. Add Mulch: Apply a layer of mulch around the plants to help retain moisture, suppress weeds, and warm the soil. Black plastic mulch is particularly effective for warming the soil. Straw mulch is also a good option.
Caring for Your Watermelon Plants
Watermelons need consistent care to thrive. Here’s what you need to do:
1. Water Regularly: Watermelons need plenty of water, especially during fruit development. Water deeply and regularly, especially during dry spells. Aim for about 1-2 inches of water per week. Avoid overhead watering, as this can promote fungal diseases. Drip irrigation is an excellent way to water watermelons.
2. Fertilize Regularly: Fertilize your watermelon plants every 2-3 weeks with a balanced fertilizer or a fertilizer specifically formulated for melons. Follow the instructions on the fertilizer package.
3. Weed Regularly: Keep the garden bed free of weeds. Weeds compete with watermelons for water and nutrients.
4. Control Pests and Diseases: Watermelons can be susceptible to pests like aphids, squash bugs, and vine borers. Inspect your plants regularly and take action if you see any signs of pests. Common watermelon diseases include Fusarium wilt, Anthracnose, and powdery mildew. Choose disease-resistant varieties and practice good garden hygiene to prevent these diseases.
5. Protect from Pests: Young watermelon plants are vulnerable to pests. Use row covers to protect them from insects and other critters.
6. Pollination: Watermelons need to be pollinated to produce fruit. Bees are the primary pollinators. If you don’t see many bees in your garden, you can hand-pollinate the flowers. To hand-pollinate, use a small paintbrush to transfer pollen from the male flowers to the female flowers. Female flowers have a small fruit behind the flower, while male flowers do not.
7. Vine Training: As the vines grow, you can train them to grow in a specific direction. This can help to save space and make it easier to manage the plants.
8. Fruit Support: As the watermelons grow larger, you may need to support them to prevent them from rotting on the ground. Place a piece of cardboard or straw under each watermelon to keep it off the soil.
Harvesting Your Watermelons
Harvesting watermelons at the right time is crucial for getting the best flavor. Here’s how to tell when your watermelons are ripe:
1. Check the Tendril: The tendril closest
Conclusion
So, there you have it! Growing watermelons at home might seem daunting at first, but with a little planning, patience, and the right techniques, you can be harvesting your own juicy, sweet watermelons before you know it. This isn’t just about saving money; it’s about experiencing the unparalleled satisfaction of nurturing a plant from seed to fruit, knowing exactly what went into its growth, and enjoying a flavor that store-bought watermelons simply can’t match.
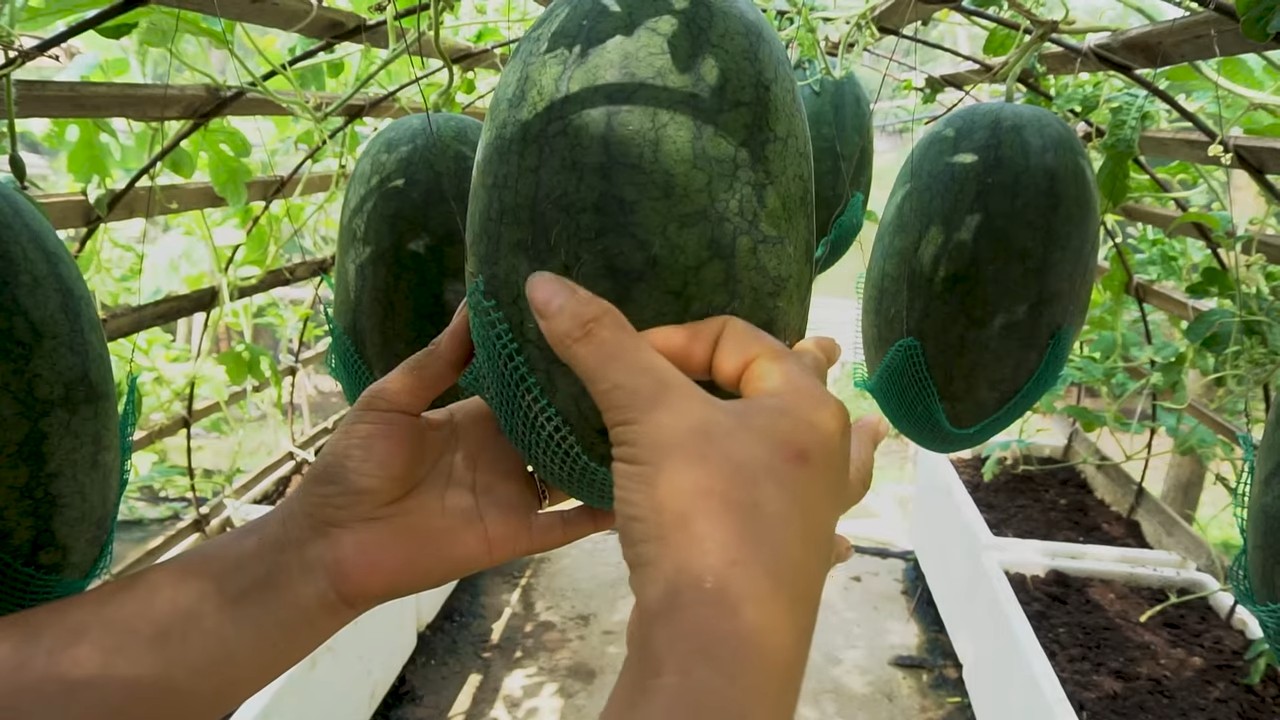
The DIY trick of creating a watermelon sling, as detailed above, is a game-changer, especially if you’re dealing with limited space or varieties that produce particularly large fruit. It provides crucial support, prevents rot, and ensures your watermelons ripen evenly, maximizing their sweetness and flavor. Think of it as a little hammock of love for your growing gourds!
But don’t stop there! Experiment with different watermelon varieties to find your favorites. Try growing smaller, personal-sized watermelons like Sugar Baby if you’re short on space, or go big with a Charleston Gray for a truly impressive harvest. You can also explore different trellising methods to further optimize your growing area. Consider companion planting with herbs like basil or marigolds to deter pests naturally.
Remember, growing watermelons at home is a journey, not just a destination. There will be challenges along the way – pests, weather fluctuations, and the occasional unexpected setback. But don’t be discouraged! Each season is a learning opportunity, and with each watermelon you harvest, you’ll gain valuable experience and a deeper appreciation for the magic of gardening.
We wholeheartedly encourage you to give this DIY trick a try. The rewards are well worth the effort. Imagine biting into a perfectly ripe, homegrown watermelon on a hot summer day – the taste of sunshine and success!
Once you’ve tried growing watermelons at home and implemented the sling technique, we’d love to hear about your experience. Share your photos, tips, and stories in the comments below. Let’s create a community of watermelon enthusiasts, sharing our knowledge and inspiring each other to grow the best watermelons possible! Happy growing!
Frequently Asked Questions (FAQs)
What are the benefits of using a watermelon sling?
The primary benefit of using a watermelon sling is to provide support for the developing fruit, especially as it grows larger and heavier. This is particularly important for watermelons grown on trellises, as the vine alone may not be strong enough to support the weight. The sling prevents the watermelon from detaching from the vine prematurely, which can lead to rot or uneven ripening. It also helps to distribute the weight evenly, reducing stress on the vine and promoting healthier growth. Furthermore, the sling elevates the watermelon off the ground, minimizing contact with soil moisture and reducing the risk of fungal diseases and pest infestations.
What materials can I use to make a watermelon sling?
You have several options when it comes to materials for your watermelon sling. Burlap is a popular choice due to its breathability and natural fibers. Old t-shirts or pillowcases can be repurposed, offering a sustainable and cost-effective solution. Netting, such as onion bags or produce bags, provides excellent airflow and drainage. Strong fabric scraps, like denim or canvas, can also be used, but ensure they are breathable to prevent moisture buildup. Avoid using plastic materials, as they can trap moisture and increase the risk of rot. The key is to choose a material that is strong, breathable, and can comfortably support the weight of the watermelon.
How do I know when to put the watermelon in a sling?
The best time to put your watermelon in a sling is when it’s about the size of a softball or slightly larger. At this stage, the watermelon is starting to gain significant weight, and the vine may need extra support. Gently lift the watermelon to assess its weight and the strength of the vine. If the vine appears strained or the watermelon is resting on the ground, it’s time to install the sling. Avoid waiting until the watermelon is fully grown, as it may be more difficult to maneuver and the vine may already be damaged.
Can I use the same sling for multiple watermelons?
Yes, you can reuse the same sling for multiple watermelons, provided it’s in good condition and properly cleaned between uses. After harvesting a watermelon, inspect the sling for any signs of wear and tear, such as rips, tears, or weakened seams. Wash the sling thoroughly with soap and water to remove any dirt, debris, or potential pathogens. Allow the sling to dry completely before using it for another watermelon. If the sling is damaged or worn, it’s best to replace it to ensure adequate support for the next watermelon.
What if my watermelon is already too big for a sling?
If your watermelon is already quite large and you haven’t used a sling, you can still try to provide support, but you’ll need to be extra careful. Gently lift the watermelon and assess the vine’s strength. If the vine seems strong enough, you can try to create a makeshift sling using a large piece of fabric or netting. However, be extremely cautious not to damage the vine or the watermelon. If the watermelon is too heavy or the vine appears weak, it may be best to leave it as is and monitor it closely for signs of rot or damage. In this case, you can try placing a board or a bed of straw underneath the watermelon to elevate it off the ground and improve airflow.
How do I prevent pests and diseases from affecting my watermelons?
Preventing pests and diseases is crucial for a successful watermelon harvest. Start by choosing disease-resistant varieties. Ensure proper spacing between plants to promote good airflow and reduce humidity. Regularly inspect your plants for signs of pests or diseases, such as aphids, squash bugs, or powdery mildew. Use organic pest control methods, such as insecticidal soap or neem oil, to control pests. Remove any diseased leaves or fruit promptly to prevent the spread of infection. Watermelons need consistent watering, but avoid overwatering, which can create a favorable environment for fungal diseases. Consider using a drip irrigation system to deliver water directly to the roots, minimizing leaf wetness. Companion planting with herbs like basil or marigolds can also help deter pests naturally.
What are some common mistakes to avoid when growing watermelons?
Several common mistakes can hinder your watermelon growing efforts. One of the biggest is planting too early, before the soil has warmed up sufficiently. Watermelons are heat-loving plants and require warm soil for germination and growth. Overwatering or underwatering can also be detrimental. Watermelons need consistent moisture, but soggy soil can lead to root rot. Insufficient sunlight is another common mistake. Watermelons need at least 6-8 hours of direct sunlight per day to thrive. Neglecting to fertilize your plants can also result in poor growth and small, tasteless fruit. Use a balanced fertilizer specifically formulated for fruits and vegetables. Finally, failing to protect your watermelons from pests and diseases can lead to significant crop losses. Regularly monitor your plants and take proactive measures to prevent problems.
How do I know when my watermelon is ripe and ready to harvest?
Determining when a watermelon is ripe can be tricky, but there are several indicators to look for. The most reliable sign is the ground spot, the area where the watermelon rests on the ground. When the watermelon is ripe, the ground spot will turn from white to a creamy yellow color. Another indicator is the tendril closest to the watermelon stem. When this tendril turns brown and dries out, it’s a sign that the watermelon is nearing ripeness. You can also thump the watermelon with your knuckles. A ripe watermelon will produce a deep, hollow sound, while an unripe watermelon will sound dull and solid. Finally, check the skin of the watermelon. A ripe watermelon will have a dull, slightly waxy appearance, while an unripe watermelon will be shiny and smooth.


Leave a Comment