
Planting potatoes at home might sound like a daunting task reserved for seasoned farmers, but I’m here to tell you it’s surprisingly simple and incredibly rewarding! Imagine harvesting your own homegrown potatoes, bursting with flavor and freshness, right from your backyard. Forget those bland, store-bought spuds – we’re talking about a culinary adventure that starts with a single seed potato.
Potatoes have a rich history, dating back thousands of years to the Andes Mountains in South America, where they were a staple food for the Inca civilization. From their humble beginnings, potatoes have spread across the globe, becoming a beloved and versatile ingredient in countless cuisines. Now, you can be a part of that history by cultivating your own potato patch!
Why should you try this DIY trick? Well, for starters, planting potatoes at home allows you to control exactly what goes into your food, ensuring it’s free from harmful pesticides and chemicals. Plus, it’s a fantastic way to connect with nature, get some exercise, and teach your kids about where their food comes from. In this article, I’ll share my favorite tips and tricks for growing a bountiful potato harvest, even if you have limited space or gardening experience. Get ready to dig in and discover the joy of homegrown potatoes!
Unlocking the Cleaning Power of Vinegar: DIY Hacks for a Sparkling Home
Vinegar, that humble bottle sitting in your pantry, is a cleaning superhero in disguise! Forget expensive, chemical-laden cleaners; vinegar is a natural, affordable, and incredibly versatile solution for tackling grime all over your house. I’m going to share some of my favorite vinegar cleaning hacks that will leave your home sparkling and smelling fresh (don’t worry, the vinegar smell dissipates quickly!).
General Vinegar Cleaning Tips
Before we dive into specific hacks, let’s cover some essential vinegar cleaning guidelines:
* Dilution is Key: Always dilute vinegar with water. A 1:1 ratio (equal parts vinegar and water) is generally safe for most surfaces. For tougher jobs, you can increase the vinegar concentration, but always test on an inconspicuous area first.
* White Distilled Vinegar is Your Best Friend: While other types of vinegar exist, white distilled vinegar is the cleaning champion. It’s clear, inexpensive, and doesn’t contain any coloring agents that could stain surfaces.
* Avoid Certain Surfaces: Vinegar is acidic and can damage certain materials. Avoid using it on marble, granite, waxed wood, aluminum, cast iron, and electronics screens.
* Smell Sensitivity: If you’re sensitive to the smell of vinegar, add a few drops of your favorite essential oil to the cleaning solution. Lemon, lavender, and eucalyptus are great choices.
* Always Test First: Before applying any vinegar solution to a large area, test it on a small, hidden spot to ensure it doesn’t cause discoloration or damage.
Cleaning Your Kitchen with Vinegar
The kitchen is a breeding ground for grease, grime, and food splatters. Thankfully, vinegar can handle it all!
Cleaning the Microwave
My microwave gets a serious workout, and it shows! Splatters and spills are inevitable, but this vinegar trick makes cleaning a breeze.
1. Prepare the Solution: In a microwave-safe bowl, combine 1 cup of water and 2 tablespoons of white distilled vinegar.
2. Microwave: Place the bowl in the microwave and heat on high for 5-7 minutes. The water will boil and create steam, loosening the grime.
3. Let it Sit: Leave the microwave door closed for another 5-10 minutes to allow the steam to work its magic.
4. Wipe Clean: Carefully remove the bowl (it will be hot!). Use a damp cloth or sponge to wipe away the loosened food particles. The grime should come off easily. For stubborn spots, you can dip the cloth in the vinegar solution.
5. Dry: Wipe the interior of the microwave with a clean, dry cloth.
Degreasing the Stovetop
Grease buildup on the stovetop is a common problem. Vinegar to the rescue!
1. Remove Grates and Burner Caps: Take off the stovetop grates and burner caps.
2. Spray with Vinegar: Spray the stovetop surface generously with a 1:1 vinegar and water solution.
3. Let it Sit: Allow the solution to sit for 5-10 minutes to loosen the grease.
4. Wipe Clean: Use a damp cloth or sponge to wipe away the grease and grime. For stubborn areas, sprinkle baking soda on the surface and scrub gently.
5. Clean Grates and Burner Caps: Soak the grates and burner caps in a sink filled with hot, soapy water and 1/2 cup of vinegar. Let them soak for 15-20 minutes, then scrub with a brush and rinse thoroughly.
6. Dry: Dry all the components before reassembling the stovetop.
Cleaning the Dishwasher
Did you know you can use vinegar to clean your dishwasher? It helps remove buildup, deodorize, and improve its performance.
1. Remove Food Debris: Make sure your dishwasher is empty and free of any large food particles.
2. Vinegar Rinse: Place a dishwasher-safe cup or bowl filled with 1 cup of white distilled vinegar on the top rack of the dishwasher.
3. Run a Cycle: Run the dishwasher on a hot water cycle.
4. Repeat Monthly: Repeat this process once a month to keep your dishwasher clean and fresh.
Cleaning the Coffee Maker
Over time, mineral deposits can build up in your coffee maker, affecting the taste of your coffee. Vinegar can descale your coffee maker and restore its flavor.
1. Prepare the Solution: Fill the water reservoir of your coffee maker with a 1:1 solution of white distilled vinegar and water.
2. Brew: Run a full brewing cycle.
3. Rinse: Empty the carafe and fill the water reservoir with fresh water. Run two or three brewing cycles to rinse away any remaining vinegar.
4. Clean Carafe: Wash the carafe with soap and water.
Bathroom Cleaning Hacks with Vinegar
The bathroom is another area where vinegar shines. It can tackle soap scum, hard water stains, and mildew.
Cleaning Showerheads
Hard water can clog showerheads, reducing water pressure. This vinegar hack will dissolve mineral deposits and restore your showerhead’s performance.
1. Prepare the Solution: Fill a plastic bag with white distilled vinegar.
2. Attach to Showerhead: Secure the bag around the showerhead with a rubber band, ensuring the showerhead is submerged in the vinegar.
3. Soak: Let the showerhead soak in the vinegar for at least 30 minutes, or preferably overnight.
4. Remove and Rinse: Remove the bag and run the shower for a few minutes to flush out any remaining vinegar and mineral deposits.
5. Wipe Clean: Wipe the showerhead with a clean cloth.
Cleaning Shower Doors and Walls
Soap scum and hard water stains can make shower doors and walls look grimy. Vinegar can cut through the buildup and restore their shine.
1. Prepare the Solution: Mix equal parts white distilled vinegar and warm water in a spray bottle.
2. Spray: Spray the shower doors and walls generously with the vinegar solution.
3. Let it Sit: Allow the solution to sit for 10-15 minutes to loosen the soap scum and hard water stains.
4. Scrub: Use a sponge or scrub brush to scrub the surfaces. For stubborn areas, you can sprinkle baking soda on the sponge.
5. Rinse: Rinse the surfaces thoroughly with water.
6. Dry: Dry the shower doors and walls with a clean towel or squeegee.
Cleaning Toilets
Vinegar can clean and deodorize your toilet bowl.
1. Pour in Vinegar: Pour 1-2 cups of white distilled vinegar into the toilet bowl.
2. Let it Sit: Let the vinegar sit for at least 30 minutes, or preferably overnight.
3. Scrub: Scrub the toilet bowl with a toilet brush, paying attention to any stains or buildup.
4. Flush: Flush the toilet.
Other Clever Vinegar Cleaning Hacks
Vinegar’s cleaning prowess extends beyond the kitchen and bathroom. Here are a few more of my favorite hacks:
Cleaning Windows and Mirrors
Vinegar can leave your windows and mirrors streak-free and sparkling.
1. Prepare the Solution: Mix equal parts white distilled vinegar and water in a spray bottle.
2. Spray: Spray the windows or mirrors with the vinegar solution.
3. Wipe: Wipe the surfaces with a clean microfiber cloth. Avoid using paper towels, as they can leave streaks.
Removing Carpet Stains
Vinegar can help remove certain carpet stains.
1. Test First: Always test the vinegar solution on a hidden area of the carpet to ensure it doesn’t cause discoloration.
2. Prepare the Solution: Mix equal parts white distilled vinegar and water in a spray bottle.
3. Spray: Spray the stain with the vinegar solution.
4. Blot: Blot the stain with a clean cloth, working from the outside in. Avoid rubbing, as this can spread the stain.
5. Repeat: Repeat the process until the stain is removed.
6. Dry: Blot the area with a dry cloth to remove excess moisture.
Freshening Laundry
Vinegar can be used as a natural laundry booster and fabric softener.
1. Add to Wash: Add 1/2 cup of white distilled vinegar to the fabric softener dispenser of your washing machine.
2. Benefits: Vinegar helps remove odors, soften fabrics, and brighten colors. It also helps remove detergent residue.
Cleaning Cutting Boards
Cutting boards can harbor bacteria. Vinegar can disinfect and deodorize them.
1. Wipe with Vinegar: Wipe the cutting board with undiluted white distilled vinegar.
2. Let it Sit: Let the vinegar sit for a few minutes

Conclusion
So, there you have it! Planting potatoes at home is not only surprisingly simple, but it’s also incredibly rewarding. Imagine the satisfaction of harvesting your own homegrown potatoes, knowing exactly where they came from and how they were grown. Forget the bland, store-bought spuds – these will be bursting with fresh, earthy flavor, ready to be transformed into your favorite potato dishes.
This DIY trick is a must-try for several reasons. First, it’s a fantastic way to connect with nature and learn about the growing process. Second, it’s an economical choice, especially if you regularly consume potatoes. Third, and perhaps most importantly, it allows you to control the quality of your food, ensuring it’s free from unwanted chemicals and pesticides. You’re essentially creating your own little potato farm right in your backyard (or even on your balcony!).
But the fun doesn’t stop there! Feel free to experiment with different potato varieties. Try planting Yukon Golds for their creamy texture, Russets for their perfect baking qualities, or even colorful fingerling potatoes for a unique and visually appealing addition to your meals. You can also explore different growing methods. While we’ve focused on planting in the ground, container gardening is an excellent option for those with limited space. Consider using grow bags or large pots filled with well-draining soil.
Another variation to consider is companion planting. Certain plants, like marigolds and basil, can help deter pests and improve the overall health of your potato plants. Do some research and see which companion plants thrive in your area.
Don’t be intimidated by the process. Planting potatoes at home is much easier than you might think. With a little preparation and care, you’ll be well on your way to enjoying a bountiful harvest.
We wholeheartedly encourage you to give this DIY trick a try. It’s a fun, educational, and ultimately delicious experience. And once you’ve harvested your first crop of homegrown potatoes, we’d love to hear about it! Share your experiences, tips, and photos in the comments below. Let’s create a community of home potato growers and inspire others to embrace the joys of gardening. What are you waiting for? Get planting!
Frequently Asked Questions (FAQs)
What kind of potatoes can I plant?
You can plant almost any type of potato, but it’s best to use seed potatoes, which are specifically grown for planting. These are certified disease-free and will give you the best results. You can find seed potatoes at most garden centers or online retailers. If you’re using potatoes from the grocery store, make sure they are organic to avoid any growth inhibitors. Also, look for potatoes that have already started to sprout “eyes,” as these will be more likely to grow.
When is the best time to plant potatoes?
The best time to plant potatoes is in early spring, about two to three weeks before the last expected frost. The soil temperature should be at least 45 degrees Fahrenheit. In warmer climates, you can also plant potatoes in late summer for a fall harvest. Check your local planting calendar for specific dates in your area.
How deep should I plant the potatoes?
Plant your seed potatoes about 4-6 inches deep and 12 inches apart in rows that are 2-3 feet apart. This gives the plants enough room to grow and allows for easy hilling.
What is “hilling” and why is it important?
Hilling is the process of mounding soil around the base of the potato plants as they grow. This encourages the plants to produce more potatoes along the buried stems. Start hilling when the plants are about 6 inches tall, and continue to hill every few weeks until the mounds are about 12 inches high.
What kind of soil is best for growing potatoes?
Potatoes prefer well-draining, slightly acidic soil with a pH between 6.0 and 6.5. Amend your soil with compost or other organic matter to improve drainage and fertility. Avoid heavy clay soils, as they can become waterlogged and lead to rot.
How much sunlight do potatoes need?
Potatoes need at least six hours of sunlight per day to thrive. Choose a sunny location in your garden for planting.
How often should I water my potato plants?
Water your potato plants regularly, especially during dry periods. Keep the soil consistently moist, but avoid overwatering, which can lead to rot. A good rule of thumb is to water deeply once or twice a week, depending on the weather.
What are some common potato pests and diseases?
Common potato pests include potato beetles, aphids, and flea beetles. Common diseases include blight, scab, and rot. Monitor your plants regularly for signs of pests or diseases, and take action promptly to prevent them from spreading. Organic pest control methods, such as insecticidal soap or neem oil, can be effective. For diseases, ensure good air circulation and avoid overwatering.
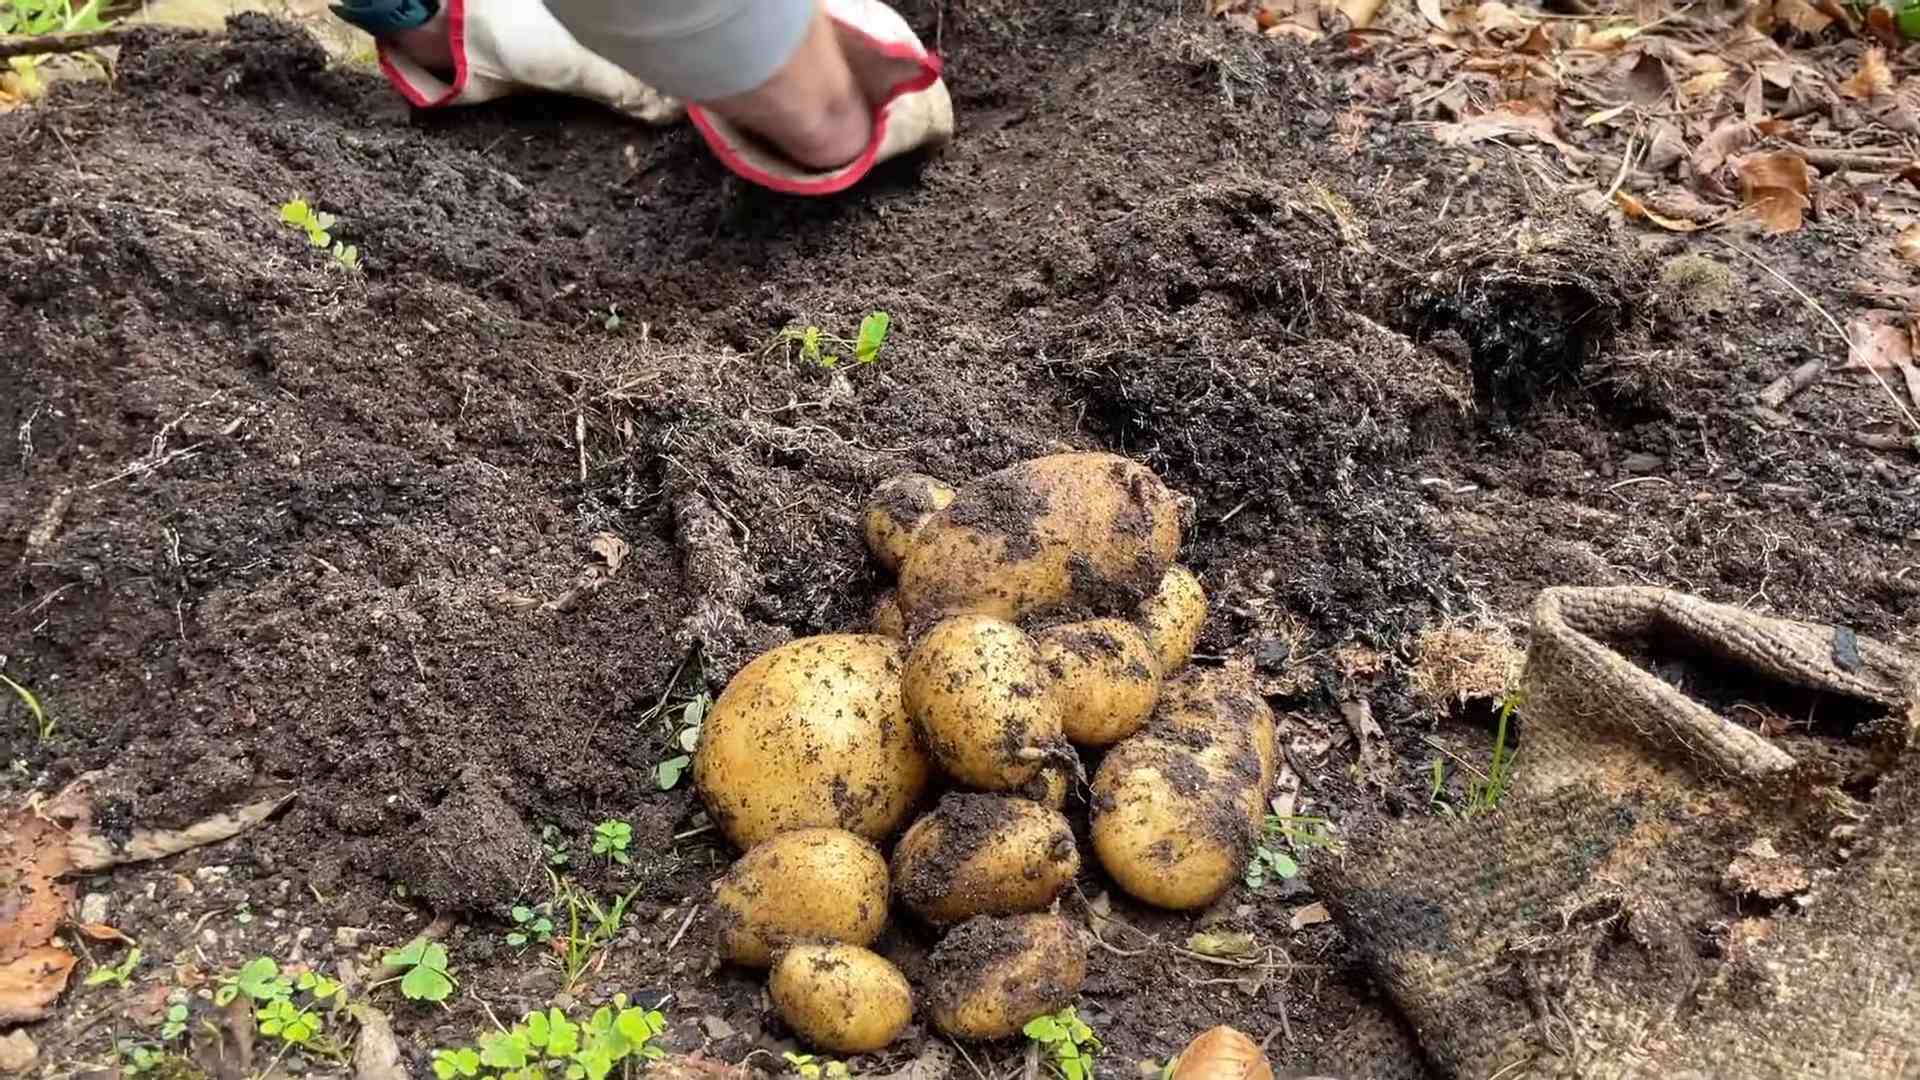
How do I know when my potatoes are ready to harvest?
Potatoes are typically ready to harvest about 70-80 days after planting for “new” potatoes (small, tender potatoes) or 90-120 days for mature potatoes. For new potatoes, you can carefully dig around the base of the plant and harvest a few potatoes without disturbing the rest of the plant. For mature potatoes, wait until the foliage has died back and turned brown. Then, carefully dig up the potatoes with a garden fork, being careful not to damage them.
So, there you have it! Planting potatoes at home is not only surprisingly simple, but it’s also incredibly rewarding. Imagine the satisfaction of harvesting your own homegrown potatoes, knowing exactly where they came from and how they were grown. Forget the bland, store-bought spuds – these will be bursting with fresh, earthy flavor, ready to be transformed into your favorite potato dishes.
This DIY trick is a must-try for several reasons. First, it’s a fantastic way to connect with nature and learn about the growing process. Second, it’s an economical choice, especially if you regularly consume potatoes. Third, and perhaps most importantly, it allows you to control the quality of your food, ensuring it’s free from unwanted chemicals and pesticides. You’re essentially creating your own little potato farm right in your backyard (or even on your balcony!).
But the fun doesn’t stop there! Feel free to experiment with different potato varieties. Try planting Yukon Golds for their creamy texture, Russets for their perfect baking qualities, or even colorful fingerling potatoes for a unique and visually appealing addition to your meals. You can also explore different growing methods. While we’ve focused on planting in the ground, container gardening is an excellent option for those with limited space. Consider using grow bags or large pots filled with well-draining soil.
Another variation to consider is companion planting. Certain plants, like marigolds and basil, can help deter pests and improve the overall health of your potato plants. Do some research and see which companion plants thrive in your area.
Don’t be intimidated by the process. Planting potatoes at home is much easier than you might think. With a little preparation and care, you’ll be well on your way to enjoying a bountiful harvest.
We wholeheartedly encourage you to give this DIY trick a try. It’s a fun, educational, and ultimately delicious experience. And once you’ve harvested your first crop of homegrown potatoes, we’d love to hear about it! Share your experiences, tips, and photos in the comments below. Let’s create a community of home potato growers and inspire others to embrace the joys of gardening. What are you waiting for? Get planting!
Frequently Asked Questions (FAQs)
What kind of potatoes can I plant?
You can plant almost any type of potato, but it’s best to use seed potatoes, which are specifically grown for planting. These are certified disease-free and will give you the best results. You can find seed potatoes at most garden centers or online retailers. If you’re using potatoes from the grocery store, make sure they are organic to avoid any growth inhibitors. Also, look for potatoes that have already started to sprout “eyes,” as these will be more likely to grow.
When is the best time to plant potatoes?
The best time to plant potatoes is in early spring, about two to three weeks before the last expected frost. The soil temperature should be at least 45 degrees Fahrenheit. In warmer climates, you can also plant potatoes in late summer for a fall harvest. Check your local planting calendar for specific dates in your area.
How deep should I plant the potatoes?
Plant your seed potatoes about 4-6 inches deep and 12 inches apart in rows that are 2-3 feet apart. This gives the plants enough room to grow and allows for easy hilling.
What is “hilling” and why is it important?
Hilling is the process of mounding soil around the base of the potato plants as they grow. This encourages the plants to produce more potatoes along the buried stems. Start hilling when the plants are about 6 inches tall, and continue to hill every few weeks until the mounds are about 12 inches high.
What kind of soil is best for growing potatoes?
Potatoes prefer well-draining, slightly acidic soil with a pH between 6.0 and 6.5. Amend your soil with compost or other organic matter to improve drainage and fertility. Avoid heavy clay soils, as they can become waterlogged and lead to rot.
How much sunlight do potatoes need?
Potatoes need at least six hours of sunlight per day to thrive. Choose a sunny location in your garden for planting.
How often should I water my potato plants?
Water your potato plants regularly, especially during dry periods. Keep the soil consistently moist, but avoid overwatering, which can lead to rot. A good rule of thumb is to water deeply once or twice a week, depending on the weather.
What are some common potato pests and diseases?
Common potato pests include potato beetles, aphids, and flea beetles. Common diseases include blight, scab, and rot. Monitor your plants regularly for signs of pests or diseases, and take action promptly to prevent them from spreading. Organic pest control methods, such as insecticidal soap or neem oil, can be effective. For diseases, ensure good air circulation and avoid overwatering.
How do I know when my potatoes are ready to harvest?
Potatoes are typically ready to harvest about 70-80 days after planting for “new” potatoes (small, tender potatoes) or 90-120 days for mature potatoes. For new potatoes, you can carefully dig around the base of the plant and harvest a few potatoes without disturbing the rest of the plant. For mature potatoes, wait until the foliage has died back and turned brown. Then, carefully dig up the potatoes with a garden fork, being careful not to damage them.
How should I store my harvested potatoes?
Store your harvested potatoes in a cool, dark, and well-ventilated place, such as a root cellar or basement. Avoid storing them in the refrigerator, as this can cause them to develop a sweet taste. Properly stored potatoes can last for several months.
Can I grow potatoes in containers?
Yes, you can definitely grow potatoes in containers! Choose a large container (at least 10 gallons) with drainage holes. Fill it with well-draining potting mix and plant your seed potatoes as described above. As the plants grow, add more soil to the container, burying the stems to encourage more potato production. Container-grown potatoes may require more frequent watering than those grown in the ground.
What if my potato plants are flowering?
Potato plants flowering is a normal part of their growth cycle and doesn’t necessarily indicate that the potatoes are ready to harvest. However, it does suggest that the plants are maturing. You can still harvest potatoes even if the plants are flowering.
Can I use potatoes that have turned green?
No, do not eat potatoes that have turned green. The green color indicates the presence of solanine, a toxic compound that can cause illness. Discard any green potatoes.
Is planting potatoes at home worth the effort?
Absolutely! While it requires some initial effort, the reward of harvesting your own fresh, flavorful potatoes is well worth it. Plus, you’ll have the satisfaction of knowing exactly where your food came from and how it was grown. Give it a try – you might be surprised at how much you enjoy it!

Leave a Comment