
Grow Artichokes Beginners: A Guide to Harvesting Your Own
Grow artichokes beginners? Yes, you can! I’ve always been fascinated by artichokes – those majestic, thistle-like plants producing such a unique and delicious treat. For years, I thought growing them was some sort of mystical gardening skill reserved for seasoned professionals. But I was wrong! This article is all about demystifying the process and sharing my own journey of successfully growing artichokes, even as a beginner. I’ll walk you through everything from selecting the right variety to harvesting those beautiful, plump buds.
Historically, artichokes have a rich and fascinating past, cultivated in the Mediterranean region for centuries. They’ve graced the tables of royalty and peasants alike, symbolizing both luxury and sustenance. But today, you don’t need a sprawling estate to enjoy the fruits (or rather, the buds!) of your labor. With a little know-how and these simple Grow Artichokes Beginners tips, you can cultivate these culinary gems right in your own backyard.
Why Grow Your Own Artichokes?
There’s something incredibly rewarding about harvesting your own food. It’s a connection to the earth and a taste of freshness you simply can’t replicate with store-bought produce. Plus, homegrown artichokes are often far more flavorful and tender than those you find in supermarkets. This guide for Grow Artichokes Beginners will empower you to experience the joy of growing your own artichokes, saving money, and enjoying superior quality.
So, whether you’re a complete novice or have dabbled in gardening before, get ready to embark on this exciting adventure! Let’s dive into the practical tips and tricks that will help you successfully grow artichokes and enjoy the delicious rewards of your hard work.
Clean Your Oven Naturally: A Sparkling DIY Guide
I’ve always hated cleaning the oven. The baked-on grime, the stubborn grease… it’s a nightmare! But I’ve discovered a fantastically effective, all-natural method that’s saved me hours of scrubbing and harsh chemicals. Ready to ditch the toxic cleaners and get that oven sparkling? Let’s do this!
Phase 1: Preparation is Key
- Gather your supplies: You’ll need baking soda, white vinegar, a spray bottle, a bowl, a sponge or cleaning cloths, rubber gloves (optional but recommended), and a scraper (a plastic one is best to avoid scratching your oven). A small bowl for mixing is also helpful.
- Clear the oven: Remove all racks, baking sheets, and anything else from inside your oven. This gives you a clear workspace and prevents damage to your other ovenware.
- Pre-clean loose debris: Use a scraper to remove any large chunks of food or burnt-on bits. Don’t worry about getting everything perfectly clean at this stage; we’re just removing the biggest obstacles.
Phase 2: The Baking Soda Paste
- Mix your paste: In your bowl, combine baking soda and water to create a thick paste. The consistency should be similar to toothpaste. There’s no exact ratio; just add water gradually until you achieve the desired consistency. I usually start with about 1/2 cup of baking soda and add water a tablespoon at a time.
- Apply the paste: Using your sponge or cloth, generously apply the baking soda paste to all the interior surfaces of your oven. Pay special attention to areas with heavy grease buildup. Make sure to coat everything evenly. Don’t be shy with the paste!
- Let it sit: This is the most crucial step. Allow the paste to sit overnight (or for at least 8-12 hours). The baking soda will work its magic, absorbing grease and loosening grime.
Phase 3: The Vinegar Power
- Spray with vinegar: After the paste has sat for the recommended time, lightly spray the baking soda paste with white vinegar. You’ll see a fizzing reaction – this is a good sign! The vinegar helps to break down the grease and lift the grime.
- Let it fizz: Allow the mixture to fizz for about 15-20 minutes. This gives the vinegar time to work its magic and further loosen the grime.
- Scrub-a-dub-dub: Now comes the easy part! Using your sponge or cloth, gently scrub the oven surfaces. The baking soda and vinegar combination should have significantly loosened the grime, making scrubbing much easier. For stubborn spots, you can use your scraper, but be gentle to avoid scratching.
- Wipe it clean: Once you’ve scrubbed everything, use a clean, damp cloth to wipe away the remaining paste and grime. Rinse the cloth frequently to remove the loosened dirt.
Phase 4: Oven Rack Revival
- Prepare the racks: While the oven interior is soaking, prepare your oven racks. Place them in your bathtub or a large container that can hold them comfortably. You can use the same baking soda paste method on the racks as well.
- Soak the racks: Cover the racks generously with the baking soda paste. Let them soak for at least 2-3 hours, or even overnight for really stubborn grime. You can add hot water to the tub or container to help the process.
- Scrub the racks: After soaking, scrub the racks with a sponge or brush. The baking soda paste should have loosened most of the grime, making this step much easier. For really stubborn spots, you can use a stiff brush or even a pumice stone (be gentle!).
- Rinse and dry: Once the racks are clean, rinse them thoroughly and dry them completely before placing them back in the oven.
Phase 5: Final Touches
- Inspect and repeat: Once you’ve cleaned the entire oven, inspect it carefully. Are there any areas that still need attention? If so, don’t hesitate to reapply the baking soda paste and repeat the process. It’s better to do it right than to leave any grime behind.
- Dry thoroughly: Make sure to dry the oven completely before using it again. This will prevent any lingering moisture from causing problems.
- Enjoy your sparkling clean oven! You’ve successfully cleaned your oven naturally and effectively, saving money and avoiding harsh chemicals. Give yourself a pat on the back!
Important Note:
Always exercise caution when cleaning your oven. Avoid using excessive force that could damage the oven’s interior. If you have any concerns about cleaning your specific oven model, consult your owner’s manual.
Pro Tip:
For extra cleaning power, add a few drops of essential oil (like lemon or tea tree) to your baking soda paste for a fresh scent.
Conclusion
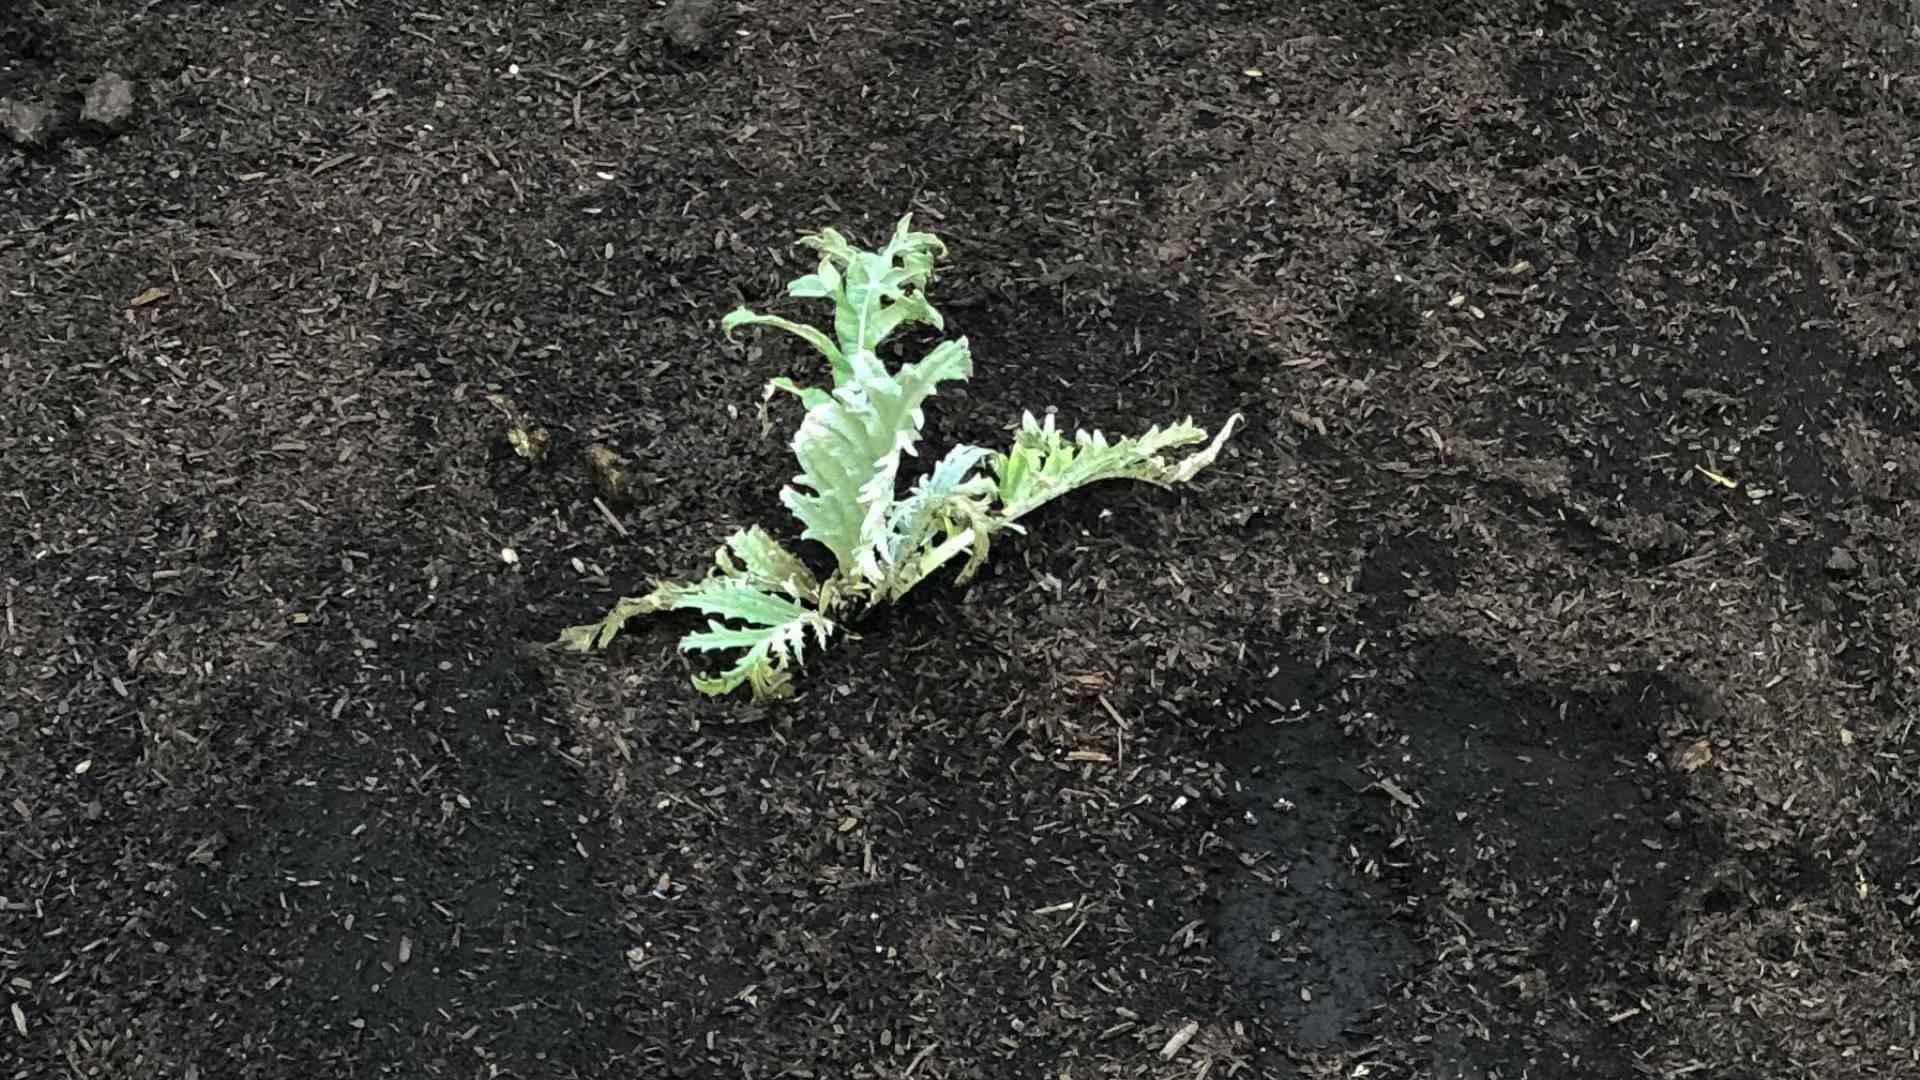
So there you have it! Growing artichokes from seed or starts might seem daunting at first, but with a little patience and the right techniques, you’ll be harvesting your own delicious, homegrown artichokes in no time. This DIY approach to growing artichokes offers a rewarding experience, far surpassing the taste and satisfaction of store-bought artichokes. The unique flavor and texture of homegrown artichokes are simply unparalleled, making this a must-try for any aspiring gardener, even complete beginners. You’ll not only enjoy the freshest artichokes imaginable, but you’ll also gain a deep appreciation for the process of nurturing a plant from seed to harvest. This method allows for greater control over the growing conditions, resulting in healthier and more productive plants. Beyond the superior taste, growing your own artichokes is a sustainable and fulfilling endeavor, connecting you more closely with your food source. It’s a fantastic way to add a unique and flavorful element to your garden and your culinary repertoire.
Beyond the basic method outlined, there are several exciting variations you can explore. Experiment with different artichoke varieties to discover your favorites – some boast larger heads, while others offer a more tender texture. Consider companion planting; herbs like rosemary and sage thrive in similar conditions and can even deter pests. If you have limited space, try growing artichokes in large containers. Remember to adjust your watering and fertilization schedules based on your climate and the specific needs of your chosen variety. Don’t be afraid to get creative and adapt the techniques to your unique gardening environment. The beauty of this DIY approach is its adaptability; you can tailor it to your specific needs and preferences.
We strongly encourage you to embark on this rewarding journey of growing your own artichokes. Share your experiences with us! We’d love to hear about your successes, challenges, and any innovative techniques you discover along the way. Post pictures of your thriving artichoke plants and your delicious harvests on social media using #GrowArtichokesBeginners. Let’s build a community of artichoke enthusiasts, sharing tips, tricks, and celebrating the joy of homegrown goodness. Remember, even if you encounter setbacks, the learning process is part of the fun. Embrace the challenges, learn from your mistakes, and enjoy the incredible satisfaction of harvesting your own artichokes. This is more than just a gardening project; it’s a journey of discovery, a testament to your green thumb, and a delicious reward for your efforts. So, what are you waiting for? Get your hands dirty and start growing!
Frequently Asked Questions
What type of soil is best for growing artichokes?
Artichokes thrive in well-drained, fertile soil with a slightly acidic to neutral pH (6.0-7.0). Amend heavy clay soils with organic matter like compost to improve drainage and aeration. Sandy soils may benefit from the addition of organic matter to retain moisture. A soil test can help determine your soil’s pH and nutrient levels, allowing you to make necessary adjustments. Proper soil preparation is crucial for healthy artichoke growth.
How much sunlight do artichokes need?
Artichokes are sun-worshippers! They require at least 6-8 hours of direct sunlight per day to thrive. Choose a location in your garden that receives ample sunlight, especially during the warmest part of the day. Insufficient sunlight can lead to reduced yields and smaller artichoke heads. Consider the sun’s path throughout the day when selecting your planting site.
When is the best time to plant artichokes?
The ideal time to plant artichokes depends on your climate. In warmer climates, you can plant them in the fall or early spring. In cooler climates, spring planting is generally recommended, after the last frost. Starting artichokes from seed indoors 6-8 weeks before the last frost allows for earlier harvesting. Check your local frost dates to determine the best planting time for your region.
How often should I water my artichokes?
Consistent watering is essential, especially during dry periods. Aim for deep, infrequent watering rather than shallow, frequent watering. The soil should be kept consistently moist but not waterlogged. Overwatering can lead to root rot, while underwatering can stress the plants and reduce yields. Mulching around the plants helps retain soil moisture and suppress weeds.
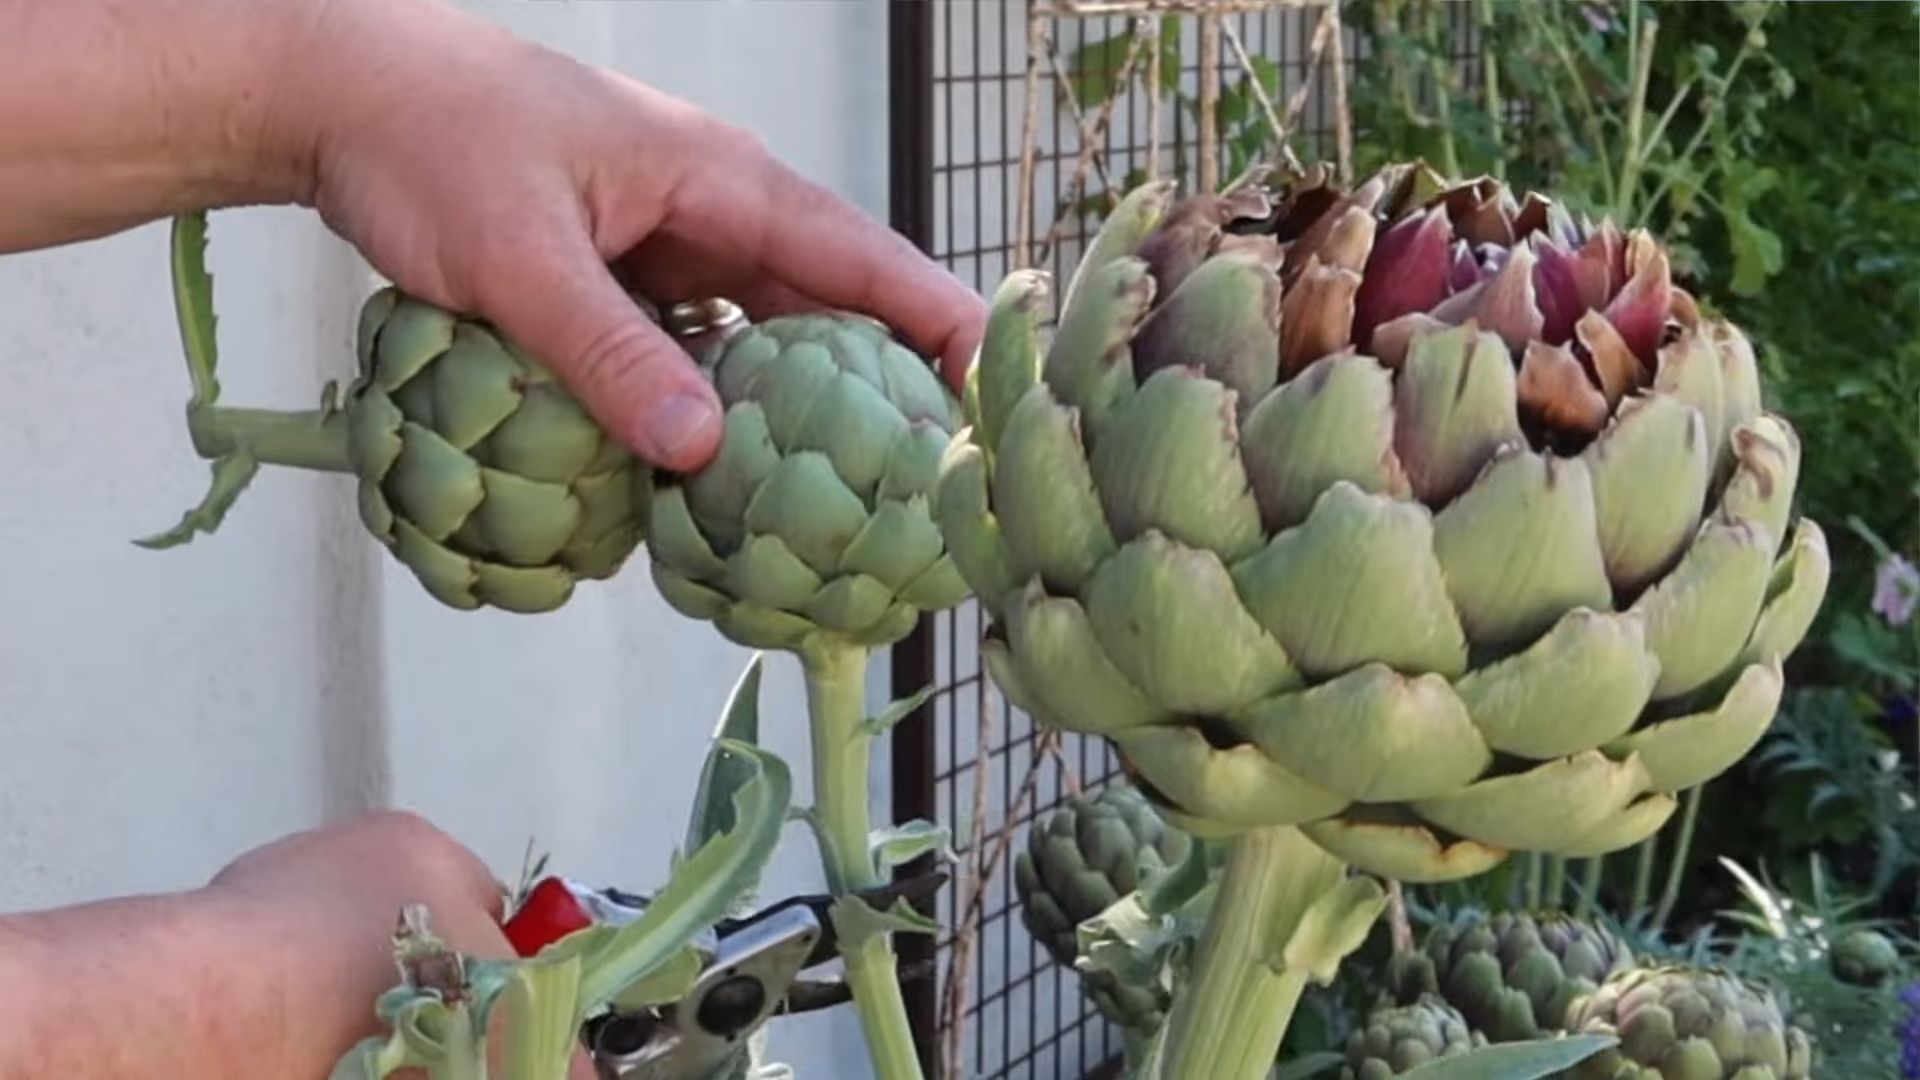
How do I harvest artichokes?
Artichokes are ready for harvest when the buds are firm, tightly closed, and the bracts are dark green and slightly purplish. Harvest the buds by cutting them from the stem with a sharp knife, leaving about an inch of stem attached. Harvesting should begin when the buds are about 3-4 inches in diameter. Harvesting regularly encourages the production of more buds.
What are some common pests and diseases that affect artichokes?
Artichokes can be susceptible to various pests and diseases, including aphids, spider mites, and fungal diseases like crown rot. Regularly inspect your plants for signs of pests or diseases. Use appropriate pest control methods, such as insecticidal soap or neem oil for pests, and ensure good air circulation to prevent fungal diseases. Maintaining healthy plants through proper soil preparation, watering, and fertilization helps increase their resistance to pests and diseases.
Can I grow artichokes in containers?
Yes, you can grow artichokes in large containers, provided they are at least 15-20 gallons in capacity. Choose a container with adequate drainage holes to prevent waterlogging. Use a high-quality potting mix that retains moisture but drains well. Container-grown artichokes may require more frequent watering than those grown in the ground.
How long does it take for artichokes to mature?
The time it takes for artichokes to mature depends on the variety and growing conditions. Generally, it takes about 18-24 months from planting to the first harvest. However, you can often start harvesting smaller buds earlier in the growing season. Patience is key when growing artichokes, as they are a relatively slow-growing plant.
Leave a Comment