
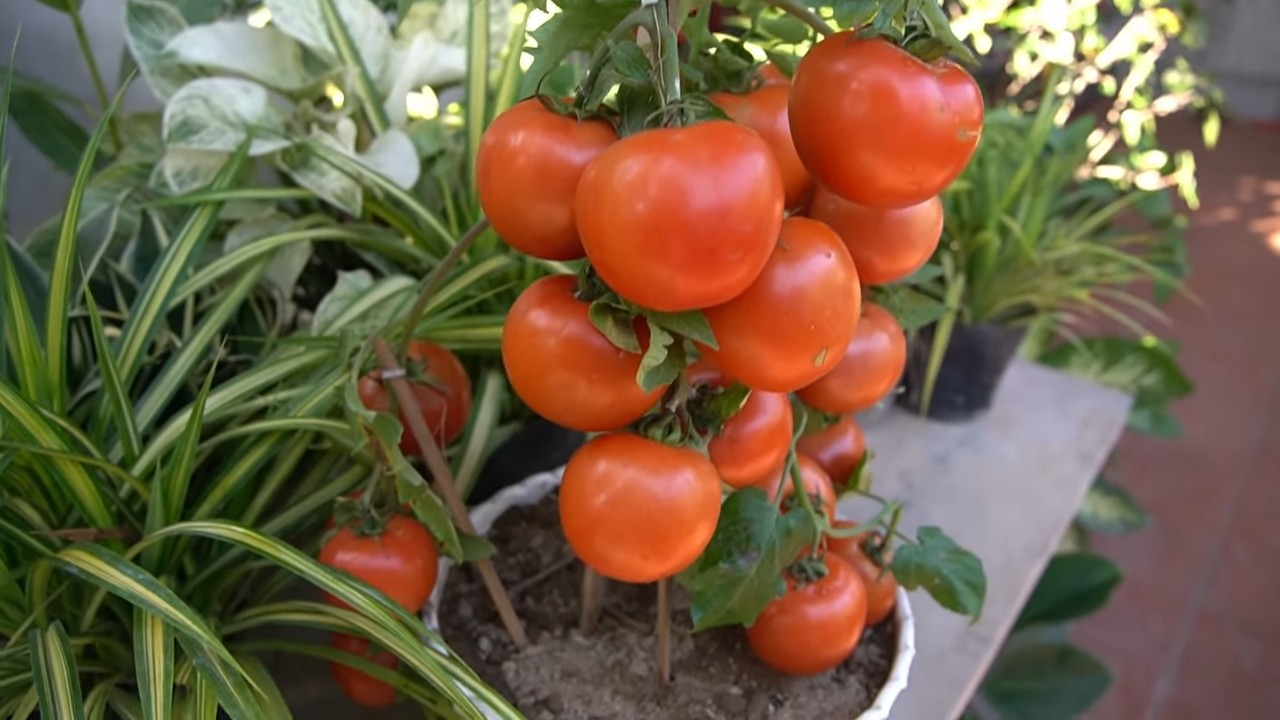
Tomato propagation hacks are your secret weapon to a bountiful tomato harvest, and I’m thrilled to share some of my favorite tricks with you! Imagine turning one tomato plant into many, filling your garden with juicy, sun-ripened goodness without breaking the bank. Sounds amazing, right?
For centuries, gardeners have been experimenting with ways to multiply their tomato plants. From ancient civilizations carefully saving seeds to modern-day enthusiasts perfecting cloning techniques, the desire to maximize tomato production has always been strong. Tomatoes, originating in South America, quickly became a global staple, and with that came the need to efficiently cultivate them.
Let’s face it, buying tomato seedlings every year can get expensive. Plus, you might have a particular variety you absolutely adore and want to replicate. That’s where these tomato propagation hacks come in! I’m going to show you simple, effective methods to clone your existing plants, ensuring a continuous supply of your favorite tomatoes. Whether you’re a seasoned gardener or just starting out, these DIY tricks will empower you to grow more tomatoes than you ever thought possible. Get ready to transform your garden and enjoy a summer filled with delicious, homegrown tomatoes!
Tomato Propagation Hacks: Turn One Plant into Many!
Hey there, fellow gardening enthusiasts! Ever wished you could magically multiply your favorite tomato plant? Well, while I can’t promise magic, I can share some fantastic DIY hacks for tomato propagation that will have you swimming in delicious tomatoes in no time! These methods are surprisingly easy, and I’ve had great success with them. Let’s dive in!
Understanding Tomato Propagation
Before we get our hands dirty, let’s quickly understand what we’re doing. Tomato propagation is simply the process of creating new tomato plants from existing ones. Tomatoes are incredibly generous plants, and they readily root from cuttings, making propagation a breeze. We’ll be exploring two main methods: propagating from suckers and propagating from stem cuttings.
Method 1: Propagating from Tomato Suckers
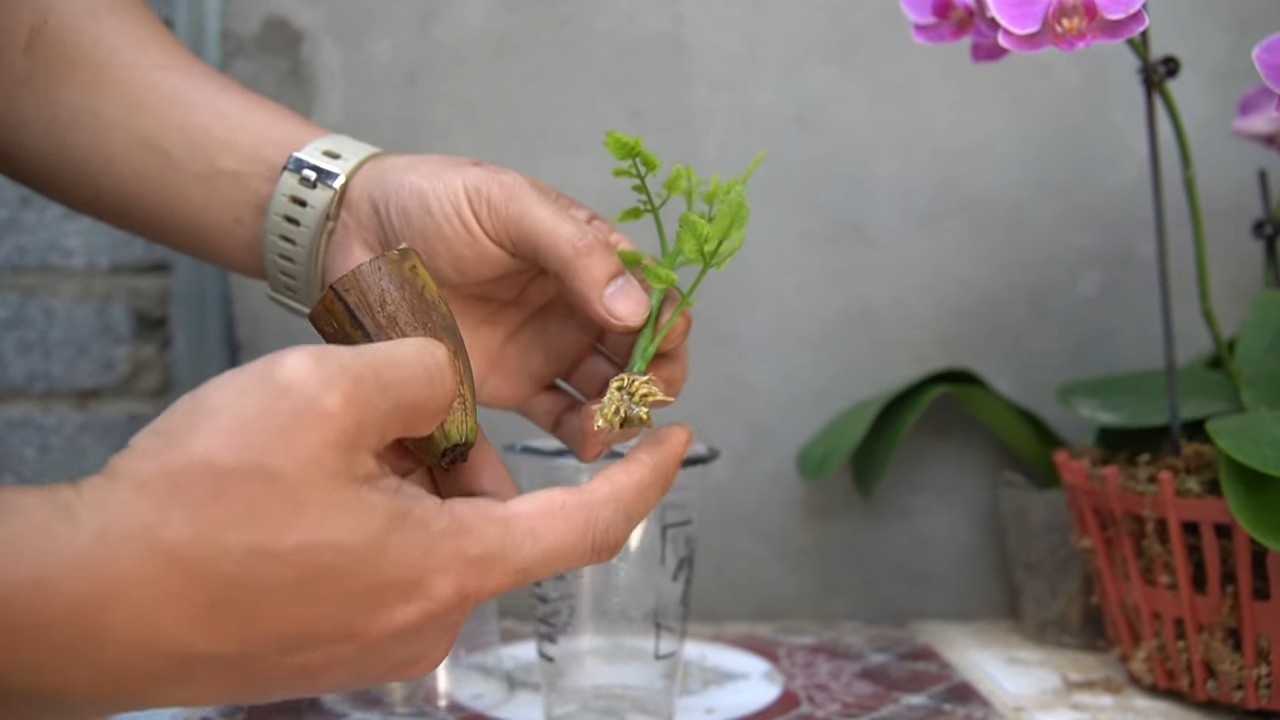
Tomato suckers are those little shoots that grow in the “armpit” where a branch meets the main stem. Many gardeners prune them off to encourage the main plant to focus on fruit production. But guess what? We can turn those suckers into brand new tomato plants!
What You’ll Need:
* A healthy tomato plant with suckers (at least 4-6 inches long)
* Clean pruning shears or a sharp knife
* Rooting hormone (optional, but it speeds things up!)
* Small pots (3-4 inch)
* Potting mix (seed starting mix works great)
* Watering can or spray bottle
* Clear plastic bag or humidity dome (optional, but helpful)
Step-by-Step Instructions:
1. Identify the Suckers: Look for the small shoots growing between the main stem and the branches. Choose suckers that are at least 4-6 inches long and look healthy and vigorous. Avoid any that are yellowing or damaged.
2. Carefully Remove the Suckers: Using your clean pruning shears or knife, carefully cut the sucker off the main plant. Make the cut as close to the main stem as possible without damaging it. I like to make a clean, angled cut.
3. Prepare the Suckers: Remove the lower leaves from the sucker, leaving only the top few leaves intact. This will prevent the leaves from rotting when they’re buried in the soil.
4. Apply Rooting Hormone (Optional): Dip the cut end of the sucker into rooting hormone powder or liquid. This will encourage root development. I find it makes a noticeable difference, but it’s not absolutely necessary.
5. Plant the Suckers: Fill your small pots with potting mix. Make a small hole in the center of the soil and gently insert the cut end of the sucker into the hole. Make sure the lowest leaves are just above the soil surface.
6. Water Thoroughly: Water the newly planted suckers thoroughly, making sure the soil is evenly moist.
7. Create a Humid Environment (Optional): Place the pots inside a clear plastic bag or under a humidity dome. This will help to keep the humidity high, which is essential for root development. If you use a plastic bag, make sure to poke a few holes in it for ventilation.
8. Place in a Warm, Bright Location: Place the pots in a warm, bright location, but avoid direct sunlight, which can scorch the leaves. A windowsill or under grow lights works well.
9. Monitor and Water: Keep the soil consistently moist, but not soggy. Check the moisture level daily and water as needed. If you’re using a plastic bag or humidity dome, open it up for a few minutes each day to allow for air circulation.
10. Wait for Roots to Develop: It usually takes about 1-2 weeks for roots to develop. You’ll know the suckers have rooted when you see new growth. You can also gently tug on the sucker – if it resists, it means roots have formed.
11. Transplant: Once the suckers have developed a good root system, you can transplant them into larger pots or directly into your garden. Harden them off gradually by exposing them to outdoor conditions for a few hours each day before transplanting.
Method 2: Propagating from Tomato Stem Cuttings
This method is similar to propagating from suckers, but instead of using suckers, we’ll be using stem cuttings from the main plant. This is a great way to propagate tomatoes if you don’t have any suckers available or if you want to propagate a specific variety.
What You’ll Need:
* A healthy tomato plant
* Clean pruning shears or a sharp knife
* Rooting hormone (optional)
* Small pots (3-4 inch)
* Potting mix
* Watering can or spray bottle
* Clear plastic bag or humidity dome (optional)
Step-by-Step Instructions:
1. Select a Healthy Stem: Choose a healthy stem from your tomato plant that is about 4-6 inches long. The stem should be green and flexible, not woody.
2. Take the Cutting: Using your clean pruning shears or knife, cut the stem just below a leaf node (the point where a leaf grows from the stem).
3. Prepare the Cutting: Remove the lower leaves from the cutting, leaving only the top few leaves intact. This will prevent the leaves from rotting when they’re buried in the soil.
4. Apply Rooting Hormone (Optional): Dip the cut end of the cutting into rooting hormone powder or liquid.
5. Plant the Cutting: Fill your small pots with potting mix. Make a small hole in the center of the soil and gently insert the cut end of the cutting into the hole. Make sure the lowest leaves are just above the soil surface.
6. Water Thoroughly: Water the newly planted cutting thoroughly, making sure the soil is evenly moist.
7. Create a Humid Environment (Optional): Place the pots inside a clear plastic bag or under a humidity dome.
8. Place in a Warm, Bright Location: Place the pots in a warm, bright location, but avoid direct sunlight.
9. Monitor and Water: Keep the soil consistently moist, but not soggy.
10. Wait for Roots to Develop: It usually takes about 1-2 weeks for roots to develop.
11. Transplant: Once the cuttings have developed a good root system, you can transplant them into larger pots or directly into your garden. Remember to harden them off first!
Troubleshooting Tips
* Cuttings are wilting: This is usually a sign that the humidity is too low. Make sure you’re providing a humid environment by using a plastic bag or humidity dome. You can also mist the leaves with water several times a day.
* Cuttings are rotting: This is usually a sign that the soil is too wet or that there’s not enough air circulation. Make sure the soil is well-draining and that you’re not overwatering. If you’re using a plastic bag or humidity dome, open it up for a few minutes each day to allow for air circulation.
* Cuttings are not rooting: This could be due to a number of factors, such as low humidity, cold temperatures, or poor-quality cuttings. Make sure you’re providing the cuttings with the right conditions and that you’re using healthy, vigorous cuttings. Using rooting hormone can also help.
Additional Tips for Success
* Choose healthy plants: Start with healthy, disease-free tomato plants for the best results.
* Use clean tools: Always use clean pruning shears or knives to prevent the spread of disease.
* Be patient: It takes time for roots to develop, so be patient and don’t give up!
* Experiment: Try different methods and see what works best for you.
Why Propagate Tomatoes?
There are so many reasons why I love propagating tomatoes!
* Save Money: Instead of buying new tomato plants every year, you can propagate your own from existing plants.
* Clone Your Favorites: If you have a tomato plant that produces particularly delicious or abundant fruit, you can propagate it to ensure you have the same great tomatoes year after year.
* Extend the Growing Season: You can start new tomato plants indoors from cuttings taken from your existing plants, giving you a head start on the growing season.
* Share with Friends: Propagating tomatoes is a great way to share your favorite varieties with friends and family.
* It’s Fun! Honestly, there’s something incredibly satisfying about creating new plants from cuttings. It’s like a little gardening magic!
So there you have it! Two easy and effective methods for propagating tomatoes. Give them a try, and I’m sure you’ll be amazed at how easy it is to multiply your tomato plants. Happy gardening!
Conclusion
So, there you have it! Transforming kitchen scraps into thriving tomato plants is not just a fun experiment; it’s a sustainable and rewarding way to garden. This tomato propagation hack offers a fantastic opportunity to reduce waste, save money, and enjoy the unparalleled flavor of homegrown tomatoes. Forget expensive seedlings or relying solely on store-bought produce. With a little patience and these simple steps, you can cultivate a flourishing tomato patch from the comfort of your own home.
The beauty of this method lies in its adaptability. Feel free to experiment with different tomato varieties. Cherry tomatoes, Roma tomatoes, beefsteak tomatoes – each will offer a unique growing experience and a delightful harvest. Consider the space you have available. If you’re limited on outdoor space, dwarf or determinate varieties are excellent choices for container gardening. You can even try this method indoors with the help of grow lights, extending your growing season and enjoying fresh tomatoes year-round.
Don’t be afraid to tweak the process to suit your specific environment and resources. If you live in a particularly dry climate, you might need to water your seedlings more frequently. If your soil is nutrient-poor, consider amending it with compost or other organic matter. The key is to observe your plants closely and adjust your care accordingly.
Beyond the practical benefits, this tomato propagation hack is also a fantastic way to connect with nature and learn about the life cycle of plants. It’s a rewarding experience to witness a tiny seed or a discarded tomato slice transform into a vibrant, fruit-bearing plant. It’s also a great project to involve children in, teaching them about sustainability, gardening, and the importance of healthy eating.
We wholeheartedly encourage you to give this DIY trick a try. It’s easier than you might think, and the results are well worth the effort. Imagine the satisfaction of serving a salad made with tomatoes you grew yourself, or sharing your homegrown bounty with friends and family.
But don’t just take our word for it! We want to hear about your experiences. Did you try this method? What challenges did you encounter? What successes did you celebrate? Share your tips, tricks, and photos in the comments below. Let’s create a community of tomato-growing enthusiasts and learn from each other. Your insights could inspire others to embark on their own tomato-growing adventures. Happy gardening!
Frequently Asked Questions (FAQ)
1. What types of tomatoes work best for propagation from slices or scraps?
While you can technically propagate any type of tomato from slices or scraps, some varieties tend to be more successful than others. Heirloom varieties, known for their robust genetics, often perform well. Cherry tomatoes and other smaller varieties also tend to sprout more readily. However, don’t let this discourage you from experimenting with your favorite types! The key is to use ripe, healthy tomatoes that haven’t been treated with any chemicals or preservatives. Hybrid varieties may also work, but the resulting plants might not produce fruit that is exactly the same as the parent tomato.
2. How long does it take for tomato seeds to germinate from a slice?
Germination time can vary depending on several factors, including temperature, humidity, and the specific tomato variety. Generally, you can expect to see sprouts emerge within 7 to 14 days. It’s important to maintain consistent moisture and warmth during this period. Covering the container with plastic wrap can help create a humid environment, but be sure to remove it periodically to allow for air circulation and prevent mold growth. Be patient, and don’t give up if you don’t see sprouts immediately. Sometimes, it can take a little longer for the seeds to germinate.
3. What kind of soil should I use for propagating tomato slices?
The ideal soil for propagating tomato slices is a well-draining seed starting mix. This type of mix is typically lightweight and sterile, which helps prevent fungal diseases that can affect young seedlings. You can find seed starting mix at most garden centers or online retailers. Avoid using garden soil, as it can be too heavy and may contain pathogens that can harm your seedlings. If you don’t have seed starting mix, you can create your own by mixing equal parts peat moss, perlite, and vermiculite.
4. How often should I water the tomato slices during propagation?
It’s crucial to keep the soil consistently moist, but not waterlogged, during the propagation process. Water the slices gently whenever the top of the soil feels dry to the touch. Avoid overwatering, as this can lead to root rot. A spray bottle can be helpful for misting the soil without disturbing the developing seedlings. Once the seedlings have emerged, you can gradually reduce the frequency of watering, allowing the soil to dry out slightly between waterings.
5. When should I transplant the tomato seedlings to larger pots or the garden?
The best time to transplant your tomato seedlings is when they have developed several sets of true leaves (the leaves that look like miniature versions of adult tomato leaves) and are about 4-6 inches tall. Before transplanting, harden off the seedlings by gradually exposing them to outdoor conditions for a week or two. This will help them acclimate to the sun, wind, and temperature changes. Choose a sunny location in your garden with well-drained soil. Dig a hole that is slightly larger than the root ball of the seedling, and gently transplant it into the hole. Water thoroughly after transplanting.
6. Can I use this method to propagate tomatoes indoors year-round?
Yes, you can absolutely use this method to propagate tomatoes indoors year-round, especially if you live in a climate with short growing seasons or harsh winters. To successfully grow tomatoes indoors, you’ll need to provide them with adequate light. A sunny south-facing window can work, but supplemental grow lights are often necessary to ensure optimal growth and fruit production. You’ll also need to pollinate the flowers manually, as there won’t be any bees or other insects to do it for you. A small paintbrush can be used to transfer pollen from one flower to another.
7. What are some common problems I might encounter when propagating tomatoes from slices, and how can I fix them?
One common problem is mold growth on the tomato slices. This can be prevented by ensuring good air circulation and avoiding overwatering. If you see mold, remove the affected slice immediately. Another problem is damping off, a fungal disease that can kill young seedlings. To prevent damping off, use sterile seed starting mix and avoid overwatering. If you notice seedlings wilting or collapsing, remove them immediately to prevent the disease from spreading. Finally, seedlings may become leggy (tall and spindly) if they don’t receive enough light. To prevent legginess, provide your seedlings with plenty of light, either from a sunny window or grow lights.
8. Is this tomato propagation hack suitable for all skill levels?
Absolutely! This method is incredibly beginner-friendly and requires no special equipment or expertise. It’s a fantastic way to introduce children to gardening and teach them about plant propagation. Even experienced gardeners can enjoy the simplicity and sustainability of this technique. The key is to follow the basic steps and be patient. With a little bit of care and attention, you can successfully grow your own tomatoes from kitchen scraps.
9. What are the benefits of propagating tomatoes from slices compared to starting from seeds?
While starting from seeds is a common method, propagating from slices offers several advantages. It’s a great way to recycle kitchen waste and reduce your environmental impact. It can also be faster than starting from seeds, as the tomato slices already contain mature plant tissue. Additionally, it allows you to clone your favorite tomato varieties, ensuring that you get the same delicious fruit year after year. However, keep in mind that the success rate of propagating from slices may vary depending on the tomato variety and growing conditions.
10. Can I use this method to propagate other vegetables or fruits?
While this specific method is tailored for tomatoes, the general principle of vegetative propagation can be applied to other vegetables and fruits. For example, you can propagate potatoes from their eyes, onions from their bulbs, and strawberries from their runners. Research the specific propagation methods for each plant to ensure the best results. Experimenting with different propagation techniques is a fun and rewarding way to expand your gardening skills and grow a wider variety of plants.

Leave a Comment