
Small Space Long Bean gardening might seem like a pipe dream, especially if you’re picturing sprawling vines and endless rows. But guess what? You absolutely can cultivate these delicious, prolific beans even if you’re working with a tiny balcony, a petite patio, or just a sunny corner in your yard! For centuries, cultures around the world, particularly in Asia, have treasured long beans, not just for their unique flavor and impressive length, but also for their ability to thrive in diverse climates and limited spaces. Think of the resourceful farmers who maximized every inch of their land, passing down generations of clever gardening techniques – we’re tapping into that same spirit!
Let’s face it, fresh, homegrown vegetables taste infinitely better than anything you can buy at the store. And with rising food costs and a growing desire for sustainable living, learning how to grow your own food, even in a small space, is more important than ever. This DIY guide is packed with simple, effective tricks and hacks that will empower you to successfully grow small space long bean plants, even if you’ve never gardened before. I’m going to show you how to choose the right varieties, optimize your growing conditions, and maximize your yield, all without breaking the bank or needing a huge garden. Get ready to enjoy a bountiful harvest of fresh, flavorful long beans right from your own little urban oasis!
DIY Vertical Long Bean Trellis for Small Spaces
Hey there, fellow gardeners! If you’re anything like me, you’re always looking for ways to maximize your garden space, especially when you’re working with a limited area. Long beans, also known as yardlong beans, are fantastic climbers, but they can quickly take over if you don’t provide them with proper support. That’s why I’m so excited to share my DIY vertical long bean trellis project – it’s perfect for small spaces and will keep your beans happy and productive!
Materials You’ll Need
Before we dive in, let’s gather our supplies. I’ve tried to keep this project budget-friendly, using materials that are readily available at most hardware stores.
* Bamboo Poles: I recommend at least 6-8 bamboo poles, each about 6-8 feet long. The thickness doesn’t matter too much, but sturdier poles will obviously last longer.
* Twine or Jute Rope: You’ll need a good amount of strong twine or jute rope to create the trellis netting. Natural fibers are great because they’re biodegradable.
* Metal Wire (Optional): For added stability, especially if you live in a windy area, you can use some thin metal wire to reinforce the structure.
* Measuring Tape: Essential for accurate spacing and cutting.
* Scissors or Pruning Shears: For cutting the twine and any stray bamboo bits.
* Gloves: To protect your hands from splinters and dirt.
* Hammer (Optional): If your soil is particularly hard, a hammer can help you drive the bamboo poles into the ground.
* Level (Optional): To ensure your trellis is perfectly vertical.
* Wood Stakes (Optional): For extra support in windy conditions.
Planning Your Trellis Design
Okay, before we start building, let’s think about the design. I’m going to walk you through a simple A-frame trellis, which is sturdy and easy to construct. But feel free to adapt this to your own space and preferences!
* Consider Your Space: Measure the area where you plan to place the trellis. This will determine the width and height of your structure. Remember to leave enough space around the trellis for you to access the plants for watering and harvesting.
* Think About Sunlight: Long beans need plenty of sunlight, so make sure your trellis is positioned in a sunny spot.
* Visualize the Structure: Imagine the A-frame shape. The wider the base, the more stable the trellis will be. The taller the trellis, the more vertical space you’ll have for your beans to climb.
* Number of Plants: Consider how many long bean plants you want to grow. Each plant will need adequate space to climb, so plan accordingly. I usually allow about 6-8 inches between plants.
Building the A-Frame Trellis: Step-by-Step
Alright, let’s get our hands dirty! Here’s how to build the A-frame trellis:
1. Prepare the Bamboo Poles: Inspect your bamboo poles for any sharp edges or splinters. Use your pruning shears to trim off any protruding bits.
2. Create the A-Frame Legs: Take two bamboo poles and lean them against each other, forming an “A” shape. Adjust the angle until you’re happy with the width of the base and the height of the frame. I usually aim for a base width of about 3-4 feet and a height of about 6 feet.
3. Secure the Top: Where the two poles meet at the top, tightly wrap them together with twine or jute rope. Make sure the knot is secure and won’t slip. You can also use metal wire for extra reinforcement if desired. Wrap the wire tightly around the poles several times and twist the ends together to secure it.
4. Repeat for Additional Frames: Depending on the length of your garden bed, create additional A-frames. I usually space them about 4-5 feet apart.
5. Connect the Frames: Now, we need to connect the A-frames to create a stable structure. Take another bamboo pole and lay it horizontally across the top of the A-frames, connecting them together. Secure this horizontal pole to each A-frame with twine or wire.
6. Add Horizontal Supports (Optional): For added stability, especially in windy areas, you can add additional horizontal supports lower down on the A-frames. This will help prevent the trellis from swaying or collapsing.
7. Secure the Base: Now, it’s time to secure the base of the trellis to the ground. This is crucial for preventing the trellis from tipping over.
* Option 1 (Direct Insertion): If your soil is soft enough, you can simply push the bamboo poles directly into the ground. Use a hammer to gently tap them in if needed. Make sure they are firmly planted and won’t easily move.
* Option 2 (Wood Stakes): If your soil is hard or you want extra security, use wood stakes. Drive the stakes into the ground next to the bamboo poles and then tie the poles to the stakes with twine or wire.
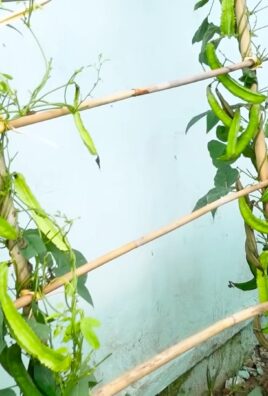
8. Create the Trellis Netting: This is where the long beans will actually climb! Use your twine or jute rope to create a netting between the bamboo poles.
* Vertical Lines: Start by tying a length of twine to the top of one of the A-frames. Run the twine vertically down to the base of the frame and tie it securely. Repeat this process, spacing the vertical lines about 6-8 inches apart.
* Horizontal Lines: Now, weave horizontal lines of twine through the vertical lines, creating a grid pattern. Tie the horizontal lines to the vertical lines at each intersection. This will create a strong and supportive netting for your long beans to climb.
* Adjust Tension: As you create the netting, make sure the twine is taut but not too tight. You don’t want to put too much stress on the bamboo poles.
9. Reinforce Weak Points: Inspect the trellis for any weak points or areas that seem unstable. Reinforce these areas with extra twine or wire.
Planting Your Long Beans
Now that your trellis is built, it’s time to plant your long beans!
1. Prepare the Soil: Make sure the soil around the base of the trellis is loose and well-draining. Amend the soil with compost or other organic matter to provide nutrients for your plants.
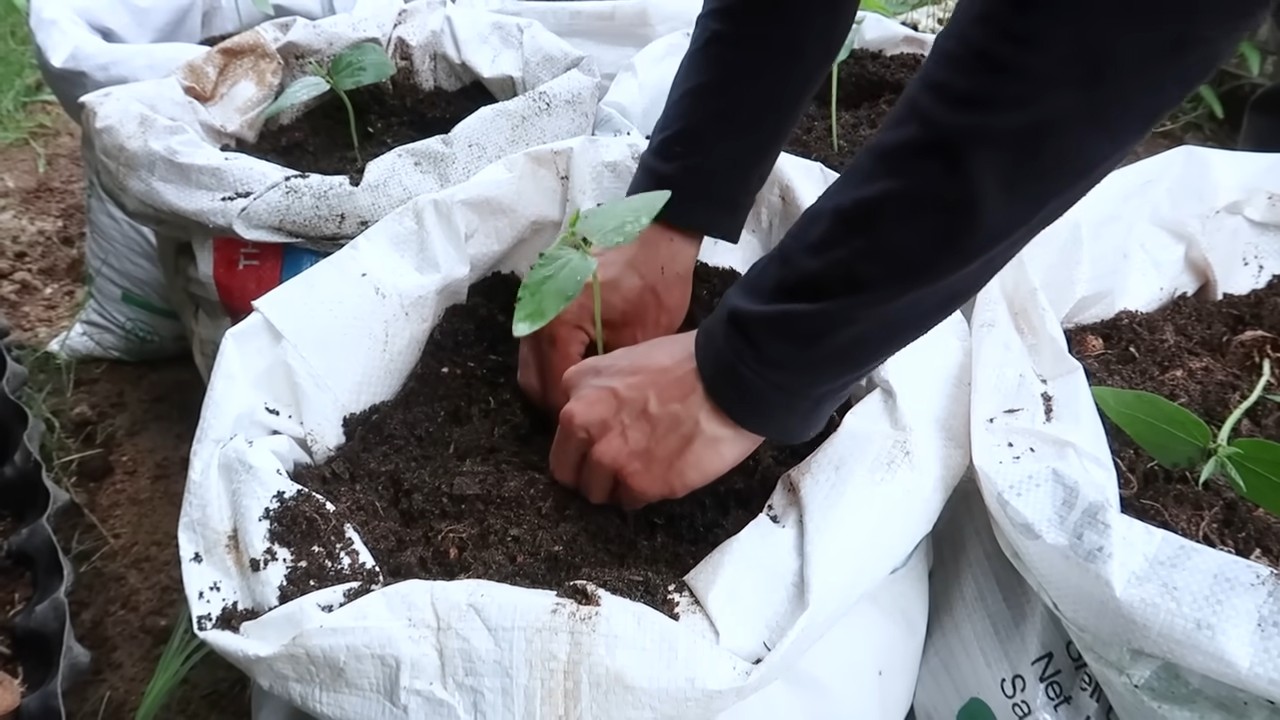
2. Plant the Seeds or Seedlings: Plant your long bean seeds or seedlings at the base of the trellis, spacing them about 6-8 inches apart. Follow the instructions on your seed packet or seedling label for proper planting depth and watering.
3. Water Thoroughly: After planting, water the plants thoroughly.
4. Guide the Vines: As the long bean vines start to grow, gently guide them towards the trellis. You can use small pieces of twine to tie the vines to the trellis if needed. Once they start climbing on their own, they’ll take over!
Maintaining Your Trellis and Plants
A little bit of maintenance will go a long way in ensuring your long bean trellis and plants thrive.
* Water Regularly: Long beans need consistent moisture, especially during hot weather. Water deeply and regularly, especially when the plants are flowering and producing beans.
* Fertilize: Feed your long bean plants with a balanced fertilizer every few weeks to promote healthy growth and abundant bean production.
* Prune: Prune away any dead or diseased leaves or vines. This will help improve air circulation and prevent the spread of disease.
* Monitor for Pests: Keep an eye out for pests such as aphids, bean beetles, and spider mites. Treat any infestations promptly with organic pest control methods.
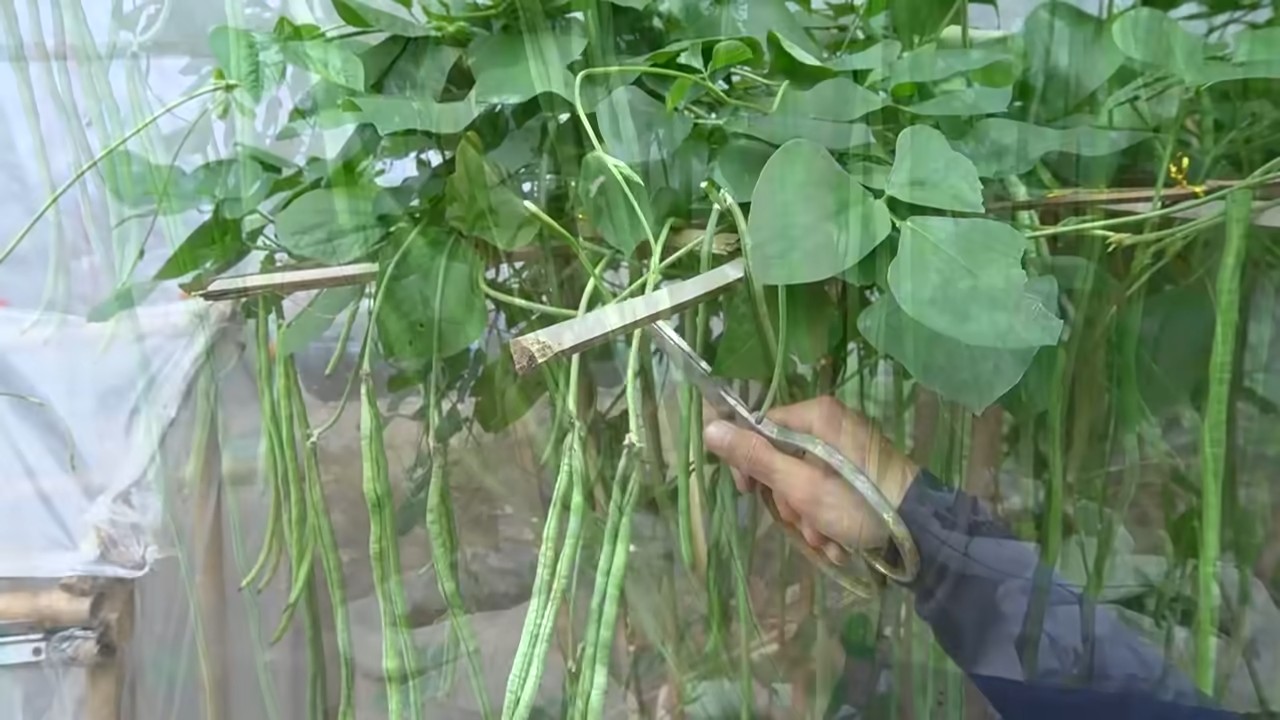
* Harvest Regularly: Harvest your long beans regularly when they are young and tender. This will encourage the plants to produce more beans.
* Check Trellis Stability: Periodically check the stability of your trellis and make any necessary repairs. Tighten loose twine or wire, and reinforce any weak points.
Troubleshooting Tips
Even with the best planning, things can sometimes go wrong. Here are a few troubleshooting tips to help you overcome common challenges:
* Trellis Tipping Over: If your trellis is tipping over, make sure the base is securely anchored to the ground. Use wood stakes for extra support, especially in windy areas.
Hey there, fellow gardeners! If you’re anything like me, you’re always looking for ways to maximize your garden space, especially when you’re working with a limited area. Long beans, also known as yardlong beans, are fantastic climbers, but they can quickly take over if you don’t provide them with proper support. That’s why I’m so excited to share my DIY vertical long bean trellis project – it’s perfect for small spaces and will keep your beans happy and productive!
Materials You’ll Need
Before we dive in, let’s gather our supplies. I’ve tried to keep this project budget-friendly, using materials that are readily available at most hardware stores.
* Bamboo Poles: I recommend at least 6-8 bamboo poles, each about 6-8 feet long. The thickness doesn’t matter too much, but sturdier poles will obviously last longer.
* Twine or Jute Rope: You’ll need a good amount of strong twine or jute rope to create the trellis netting. Natural fibers are great because they’re biodegradable.
* Metal Wire (Optional): For added stability, especially if you live in a windy area, you can use some thin metal wire to reinforce the structure.
* Measuring Tape: Essential for accurate spacing and cutting.
* Scissors or Pruning Shears: For cutting the twine and any stray bamboo bits.
* Gloves: To protect your hands from splinters and dirt.
* Hammer (Optional): If your soil is particularly hard, a hammer can help you drive the bamboo poles into the ground.
* Level (Optional): To ensure your trellis is perfectly vertical.
* Wood Stakes (Optional): For extra support in windy conditions.
Planning Your Trellis Design
Okay, before we start building, let’s think about the design. I’m going to walk you through a simple A-frame trellis, which is sturdy and easy to construct. But feel free to adapt this to your own space and preferences!
* Consider Your Space: Measure the area where you plan to place the trellis. This will determine the width and height of your structure. Remember to leave enough space around the trellis for you to access the plants for watering and harvesting.
* Think About Sunlight: Long beans need plenty of sunlight, so make sure your trellis is positioned in a sunny spot.
* Visualize the Structure: Imagine the A-frame shape. The wider the base, the more stable the trellis will be. The taller the trellis, the more vertical space you’ll have for your beans to climb.
* Number of Plants: Consider how many long bean plants you want to grow. Each plant will need adequate space to climb, so plan accordingly. I usually allow about 6-8 inches between plants.
Building the A-Frame Trellis: Step-by-Step
Alright, let’s get our hands dirty! Here’s how to build the A-frame trellis:
1. Prepare the Bamboo Poles: Inspect your bamboo poles for any sharp edges or splinters. Use your pruning shears to trim off any protruding bits.
2. Create the A-Frame Legs: Take two bamboo poles and lean them against each other, forming an “A” shape. Adjust the angle until you’re happy with the width of the base and the height of the frame. I usually aim for a base width of about 3-4 feet and a height of about 6 feet.
3. Secure the Top: Where the two poles meet at the top, tightly wrap them together with twine or jute rope. Make sure the knot is secure and won’t slip. You can also use metal wire for extra reinforcement if desired. Wrap the wire tightly around the poles several times and twist the ends together to secure it.
4. Repeat for Additional Frames: Depending on the length of your garden bed, create additional A-frames. I usually space them about 4-5 feet apart.
5. Connect the Frames: Now, we need to connect the A-frames to create a stable structure. Take another bamboo pole and lay it horizontally across the top of the A-frames, connecting them together. Secure this horizontal pole to each A-frame with twine or wire.
6. Add Horizontal Supports (Optional): For added stability, especially in windy areas, you can add additional horizontal supports lower down on the A-frames. This will help prevent the trellis from swaying or collapsing.
7. Secure the Base: Now, it’s time to secure the base of the trellis to the ground. This is crucial for preventing the trellis from tipping over.
* Option 1 (Direct Insertion): If your soil is soft enough, you can simply push the bamboo poles directly into the ground. Use a hammer to gently tap them in if needed. Make sure they are firmly planted and won’t easily move.
* Option 2 (Wood Stakes): If your soil is hard or you want extra security, use wood stakes. Drive the stakes into the ground next to the bamboo poles and then tie the poles to the stakes with twine or wire.
8. Create the Trellis Netting: This is where the long beans will actually climb! Use your twine or jute rope to create a netting between the bamboo poles.
* Vertical Lines: Start by tying a length of twine to the top of one of the A-frames. Run the twine vertically down to the base of the frame and tie it securely. Repeat this process, spacing the vertical lines about 6-8 inches apart.
* Horizontal Lines: Now, weave horizontal lines of twine through the vertical lines, creating a grid pattern. Tie the horizontal lines to the vertical lines at each intersection. This will create a strong and supportive netting for your long beans to climb.
* Adjust Tension: As you create the netting, make sure the twine is taut but not too tight. You don’t want to put too much stress on the bamboo poles.
9. Reinforce Weak Points: Inspect the trellis for any weak points or areas that seem unstable. Reinforce these areas with extra twine or wire.
Planting Your Long Beans
Now that your trellis is built, it’s time to plant your long beans!
1. Prepare the Soil: Make sure the soil around the base of the trellis is loose and well-draining. Amend the soil with compost or other organic matter to provide nutrients for your plants.
2. Plant the Seeds or Seedlings: Plant your long bean seeds or seedlings at the base of the trellis, spacing them about 6-8 inches apart. Follow the instructions on your seed packet or seedling label for proper planting depth and watering.
3. Water Thoroughly: After planting, water the plants thoroughly.
4. Guide the Vines: As the long bean vines start to grow, gently guide them towards the trellis. You can use small pieces of twine to tie the vines to the trellis if needed. Once they start climbing on their own, they’ll take over!
Maintaining Your Trellis and Plants
A little bit of maintenance will go a long way in ensuring your long bean trellis and plants thrive.
* Water Regularly: Long beans need consistent moisture, especially during hot weather. Water deeply and regularly, especially when the plants are flowering and producing beans.
* Fertilize: Feed your long bean plants with a balanced fertilizer every few weeks to promote healthy growth and abundant bean production.
* Prune: Prune away any dead or diseased leaves or vines. This will help improve air circulation and prevent the spread of disease.
* Monitor for Pests: Keep an eye out for pests such as aphids, bean beetles, and spider mites. Treat any infestations promptly with organic pest control methods.
* Harvest Regularly: Harvest your long beans regularly when they are young and tender. This will encourage the plants to produce more beans.
* Check Trellis Stability: Periodically check the stability of your trellis and make any necessary repairs. Tighten loose twine or wire, and reinforce any weak points.
Troubleshooting Tips
Even with the best planning, things can sometimes go wrong. Here are a few troubleshooting tips to help you overcome common challenges:
* Trellis Tipping Over: If your trellis is tipping over, make sure the base is securely anchored to the ground. Use wood stakes for extra support, especially in windy areas.
* Plants Not Climbing: If your long bean vines are not climbing the trellis, gently guide them towards the netting and tie them to the trellis with twine.
* Pest Infestations: If you have a pest infestation, try using organic pest control methods such as insecticidal soap or neem oil.
* Yellowing Leaves: Yellowing leaves can be a sign of nutrient deficiency. Fertilize your plants with a balanced fertilizer.
* Poor Bean Production: Poor bean production can be caused by a variety of factors, including lack of sunlight, poor soil, or inadequate watering. Make
Conclusion
So, there you have it! Growing long beans in small spaces doesn’t have to be a pipe dream. This DIY trick, utilizing readily available materials and a bit of ingenuity, unlocks the potential for a bountiful harvest even if you’re limited to a balcony, patio, or tiny garden. We’ve shown you how to create a vertical growing system that maximizes space and provides the support these vigorous climbers need to thrive.
But why is this DIY approach a must-try? Beyond the obvious space-saving benefits, it offers a level of control and customization that traditional gardening often lacks. You can tailor the size and design of your container to perfectly fit your available area and aesthetic preferences. You’re also in complete control of the soil composition, ensuring your long beans receive the optimal nutrients for healthy growth and delicious, tender pods. Plus, let’s be honest, there’s a unique satisfaction in building something yourself and watching it flourish.
This method isn’t just about replicating our exact setup, though. Feel free to experiment and adapt it to your specific needs and resources. Consider using different types of containers, such as repurposed buckets or even grow bags. You could also explore various trellising options, from simple bamboo stakes to more elaborate wire structures. For those in particularly sunny locations, consider adding a shade cloth to protect your long beans from scorching. And if you’re feeling adventurous, try companion planting! Marigolds, basil, and nasturtiums are all known to deter pests and attract beneficial insects, creating a healthier and more productive growing environment for your long beans.
Don’t be afraid to get creative and personalize your small-space long bean garden!
The key takeaway is that growing long beans in a small space is entirely achievable with a little planning and the right DIY approach. It’s a rewarding experience that connects you with your food, promotes sustainable practices, and adds a touch of green to even the most urban environments.
We wholeheartedly encourage you to give this DIY trick a try. Start small, experiment with different techniques, and most importantly, have fun! We’re confident that you’ll be amazed at the abundance you can cultivate in even the smallest of spaces.
And once you’ve harvested your first crop of delicious, homegrown long beans, we want to hear all about it! Share your experiences, photos, and tips in the comments below. Let’s build a community of small-space gardeners and inspire others to embrace the joy of growing their own food. Your insights could be invaluable to someone just starting out. So, grab your tools, gather your materials, and get ready to transform your small space into a thriving long bean oasis! Happy gardening!
Frequently Asked Questions (FAQ)
What are the best long bean varieties for small spaces?
While most long bean varieties are vigorous climbers, some are better suited for container gardening than others. Look for varieties that are known for their compact growth habit or shorter pod length. Some popular choices include ‘Yardlong’ (a classic), ‘Chinese Red Noodle’ (adds visual appeal), and ‘Orient Wonder’ (early maturing). Read the seed packet descriptions carefully to understand the plant’s mature size and growth requirements before making your selection. Also, consider bush bean varieties if you want to avoid trellising altogether, although they won’t produce the same length of pods.
How much sunlight do long beans need?
Long beans thrive in full sun, requiring at least 6-8 hours of direct sunlight per day. If you’re growing them indoors or in a partially shaded area, you may need to supplement with artificial lighting to ensure optimal growth and pod production. Insufficient sunlight can lead to leggy growth, reduced flowering, and smaller harvests. Observe your plants closely and adjust their location or lighting as needed.
What type of soil is best for growing long beans in containers?
Long beans prefer well-draining, fertile soil that is rich in organic matter. A good potting mix for containers should consist of a blend of compost, peat moss (or coconut coir), and perlite or vermiculite. Avoid using garden soil in containers, as it can become compacted and poorly drained. You can also amend your potting mix with slow-release fertilizer to provide a steady supply of nutrients throughout the growing season. Regularly test the soil pH and adjust it to be slightly acidic (around 6.0-6.8) for optimal nutrient uptake.
How often should I water my long beans?
Long beans need consistent moisture, especially during hot weather and pod development. Water deeply whenever the top inch of soil feels dry to the touch. Avoid overwatering, as this can lead to root rot. Container-grown plants tend to dry out more quickly than those grown in the ground, so check the soil moisture regularly. Consider using a self-watering container or adding a layer of mulch to help retain moisture.
How do I fertilize my long beans?
Long beans are heavy feeders and benefit from regular fertilization. Start with a slow-release fertilizer at planting time, and then supplement with a liquid fertilizer every 2-3 weeks throughout the growing season. Choose a fertilizer that is high in phosphorus and potassium to promote flowering and pod production. Avoid over-fertilizing with nitrogen, as this can lead to excessive foliage growth at the expense of pod development.
How do I deal with pests and diseases on my long beans?
Long beans can be susceptible to various pests and diseases, including aphids, bean beetles, and fungal infections. Regularly inspect your plants for signs of infestation or disease, and take action promptly. Handpick pests whenever possible, and use insecticidal soap or neem oil for more severe infestations. Ensure good air circulation around your plants to prevent fungal diseases. Consider using organic pest control methods to minimize the use of harmful chemicals.
When and how do I harvest long beans?
Long beans are typically ready to harvest about 60-70 days after planting. Harvest the pods when they are young, tender, and about 12-18 inches long. Use scissors or pruning shears to cut the pods from the vine, being careful not to damage the plant. Regular harvesting encourages continued pod production. Overripe pods can become tough and stringy.
Can I grow long beans indoors?
While it’s possible to grow long beans indoors, it can be challenging to provide them with the necessary sunlight and space. If you choose to grow them indoors, select a sunny location or supplement with artificial lighting. You’ll also need a large container and a sturdy trellis to support their growth. Be prepared to hand-pollinate the flowers if there are no pollinators present indoors.
What are some creative ways to use long beans in cooking?
Long beans are a versatile vegetable that can be used in a variety of dishes. They can be stir-fried, steamed, boiled, grilled, or added to soups and stews. They pair well with Asian flavors such as soy sauce, ginger, garlic, and chili. You can also use them in salads, casseroles, and even as a pizza topping. Get creative and experiment with different recipes to find your favorite ways to enjoy this delicious vegetable.
How can I save seeds from my long beans for next year?
Saving seeds from your long beans is a great way to ensure a continuous supply of seeds for future plantings. Allow a few pods to mature completely on the vine until they are dry and brown. Remove the seeds from the pods and allow them to dry thoroughly for several days. Store the seeds in an airtight container in a cool, dark, and dry place. Label the container with the variety and date of harvest.
Leave a Comment