
Growing Marigolds From Seed is easier than you might think, and I’m here to show you how! Have you ever admired those vibrant, cheerful blooms adding pops of sunshine to gardens and wondered if you could cultivate them yourself? Well, wonder no more! This DIY guide will unlock the secrets to successfully growing marigolds from seed, even if you’re a complete beginner.
Marigolds have a rich history, dating back to ancient Aztec cultures who used them for medicinal and ceremonial purposes. Their bright colors and pungent scent have made them a beloved flower across the globe for centuries. Beyond their beauty, marigolds are also incredibly beneficial for your garden. They act as natural pest repellents, protecting your precious plants from unwanted visitors.
Let’s face it, gardening can sometimes feel overwhelming, especially when you’re dealing with pests or struggling to get your plants to thrive. That’s where this DIY trick comes in! By learning how to growing marigolds from seed, you’re not just adding beauty to your space; you’re also creating a healthier, more resilient garden ecosystem. Plus, there’s nothing quite as satisfying as watching a tiny seed transform into a vibrant, blooming flower, all thanks to your own efforts. So, grab your gardening gloves, and let’s get started on this rewarding journey together!
“`html
Growing Marigolds From Seed: A Beginner’s Guide
Hey there, fellow gardening enthusiasts! I’m so excited to share my experience with growing marigolds from seed. It’s a surprisingly easy and rewarding process, and trust me, nothing beats the vibrant colors and cheerful blooms of homegrown marigolds. Plus, they’re fantastic for attracting pollinators and deterring pests in your garden! Let’s dive in!
Choosing Your Marigold Variety
Before we get our hands dirty, let’s talk about choosing the right marigold variety. There are two main types: African marigolds (also known as American marigolds) and French marigolds.
* **African Marigolds (Tagetes erecta):** These are the giants of the marigold world, growing up to 3 feet tall with large, pom-pom-like flowers. They come in shades of yellow, orange, and gold. If you want a bold statement in your garden, these are your go-to.
* **French Marigolds (Tagetes patula):** These are smaller and bushier, typically reaching 6-12 inches in height. They have smaller, more delicate flowers, often with intricate patterns and bi-color combinations. They’re perfect for borders, containers, and edging.
* Signet Marigolds (Tagetes tenuifolia): These are less common but offer a unique charm. They have finely divided foliage and edible flowers with a citrusy flavor. They’re great for adding a touch of whimsy to your garden and salads!
Consider your garden space, desired flower size, and color preferences when making your choice. I personally love a mix of French and African marigolds for a diverse and colorful display.
Materials You’ll Need
Okay, let’s gather our supplies. Here’s what you’ll need to successfully grow marigolds from seed:
* **Marigold Seeds:** Choose your favorite variety from a reputable seed supplier.
* **Seed Starting Trays or Small Pots:** These will be your nurseries for the seedlings.
* **Seed Starting Mix:** This is a light and airy soil mix specifically formulated for seed germination. Don’t use regular garden soil, as it can be too heavy and compact.
* **Watering Can or Spray Bottle:** For gentle watering.
* **Grow Lights (Optional):** If you don’t have a sunny windowsill, grow lights will provide the necessary light for healthy seedling growth.
* **Heat Mat (Optional):** Marigolds germinate best in warm soil, so a heat mat can speed up the process.
* **Plant Labels:** To keep track of which variety you’re growing.
* **Small Trowel or Spoon:** For transplanting seedlings.
Sowing Your Marigold Seeds
Now for the fun part – planting! Here’s how to sow your marigold seeds:
1. **Prepare Your Seed Starting Trays or Pots:** Fill your trays or pots with seed starting mix, leaving about half an inch of space at the top. Gently tap the trays to settle the soil.
2. **Moisten the Soil:** Water the soil thoroughly until it’s evenly moist but not soggy. You can use a spray bottle or a watering can with a gentle rose attachment.
3. **Sow the Seeds:** Make small indentations in the soil, about ¼ inch deep, using your finger or a pencil. Place one or two seeds in each indentation.
4. **Cover the Seeds:** Gently cover the seeds with a thin layer of seed starting mix.
5. **Water Again:** Lightly water the soil again to ensure good seed-to-soil contact.
6. **Label Your Trays:** Don’t forget to label your trays with the variety of marigold you’re growing and the date you planted them. This will help you keep track of everything.
7. **Provide Warmth and Light:** Place your trays in a warm location, ideally between 70-75°F (21-24°C). If you’re using a heat mat, place the trays on top of it. If you don’t have a sunny windowsill, place the trays under grow lights.
Caring for Your Marigold Seedlings
Once your seeds have germinated (usually within 5-10 days), it’s crucial to provide proper care to ensure healthy seedling growth.
1. **Watering:** Keep the soil consistently moist but not waterlogged. Water when the top inch of soil feels dry to the touch. Avoid overwatering, as this can lead to fungal diseases.
2. **Light:** Provide plenty of light. If you’re using grow lights, keep them on for 14-16 hours per day. If you’re using a windowsill, rotate the trays regularly to ensure even light exposure.
3. **Thinning:** Once your seedlings have developed their first true leaves (the second set of leaves after the initial seed leaves), thin them out by snipping off the weaker seedlings at the soil line. This will give the remaining seedlings more space to grow.
4. **Fertilizing:** After a couple of weeks, start feeding your seedlings with a diluted liquid fertilizer. Use a balanced fertilizer (e.g., 10-10-10) diluted to half strength.
5. **Hardening Off:** Before transplanting your seedlings outdoors, you’ll need to harden them off. This process gradually acclimates them to outdoor conditions. Start by placing the trays outdoors in a sheltered location for a few hours each day, gradually increasing the amount of time they spend outside over the course of a week or two.
Transplanting Your Marigold Seedlings
Once your seedlings are about 4-6 inches tall and the danger of frost has passed, it’s time to transplant them into your garden or containers.
1. **Choose a Sunny Location:** Marigolds thrive in full sun, so choose a location that receives at least 6 hours of direct sunlight per day.
2. **Prepare the Soil:** Amend your garden soil with compost or other organic matter to improve drainage and fertility.
3. **Dig Holes:** Dig holes that are slightly larger than the root balls of your seedlings. Space the holes according to the mature size of your chosen variety. For African marigolds, space them about 12-18 inches apart. For French marigolds, space them about 6-12 inches apart.
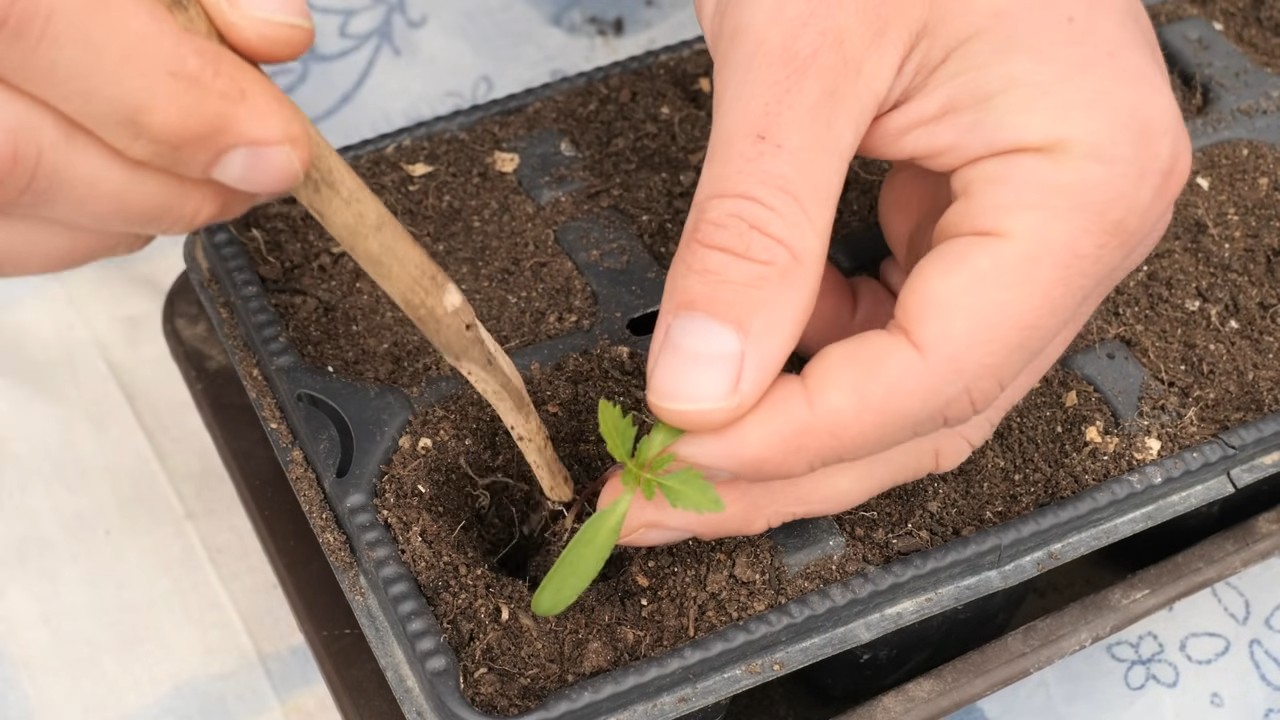
4. **Remove Seedlings from Trays:** Gently remove the seedlings from their trays or pots, being careful not to damage the roots. You can use a small trowel or spoon to help loosen the soil.
5. **Plant the Seedlings:** Place the seedlings in the holes and backfill with soil, gently firming the soil around the base of the plants.
6. **Water Thoroughly:** Water the newly transplanted seedlings thoroughly.
7. **Mulch (Optional):** Apply a layer of mulch around the plants to help retain moisture and suppress weeds.
Caring for Your Marigolds After Transplanting
Congratulations! You’ve successfully transplanted your marigold seedlings. Now, let’s keep them happy and healthy.
1. **Watering:** Water regularly, especially during dry spells. Marigolds prefer consistently moist soil, but avoid overwatering.
2. **Fertilizing:** Continue to fertilize your marigolds every few weeks with a diluted liquid fertilizer.
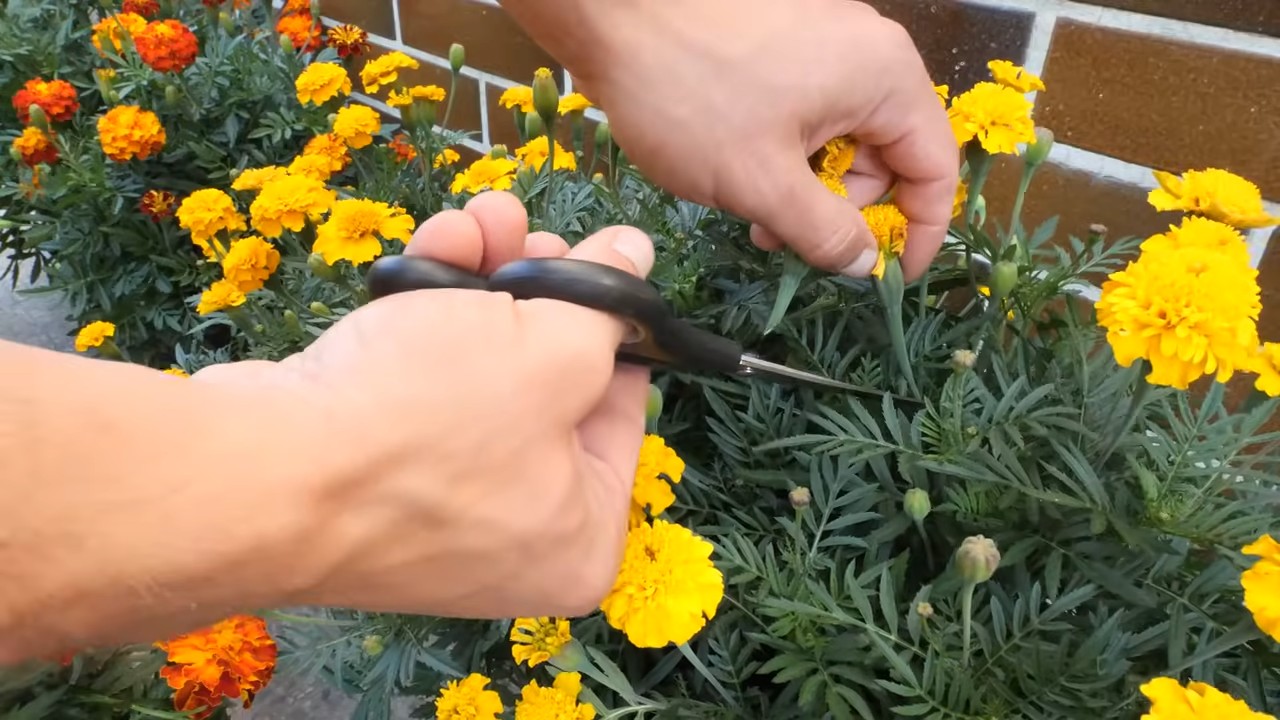
3. **Deadheading:** Deadheading, or removing spent flowers, encourages more blooms. Simply pinch or snip off the faded flowers just below the flower head.
4. **Pest Control:** Marigolds are relatively pest-resistant, but they can occasionally be bothered by aphids or spider mites. If you notice any pests, spray the plants with insecticidal soap or neem oil.
5. **Disease Prevention:** To prevent fungal diseases, avoid overhead watering and ensure good air circulation around the plants.
Troubleshooting
Even with the best care, you might encounter a few challenges along the way. Here are some common problems and how to address them:
* **Leggy Seedlings:** This usually indicates insufficient light. Provide more light by moving the seedlings to a sunnier location or using grow lights.
* **Yellowing Leaves:** This could be caused by overwatering, underwatering, or nutrient deficiencies. Check the soil moisture and adjust your watering accordingly. Fertilize with a balanced fertilizer.
* **Powdery Mildew:** This fungal disease appears as a white, powdery coating on the leaves. Improve air circulation and spray with a fungicide if necessary.
* **Slugs and Snails:** These pests can damage marigold leaves. Use slug bait or handpick them off the plants.
Enjoying Your Marigolds
Now that you’ve nurtured your marigolds from seed to bloom, it’s time to enjoy the fruits (or rather, flowers) of your labor! Marigolds are beautiful additions to any garden, and they also make excellent cut flowers. Bring some of that sunshine indoors and brighten up your home with a vase of homegrown marigolds. Plus, remember those signet marigolds? Toss their petals into salads for a zesty, floral touch!
Growing marigolds
Conclusion
So, there you have it! Growing marigolds from seed isn’t just a cost-effective way to fill your garden with vibrant color; it’s a deeply rewarding experience that connects you to the natural world. From the tiny, unassuming seed to the burst of sunshine that is a fully bloomed marigold, you’ll witness the magic of life unfolding right before your eyes.
But why is this DIY trick a must-try? Beyond the obvious financial benefits, starting your marigolds from seed gives you complete control over the process. You get to choose the specific varieties you want, ensuring a diverse and personalized display in your garden. You can select heirloom varieties with unique colors and petal formations, or opt for compact cultivars perfect for containers and small spaces. This level of customization simply isn’t available when you purchase pre-grown plants from a nursery.
Furthermore, growing from seed allows you to nurture stronger, healthier plants from the very beginning. You can use organic potting mix and avoid the harsh chemicals that are sometimes used in commercial nurseries. This results in marigolds that are more resistant to pests and diseases, and ultimately, more prolific bloomers. Plus, the satisfaction of knowing you nurtured these beauties from seed to flower is unparalleled.
Looking for variations to spice things up? Consider these ideas:
* **Succession Planting:** Sow seeds every few weeks to ensure a continuous bloom throughout the growing season. This way, you’ll always have fresh marigolds to enjoy.
* **Companion Planting:** Marigolds are excellent companion plants for vegetables like tomatoes, peppers, and eggplant. Their scent repels many common garden pests, protecting your precious crops. Plant marigold seeds directly in your vegetable garden or start them indoors and transplant them later.
* **Container Gardening:** Marigolds thrive in containers, making them perfect for balconies, patios, and small gardens. Choose dwarf varieties for smaller pots and taller varieties for larger containers.
* **Dried Flower Crafts:** Once your marigolds have finished blooming, don’t throw them away! Dry the flower heads and use them in potpourri, wreaths, or other craft projects. The vibrant colors will add a touch of sunshine to your home all year round.
* Experiment with different varieties: There are so many different types of marigolds, from the tall African marigolds to the compact French marigolds. Try growing a few different varieties to see which ones you like best.
We wholeheartedly encourage you to give this DIY trick a try. It’s easier than you might think, and the rewards are well worth the effort. Imagine your garden bursting with vibrant marigolds, all thanks to your own two hands.
And now, we want to hear from you! Have you tried growing marigolds from seed before? What are your favorite varieties? Do you have any tips or tricks to share? Please leave a comment below and let us know about your experience. Your insights could help other gardeners succeed in their own marigold-growing adventures. Let’s create a community of passionate gardeners, all sharing our love for these cheerful and beneficial flowers. Embrace the joy of **growing marigolds from seed** and transform your garden into a vibrant oasis!
Frequently Asked Questions (FAQ)
Q: How long does it take for marigold seeds to germinate?
A: Marigold seeds typically germinate within 5 to 14 days, depending on the temperature and moisture levels. Warmer temperatures (around 70-75°F or 21-24°C) will encourage faster germination. Make sure the soil is consistently moist but not waterlogged. Using a heat mat can also speed up the germination process, especially in cooler climates.
Q: What kind of soil is best for growing marigolds from seed?
A: Marigolds aren’t particularly fussy about soil, but they thrive in well-draining soil that is rich in organic matter. A good quality seed starting mix is ideal for starting seeds indoors. Once the seedlings are ready to be transplanted, you can use a general-purpose potting mix or amend your garden soil with compost or other organic matter. Avoid heavy clay soils, as they can become waterlogged and lead to root rot.
Q: How much sunlight do marigolds need?
A: Marigolds need at least six hours of direct sunlight per day to thrive. They can tolerate some partial shade, but they will bloom more profusely in full sun. If you’re growing marigolds indoors, place them near a sunny window or use grow lights to provide adequate light. Insufficient sunlight can result in leggy plants with fewer blooms.
Q: When is the best time to plant marigold seeds?
A: You can start marigold seeds indoors 6-8 weeks before the last expected frost in your area. This will give you a head start on the growing season. Alternatively, you can sow seeds directly into the garden after the last frost, once the soil has warmed up. In warmer climates, you can sow seeds directly into the garden in early spring or even late summer for a fall bloom.
Q: How often should I water marigold seedlings?
A: Keep the soil consistently moist but not waterlogged. Water when the top inch of soil feels dry to the touch. Avoid overwatering, as this can lead to damping off, a fungal disease that can kill seedlings. Use a gentle watering can or spray bottle to avoid disturbing the delicate seedlings.
Q: Do I need to fertilize marigolds?
A: Marigolds are not heavy feeders, but they will benefit from occasional fertilization. Use a balanced fertilizer diluted to half strength every few weeks during the growing season. Avoid over-fertilizing, as this can lead to excessive foliage growth at the expense of blooms.
Q: How do I prevent pests and diseases from affecting my marigolds?
A: Marigolds are relatively pest-resistant, but they can be susceptible to spider mites, aphids, and powdery mildew. To prevent these problems, ensure good air circulation around the plants, avoid overwatering, and inspect the plants regularly for signs of pests or diseases. If you notice any problems, treat them promptly with an appropriate insecticide or fungicide. Companion planting with herbs like basil and rosemary can also help repel pests.
Q: Can I save seeds from my marigolds to plant next year?
A: Yes, you can save seeds from your marigolds to plant next year. Allow the flower heads to dry completely on the plant. Once they are dry, remove the petals and collect the seeds from the center of the flower head. Store the seeds in a cool, dry place until next spring. Keep in mind that hybrid varieties may not produce true-to-type seeds, so you may not get the same results as the parent plant.
Q: What are the benefits of growing marigolds in my garden?
A: Marigolds offer numerous benefits to the garden. They are excellent companion plants for vegetables, as their scent repels many common pests, such as nematodes, aphids, and whiteflies. They also attract beneficial insects, such as ladybugs and hoverflies, which prey on garden pests. Marigolds can also help improve soil health by suppressing weeds and adding organic matter to the soil. Plus, they add a splash of vibrant color to your garden!


Leave a Comment