
Effortless way to grow carrots? Yes, you read that right! Imagine plucking vibrant, sweet carrots straight from your own backyard, without back-breaking labor or constant worry. Sounds like a dream, doesn’t it? Well, it doesn’t have to be! For centuries, humans have cultivated carrots, tracing their origins back to Afghanistan. They weren’t always the bright orange delights we know today, but their nutritional value and versatility have always been appreciated.
But let’s be honest, growing carrots can sometimes feel like a gamble. Poor germination, pesky pests, and rocky soil can all conspire to leave you with stunted, misshapen roots. That’s where our DIY tricks and hacks come in! I’m going to share some game-changing techniques that will transform your carrot-growing experience.
Why do you need these tips? Because everyone deserves the satisfaction of harvesting their own delicious, homegrown produce. Plus, knowing exactly where your food comes from and how it was grown is incredibly empowering. So, get ready to discover an effortless way to grow carrots, even if you’re a complete beginner. Let’s ditch the gardening frustrations and unlock the secrets to a bountiful carrot harvest!
Effortless Carrots: The No-Dig, Container Gardening Method
Hey there, fellow garden enthusiasts! Are you dreaming of pulling up plump, juicy carrots from your own backyard, but dread the thought of back-breaking digging and weeding? Well, I’ve got fantastic news! I’m going to share my super-easy, no-dig container gardening method for growing carrots that’s perfect for beginners and seasoned gardeners alike. This method minimizes effort, maximizes yield, and lets you grow carrots even if you have limited space or poor soil. Let’s get started!
What You’ll Need
Before we dive into the planting process, let’s gather our supplies. This is a pretty straightforward project, so the list is relatively short:
* A Large Container: This is key! Carrots need plenty of vertical space to grow properly. I recommend a container that’s at least 12 inches deep, but 18-24 inches is even better. The wider the container, the more carrots you can grow. Think large pots, raised beds (if you don’t want to dig into the ground), or even repurposed storage bins. Just make sure it has drainage holes!
* High-Quality Potting Mix: Don’t skimp on this! Carrots need loose, well-draining soil to thrive. Avoid using garden soil directly, as it can be too heavy and compacted. I prefer a mix specifically formulated for vegetables, or you can create your own by combining equal parts compost, peat moss (or coconut coir), and perlite or vermiculite.
* Carrot Seeds: Choose your favorite variety! Nantes are a classic choice, but there are also shorter, round varieties like Parisian that are perfect for shallower containers. Consider trying a colorful mix for a fun harvest!
* Watering Can or Hose: For keeping your carrots hydrated.
* Optional: Slow-Release Fertilizer: This will give your carrots a boost of nutrients throughout the growing season.
* Optional: Horticultural Sand: Adding a bit of sand to the top layer of soil can help with drainage and prevent the carrot tops from turning green.
* Optional: Seed Starting Tray: If you prefer to start your seeds indoors.
Preparing Your Container
This step is crucial for creating the perfect environment for your carrots to flourish.
1. Clean Your Container: If you’re using a previously used container, give it a good scrub with soap and water to remove any dirt or debris. This will help prevent the spread of diseases.
2. Ensure Proper Drainage: Make sure your container has adequate drainage holes. If not, drill a few more. Carrots hate sitting in soggy soil.
3. Fill with Potting Mix: Fill your container with the high-quality potting mix, leaving about an inch or two of space at the top. Gently pat down the soil to remove any air pockets.
4. Optional: Incorporate Slow-Release Fertilizer: If you’re using slow-release fertilizer, mix it into the top few inches of the potting mix according to the package directions.
Sowing Your Carrot Seeds
Now for the fun part – planting those tiny seeds that will eventually become delicious carrots!
1. Water the Soil: Before planting, thoroughly water the potting mix until it’s evenly moist but not soggy. This will help the seeds germinate.
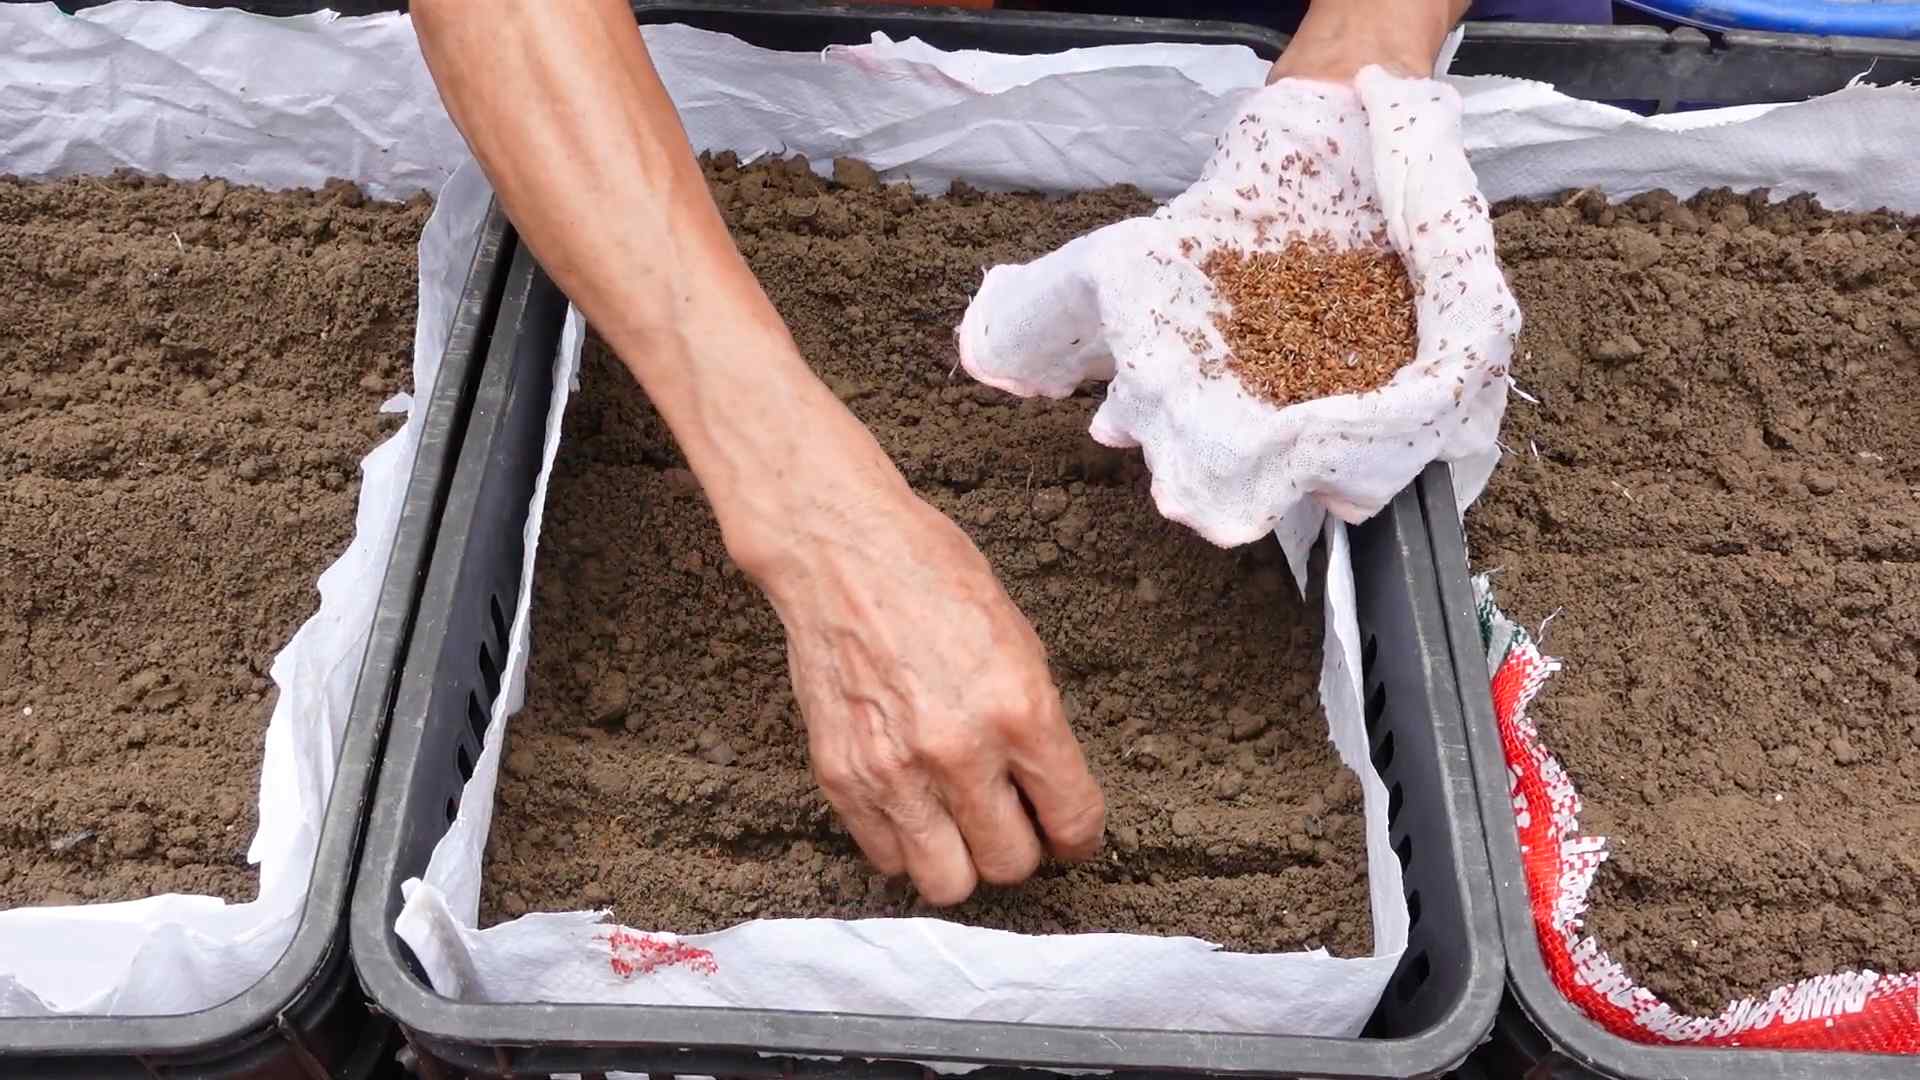
2. Sow the Seeds: Carrot seeds are tiny, so it’s easy to overcrowd them. I like to sprinkle the seeds thinly across the surface of the soil, spacing them about 1-2 inches apart. You can also use a seed dispenser for more precise placement.
3. Cover the Seeds: Gently cover the seeds with a thin layer (about ¼ inch) of potting mix or horticultural sand. This will help keep them moist and protected.
4. Water Again: Lightly water the surface of the soil again, being careful not to dislodge the seeds. I recommend using a gentle spray nozzle or a watering can with a rose attachment.
5. Label Your Container: Don’t forget to label your container with the date and the variety of carrots you planted. This will help you keep track of your progress.
Caring for Your Carrot Seedlings
This is where patience comes in! It can take anywhere from 7 to 21 days for carrot seeds to germinate, depending on the temperature and moisture levels.
1. Keep the Soil Moist: The most important thing during germination is to keep the soil consistently moist. Check the soil daily and water as needed. Avoid letting the soil dry out completely, but also avoid overwatering, which can lead to rot.
2. Provide Sunlight: Once the seedlings emerge, they’ll need plenty of sunlight to grow. Place your container in a location that receives at least 6-8 hours of direct sunlight per day. If you don’t have enough sunlight, you can supplement with grow lights.
3. Thin the Seedlings: Once the seedlings are about 2 inches tall, it’s time to thin them out. This is crucial for giving the remaining carrots enough space to grow. Gently pull out the weaker seedlings, leaving the strongest ones spaced about 2-3 inches apart. Don’t be afraid to thin them aggressively – it’s better to have fewer, larger carrots than a crowded container of small ones.
4. Water Regularly: Continue to water your carrots regularly, especially during hot, dry weather. Water deeply and thoroughly, allowing the water to soak into the soil.
5. Fertilize (Optional): If you didn’t use slow-release fertilizer, you can start feeding your carrots with a liquid fertilizer diluted to half strength every 2-3 weeks. Choose a fertilizer that’s high in phosphorus and potassium, which are essential for root development.
6. Weed (If Necessary): Even in a container garden, weeds can sometimes pop up. Remove any weeds as soon as you see them to prevent them from competing with your carrots for nutrients and water.
Protecting Your Carrots
While container gardening minimizes some pest and disease issues, it’s still important to be vigilant.
1. Watch Out for Pests: Common carrot pests include carrot rust flies, aphids, and nematodes. Inspect your plants regularly for signs of infestation. If you spot any pests, you can try using insecticidal soap or neem oil to control them.
2. Prevent Diseases: Carrots are susceptible to several fungal diseases, such as leaf blight and powdery mildew. To prevent these diseases, avoid overwatering, provide good air circulation, and remove any infected leaves promptly.
3. Protect from Extreme Weather: If you live in an area with extreme weather conditions, such as scorching heat or freezing temperatures, you may need to protect your carrots. You can move the container to a sheltered location or cover it with a frost blanket.
Harvesting Your Carrots
The moment you’ve been waiting for! Harvesting your own homegrown carrots is incredibly rewarding.
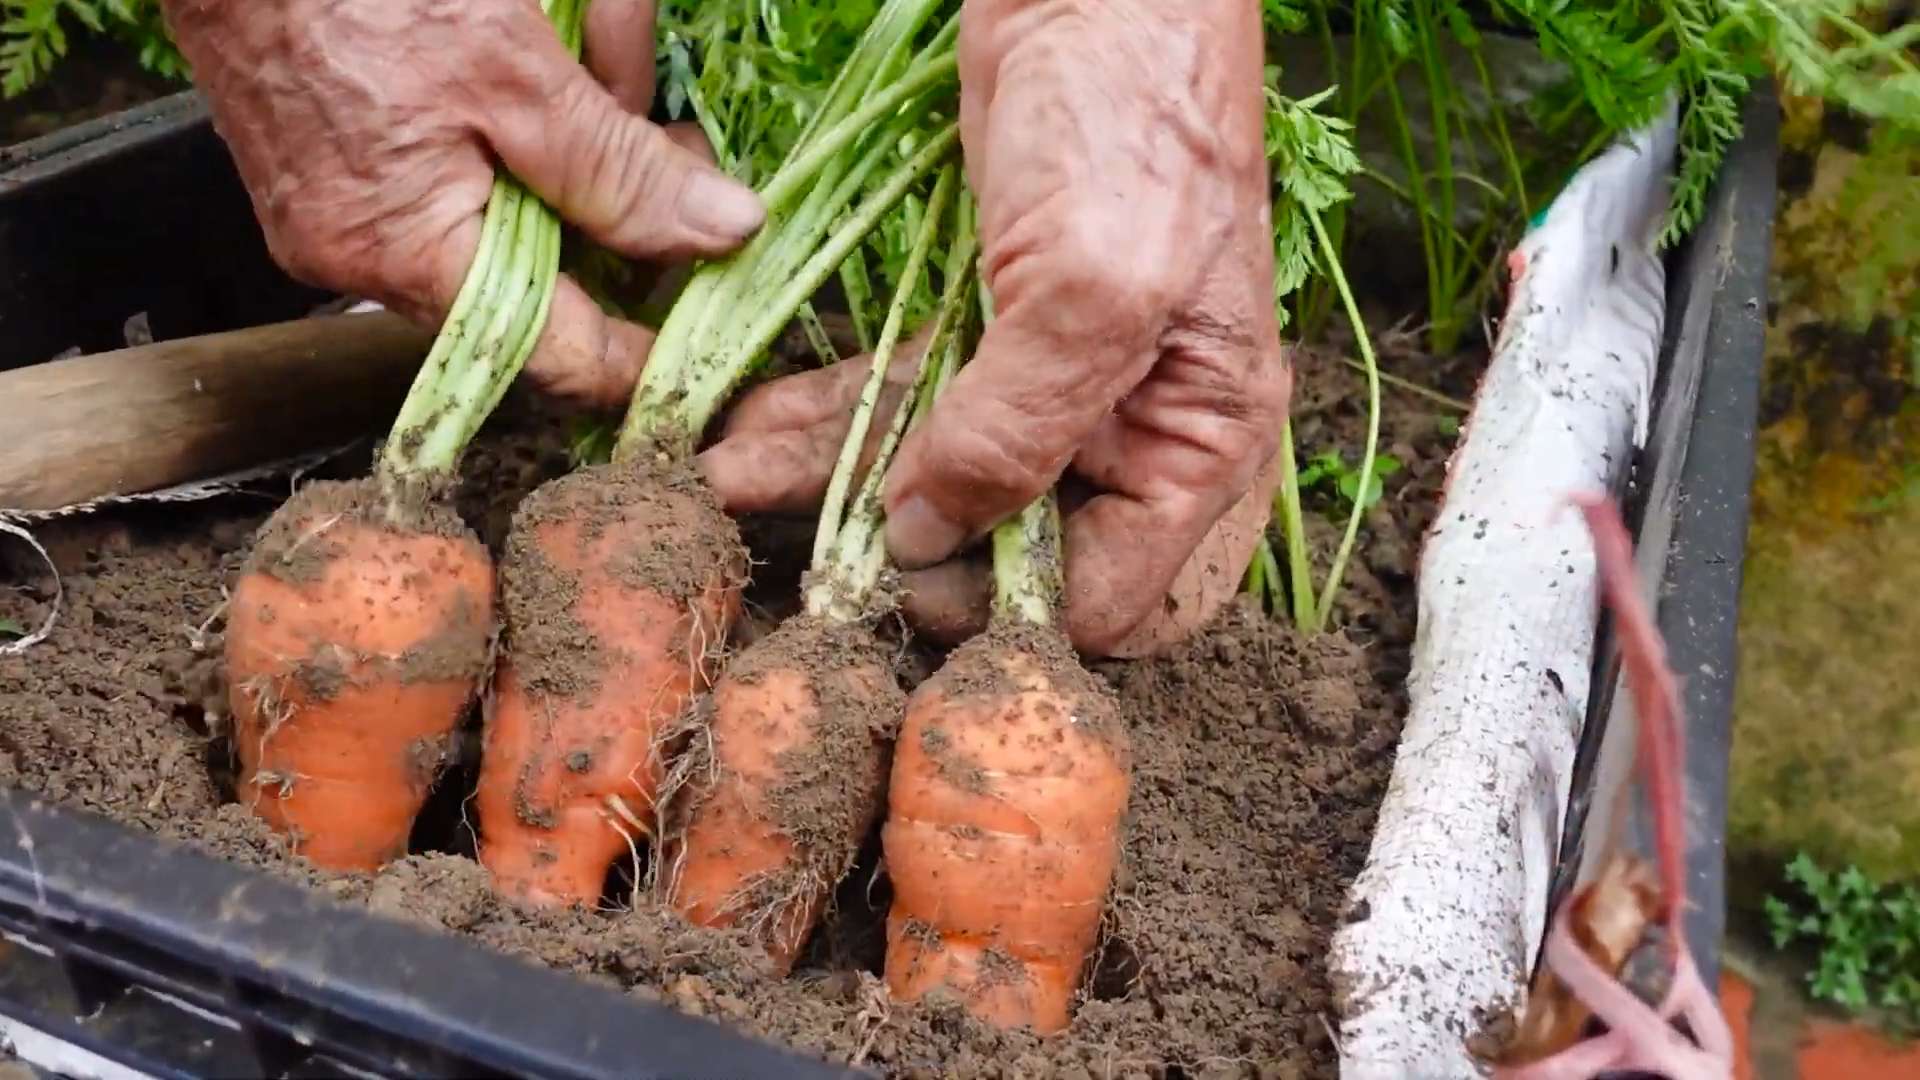
1. Check for Maturity: Carrots are typically ready to harvest 60-80 days after planting, depending on the variety. You can check for maturity by gently pulling back the soil around the base of the carrot to see its size.
2. Harvest Carefully: To harvest your carrots, gently loosen the soil around the base of the plant with a trowel or garden fork. Then, grasp the carrot by the greens and pull it straight up out of the soil. If the carrot is difficult to pull, you may need to loosen the soil further.
3. Wash and Store: After harvesting, wash your carrots thoroughly to remove any dirt. You can store them in the refrigerator for several weeks. To keep them fresh, wrap them in a damp paper towel and place them in a plastic bag.
Troubleshooting
Even with the best planning, sometimes things don’t go exactly as expected. Here are a few common problems you might encounter and how to fix them:
* Poor Germination: If your carrot seeds aren’t germinating, it could be due to several factors, such as old seeds, dry soil, or cold temperatures. Make sure your seeds are fresh, keep the soil consistently moist, and provide adequate warmth.
* Forked or Stunted Roots: Forked or stunted roots can be caused by compacted soil, rocks, or nematodes. Make sure your potting mix is loose and well-draining, remove any rocks or debris, and consider using a nematode-resistant variety.
* Green Shoulders: Green shoulders occur when the tops of the carrots are exposed to sunlight. To prevent this, make sure to cover the tops of the carrots with soil or mulch.
* Pests and Diseases: As mentioned earlier, pests and diseases can be a problem. Inspect your plants regularly and take action promptly if you spot any issues.
Tips for Success
Here are a few extra tips to help you grow the best carrots possible:
* Choose the Right Variety: Select a carrot variety that’s well-suited to your climate and growing conditions.
* Use Fresh Seeds: Carrot seeds have a relatively short shelf life, so it’s best to use
Conclusion
So, there you have it! Growing your own carrots doesn’t have to be a daunting task. This effortless DIY trick transforms the often-challenging process into a rewarding and surprisingly simple experience. Forget about battling rocky soil, struggling with seed spacing, or facing the frustration of stunted growth. This method provides the ideal environment for your carrots to thrive, resulting in longer, straighter, and sweeter harvests.
Why is this a must-try? Because it addresses the core issues that plague carrot cultivation. The carefully prepared soil mix ensures proper drainage and aeration, preventing the dreaded forking and misshapen roots. The precise seed placement eliminates the need for thinning, saving you time and effort. And the consistent moisture levels promote even germination and steady growth, leading to a bountiful crop.
But the beauty of this DIY trick lies not only in its simplicity but also in its adaptability. Feel free to experiment with different soil amendments to tailor the mix to your specific garden conditions. For example, if your soil is particularly heavy, consider adding more perlite or vermiculite to improve drainage. If you’re looking to boost the nutrient content, incorporate some well-rotted compost or aged manure.
Consider these variations to personalize your carrot-growing experience:
* Container Gardening: This method works exceptionally well in containers, making it perfect for those with limited garden space or balcony gardens. Choose a container that is at least 12 inches deep to accommodate the carrot roots.
* Succession Planting: Plant a new batch of carrots every few weeks to ensure a continuous harvest throughout the growing season. This is especially useful if you have a large family or enjoy eating carrots regularly.
* Different Carrot Varieties: Experiment with different carrot varieties to discover your favorites. Nantes carrots are known for their sweetness and cylindrical shape, while Chantenay carrots are shorter and stockier, making them ideal for heavier soils. Danvers carrots are a classic choice with a slightly tapered shape and excellent flavor.
* Companion Planting: Plant carrots alongside companion plants like onions, garlic, or rosemary to deter pests and improve growth. These plants release compounds that repel common carrot pests, such as carrot root flies.
This effortless way to grow carrots is more than just a gardening hack; it’s a pathway to fresh, homegrown goodness. Imagine the satisfaction of harvesting your own sweet, crunchy carrots, knowing that you nurtured them from tiny seeds to vibrant vegetables. Think of the delicious meals you can create, from simple roasted carrots to hearty stews and vibrant salads.
We wholeheartedly encourage you to give this DIY trick a try. It’s a game-changer for carrot cultivation, and we’re confident that you’ll be amazed by the results. Once you’ve experienced the joy of growing your own perfect carrots, you’ll never look back.
Don’t keep this secret to yourself! Share your experiences with us. Let us know what worked well for you, what challenges you encountered, and any variations you tried. Your feedback will help us refine this method and inspire other gardeners to embark on their own carrot-growing adventures. Post pictures of your bountiful harvests on social media using #EffortlessCarrots and tag us so we can celebrate your success! Happy gardening!
Frequently Asked Questions (FAQ)
What type of soil mix is best for this DIY carrot-growing trick?
The ideal soil mix for growing carrots using this method is a light, well-draining blend that is free of rocks and debris. A good starting point is a mix of equal parts compost, sand, and peat moss or coconut coir. The compost provides essential nutrients, the sand improves drainage, and the peat moss or coconut coir helps retain moisture. Avoid using heavy clay soils, as they can impede root growth and lead to forked or stunted carrots. You can also purchase pre-made raised bed mixes, which are often formulated with the right balance of ingredients for vegetable gardening. Remember to amend your soil with a slow-release fertilizer at planting time to provide a steady supply of nutrients throughout the growing season.
How deep should the container or raised bed be for growing carrots?
Carrots need plenty of room to grow downwards, so choose a container or raised bed that is at least 12 inches deep. Deeper is even better, especially if you are growing longer carrot varieties like Nantes or Imperator. If the container is too shallow, the carrots will be forced to grow sideways or become stunted. Ensure the container also has adequate drainage holes to prevent waterlogging, which can lead to root rot.
How often should I water my carrots grown using this method?
Consistent moisture is crucial for carrot growth. Water your carrots regularly, especially during dry periods. Aim to keep the soil consistently moist but not waterlogged. A good rule of thumb is to water deeply whenever the top inch of soil feels dry to the touch. Avoid overhead watering, as this can promote fungal diseases. Instead, water at the base of the plants or use a soaker hose. Mulching around the carrots can also help retain moisture and suppress weeds.
What are some common pests and diseases that affect carrots, and how can I prevent them?
Carrots are susceptible to several pests and diseases, including carrot root flies, aphids, and fungal diseases like leaf blight. To prevent carrot root flies, use row covers to protect your plants from egg-laying females. Companion planting with onions or garlic can also help deter these pests. Aphids can be controlled with insecticidal soap or a strong blast of water from a hose. To prevent fungal diseases, ensure good air circulation around your plants and avoid overhead watering. Remove any infected leaves promptly. Crop rotation can also help prevent soilborne diseases from building up.
How do I know when my carrots are ready to harvest?
Carrots are typically ready to harvest when they reach the desired size and color for the variety you are growing. Check the seed packet for specific maturity dates. You can also gently brush away the soil around the base of the plant to check the size of the carrot. If the carrots are large enough, carefully loosen the soil around them and pull them straight up. Avoid yanking on the tops, as this can break the carrots. Harvest carrots on a dry day to prevent them from rotting in storage.
Can I grow carrots indoors using this DIY trick?
Yes, you can grow carrots indoors using this method, provided you have adequate light. Place your container or raised bed near a sunny window that receives at least 6 hours of direct sunlight per day. If you don’t have enough natural light, you can supplement with grow lights. Choose a compact carrot variety that is well-suited for container gardening. Be sure to monitor the soil moisture levels and water regularly.
What if my carrots are forking or misshapen?
Forking or misshapen carrots are often caused by rocky soil or compacted soil. This DIY trick helps prevent this by providing a loose, well-draining soil mix. However, if you still experience forking, it could be due to nematodes in the soil. Consider soil testing to determine if nematodes are present and take appropriate measures to control them. Adding organic matter to the soil can also help improve its structure and reduce the risk of forking.
Can I use this method to grow other root vegetables besides carrots?
Yes, this method can be adapted for growing other root vegetables like radishes, parsnips, and turnips. The key is to choose a soil mix that is appropriate for the specific vegetable you are growing and to ensure that the container or raised bed is deep enough to accommodate the roots. Radishes, for example, have shorter roots than carrots and can be grown in shallower containers.
How do I store my harvested carrots?
To store your harvested carrots, remove the tops, brush off any excess soil, and store them in a cool, dark, and humid place. A refrigerator is ideal. You can store them in a plastic bag or container lined with a damp paper towel to help maintain humidity. Carrots can also be stored in a root cellar or buried in sand. Properly stored carrots can last for several months.

Leave a Comment