
Bay Leaf Propagation Indoors might sound intimidating, but trust me, it’s a rewarding journey that brings the aromatic essence of the Mediterranean right into your home! For centuries, bay leaves have been treasured not just for their culinary prowess, flavoring everything from hearty stews to delicate sauces, but also for their symbolic significance, representing victory and honor in ancient Greece and Rome. Imagine having a constant supply of fresh bay leaves, grown with your own two hands, ready to elevate your cooking to the next level.
But let’s be honest, buying bay leaves from the store can be a bit of a gamble. Sometimes they’re dried out, lacking that vibrant flavor we crave. That’s where this DIY guide comes in! I’m going to share my tried-and-true methods for successful bay leaf propagation indoors, even if you don’t have a green thumb. We’ll explore simple techniques that will empower you to nurture your own bay laurel plant from a simple cutting.
Why is this DIY trick so essential? Because it’s not just about saving money; it’s about connecting with nature, understanding the life cycle of a plant, and experiencing the satisfaction of growing your own food. Plus, a thriving bay laurel plant adds a touch of elegance and fragrance to any indoor space. So, are you ready to embark on this exciting propagation adventure with me? Let’s get started!
Propagating Bay Leaf Indoors: A DIY Guide
Hey there, fellow plant enthusiasts! Have you ever looked at your beautiful bay leaf plant and thought, “I wish I had more of these!” Well, you’re in luck! Propagating bay leaf plants indoors is totally doable, and I’m here to walk you through the process. It might seem a little intimidating at first, but trust me, with a little patience and the right steps, you’ll be well on your way to expanding your bay leaf collection.
Choosing Your Propagation Method
Before we dive into the nitty-gritty, let’s talk about the two main ways you can propagate bay leaf plants indoors:
* Stem Cuttings: This is the most common and, in my opinion, the easiest method. You’ll be taking cuttings from a mature plant and encouraging them to root.
* Air Layering: This method involves encouraging roots to grow on a stem while it’s still attached to the parent plant. It’s a bit more involved, but it can be a fun experiment!
For this guide, we’re going to focus on stem cuttings, as it’s the most beginner-friendly.
Gathering Your Supplies
Okay, let’s get our supplies together. Here’s what you’ll need:
* A Healthy Bay Leaf Plant: This is the most important ingredient! Choose a mature plant that’s free from pests and diseases.
* Sharp, Clean Pruning Shears or a Knife: Sterilize these with rubbing alcohol to prevent the spread of any potential diseases.
* Rooting Hormone (Optional): This can help speed up the rooting process, but it’s not strictly necessary. I’ve had success both with and without it.
* Small Pots or Containers: Choose pots that are about 3-4 inches in diameter. Make sure they have drainage holes!
* Well-Draining Potting Mix: A mix of perlite, vermiculite, and peat moss works well. You can also use a commercial seed starting mix.
* Clear Plastic Bag or Humidity Dome: This will help create a humid environment for your cuttings.
* Spray Bottle with Water: For misting the cuttings.
* A Warm, Bright Location: Indirect sunlight is best.
Taking Stem Cuttings
Alright, let’s get to the fun part – taking the cuttings!
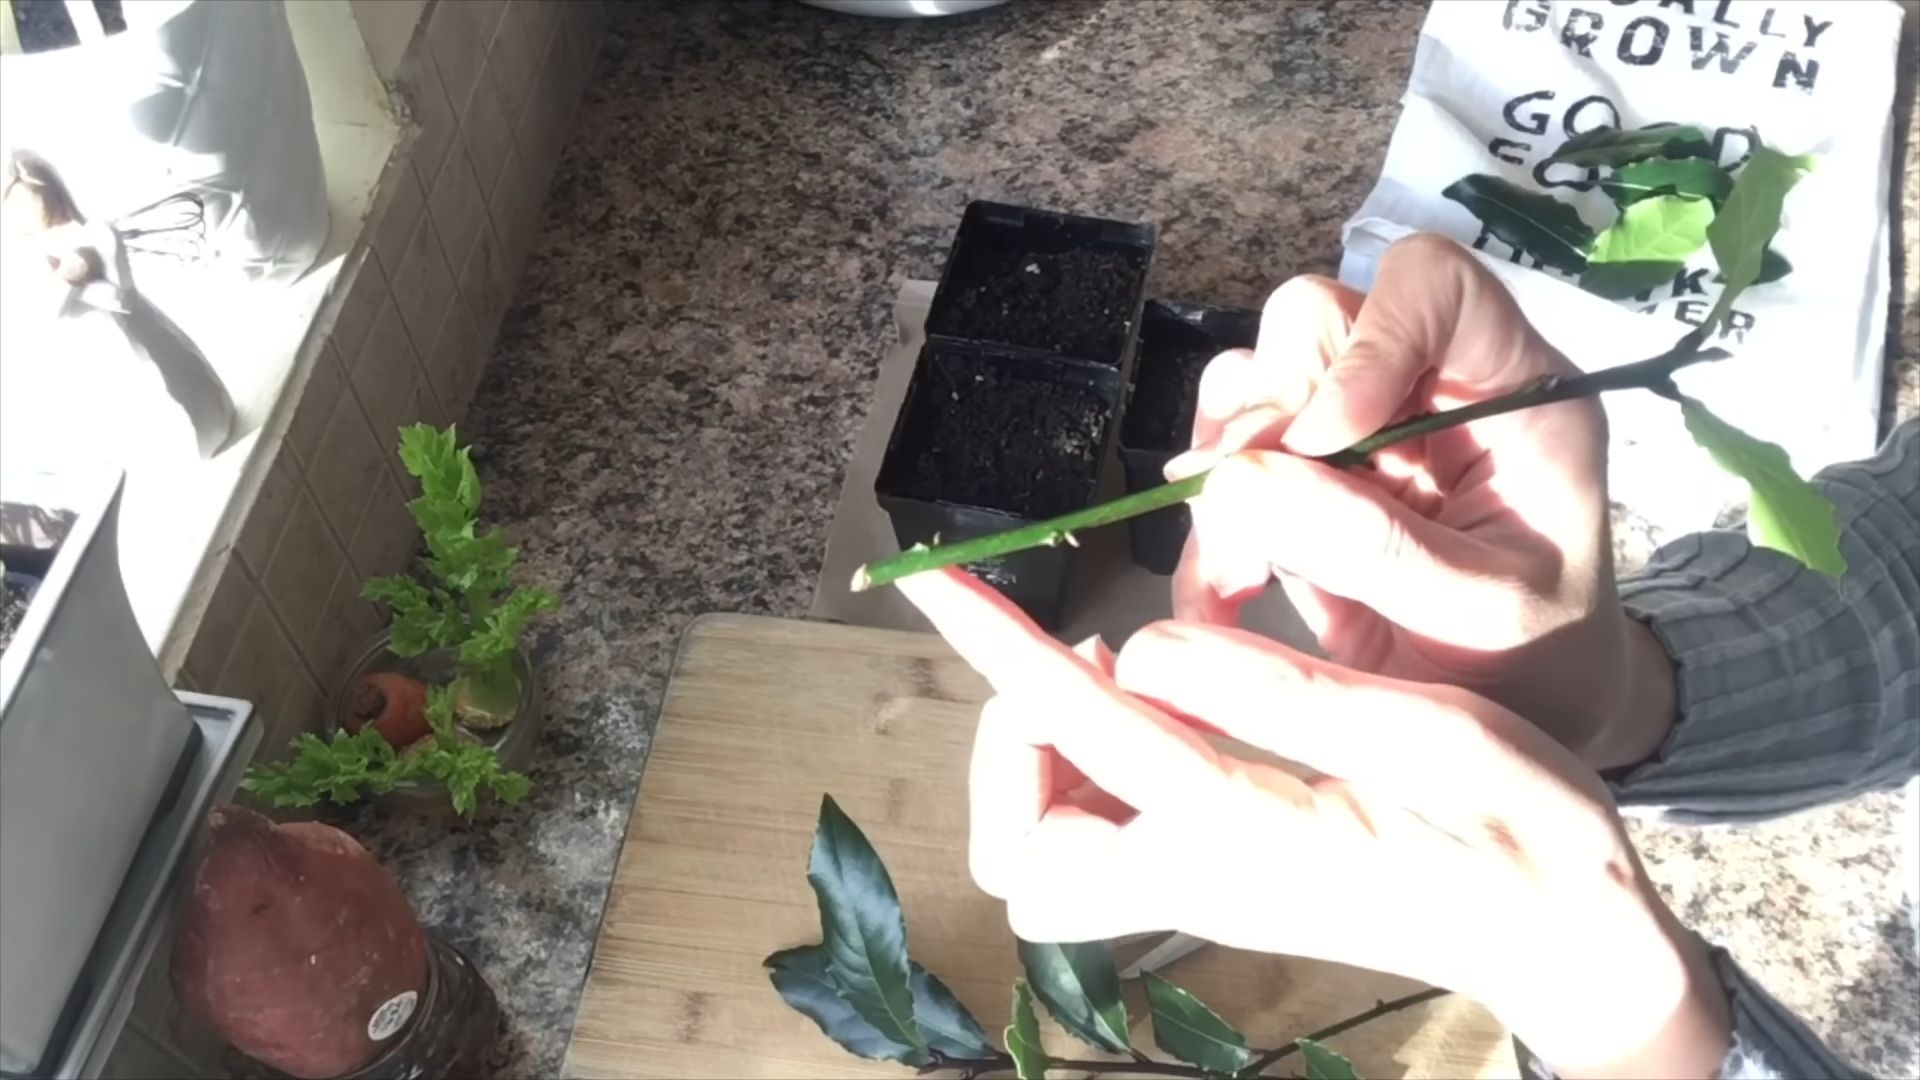
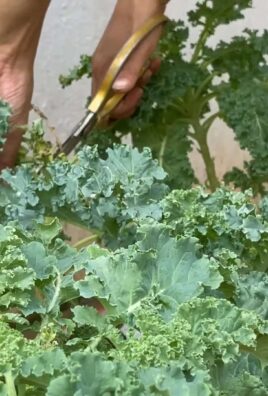
1. Select Your Cuttings: Look for healthy, new growth on your bay leaf plant. Choose stems that are about 4-6 inches long. Avoid stems that are too woody or too soft.
2. Make the Cut: Using your sterilized pruning shears or knife, make a clean cut just below a leaf node (the point where a leaf grows from the stem).
3. Remove Lower Leaves: Remove the leaves from the bottom 1-2 inches of the cutting. This will prevent them from rotting when they’re buried in the soil.
4. Apply Rooting Hormone (Optional): If you’re using rooting hormone, dip the cut end of the stem into the powder or gel. Tap off any excess.
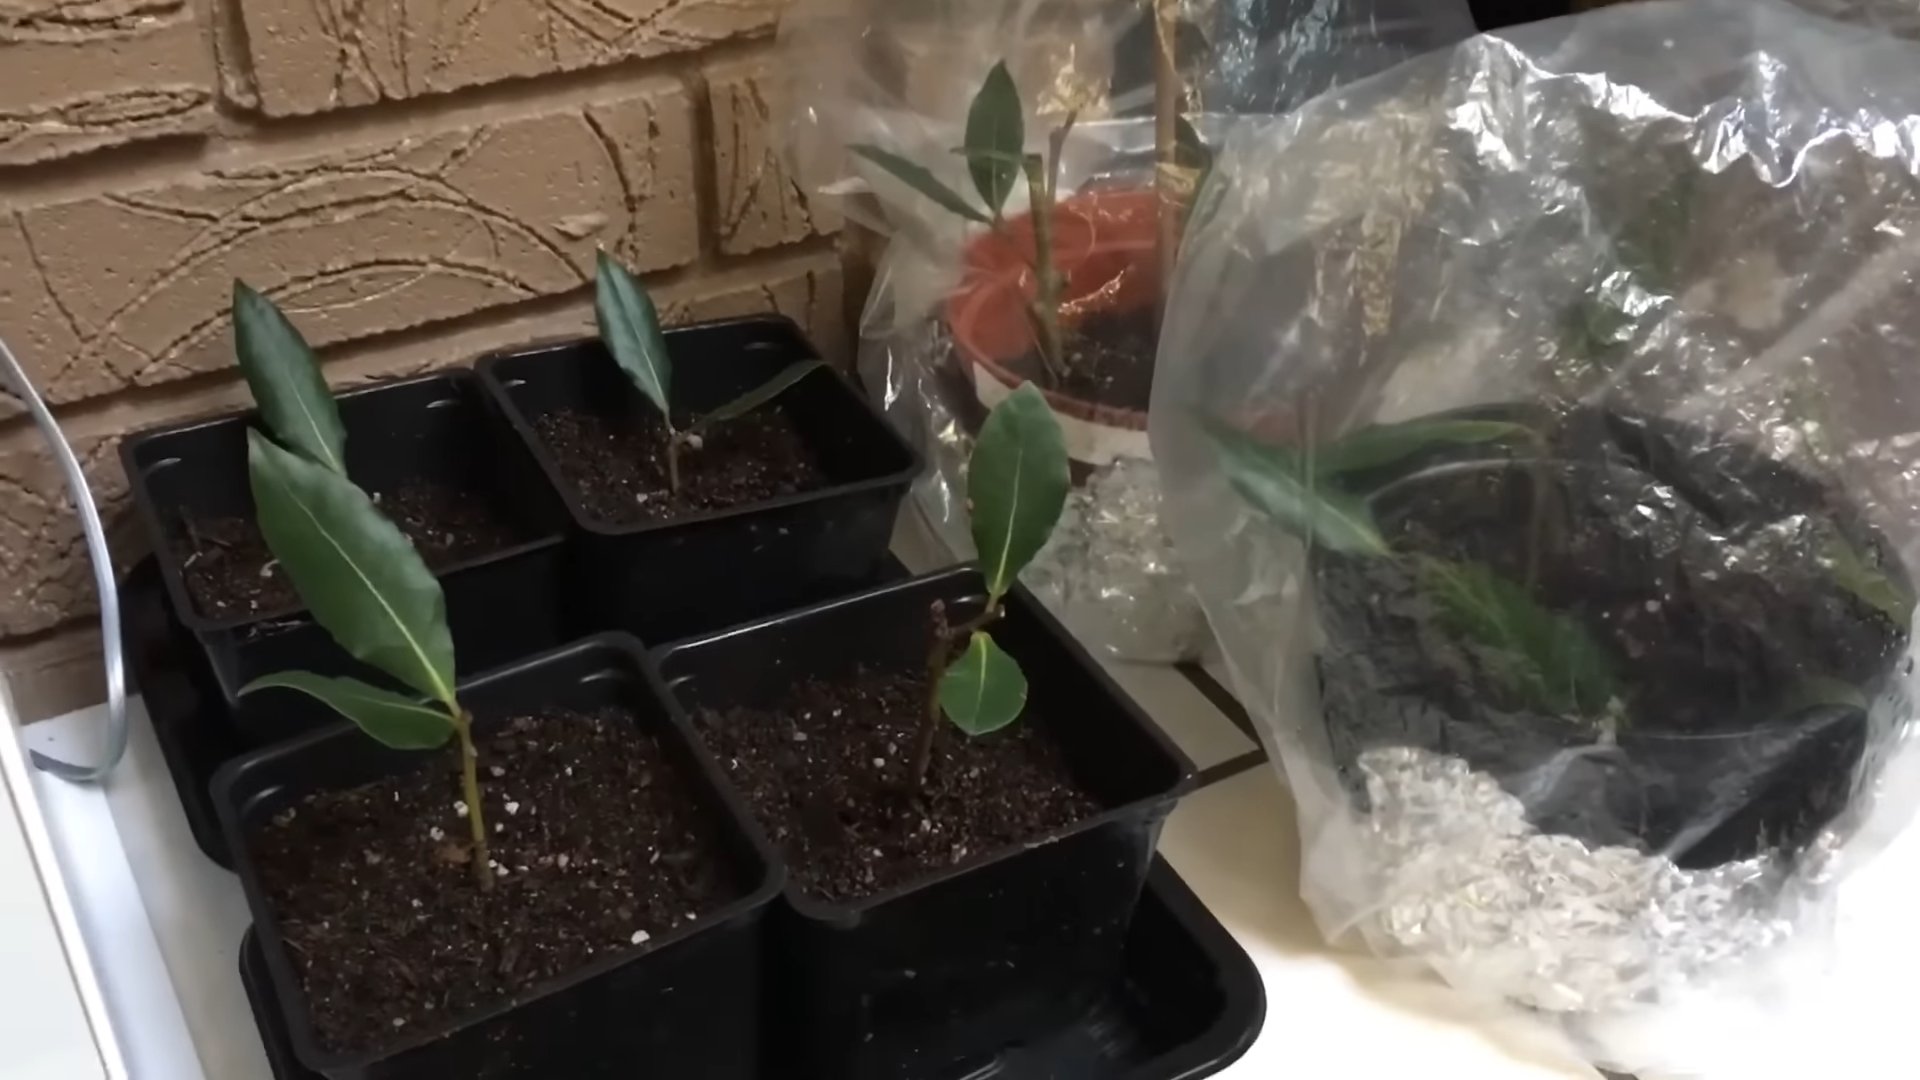
5. Prepare Your Pots: Fill your pots with the well-draining potting mix. Moisten the soil slightly.
6. Plant the Cuttings: Make a small hole in the soil with your finger or a pencil. Insert the cutting into the hole, making sure that the bottom 1-2 inches are buried. Gently press the soil around the cutting to secure it.
7. Water and Cover: Water the cuttings gently to settle the soil. Then, cover the pots with a clear plastic bag or place them under a humidity dome. This will help create a humid environment, which is essential for rooting.
Caring for Your Cuttings
Now comes the waiting game! Here’s how to care for your bay leaf cuttings while they’re rooting:
1. Maintain Humidity: Keep the cuttings covered with the plastic bag or humidity dome. Mist the cuttings with water every few days to keep the humidity high. If you notice condensation building up on the inside of the bag or dome, open it up for a few hours to allow for some air circulation.
2. Provide Light: Place the cuttings in a warm, bright location, but avoid direct sunlight. Indirect sunlight is best, as direct sunlight can scorch the leaves.
3. Water Carefully: Keep the soil consistently moist, but not soggy. Overwatering can lead to rot. Check the soil moisture by sticking your finger into the soil. If it feels dry to the touch, water the cuttings.
4. Be Patient: Rooting can take several weeks, or even a few months. Don’t get discouraged if you don’t see results right away. Just keep providing the right conditions, and eventually, your cuttings will start to root.
Checking for Roots
After a few weeks, you can start checking for roots. Gently tug on the cuttings. If you feel resistance, that means they’ve started to root! You can also gently remove a cutting from the pot and examine the roots.
Potting Up Your Rooted Cuttings
Once your cuttings have developed a good root system, it’s time to pot them up into larger containers.
1. Choose a Larger Pot: Select a pot that’s a few inches larger than the current pot.
2. Prepare the Potting Mix: Use a well-draining potting mix that’s suitable for bay leaf plants.
3. Remove the Cutting from the Old Pot: Gently remove the rooted cutting from its current pot. Be careful not to damage the roots.
4. Plant the Cutting in the New Pot: Place the cutting in the center of the new pot and fill in around it with potting mix. Gently press the soil around the cutting to secure it.
5. Water Thoroughly: Water the newly potted cutting thoroughly to settle the soil.
Caring for Your New Bay Leaf Plant
Congratulations! You’ve successfully propagated a bay leaf plant from a cutting. Now, here’s how to care for your new plant:
1. Light: Bay leaf plants need plenty of light, but they can be sensitive to direct sunlight. Place your plant in a location that receives bright, indirect sunlight.
2. Watering: Water your bay leaf plant when the top inch of soil feels dry to the touch. Avoid overwatering, as this can lead to root rot.
3. Humidity: Bay leaf plants prefer a humid environment. If your home is dry, you can increase the humidity by misting the plant regularly or placing it on a pebble tray filled with water.
4. Fertilizing: Fertilize your bay leaf plant every few months with a balanced fertilizer.
5. Pruning: Prune your bay leaf plant regularly to maintain its shape and encourage new growth. You can also harvest leaves for cooking as needed.
Troubleshooting
Sometimes, things don’t go as planned. Here are a few common problems you might encounter when propagating bay leaf plants, and how to fix them:
* Cuttings Rotting: This is usually caused by overwatering or poor drainage. Make sure your potting mix is well-draining and avoid overwatering.
* Cuttings Not Rooting: This could be due to a number of factors, such as low humidity, insufficient light, or using unhealthy cuttings. Make sure you’re providing the right conditions and using healthy cuttings.
* Leaves Turning Yellow: This could be a sign of overwatering, underwatering, or nutrient deficiency. Adjust your watering schedule and fertilize your plant as needed.
Air Layering (A Brief Overview)
While we focused on stem cuttings, I wanted to briefly mention air layering. It’s a cool technique! Basically, you wound a section of a stem on the parent plant, apply rooting hormone, and wrap it in moist sphagnum moss. Then, you cover the moss with plastic wrap to keep it moist. Over time, roots will grow into the moss. Once the roots are well-developed, you can cut the stem below the rooted section and pot it up as a new plant. It requires more monitoring and patience, but it’s a fun alternative!
Final Thoughts
Propagating bay leaf plants indoors can be a rewarding experience. It takes a little time and effort, but the results are well worth it. With a little patience and the right techniques, you can easily expand your bay leaf collection and enjoy the fresh, aromatic leaves in your cooking. Happy propagating!
Conclusion
So, there you have it! Propagating bay leaf indoors might seem like a challenge, but with a little patience and the right approach, you can cultivate your own thriving bay laurel plant right in your home. This DIY trick isn’t just about saving money; it’s about connecting with nature, understanding the life cycle of a plant, and enjoying the satisfaction of nurturing something from a simple cutting to a fragrant, useful herb.
Why is this a must-try? Because fresh bay leaves are a culinary game-changer. Store-bought dried leaves simply can’t compare to the vibrant aroma and flavor of freshly picked, homegrown bay. Imagine adding a leaf or two to your soups, stews, sauces, or even rice dishes, infusing them with a depth of flavor that will elevate your cooking to a whole new level. Plus, a bay laurel plant adds a touch of Mediterranean elegance to your indoor space.
Beyond the basic method we’ve outlined, there’s room for experimentation. Try using different rooting hormones to see which yields the best results for you. Some gardeners swear by willow water as a natural rooting stimulant. You could also experiment with different types of potting mixes, focusing on well-draining options that cater to the specific needs of bay laurel. Consider using a humidity dome or plastic bag to create a mini-greenhouse environment, especially in drier climates. Another variation is to try propagating from seed, although this method is significantly slower and less reliable than using cuttings.
Don’t be discouraged if your first attempt isn’t a resounding success. Propagation can be tricky, and not every cutting will take root. The key is to learn from your experiences, adjust your technique, and keep trying. The reward of a healthy, thriving bay laurel plant is well worth the effort.
We wholeheartedly encourage you to give this DIY trick a try. It’s a rewarding project that will not only enhance your culinary creations but also bring a touch of greenery and tranquility to your home. Once you’ve successfully propagated your own bay leaf plant, we’d love to hear about your experience! Share your tips, tricks, and photos in the comments below. Let’s build a community of bay leaf enthusiasts and help each other cultivate thriving indoor gardens. Your insights could be invaluable to other aspiring gardeners. So, grab your pruning shears, prepare your rooting medium, and embark on this exciting journey of indoor bay leaf propagation. Happy gardening!
Frequently Asked Questions (FAQ)
1. What is the best time of year to propagate bay leaf cuttings?
The ideal time to propagate bay leaf cuttings is typically in late spring or early summer. During this period, the plant is actively growing, and the cuttings are more likely to root successfully. The warmer temperatures and longer daylight hours provide optimal conditions for root development. However, with proper care and controlled indoor conditions, you can attempt propagation at other times of the year, although success rates may be lower. Avoid taking cuttings during the dormant winter months.
2. What type of cutting should I take for propagation?
The best cuttings for bay leaf propagation are semi-hardwood cuttings. These are cuttings taken from new growth that has partially matured. Look for stems that are flexible but not too soft and green. The ideal length for a cutting is about 4-6 inches. Use clean, sharp pruning shears or a knife to make a clean cut just below a node (the point where a leaf or branch grows from the stem). Remove the leaves from the lower half of the cutting to prevent them from rotting in the rooting medium.
3. What is the best rooting medium for bay leaf cuttings?
A well-draining rooting medium is crucial for successful bay leaf propagation. A common and effective mix is a combination of perlite and peat moss in equal parts. Perlite provides aeration, while peat moss retains moisture. You can also use a commercial seed starting mix or a mixture of sand and compost. Avoid using garden soil, as it can be too heavy and may contain pathogens that can harm the cuttings. Ensure the rooting medium is moist but not waterlogged.
4. How long does it take for bay leaf cuttings to root?
Rooting time can vary depending on environmental conditions and the health of the cuttings. Generally, it takes anywhere from 4 to 8 weeks for bay leaf cuttings to develop roots. You can check for root development by gently tugging on the cutting. If you feel resistance, it indicates that roots have formed. You can also carefully remove a cutting from the rooting medium to inspect the roots. Be patient and avoid disturbing the cuttings too frequently, as this can hinder root development.
5. How do I care for bay leaf cuttings while they are rooting?
Maintaining a warm, humid environment is essential for successful rooting. Place the cuttings in a location with bright, indirect light. Avoid direct sunlight, as it can scorch the leaves. Keep the rooting medium consistently moist but not waterlogged. You can use a spray bottle to mist the cuttings regularly to increase humidity. Consider using a humidity dome or plastic bag to create a mini-greenhouse effect. Ensure there is adequate ventilation to prevent fungal growth.
6. What type of pot and soil should I use when transplanting rooted bay leaf cuttings?
Once the cuttings have developed a healthy root system, they can be transplanted into individual pots. Choose pots that are slightly larger than the root ball. Use a well-draining potting mix that is specifically formulated for container gardening. A mix of potting soil, perlite, and compost is a good option. Ensure the pot has drainage holes to prevent waterlogging. Gently remove the rooted cutting from the rooting medium and plant it in the pot, being careful not to damage the roots.
7. How often should I water my bay leaf plant?
Water your bay leaf plant when the top inch of soil feels dry to the touch. Avoid overwatering, as this can lead to root rot. Water thoroughly until excess water drains from the drainage holes. During the growing season (spring and summer), you may need to water more frequently than during the dormant season (fall and winter). Adjust your watering schedule based on the environmental conditions and the plant’s needs.
8. What kind of light does a bay leaf plant need?
Bay leaf plants thrive in bright, indirect light. They can tolerate some direct sunlight, especially in the morning, but avoid exposing them to harsh afternoon sun, which can scorch the leaves. If you are growing your bay leaf plant indoors, place it near a sunny window, such as a south-facing or east-facing window. If you don’t have access to enough natural light, you can supplement with artificial grow lights.
9. How do I fertilize my bay leaf plant?
Fertilize your bay leaf plant during the growing season (spring and summer) with a balanced liquid fertilizer diluted to half strength. Apply the fertilizer every 2-4 weeks. Avoid fertilizing during the dormant season (fall and winter). Over-fertilizing can damage the plant, so it’s best to err on the side of caution. You can also amend the soil with compost or other organic matter to provide essential nutrients.
10. Are there any common pests or diseases that affect bay leaf plants?
Bay leaf plants are generally resistant to pests and diseases, but they can occasionally be affected by aphids, scale, or spider mites. Inspect your plant regularly for signs of infestation. If you notice any pests, you can treat them with insecticidal soap or neem oil. Overwatering can lead to root rot, so it’s important to ensure the soil is well-draining and avoid letting the plant sit in standing water. Good air circulation can also help prevent fungal diseases.
11. Can I use rooting powder or hormone to help the cuttings root?
Yes, using a rooting hormone can significantly increase the success rate of bay leaf propagation. Rooting hormones contain auxins, which are plant hormones that promote root development. Dip the cut end of the cutting in rooting powder or liquid before planting it in the rooting medium. Follow the instructions on the rooting hormone product for proper application. While not essential, rooting hormone can give your cuttings a significant boost.
12. My bay leaf cuttings are wilting. What should I do?
Wilting cuttings are often a sign of insufficient humidity or moisture. Ensure the rooting medium is consistently moist but not waterlogged. Mist the cuttings regularly with water to increase humidity. If you are not already using a humidity dome or plastic bag, consider creating one to help retain moisture. Also, make sure the cuttings are not exposed to direct sunlight or drafts. If the wilting persists, the cuttings may not be viable.
13. Can I propagate bay leaf from seed?
Yes, you can propagate bay leaf from seed, but it is a much slower and less reliable method than propagating from cuttings. Bay leaf seeds can be difficult to germinate, and it can take several months for seedlings to emerge. If you choose to propagate from seed, use fresh seeds and sow them in a well-draining seed starting mix. Keep the soil consistently moist and provide warmth and bright, indirect light. Be patient, as germination can be erratic.
14. How big will my indoor bay leaf plant get?
The size of your indoor bay leaf plant will depend on the size of the pot and how you prune it. Bay laurel trees can grow quite large in their natural environment, but when grown in containers indoors, their growth is typically restricted. You can prune your bay leaf plant regularly to maintain its desired size and shape. With proper care,
Leave a Comment