
Indoor Garlic Growing: Unlock the secrets to fresh, flavorful garlic right in your home! Imagine the satisfaction of snipping off vibrant green garlic scapes for your salads or harvesting plump bulbs without ever stepping foot in a garden. For centuries, garlic has been revered not only for its culinary prowess but also for its medicinal properties, dating back to ancient Egypt where it was used to boost immunity and stamina.
But who says you need acres of land to enjoy this pungent powerhouse? I’m here to tell you that indoor garlic growing is not only possible but surprisingly easy and rewarding. In today’s fast-paced world, having access to fresh, homegrown ingredients is a luxury many crave. This DIY guide will empower you to bypass the grocery store and cultivate your own supply of garlic, adding a burst of flavor to your dishes and a touch of green to your living space.
Whether you’re a seasoned gardener or a complete beginner, I’ll walk you through simple, step-by-step instructions, ensuring you can successfully grow garlic indoors, regardless of your experience level. Get ready to transform your windowsill into a mini garlic farm and enjoy the delicious benefits of homegrown goodness!
Growing Garlic Indoors: A Comprehensive DIY Guide
Hey there, fellow garlic lovers! Ever dreamt of having fresh, pungent garlic readily available, even when the snow is piling up outside? Well, dream no more! I’m going to walk you through the surprisingly simple process of growing garlic indoors. It’s a fantastic way to add a touch of green to your home, enjoy the delightful aroma, and, most importantly, harvest your own delicious garlic scapes and bulbs. Let’s get started!
What You’ll Need: The Garlic Grower’s Toolkit
Before we dive in, let’s gather our supplies. Here’s a list of everything you’ll need to embark on this garlicky adventure:
* Garlic Cloves: This is the most crucial ingredient! Opt for organic garlic from a local farmer’s market or a reputable grocery store. Avoid garlic from the supermarket that may have been treated to prevent sprouting. Look for plump, healthy cloves. Softneck varieties tend to do better indoors.
* Pots: Choose pots that are at least 6 inches deep and wide. The bigger, the better, as garlic needs room to develop its bulbs. I prefer terracotta pots for their breathability, but plastic pots work just fine too. Just make sure they have drainage holes!
* Potting Mix: Use a high-quality, well-draining potting mix. Avoid using garden soil, as it can compact and hinder drainage. A mix specifically formulated for vegetables is ideal.
* Watering Can or Spray Bottle: For gentle and consistent watering.
* Grow Lights (Optional but Recommended): Especially if you don’t have a sunny windowsill. Garlic needs plenty of light to thrive.
* Fertilizer (Optional): A balanced liquid fertilizer can give your garlic a boost.
* Small Trowel or Spoon: For planting the cloves.
Phase 1: Preparing Your Garlic for Planting
This initial phase is all about getting your garlic cloves ready to sprout. It’s a simple process, but it sets the stage for healthy growth.
1. Separate the Cloves: Carefully separate the cloves from the garlic bulb. Leave the papery skin on each clove intact, as it protects them. Be gentle to avoid bruising or damaging the cloves.
2. Choose the Best Cloves: Select the largest, healthiest-looking cloves for planting. Avoid any cloves that are soft, discolored, or show signs of mold. These are less likely to sprout and thrive.
3. Optional: Pre-Sprouting (Water Method): You can encourage faster sprouting by placing the cloves in a shallow dish of water, pointy side up, for a day or two. Make sure only the very bottom of the clove is submerged. This will give them a head start.
4. Optional: Pre-Sprouting (Paper Towel Method): Another method is to wrap the cloves in a damp paper towel and place them in a plastic bag. Keep the paper towel moist and check for sprouts every day or two. Once you see small roots emerging, they’re ready to plant.
Phase 2: Planting Your Garlic Cloves
Now for the fun part – getting those cloves into the soil!
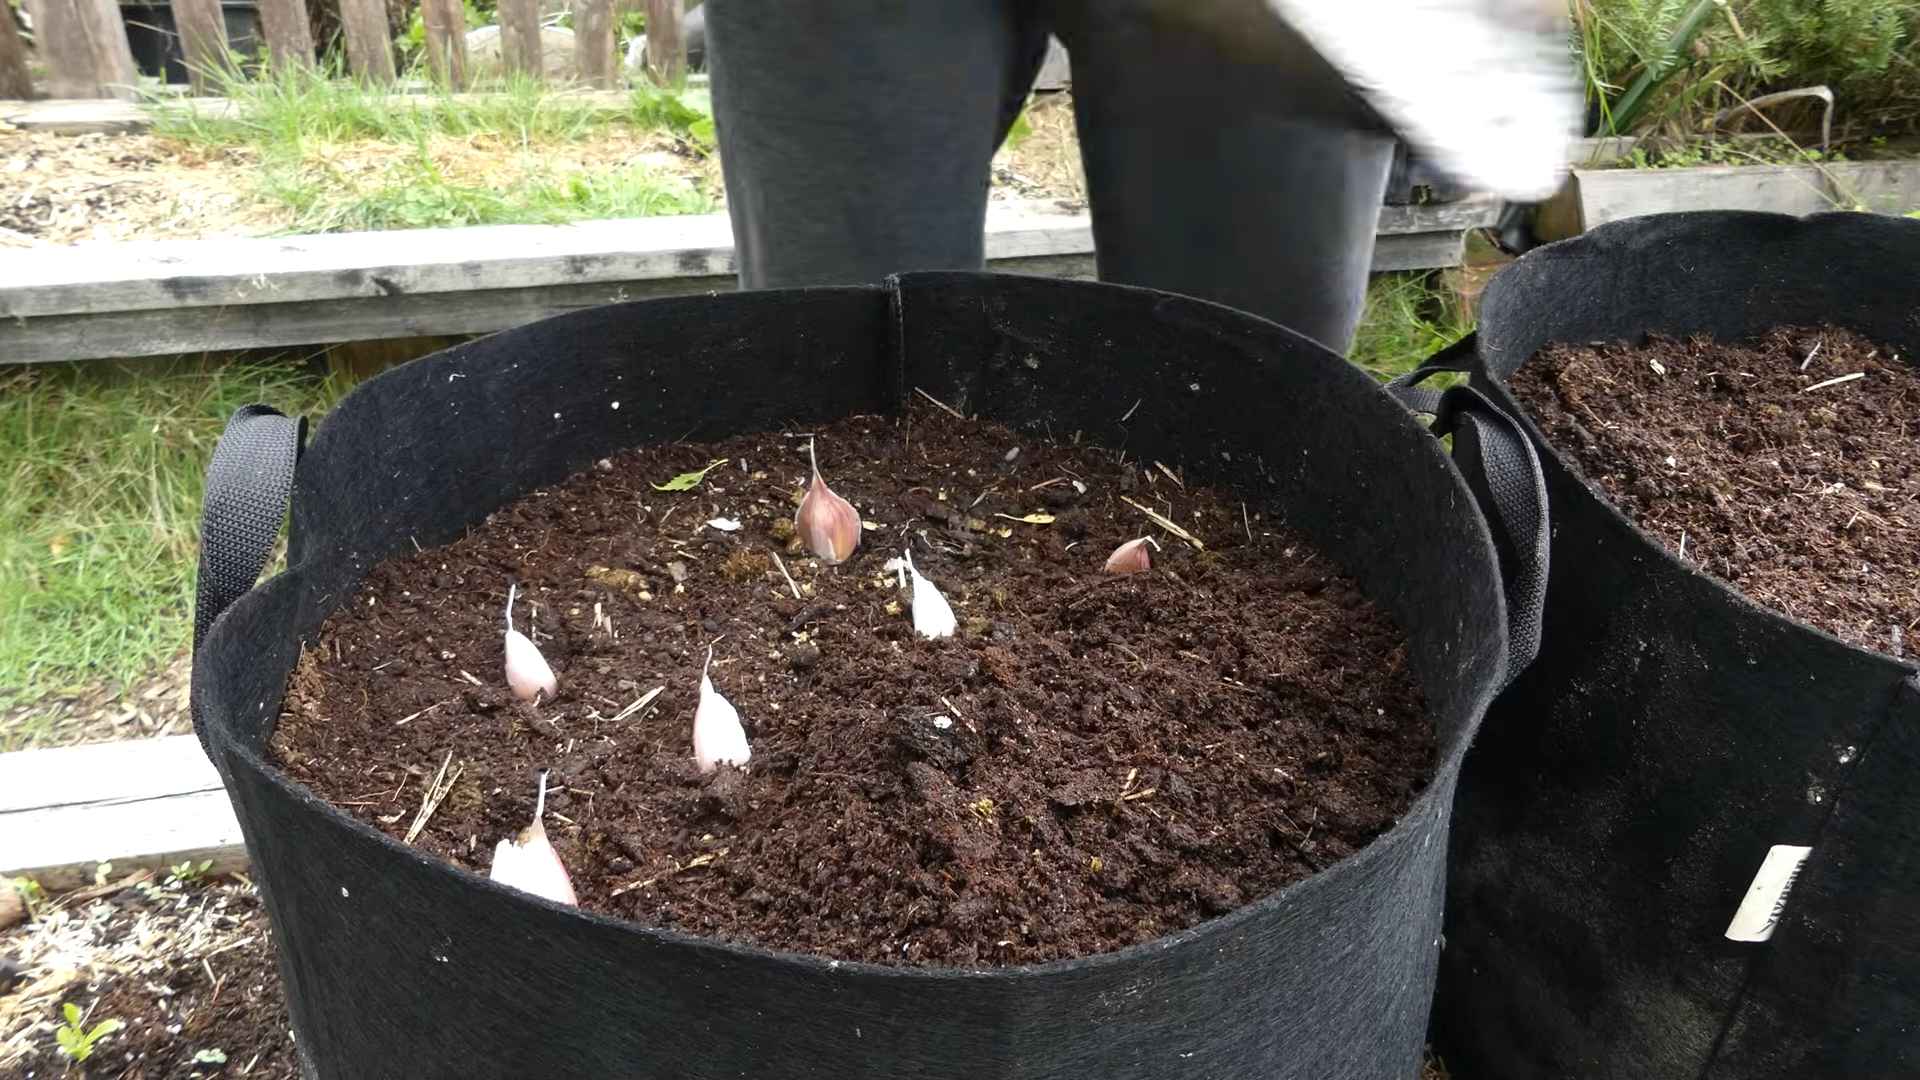
1. Fill the Pots: Fill your pots with the potting mix, leaving about an inch of space at the top. Gently tap the pot to settle the soil.
2. Plant the Cloves: Make holes in the soil about 2-3 inches deep and 4-6 inches apart. Place each clove in a hole, pointy side up. This is crucial, as the sprouts will emerge from the pointy end.
3. Cover the Cloves: Gently cover the cloves with soil and lightly pat it down.
4. Water Thoroughly: Water the pots thoroughly until water drains out of the drainage holes. This will help settle the soil and provide the cloves with the moisture they need to start growing.
Phase 3: Caring for Your Indoor Garlic
This is where the patience comes in! Consistent care is key to successful indoor garlic growing.
1. Location, Location, Location: Place your pots in a sunny location, such as a south-facing windowsill. Garlic needs at least 6-8 hours of sunlight per day. If you don’t have enough natural light, use grow lights. Position the lights a few inches above the plants and keep them on for 14-16 hours a day.
2. Watering: Keep the soil consistently moist, but not soggy. Water when the top inch of soil feels dry to the touch. Avoid overwatering, as this can lead to root rot. Use a watering can or spray bottle to water gently, avoiding splashing water on the leaves.
3. Fertilizing (Optional): If you choose to fertilize, start about a month after planting. Use a balanced liquid fertilizer diluted to half strength. Fertilize every 2-3 weeks during the growing season.
4. Temperature: Garlic prefers cool temperatures, ideally between 60-70°F (15-21°C). Avoid placing your pots near heat sources, such as radiators.
5. Pest Control: Keep an eye out for pests, such as aphids or spider mites. If you spot any, treat them with insecticidal soap or neem oil.
6. Rotating the Pots: Rotate the pots regularly to ensure that all sides of the plants receive equal sunlight. This will help them grow evenly.
Phase 4: Harvesting Garlic Scapes (Optional)
Garlic scapes are the curly flower stalks that emerge from hardneck garlic varieties. They’re a delicious delicacy with a mild garlic flavor.
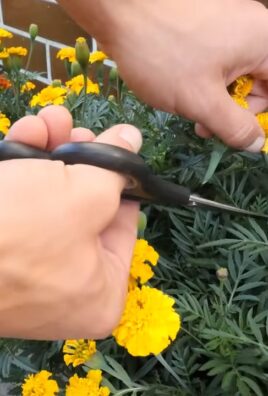
1. When to Harvest: Harvest the scapes when they’re curled once or twice. They should be tender and easy to snap off.
2. How to Harvest: Use scissors or pruners to cut the scapes off near the base of the plant.
3. Enjoy Your Harvest: Garlic scapes can be used in a variety of dishes, such as pesto, stir-fries, and soups. They can also be grilled or roasted. Removing the scapes encourages the plant to put more energy into bulb development.
Phase 5: Harvesting Your Garlic Bulbs
The moment we’ve all been waiting for – harvesting your own homegrown garlic!
1. When to Harvest: The timing of the harvest depends on the variety of garlic you’re growing and your climate. Generally, you can harvest the bulbs when the lower leaves start to turn yellow and brown. This usually happens about 8-9 months after planting.
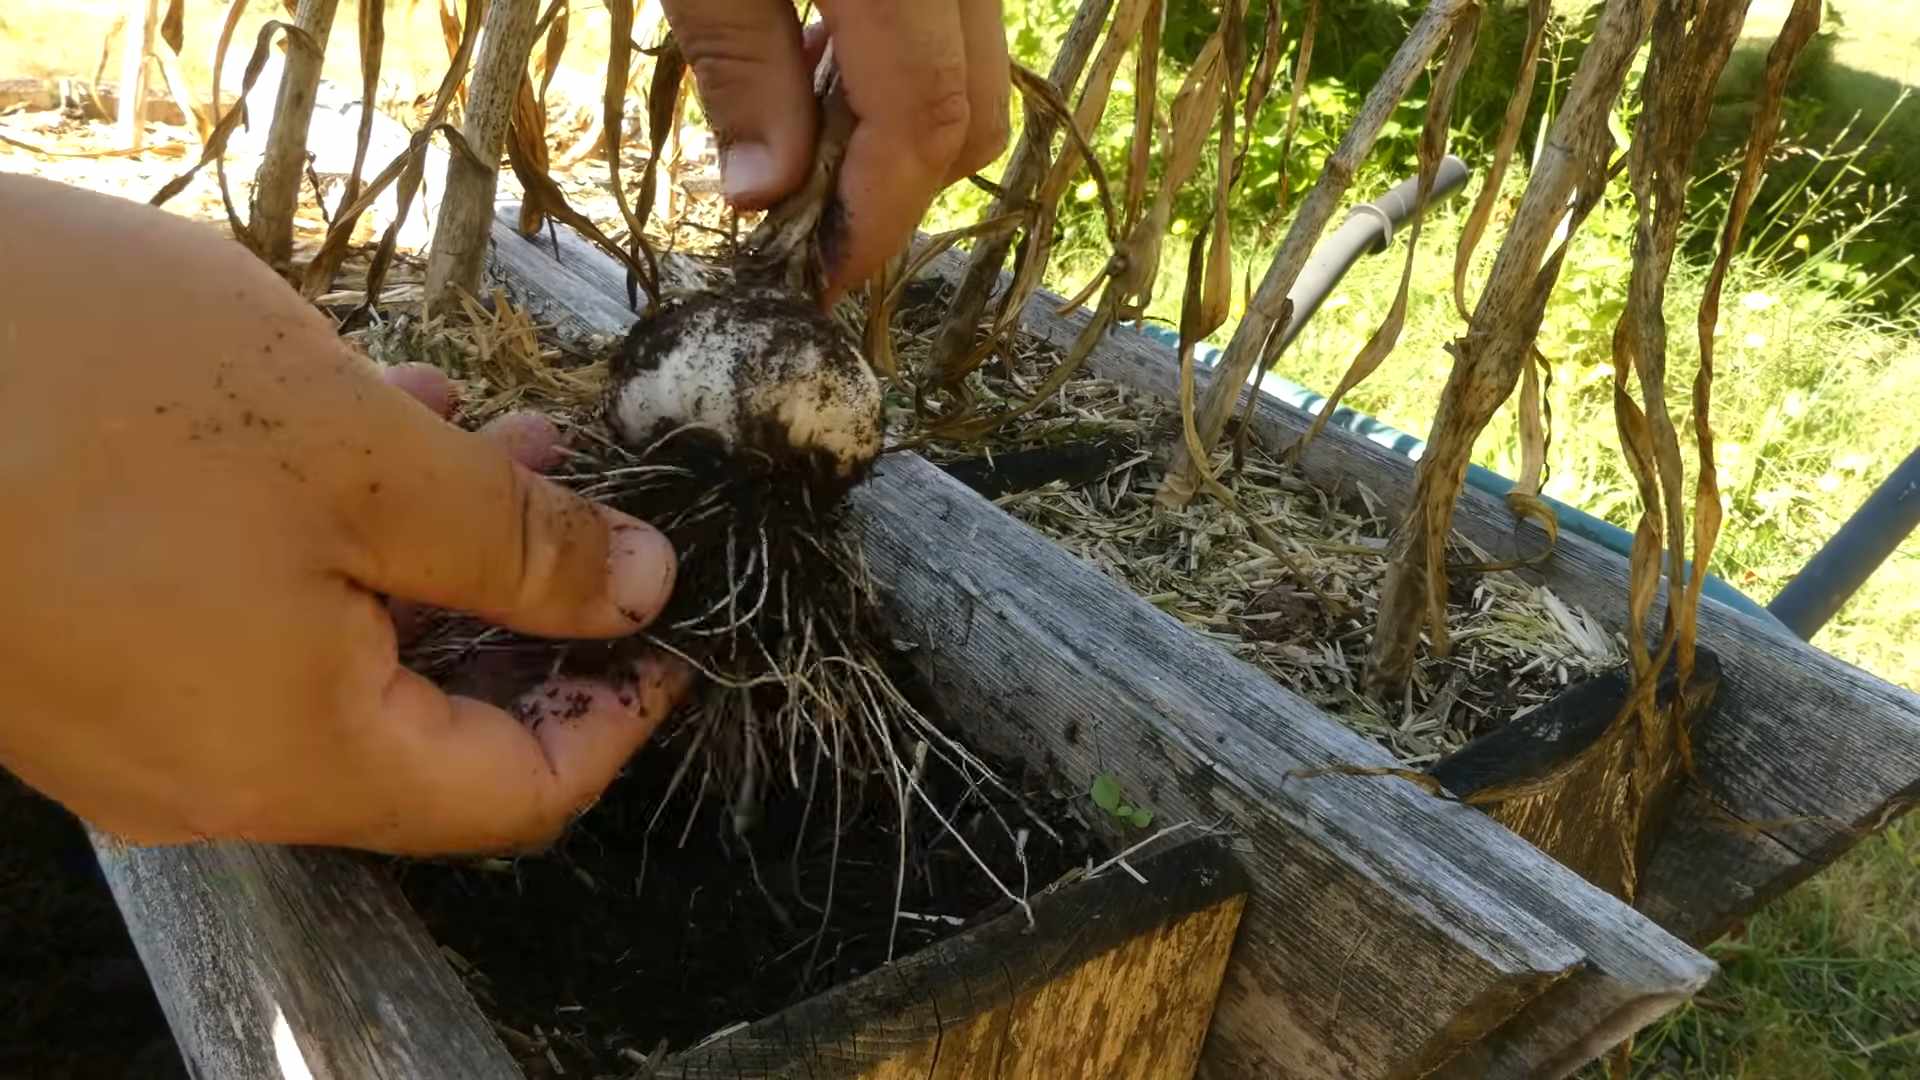
2. How to Harvest: Gently loosen the soil around the bulbs with a trowel or fork. Carefully lift the bulbs out of the soil, being careful not to damage them.
3. Curing the Garlic: Curing is essential for long-term storage. Brush off any excess soil from the bulbs. Tie the plants together in bundles of 4-6 bulbs and hang them in a cool, dry, well-ventilated place for 2-4 weeks. The leaves and stems will dry out during this process.
4. Storing Your Garlic: Once the garlic is cured, cut off the stems and roots. Store the bulbs in a cool, dry, dark place, such as a pantry or basement. Properly cured and stored garlic can last for several months.
Troubleshooting: Common Issues and Solutions
Even with the best care, you might encounter a few challenges along the way. Here are some common issues and how to address them:
* Yellowing Leaves: This could be a sign of overwatering, underwatering, nutrient deficiency, or pest infestation. Check the soil moisture, fertilize if necessary, and inspect for pests.
* Slow Growth: This could be due to insufficient light, poor soil, or cool temperatures. Provide more light, use a high-quality potting mix, and ensure the temperature is within the ideal range.
* Small Bulbs: This could be caused by insufficient sunlight, lack of nutrients, or harvesting too early. Provide more light, fertilize regularly, and wait until the lower leaves start to turn yellow before harvesting.
* Root Rot: This is caused by overwatering. Ensure the pots have good drainage and allow the soil to dry out slightly between waterings.
Tips for Success: Garlic Growing Wisdom
Here are a few extra tips to help you succeed in your indoor garlic growing endeavors:
* Choose the Right Variety: Softneck garlic varieties are generally better suited for indoor growing, as they don’t require as much cold stratification as hardneck varieties.
* Start with Healthy Cloves: The quality of the cloves you start with will greatly impact the success of your crop.
* Provide Adequate Light: Garlic needs plenty of light to thrive. If you don’t have enough natural light, invest in grow lights.
* Don’t Overwater: Overwatering is a common mistake that can lead to root rot.
* Be Patient: Growing garlic takes time and patience. Don’t get discouraged if you don’t see results immediately.
Growing garlic indoors is
Conclusion
So, there you have it! Growing your own garlic indoors is not only achievable, but it’s also incredibly rewarding. Imagine the satisfaction of snipping fresh, vibrant garlic greens to add a burst of flavor to your favorite dishes, all from the comfort of your own home. This DIY trick transforms kitchen scraps into a sustainable source of deliciousness, minimizing waste and maximizing flavor.
Why is this a must-try? Beyond the sheer convenience of having fresh garlic greens readily available, indoor garlic growing offers a unique connection to the food you consume. You control the growing environment, ensuring your garlic is free from harmful pesticides and herbicides. Plus, it’s a fantastic way to introduce children to the wonders of gardening and the life cycle of plants. It’s a simple, educational, and delicious project all rolled into one.
But the fun doesn’t stop there! Feel free to experiment with different varieties of garlic. Softneck garlic, with its multiple cloves, tends to sprout more readily indoors. You can also try different containers – from repurposed yogurt containers to stylish ceramic pots – to find what works best for your space and aesthetic. Consider adding a diluted liquid fertilizer every few weeks to boost growth, especially if you notice the greens are looking pale. Another variation is to try growing garlic in water alone, using a jar or glass to suspend the bulb above the water line, allowing the roots to reach down. This method is particularly effective for growing garlic greens.
Don’t be afraid to get creative! You can even plant multiple cloves in a single container for a fuller, more abundant harvest of garlic greens. Just be sure to provide enough space between the cloves to allow for healthy growth.
Ultimately, this indoor garlic growing trick is about more than just saving money or having fresh ingredients. It’s about fostering a deeper appreciation for the food we eat and connecting with the natural world, even in the heart of our homes. It’s about sustainability, self-sufficiency, and the simple joy of watching something grow.
We wholeheartedly encourage you to give this DIY trick a try. It’s easy, affordable, and incredibly satisfying. And most importantly, we want to hear about your experience! Share your photos, tips, and stories with us in the comments below. Let’s build a community of indoor garlic growers and inspire others to embrace the joys of homegrown goodness. What are you waiting for? Get planting!
Frequently Asked Questions (FAQ)
What kind of garlic should I use for indoor growing?
The best type of garlic for indoor growing is generally softneck garlic. Softneck varieties tend to sprout more easily and produce more greens than hardneck varieties. However, you can experiment with any garlic you have on hand. Even a single clove from the grocery store can work! Just make sure the clove is firm and healthy, without any signs of mold or rot. Elephant garlic, while technically not true garlic, can also be grown indoors for its milder flavor and impressive size.
How much sunlight does indoor garlic need?
Garlic greens need at least 4-6 hours of sunlight per day to thrive. A south-facing window is ideal, but an east or west-facing window can also work. If you don’t have access to enough natural light, you can supplement with a grow light. Position the grow light a few inches above the garlic greens and keep it on for 12-14 hours per day.
How often should I water my indoor garlic?
Water your garlic when the soil feels dry to the touch. Avoid overwatering, as this can lead to root rot. A good rule of thumb is to water thoroughly until water drains out of the bottom of the container, then allow the soil to dry out slightly before watering again. The frequency of watering will depend on factors such as the size of the container, the type of soil, and the temperature and humidity of your home.
How long does it take for garlic to sprout indoors?
You should start to see sprouts within a week or two of planting. The exact time will depend on the variety of garlic, the temperature, and the amount of light it receives. Be patient, and don’t give up if you don’t see sprouts right away. Keep the soil moist and provide plenty of light, and your garlic will eventually sprout.
Can I grow garlic indoors in water only?
Yes, you can grow garlic indoors in water only. This method is particularly effective for growing garlic greens. Simply place a garlic clove in a small glass or jar, with the pointed end facing up. Add enough water to cover the bottom of the clove, but not so much that the entire clove is submerged. Change the water every few days to prevent it from becoming cloudy. Roots will begin to grow from the bottom of the clove, and greens will sprout from the top.
How do I harvest garlic greens?
You can harvest garlic greens as soon as they are a few inches tall. Simply snip off the greens with scissors, leaving about an inch or two of the plant intact. This will allow the plant to continue growing and producing more greens. You can harvest garlic greens multiple times from the same plant.
What can I do with garlic greens?
Garlic greens have a mild, garlicky flavor that is perfect for adding to salads, soups, stir-fries, and other dishes. They can also be used as a garnish or added to dips and sauces. Garlic greens are a versatile ingredient that can be used in a variety of ways.
Can I grow a full head of garlic indoors?
While it’s possible to grow a small bulb indoors, it’s unlikely to be as large or flavorful as a bulb grown outdoors. Indoor growing conditions are simply not ideal for bulb development. However, you can still enjoy the delicious garlic greens, which are the primary focus of this DIY trick.
What if my garlic starts to mold?
If you notice mold growing on your garlic, remove the affected cloves immediately. Make sure the soil is well-draining and avoid overwatering. You can also try spraying the garlic with a diluted solution of baking soda and water to help prevent mold growth.
Is indoor garlic growing a good way to save money?
While you won’t be saving a fortune, growing your own garlic greens indoors can definitely help you save money on groceries. You’ll have a constant supply of fresh, flavorful greens at your fingertips, without having to buy them from the store. Plus, you’re reducing food waste by using garlic cloves that might otherwise be discarded.
What are the benefits of growing garlic indoors?
There are many benefits to growing garlic indoors, including:
* Fresh, flavorful garlic greens readily available
* Sustainable and eco-friendly
* Reduces food waste
* Educational and fun for kids
* Control over growing conditions (no pesticides or herbicides)
* Adds a touch of greenery to your home
Can I use regular potting soil for indoor garlic growing?
Yes, you can use regular potting soil for indoor garlic growing. However, it’s important to choose a well-draining potting mix to prevent root rot. You can also amend the potting soil with compost or other organic matter to improve its fertility.
How do I deal with pests on my indoor garlic?
Pests are less common with indoor garlic growing, but if you do encounter them, you can try spraying the plants with a diluted solution of insecticidal soap. You can also try hand-picking the pests off the plants. Regularly inspect your garlic for signs of pests to catch them early.
My garlic greens are turning yellow. What should I do?
Yellowing garlic greens can be a sign of several problems, including overwatering, underwatering, nutrient deficiency, or lack of sunlight. Check the soil moisture and adjust your watering accordingly. If the soil is dry, water thoroughly. If the soil is waterlogged, allow it to dry out before watering again. You can also try fertilizing the garlic with a diluted liquid fertilizer. Make sure the garlic is receiving enough sunlight.
How can I encourage more growth of garlic greens?
To encourage more growth of garlic greens, make sure the garlic is receiving enough sunlight, water, and nutrients. You can also try pinching off the tips of the greens to encourage branching and bushier growth. Regularly harvesting the greens will also stimulate new growth.

Leave a Comment