
Grow Bigger Zucchini? Absolutely! Who doesn’t dream of harvesting those enormous, prize-winning zucchini that make your neighbors green with envy? I know I do! But let’s be honest, sometimes our zucchini plants just don’t seem to want to cooperate. They give us a few small fruits, and then… nothing. Or worse, they produce a ton of tiny, bland zucchini that nobody wants.
Zucchini, a type of summer squash, has a fascinating history. Originating in the Americas, it wasn’t until Italian immigrants brought it to the United States in the early 20th century that it truly gained popularity. Now, it’s a staple in gardens worldwide, celebrated for its versatility and ease of cultivation. But even with its reputation for being easy to grow, getting those truly massive zucchini can be a challenge.
That’s where these DIY tricks and hacks come in! I’m going to share some simple, yet effective, techniques that will help you grow bigger zucchini than you ever thought possible. We’ll cover everything from soil preparation and watering strategies to pollination tips and pest control methods. These aren’t just random gardening tips; they’re proven strategies that I’ve used myself to achieve zucchini-growing success. So, if you’re ready to transform your zucchini patch and impress everyone with your bountiful harvest, let’s dive in!
How to Grow HUGE Zucchinis: My Secret DIY Fertilizing Trick!
Okay, zucchini lovers, listen up! Are you tired of those puny, little zucchinis that barely fill a side dish? I was too! That’s why I’ve spent years perfecting my zucchini-growing game, and I’m finally ready to share my secret weapon: a DIY fertilizing trick that will have you harvesting zucchinis the size of baseball bats (or maybe even bigger!). This isn’t just about throwing some fertilizer on the ground; it’s about targeted feeding and giving your zucchini plants exactly what they need to thrive.
Understanding Zucchini Needs
Before we dive into the DIY magic, let’s talk about what zucchinis crave. They’re heavy feeders, meaning they need a lot of nutrients, especially during their rapid growth phase. They love:
* Nitrogen (N): For lush, green foliage. Think of it as the building block for healthy leaves.
* Phosphorus (P): Essential for root development and flower production. Strong roots mean a strong plant!
* Potassium (K): Crucial for fruit development and overall plant health. This is what helps those zucchinis get BIG.
* Calcium (Ca): Prevents blossom end rot, a common zucchini problem. Nobody wants a rotten zucchini bottom!
* Magnesium (Mg): Important for chlorophyll production and nutrient absorption. Healthy leaves, healthy plant!
Most commercial fertilizers have these nutrients, but I’ve found that a combination of readily available ingredients and a specific application method works wonders.
The DIY Zucchini Fertilizer Recipe
This recipe is my go-to for boosting zucchini growth. It’s simple, affordable, and uses ingredients you might already have in your kitchen or garden.
Ingredients:
* Epsom Salts (Magnesium Sulfate): 1 tablespoon per gallon of water. Provides magnesium, which is vital for chlorophyll production and nutrient absorption.
* Bone Meal (Phosphorus): 2 tablespoons per plant (applied directly to the soil). A slow-release source of phosphorus, promoting strong root development and abundant flowering.
* Compost Tea (Nitrogen, Potassium, and Micronutrients): 1 gallon per plant. A liquid fertilizer rich in beneficial microbes and nutrients. You can make your own or buy it pre-made.
* Banana Peels (Potassium): 2-3 banana peels per plant (buried near the roots). A slow-release source of potassium, essential for fruit development.
* Eggshells (Calcium): Crushed eggshells sprinkled around the base of the plant. Provides calcium, which helps prevent blossom end rot.
Why these ingredients?
* Epsom Salts: Zucchinis are prone to magnesium deficiencies, which can lead to yellowing leaves and stunted growth. Epsom salts provide a quick boost of magnesium.
* Bone Meal: Phosphorus is crucial for root development and flower production. Bone meal is a slow-release source, ensuring a steady supply of phosphorus throughout the growing season.
* Compost Tea: A fantastic all-around fertilizer that provides nitrogen, potassium, and a host of micronutrients. It also introduces beneficial microbes to the soil, improving soil health.
* Banana Peels: Potassium is essential for fruit development, and banana peels are a readily available source. Burying them near the roots allows the potassium to slowly leach into the soil.
* Eggshells: Calcium deficiency can lead to blossom end rot, a common problem in zucchinis. Crushed eggshells provide a slow-release source of calcium, helping to prevent this issue.
Step-by-Step Fertilizing Guide
Okay, let’s get our hands dirty! Here’s how I apply my DIY fertilizer to my zucchini plants.
Phase 1: Preparing the Soil (Before Planting)
This is crucial for setting your zucchini plants up for success.
1. Amend the Soil: Before planting, dig a generous amount of compost into the planting area. This will improve drainage, aeration, and nutrient content. I usually aim for about 2-3 inches of compost worked into the top 6-8 inches of soil.
2. Incorporate Bone Meal: Mix 2 tablespoons of bone meal into the soil where each zucchini plant will be planted. This will provide a slow-release source of phosphorus for strong root development.
3. Crush Eggshells: Crush eggshells into small pieces and sprinkle them into the planting hole. This will provide calcium to help prevent blossom end rot.
4. Plant Your Zucchini: Plant your zucchini seedlings or seeds according to package directions. Make sure to space them adequately to allow for growth. Zucchinis can get quite large!
Phase 2: Initial Feeding (After Planting)
Once your zucchini plants are established (about a week or two after planting), it’s time to give them their first feeding.
1. Epsom Salt Solution: Mix 1 tablespoon of Epsom salts per gallon of water.
2. Water Thoroughly: Water each zucchini plant thoroughly with the Epsom salt solution. This will provide a quick boost of magnesium.
3. Compost Tea Application: Apply 1 gallon of compost tea to the base of each plant. Be sure to avoid getting the tea on the leaves, as this can cause fungal problems.
4. Bury Banana Peels: Bury 2-3 banana peels near the roots of each plant. Dig a small hole a few inches away from the stem and bury the peels.
Phase 3: Ongoing Fertilization (During Growing Season)
This is where the magic happens! Consistent feeding throughout the growing season will result in those massive zucchinis you’ve been dreaming of.
1. Repeat Epsom Salt Solution: Repeat the Epsom salt solution application every 2-3 weeks throughout the growing season.
2. Compost Tea Application (Weekly): Apply 1 gallon of compost tea to the base of each plant every week. This will provide a steady supply of nutrients.
3. Monitor for Blossom End Rot: Keep an eye out for blossom end rot (a dark, sunken spot on the bottom of the zucchini). If you see signs of it, sprinkle more crushed eggshells around the base of the plant.
4. Water Regularly: Zucchinis need consistent moisture, especially during fruit development. Water deeply whenever the top inch of soil feels dry.
5. Harvest Regularly: Harvest your zucchinis when they are young and tender. This will encourage the plant to produce more fruit. Don’t let them get too big, as they can become tough and seedy.
Tips and Tricks for Maximum Zucchini Growth
Here are a few extra tips to help you grow the biggest zucchinis possible:
* Choose the Right Variety: Some zucchini varieties are naturally larger than others. Look for varieties like ‘Black Beauty’ or ‘Costata Romanesco’ for larger fruits.
* Provide Plenty of Sunlight: Zucchinis need at least 6-8 hours of sunlight per day.
* Improve Soil Drainage: Zucchinis don’t like soggy soil. Make sure your soil is well-draining to prevent root rot.
* Pollination is Key: Zucchinis need to be pollinated to produce fruit. If you’re having trouble with pollination, you can hand-pollinate the flowers yourself.
* Protect from Pests: Zucchinis can be susceptible to pests like squash bugs and squash vine borers. Monitor your plants regularly and take action if you see signs of infestation.
* Don’t Over-Fertilize: While zucchinis are heavy feeders, over-fertilizing can be harmful. Stick to the recommended amounts of fertilizer and monitor your plants for signs of nutrient toxicity (e.g., yellowing leaves, stunted growth).
* Rotate Your Crops: Avoid planting zucchinis in the same spot year after year. Crop rotation helps to prevent soil depletion and pest and disease problems.
* Water deeply and less frequently: This encourages deep root growth, making the plant more resilient.
* Mulch around the plants: This helps retain moisture, suppress weeds, and regulate soil temperature.
Troubleshooting Common Zucchini Problems
Even with the best care, you might encounter some problems with your zucchini plants. Here are a few common issues and how to address them:
* Blossom End Rot: As mentioned earlier, this is caused by calcium deficiency. Add more crushed eggshells to the soil and ensure consistent watering.
* Powdery Mildew: This fungal disease appears as a white, powdery coating on the leaves. Improve air circulation around the plants and apply a fungicide if necessary.
* Squash Bugs: These pests can suck the sap from the leaves and stems, weakening the plant. Handpick them off the plants or use an insecticide.
* Squash Vine Borers: These pests bore into the stems of the plants, causing them to wilt and die. Wrap the stems with aluminum foil to prevent the borers from entering.
* Lack of Pollination: If your zucchini plants are producing flowers
Conclusion
So, there you have it! This simple, yet effective DIY trick to grow bigger zucchini is a game-changer for any gardener, whether you’re a seasoned pro or just starting out. We’ve walked you through the process, highlighting the key steps to ensure your success. But why is this method a must-try?
Firstly, it’s about maximizing your yield. Who wouldn’t want larger, more abundant zucchini from the same plant? This technique helps your zucchini plants direct their energy more efficiently, resulting in significantly larger fruits. Imagine the satisfaction of harvesting zucchini that are truly impressive in size and flavor!
Secondly, it’s about resourcefulness. This DIY approach uses readily available materials and requires minimal effort. You don’t need to invest in expensive equipment or complicated procedures. It’s a cost-effective and sustainable way to enhance your gardening efforts.
Thirdly, it’s about control. By implementing this trick, you gain more control over the growth process. You can actively influence the size and quality of your zucchini, ensuring you get the results you desire. This hands-on approach is incredibly rewarding and allows you to connect with your garden on a deeper level.
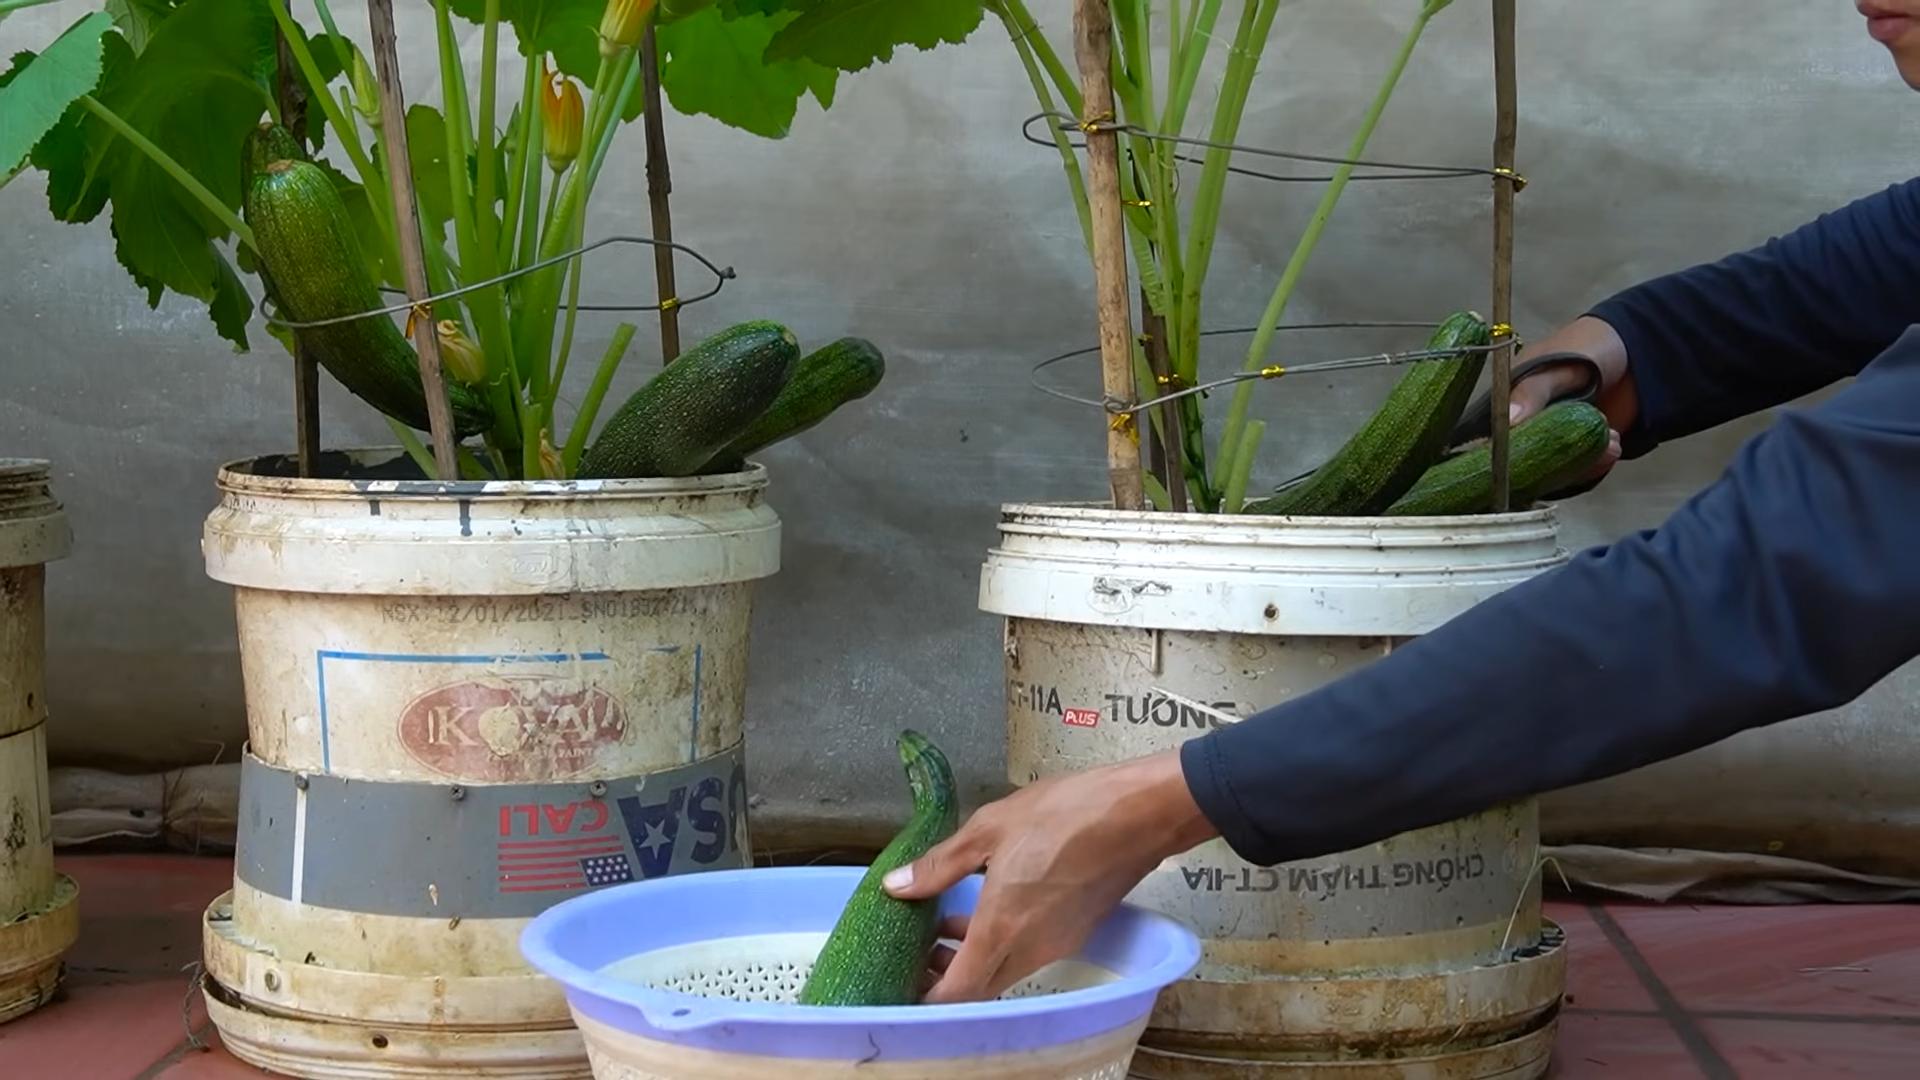
But don’t just take our word for it! We encourage you to experiment with variations of this technique. For instance, try using different types of supports for your zucchini plants. Some gardeners prefer stakes, while others opt for trellises. See what works best for your specific growing conditions and zucchini variety.
Another variation to consider is the timing of the intervention. Experiment with applying the technique at different stages of the zucchini’s growth to see how it impacts the final size. You might find that early intervention yields the most significant results.
Furthermore, consider the specific needs of your zucchini variety. Some varieties are naturally larger than others, so adjust your expectations accordingly. Research your zucchini type and tailor the technique to its unique characteristics.
We also recommend paying close attention to the overall health of your zucchini plants. Ensure they receive adequate sunlight, water, and nutrients. A healthy plant is more likely to respond positively to this DIY trick and produce larger, more flavorful zucchini.
Remember to document your progress! Take photos of your zucchini plants before and after implementing the technique. This will allow you to track your results and share your success with other gardeners.
Ultimately, the goal is to have fun and enjoy the process of growing your own food. Gardening is a rewarding hobby that connects us with nature and provides us with fresh, healthy produce. This DIY trick is just one way to enhance your gardening experience and achieve even greater success.
So, what are you waiting for? Give this DIY trick a try and witness the transformation of your zucchini plants. We’re confident that you’ll be amazed by the results. And don’t forget to share your experience with us! We’d love to hear your feedback, see your photos, and learn from your successes. Let’s create a community of gardeners who are passionate about growing bigger, better zucchini! Share your tips and tricks, and let’s all learn from each other. Happy gardening!
Frequently Asked Questions (FAQ)
What type of zucchini plant works best with this DIY trick?
This DIY trick is generally effective for most zucchini varieties. However, some varieties may respond more dramatically than others. Larger varieties, such as Black Beauty or Costata Romanesco, may benefit the most from this technique. Experiment with different varieties to see which ones yield the best results in your garden. Remember to research the specific needs of your chosen variety to ensure optimal growth conditions.
How often should I apply this technique to my zucchini plants?
The frequency of application depends on the specific technique you’re using. For example, if you’re focusing on pruning excess leaves, you may need to do this every few weeks to maintain optimal airflow and sunlight penetration. If you’re using supports to encourage vertical growth, ensure they are properly positioned and adjusted as the plant grows. Regularly monitor your zucchini plants and adjust your approach as needed.
What are the signs that my zucchini plant is not responding well to this DIY trick?
If you notice that your zucchini plant is wilting, yellowing, or showing signs of disease, it may not be responding well to the technique. Other signs include stunted growth, lack of fruit production, or deformed zucchini. If you observe any of these issues, reassess your approach and consider adjusting your technique or addressing any underlying health problems with your plant.
Can I use this DIY trick in conjunction with other gardening techniques?
Absolutely! This DIY trick can be used in conjunction with other gardening techniques to enhance your results. For example, you can combine this technique with regular fertilization, proper watering, and pest control measures. A holistic approach to gardening will ensure that your zucchini plants are healthy and thriving, maximizing their potential for growth and fruit production.
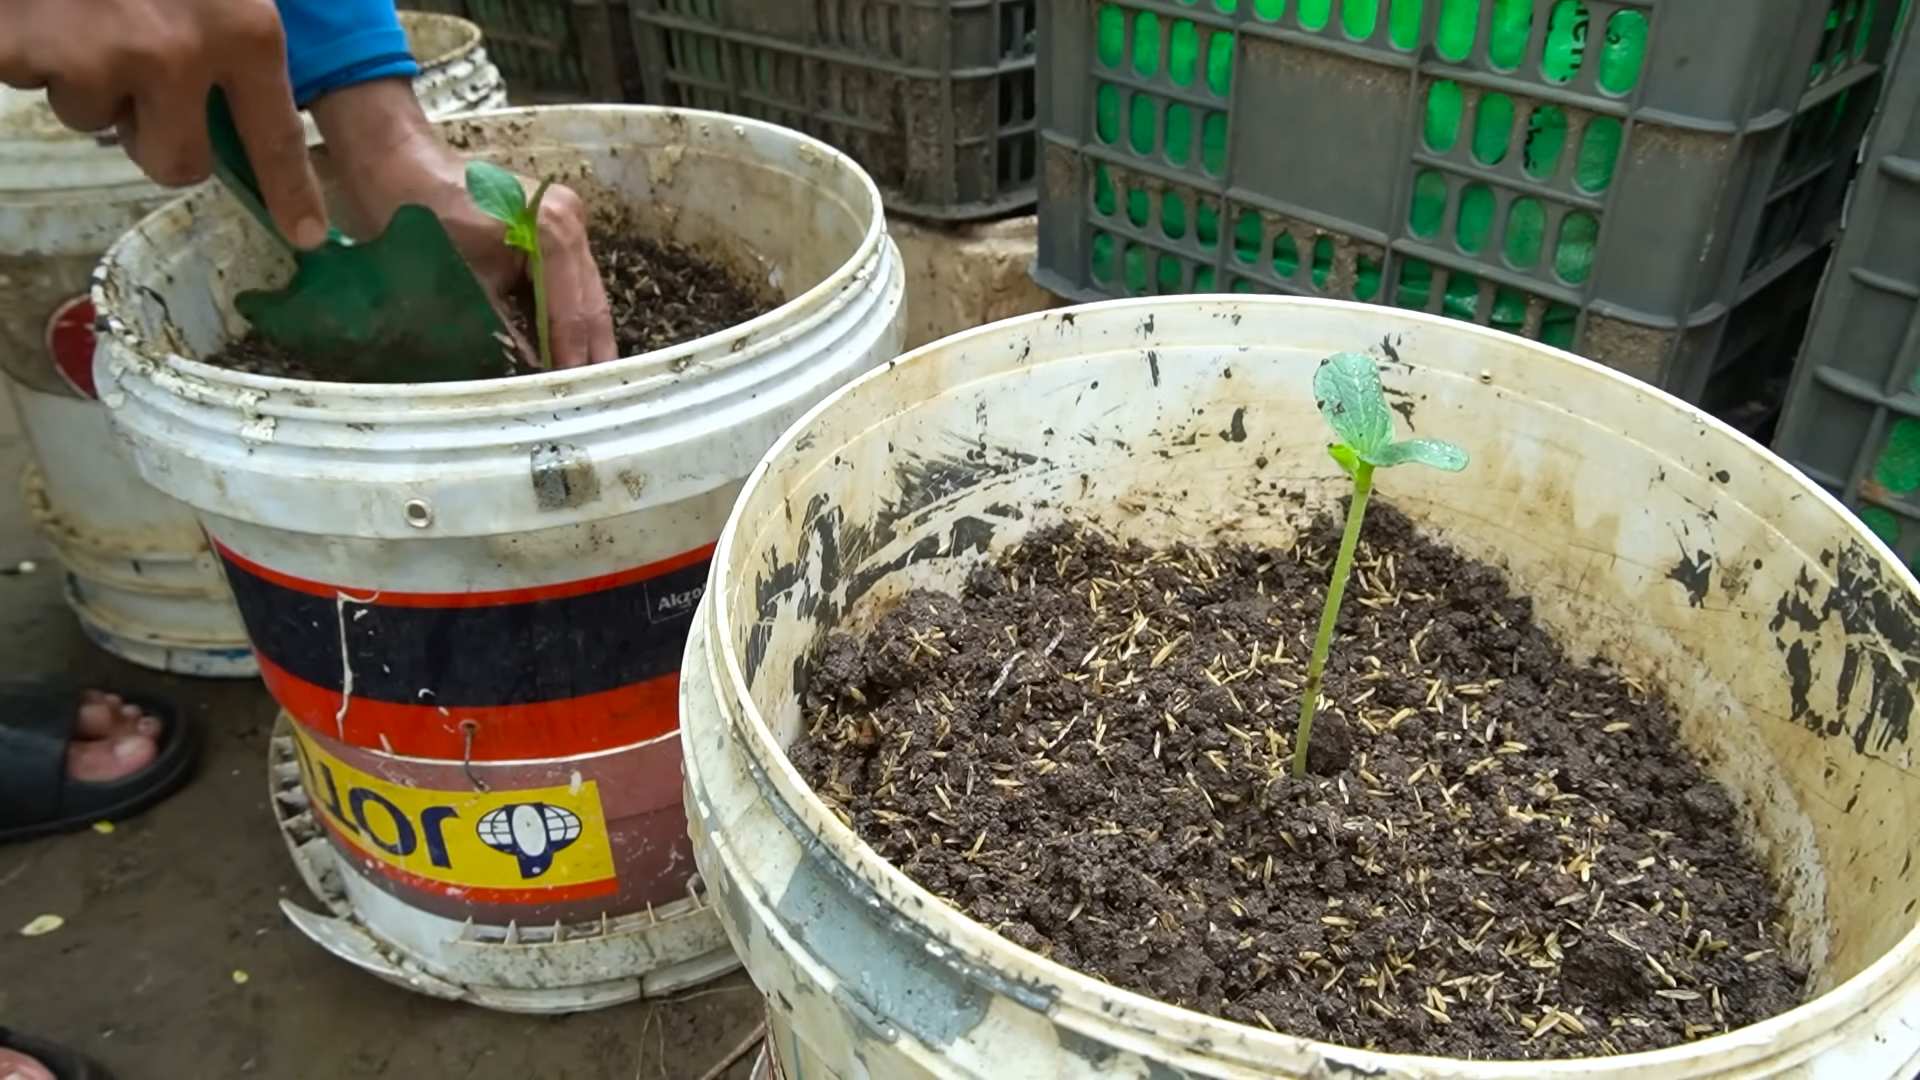
Is this DIY trick suitable for container gardening?
Yes, this DIY trick can be adapted for container gardening. However, you may need to make some adjustments to accommodate the limited space. Choose a large container that can support the growth of your zucchini plant. Ensure that the container has adequate drainage to prevent waterlogging. You may also need to provide additional support for the plant as it grows, such as a trellis or stakes.
What if I don’t have access to the materials mentioned in the instructions?
Don’t worry! There are often alternative materials you can use. For example, if you don’t have access to specific types of supports, you can use readily available materials like bamboo stakes, wooden dowels, or even repurposed materials like old clothing racks. Get creative and find solutions that work for your specific situation. The key is to provide adequate support and encourage vertical growth.
How can I prevent pests and diseases from affecting my zucchini plants?
Preventing pests and diseases is crucial for the health and productivity of your zucchini plants. Implement preventative measures such as crop rotation, proper spacing, and regular inspection of your plants. Use organic pest control methods like neem oil or insecticidal soap to control pests. Ensure that your plants have adequate airflow and sunlight to prevent fungal diseases. Remove any infected leaves or fruits promptly to prevent the spread of disease.
What is the best time of day to apply this DIY trick?
The best time of day to apply this DIY trick is typically in the morning or evening when the sun is not at its peak. This will help prevent stress on your zucchini plants. Avoid working on your plants during the hottest part of the day, as this can cause them to wilt or become damaged.
How long does it take to see results from this DIY trick?
The time it takes to see results from this DIY trick can vary depending on several factors, including the variety of zucchini, the growing conditions, and the specific technique you’re using. In general, you should start to see noticeable differences within a few weeks of implementing the technique. Be patient and consistent with your efforts, and you’ll eventually be rewarded with larger, more abundant zucchini.
What should I do if I encounter problems while trying this DIY trick?
If you encounter problems while trying this DIY trick, don’t hesitate to seek help from other gardeners or online resources. There are many online forums and communities where you can ask questions and get advice from experienced gardeners. You can also consult with your local gardening center or extension office for expert guidance. Remember, gardening is a learning process, and it’s okay to make mistakes along the way.


Leave a Comment