
Growing Peanuts at Home might sound like a whimsical dream, reserved for sprawling farms in Georgia, but I’m here to tell you it’s totally achievable, even in your own backyard! Forget those store-bought, heavily processed peanuts – imagine the satisfaction of harvesting your own fresh, earthy, and undeniably delicious peanuts right from your garden.
Peanuts, also known as groundnuts, have a rich history, dating back thousands of years to South America. They weren’t just a snack; they were a vital source of protein and oil. Today, while we often enjoy them roasted or in peanut butter, the joy of cultivating them ourselves connects us to that history and offers a unique gardening experience.
But why bother with the effort of growing peanuts at home? Well, for starters, you’ll have access to peanuts that are fresher and tastier than anything you can buy in a store. Plus, it’s a fantastic way to teach kids about where their food comes from and get them involved in gardening. More importantly, it’s a surprisingly easy and rewarding project that can add a unique element to your garden. This DIY guide will walk you through every step, from selecting the right variety to harvesting your very own peanut bounty. So, grab your gardening gloves, and let’s get started!
Growing Peanuts at Home: A Beginner’s Guide to Backyard Peanut Farming
Hey there, fellow gardening enthusiasts! Ever thought about growing your own peanuts? It might sound a little crazy, especially if you don’t live in the Deep South, but trust me, it’s totally doable and incredibly rewarding. I’ve been growing peanuts in my backyard for a few years now, and I’m excited to share my tips and tricks with you. Get ready to impress your friends with homegrown peanut butter!
Choosing the Right Peanut Variety
Before we dive into the nitty-gritty, let’s talk about peanut varieties. Not all peanuts are created equal, and some are better suited for home gardens than others. Here’s a quick rundown:
* Virginia Peanuts: These are the large, often roasted-in-the-shell peanuts you see at baseball games. They need a longer growing season (120-150 days), so they’re best for warmer climates.
* Spanish Peanuts: These are smaller, reddish-brown peanuts with a higher oil content. They mature faster (around 100 days) and are a good choice for cooler climates or shorter growing seasons.
* Runner Peanuts: These are the most commonly grown peanuts in the US, used primarily for peanut butter. They have a good yield and mature in about 120-130 days.
* Valencia Peanuts: These are sweet peanuts with multiple kernels per shell. They mature quickly (90-110 days) and are great for boiling.
I personally recommend starting with Spanish or Valencia peanuts if you’re a beginner, especially if you live in a region with a shorter growing season. They’re more forgiving and will give you a quicker harvest.
Preparing Your Peanut Patch
Peanuts need a sunny spot with well-drained, sandy loam soil. They don’t like heavy clay soil, as it can hinder the development of the “pegs” (the stems that grow down into the soil and form the peanuts).
* Sunlight: Peanuts need at least 6-8 hours of direct sunlight per day.
* Soil: The ideal soil pH for peanuts is between 6.0 and 6.5. Amend your soil with compost or well-rotted manure to improve drainage and fertility. Avoid using too much nitrogen fertilizer, as it can promote leafy growth at the expense of peanut production.
* Location: Choose a spot where you haven’t grown legumes (like beans or peas) in the past few years to avoid potential disease problems.
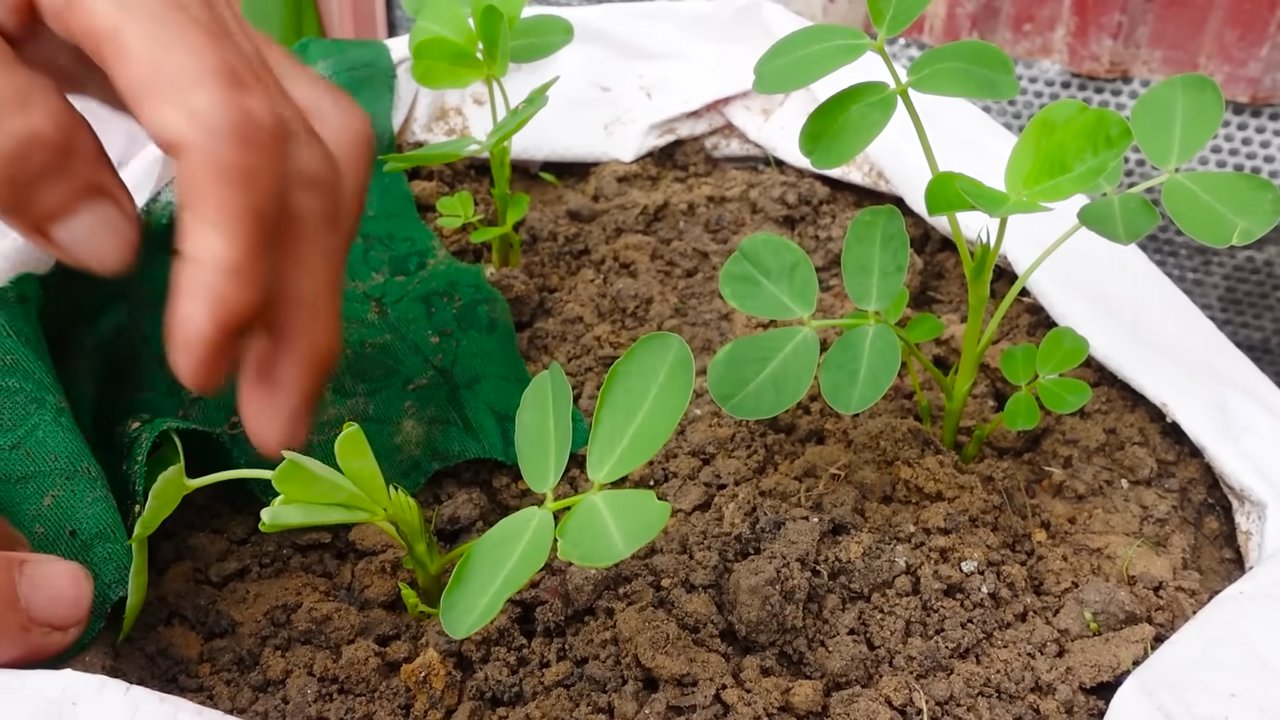
Planting Your Peanuts
Now for the fun part – planting! You can start peanuts indoors or directly sow them in the ground. I prefer direct sowing because it’s less work and avoids transplant shock.
Here’s how to plant your peanuts:
1. Timing: Wait until the soil temperature reaches at least 65°F (18°C) before planting. This is usually a couple of weeks after the last frost.
2. Seed Preparation: You can plant raw, unsalted peanuts directly from the grocery store, but I’ve found that shelling them first helps them germinate faster. Gently crack the shells and remove the peanuts, being careful not to damage the kernels.
3. Spacing: Plant the peanuts about 1-2 inches deep and 6-8 inches apart in rows that are 2-3 feet apart. This gives the plants enough room to spread out and develop their pegs.
4. Watering: Water the soil thoroughly after planting. Keep the soil consistently moist, but not waterlogged, until the seedlings emerge.
Caring for Your Peanut Plants
Peanuts are relatively low-maintenance plants, but they do need some attention to thrive.
* Watering: Water regularly, especially during dry spells. Peanuts need about 1 inch of water per week.
* Weeding: Keep the area around your peanut plants free of weeds. Weeds compete with the peanuts for nutrients and water.
* Hilling: About a month after the plants emerge, hill the soil around the base of the plants. This helps support the plants and encourages the pegs to grow into the soil.
* Fertilizing: If your soil is poor, you can side-dress your peanut plants with a balanced fertilizer (like 10-10-10) about a month after they emerge. Be careful not to over-fertilize, as this can lead to excessive leafy growth.
* Pest Control: Peanuts are generally pest-resistant, but they can be susceptible to aphids, spider mites, and leafhoppers. Inspect your plants regularly and treat any infestations promptly with insecticidal soap or neem oil.
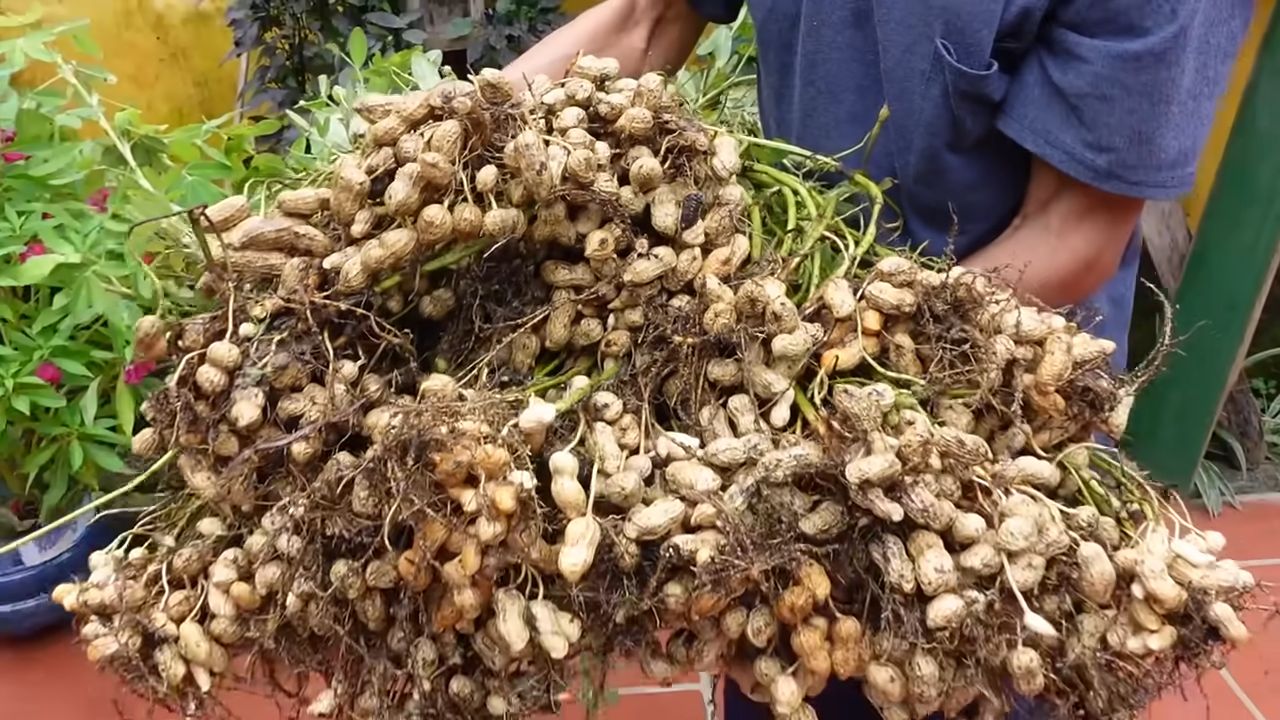
Harvesting Your Peanuts
Harvesting peanuts is the most exciting part of the whole process! You’ll know it’s time to harvest when the leaves start to turn yellow and the plants begin to die back. This usually happens about 120-150 days after planting, depending on the variety.
Here’s how to harvest your peanuts:
1. Digging: Use a garden fork or shovel to carefully dig up the entire plant, being careful not to damage the peanuts.
2. Shaking: Gently shake off the excess soil from the roots and peanuts.
3. Curing: Hang the plants upside down in a well-ventilated area for 2-4 weeks to cure. This allows the peanuts to dry out and develop their flavor. I usually hang them in my garage.
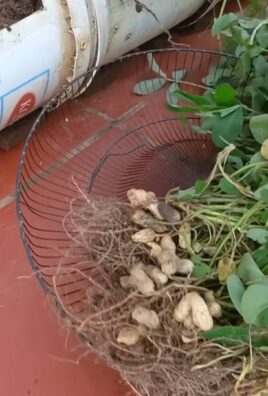
4. Picking: Once the plants are dry, pick the peanuts off the vines.
5. Cleaning: Wash the peanuts in a bucket of water to remove any remaining dirt.
6. Drying: Spread the peanuts out on a screen or tray to dry completely. This can take several days.
Roasting Your Homegrown Peanuts
Now that you’ve harvested and dried your peanuts, it’s time to roast them! Roasting brings out the nutty flavor and makes them perfect for snacking or making peanut butter.
Here’s how to roast your peanuts:
1. Preheat: Preheat your oven to 350°F (175°C).
2. Spread: Spread the peanuts in a single layer on a baking sheet.
3. Roast: Roast for 20-25 minutes, or until the peanuts are golden brown and fragrant. Stir them occasionally to ensure even roasting.
4. Cool: Let the peanuts cool completely before eating or storing.
Making Homemade Peanut Butter
Okay, this is where things get *really* good. Making your own peanut butter is surprisingly easy, and it tastes so much better than store-bought.
Here’s how to make homemade peanut butter:
1. Roast: Roast your homegrown peanuts as described above.
2. Cool: Let the peanuts cool completely.
3. Process: Place the roasted peanuts in a food processor or high-powered blender.
4. Blend: Blend until smooth, scraping down the sides of the bowl as needed. This can take several minutes.
5. Additions: Add salt, honey, or other flavorings to taste. I like to add a pinch of sea salt and a drizzle of honey.
6. Store: Store your homemade peanut butter in an airtight container in the refrigerator. It will keep for several weeks.
Troubleshooting Common Peanut Problems
Even with the best care, you might encounter some problems while growing peanuts. Here are a few common issues and how to deal with them:
* Poor Germination: If your peanuts aren’t germinating, make sure the soil temperature is warm enough and that the soil is consistently moist. You can also try soaking the peanuts in water for a few hours before planting to help them germinate.
* Yellowing Leaves: Yellowing leaves can be a sign of nutrient deficiency. Try side-dressing your plants with a balanced fertilizer.
* Small Peanuts: Small peanuts can be caused by poor soil, insufficient water, or a short growing season. Make sure your soil is well-drained and fertile, water regularly, and choose a peanut variety that is suited for your climate.
* Pest Infestations: Inspect your plants regularly for pests and treat any infestations promptly with insecticidal soap or neem oil.
Tips for a Bountiful Peanut Harvest
Here are a few extra tips to help you maximize your peanut harvest:
* Choose the Right Variety: As I mentioned earlier, choose a peanut variety that is well-suited for your climate and growing season.
* Prepare Your Soil: Peanuts need well-drained, sandy loam soil. Amend your soil with compost or well-rotted manure to improve drainage and fertility.
* Water Regularly: Peanuts need about 1 inch of water per week, especially during dry spells.
* Hill Your Plants: Hilling the soil around the base of the plants helps support them
Conclusion
So, there you have it! Growing peanuts at home is not only achievable but also a deeply rewarding experience. Forget the store-bought, often bland, peanuts – imagine the satisfaction of harvesting your own crop, bursting with fresh, nutty flavor. This DIY project transforms your garden into a source of delicious and healthy snacks, and it’s a fantastic way to connect with the natural world.
Why is this a must-try? Because it’s more than just growing food; it’s about understanding the life cycle of a plant, appreciating the effort that goes into producing our food, and enjoying the unparalleled taste of homegrown goodness. Plus, it’s a conversation starter! How many people can say they grow their own peanuts?
But the fun doesn’t stop there. Once you’ve mastered the basics, you can experiment with different varieties of peanuts. Try Valencia peanuts for their sweeter flavor and multiple kernels per shell, or go for Virginia peanuts, known for their large size and perfect roasting quality. You can also explore different planting techniques, such as raised beds or container gardening, to optimize your yield based on your available space and climate.
Consider adding companion plants like marigolds to deter pests or herbs like rosemary to enhance the soil’s health. And don’t forget the roasting! Experiment with different seasonings and roasting times to create your perfect batch of homemade roasted peanuts. From simple salt and pepper to spicy chili lime, the possibilities are endless. You can even use your homegrown peanuts to make your own peanut butter – the ultimate DIY achievement!
Growing peanuts at home is an adventure in self-sufficiency and a testament to the power of simple gardening. It’s a project that’s both educational and delicious, and one that will undoubtedly bring joy to your garden and your kitchen.
We wholeheartedly encourage you to give this DIY trick a try. Don’t be intimidated by the perceived complexity – with a little patience and the right guidance, you’ll be harvesting your own peanuts in no time. And once you do, we want to hear all about it! Share your experiences, your successes, and even your challenges in the comments below. Let’s build a community of home peanut growers and learn from each other. What variety did you choose? What challenges did you face? What delicious recipes did you create with your homegrown peanuts? Your insights will help others embark on their own peanut-growing journey. So, get your hands dirty, plant those seeds, and prepare to be amazed by the magic of growing your own peanuts!
Frequently Asked Questions (FAQ)
What is the best time to plant peanuts?
The ideal time to plant peanuts is after the last frost, when the soil temperature consistently reaches at least 65 degrees Fahrenheit (around 18 degrees Celsius). This typically falls in late spring or early summer, depending on your geographic location. Planting too early in cold soil can hinder germination and increase the risk of seed rot. Check your local weather forecasts and historical data to determine the best planting window for your area.
What kind of soil is best for growing peanuts?
Peanuts thrive in well-drained, sandy loam soil. This type of soil allows for proper root development and drainage, preventing waterlogging which can lead to fungal diseases. The soil should also be slightly acidic, with a pH between 6.0 and 6.5. Before planting, consider amending your soil with compost or other organic matter to improve its structure and fertility. Avoid heavy clay soils, as they can compact and restrict root growth. If you have clay soil, consider growing peanuts in raised beds or containers filled with a suitable soil mix.
How much sunlight do peanuts need?
Peanuts require at least 6-8 hours of direct sunlight per day to thrive. Choose a planting location that receives ample sunlight throughout the day. Insufficient sunlight can result in stunted growth, reduced yields, and poor-quality peanuts. If you live in a particularly hot climate, some afternoon shade may be beneficial to prevent the plants from overheating.
How often should I water my peanut plants?
Peanut plants need consistent moisture, especially during germination and early growth. Water deeply and regularly, ensuring the soil remains consistently moist but not waterlogged. As the plants mature and begin to flower, you can reduce the frequency of watering slightly. During dry spells, be sure to provide supplemental watering to prevent the soil from drying out completely. Avoid overhead watering, as this can promote fungal diseases. Instead, water at the base of the plants.
How long does it take for peanuts to mature?
Peanuts typically take between 120 and 150 days to mature, depending on the variety and growing conditions. The exact time will vary depending on your climate and the specific peanut variety you are growing. You’ll know your peanuts are ready to harvest when the foliage begins to yellow and the inside of the peanut shells show dark veins.
How do I harvest peanuts?
Harvesting peanuts involves digging up the entire plant. Loosen the soil around the plant with a garden fork or shovel, then gently lift the plant from the ground. Shake off any excess soil and allow the peanuts to dry in a well-ventilated area for several days. Once the peanuts are dry, you can remove them from the plant and store them in a cool, dry place.
What are some common pests and diseases that affect peanuts?
Common pests that can affect peanuts include aphids, spider mites, and nematodes. Diseases include leaf spot, stem rot, and peanut rust. To prevent pest and disease problems, practice good garden hygiene, such as removing weeds and debris, and ensure proper air circulation. You can also use organic pest control methods, such as insecticidal soap or neem oil, to control pests. If diseases become a problem, consider using a fungicide specifically formulated for peanuts.
Can I grow peanuts in containers?
Yes, you can successfully grow peanuts in containers. Choose a large container, at least 18 inches in diameter and 12 inches deep, with drainage holes. Fill the container with a well-draining potting mix. Plant 2-3 peanut seeds per container and water regularly. Place the container in a sunny location and provide support for the plants as they grow. Container-grown peanuts may require more frequent watering and fertilization than those grown in the ground.
How do I roast my homegrown peanuts?
To roast your homegrown peanuts, preheat your oven to 350 degrees Fahrenheit (175 degrees Celsius). Spread the peanuts in a single layer on a baking sheet. Roast for 15-20 minutes, or until the peanuts are golden brown and fragrant. Stir the peanuts occasionally to ensure even roasting. Once roasted, remove the peanuts from the oven and let them cool completely before storing them in an airtight container. You can season the peanuts with salt, spices, or other flavorings before or after roasting.
What are some creative ways to use homegrown peanuts?
Beyond simply roasting and eating them as a snack, homegrown peanuts can be used in a variety of creative ways. You can make your own peanut butter, add them to salads or stir-fries, use them as a topping for desserts, or even grind them into flour for baking. Experiment with different recipes and flavor combinations to discover your favorite ways to enjoy your homegrown peanuts.
Leave a Comment