
Balcony Kale Growing Tips: Unlock the secrets to a thriving edible garden, even in the smallest of spaces! Have you ever dreamed of snipping fresh, vibrant kale leaves right from your own balcony for a healthy smoothie or a delicious salad? I know I have! It’s easier than you think, and this guide is packed with DIY tricks and hacks to help you achieve balcony kale growing success.
Growing kale, a nutritional powerhouse, has a rich history. From its humble beginnings as a wild cabbage relative to its cultivation by the ancient Greeks and Romans, kale has been a staple food for centuries. Today, with increasing awareness of healthy eating and sustainable living, more and more people are turning to home gardening. But let’s face it, not everyone has a sprawling backyard. That’s where balcony gardening comes in!
Many people struggle with balcony gardening due to limited space, sunlight, and knowledge of the specific needs of different plants. That’s why I’m so excited to share these balcony kale growing tips with you. I’ll walk you through everything from choosing the right container and soil to providing adequate sunlight and protecting your kale from pests. With a little know-how, you can transform your balcony into a lush, green oasis and enjoy a continuous supply of fresh, homegrown kale. Let’s get started!
Growing Kale on Your Balcony: A Beginner’s Guide
Hey there, fellow balcony gardeners! I’m so excited to share my experiences and tips for growing lush, vibrant kale right on your balcony. Kale is a nutritional powerhouse, and having it fresh and readily available is a total game-changer. Plus, it’s surprisingly easy to grow, even in a small space. Let’s dive in!
Choosing the Right Kale Variety
Before we get our hands dirty, let’s talk kale varieties. Not all kale is created equal, and some are better suited for container gardening than others. Here are a few of my favorites:
* **Dwarf Blue Curled Vates:** This is a compact variety that’s perfect for smaller containers. It’s also incredibly cold-hardy, so it can withstand cooler temperatures.
* **Red Russian:** This kale has beautiful, flat, fringed leaves with a reddish-purple hue. It’s not only delicious but also adds a pop of color to your balcony garden.
* **Lacinato (Dinosaur Kale):** This variety has long, dark green, almost black leaves with a slightly bumpy texture. It’s a bit taller than the Dwarf Blue Curled Vates, but it still does well in containers.
* **Redbor Kale:** If you’re looking for ornamental value as well as delicious greens, Redbor is a great choice. Its deeply ruffled leaves turn a vibrant purple in cooler weather.
Gathering Your Supplies
Okay, now that we’ve chosen our kale variety, let’s gather our supplies. Here’s what you’ll need:
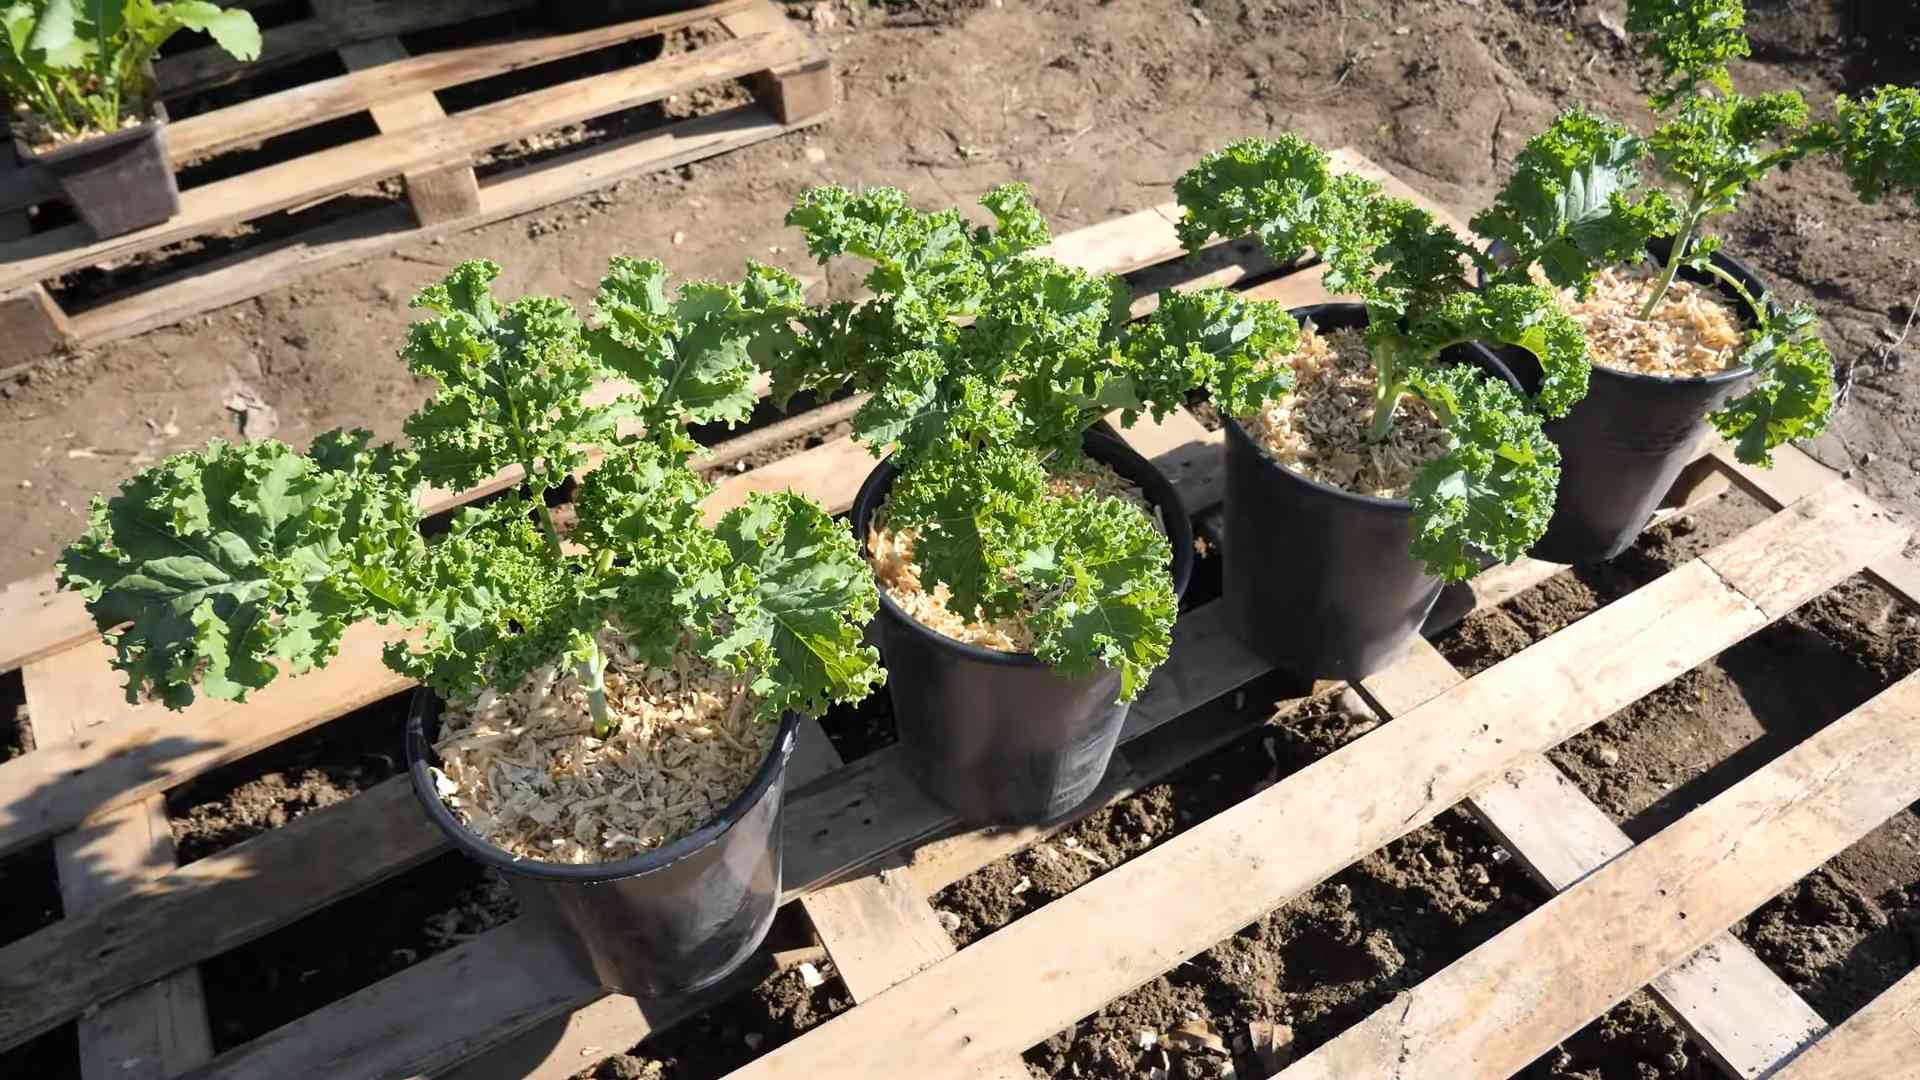
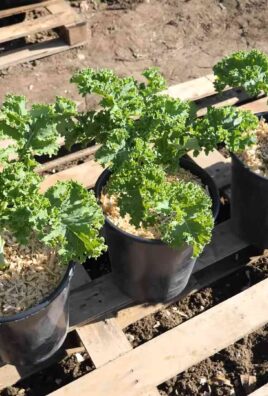
* **Containers:** Choose containers that are at least 12 inches deep and wide. This will give your kale plants enough room to grow. Make sure your containers have drainage holes!
* **Potting Mix:** Use a high-quality potting mix that’s well-draining. Avoid using garden soil, as it can become compacted in containers. I personally like to use a mix of compost, peat moss, and perlite.
* **Kale Seeds or Seedlings:** You can start kale from seed or purchase seedlings from your local nursery. Starting from seed is more economical, but seedlings will give you a head start.
* **Watering Can or Hose:** You’ll need a way to water your kale plants regularly.
* **Fertilizer:** Kale is a heavy feeder, so you’ll need to fertilize it regularly. I recommend using a balanced organic fertilizer.
* **Gardening Gloves:** Protect your hands from dirt and potential irritants.
* **Trowel or Small Shovel:** For planting and transplanting.
* **Optional: Slug and Snail Bait:** These pests can be a problem for kale, so you may want to use some slug and snail bait to protect your plants. I prefer organic options.
Planting Your Kale
Alright, let’s get planting! Here’s how to plant your kale, whether you’re starting from seed or using seedlings:
Starting from Seed:
1. **Prepare Your Containers:** Fill your containers with potting mix, leaving about an inch of space at the top.
2. **Sow the Seeds:** Sprinkle the kale seeds evenly over the surface of the soil. Then, cover them with a thin layer of potting mix (about 1/4 inch).
3. **Water Gently:** Water the soil gently to moisten it. Be careful not to wash away the seeds.
4. **Keep the Soil Moist:** Keep the soil consistently moist until the seeds germinate. This usually takes about 5-10 days.
5. **Thin the Seedlings:** Once the seedlings have developed a few true leaves, thin them out so that they’re spaced about 6-8 inches apart. This will give them enough room to grow.
Planting Seedlings:
1. **Prepare Your Containers:** Fill your containers with potting mix, leaving about an inch of space at the top.
2. **Dig a Hole:** Dig a hole in the soil that’s slightly larger than the root ball of the seedling.
3. **Remove the Seedling from its Container:** Gently remove the seedling from its container, being careful not to damage the roots.
4. **Place the Seedling in the Hole:** Place the seedling in the hole and backfill with potting mix.
5. **Water Thoroughly:** Water the seedling thoroughly to help it settle in.
Caring for Your Kale
Now that your kale is planted, it’s time to learn how to care for it. Here are some tips for keeping your kale plants healthy and productive:
* **Sunlight:** Kale needs at least 6 hours of sunlight per day. Place your containers in a sunny spot on your balcony. If you don’t have enough sunlight, you may need to supplement with grow lights.
* **Watering:** Water your kale plants regularly, especially during hot, dry weather. The soil should be consistently moist, but not soggy. Check the soil moisture by sticking your finger into the soil. If the top inch of soil is dry, it’s time to water.
* **Fertilizing:** Kale is a heavy feeder, so you’ll need to fertilize it regularly. I recommend using a balanced organic fertilizer every 2-3 weeks. Follow the instructions on the fertilizer package. You can also use compost tea as a natural fertilizer.
* **Pest Control:** Kale can be susceptible to pests like aphids, cabbage worms, and slugs. Inspect your plants regularly for signs of pests. If you find any pests, you can try hand-picking them off or using an organic insecticide. For slugs and snails, I recommend using organic slug and snail bait.
* **Weeding:** Keep your containers free of weeds. Weeds can compete with your kale plants for nutrients and water.
* **Pruning:** Prune your kale plants regularly to encourage new growth. Remove any yellowing or damaged leaves. You can also pinch off the growing tips to encourage bushier growth.
Harvesting Your Kale
The best part of growing kale is, of course, harvesting it! You can start harvesting kale leaves when they’re about 4-6 inches long. Here’s how to harvest your kale:
1. **Choose the Leaves:** Select the outer, older leaves to harvest. Leave the inner, younger leaves to continue growing.
2. **Cut the Leaves:** Use a sharp knife or scissors to cut the leaves off at the base of the stem.
3. **Wash the Leaves:** Wash the leaves thoroughly to remove any dirt or debris.
4. **Store the Leaves:** Store the kale leaves in a plastic bag in the refrigerator. They should last for about a week.
Troubleshooting Common Problems
Even with the best care, you may encounter some problems when growing kale. Here are some common problems and how to fix them:
* **Yellowing Leaves:** Yellowing leaves can be a sign of overwatering, underwatering, or nutrient deficiency. Check the soil moisture and adjust your watering accordingly. If the soil is consistently moist, you may be overwatering. If the soil is dry, you may be underwatering. If the leaves are yellowing all over, it could be a sign of nutrient deficiency. Fertilize your plants with a balanced organic fertilizer.
* **Holes in Leaves:** Holes in leaves are usually caused by pests like cabbage worms or slugs. Inspect your plants for signs of pests and take appropriate action.
* **Stunted Growth:** Stunted growth can be caused by a number of factors, including lack of sunlight, poor soil, or pest infestation. Make sure your plants are getting enough sunlight and that the soil is well-draining. If you suspect a pest infestation, inspect your plants and take appropriate action.
* **Bolting:** Bolting is when the kale plant starts to produce flowers and seeds. This usually happens when the weather gets too hot. Once a kale plant bolts, the leaves become bitter and unpalatable. To prevent bolting, try to keep your plants cool during hot weather. You can also choose bolt-resistant varieties of kale.
Extending Your Harvest
Want to keep your kale harvest going for as long as possible? Here are a few tips:
* **Succession Planting:** Plant new kale seeds or seedlings every few weeks to ensure a continuous harvest.
* **Overwintering:** Kale is a cold-hardy plant that can survive the winter in many climates. If you live in a mild climate, you can overwinter your kale plants by protecting them from frost. You can cover them with a row cover or move them to a sheltered location.
* **Cut and Come Again:** Harvest the outer leaves regularly, leaving the inner leaves to continue growing. This will encourage the plant to produce more leaves.
Delicious Ways to Enjoy Your Homegrown Kale
Now that you’re harvesting your own kale, it’s time to enjoy it! Here are a few of my favorite ways to eat kale:
* **Kale Salad:** Massage kale leaves with olive oil, lemon juice, and salt. Add your favorite toppings, such as nuts, seeds, dried fruit, and cheese.
* **Kale Chips:** Toss kale leaves with olive oil and salt. Bake at 350 degrees Fahrenheit until

Conclusion
So, there you have it! Growing your own kale on your balcony isn’t just a trendy gardening fad; it’s a genuinely rewarding experience that brings fresh, nutritious greens right to your doorstep. We’ve explored the simple steps, from choosing the right container and soil to providing adequate sunlight and water, and even tackling common pests and diseases. But why is this DIY trick a must-try?
Firstly, consider the unparalleled freshness. Store-bought kale, even organic varieties, can’t compare to the vibrant flavor and nutrient density of kale harvested moments before you eat it. Imagine stepping onto your balcony, snipping a few leaves, and adding them to your morning smoothie or evening salad. The taste difference is remarkable.
Secondly, think about the cost savings. While the initial investment in containers, soil, and seeds might seem like a hurdle, it quickly pays for itself. A single packet of kale seeds can yield a continuous supply of greens for months, far exceeding the cost of buying kale from the grocery store. Plus, you’re reducing your carbon footprint by eliminating transportation and packaging.
Thirdly, and perhaps most importantly, growing your own kale is incredibly empowering. It connects you to the natural world, provides a sense of accomplishment, and allows you to control the quality of your food. You know exactly what goes into your kale, ensuring it’s free from harmful pesticides and chemicals.
But the beauty of balcony kale growing lies in its adaptability. Feel free to experiment with different varieties. Try ‘Lacinato’ (dinosaur kale) for its unique texture and nutty flavor, or ‘Red Russian’ kale for its beautiful purple stems and mild taste. You can also companion plant your kale with herbs like rosemary or thyme to deter pests and enhance flavor. Consider adding marigolds to your container; they are not only beautiful but also act as a natural pest repellent.
Don’t be afraid to get creative with your container choices. While standard pots work perfectly well, you can also repurpose old buckets, crates, or even hanging baskets. Just make sure your chosen container has adequate drainage.
Finally, remember that growing kale on your balcony is a learning process. Don’t be discouraged if you encounter challenges along the way. Every gardener, even experienced ones, faces setbacks. The key is to learn from your mistakes, adapt your approach, and keep experimenting.
We wholeheartedly encourage you to give this DIY trick a try. It’s a simple, affordable, and incredibly rewarding way to enjoy fresh, healthy kale all season long. And once you’ve harvested your first batch, we’d love to hear about your experience! Share your photos, tips, and challenges in the comments below. Let’s build a community of balcony kale growers and inspire others to embrace the joys of urban gardening. Let us know what kind of **balcony kale growing tips** you have discovered!
Frequently Asked Questions (FAQ)
1. What is the best variety of kale to grow on a balcony?
The best kale variety for your balcony depends on your personal preferences and the amount of space you have. However, some varieties are particularly well-suited for container gardening. ‘Dwarf Blue Curled Vates’ is a compact variety that’s perfect for smaller balconies. ‘Lacinato’ (dinosaur kale) is another popular choice, known for its unique texture and nutty flavor. ‘Red Russian’ kale is also a good option, offering beautiful purple stems and a mild taste. Experiment with different varieties to see which one thrives best in your balcony’s conditions and suits your culinary needs. Consider the size of the mature plant when making your selection. Some kale varieties can grow quite large, potentially overcrowding a small balcony space.
2. How much sunlight does kale need when grown on a balcony?
Kale thrives in full sun, requiring at least 6 hours of direct sunlight per day. However, it can tolerate partial shade, especially in hotter climates. If your balcony receives less than 6 hours of sunlight, try to position your kale plants in the sunniest spot possible. You can also supplement with grow lights if necessary. Observe your plants closely for signs of insufficient sunlight, such as leggy growth or pale leaves. If you notice these symptoms, try to increase the amount of sunlight your kale receives. Remember that the intensity of sunlight can vary depending on the season and your location, so you may need to adjust your plants’ position accordingly.
3. What kind of soil is best for growing kale in containers?
The best soil for growing kale in containers is a well-draining potting mix that’s rich in organic matter. Avoid using garden soil, as it can be too heavy and compact for containers. Look for a potting mix specifically formulated for vegetables or herbs. You can also amend your potting mix with compost or other organic materials to improve its fertility and drainage. A slightly acidic to neutral pH (around 6.0 to 7.0) is ideal for kale. Before planting, make sure the soil is moist but not waterlogged. Good drainage is crucial to prevent root rot, so ensure your container has drainage holes.
4. How often should I water my balcony kale plants?
Water your balcony kale plants regularly, especially during hot, dry weather. The frequency of watering will depend on the size of your container, the type of soil you’re using, and the weather conditions. A good rule of thumb is to water when the top inch of soil feels dry to the touch. Avoid overwatering, as this can lead to root rot. When watering, water deeply, allowing the water to drain out of the bottom of the container. Check your plants daily, especially during the hottest part of the day, and adjust your watering schedule as needed. Consider using a moisture meter to accurately assess the soil moisture level.
5. What are some common pests and diseases that affect balcony kale, and how can I prevent them?
Common pests that affect balcony kale include aphids, cabbage worms, and flea beetles. Diseases include powdery mildew and black rot. To prevent pests, inspect your plants regularly for signs of infestation. You can handpick pests off the plants or use insecticidal soap or neem oil. To prevent diseases, ensure good air circulation around your plants and avoid overwatering. Remove any infected leaves promptly. Companion planting with herbs like rosemary or thyme can also help deter pests. Consider using row covers to protect your plants from pests, especially during the early stages of growth.
6. How do I harvest kale from my balcony garden?
You can start harvesting kale leaves when they are about 4-6 inches long. Harvest the outer leaves first, leaving the inner leaves to continue growing. Use a sharp knife or scissors to cut the leaves cleanly from the stem. Avoid tearing the leaves, as this can damage the plant. You can harvest kale leaves continuously throughout the growing season. Regular harvesting encourages the plant to produce more leaves. Wash the harvested leaves thoroughly before using them.
7. Can I grow kale on my balcony during the winter?
Yes, kale is a cold-hardy vegetable that can be grown on a balcony during the winter in many climates. However, you may need to provide some protection from frost and freezing temperatures. You can cover your plants with a blanket or tarp on cold nights. You can also move your containers to a more sheltered location, such as near a wall or under an overhang. In very cold climates, you may need to bring your plants indoors. Even in winter, kale will continue to grow, albeit at a slower rate.
8. How can I fertilize my balcony kale plants?
Fertilize your balcony kale plants regularly with a balanced fertilizer. You can use a liquid fertilizer or a slow-release granular fertilizer. Follow the instructions on the fertilizer package. Avoid over-fertilizing, as this can lead to excessive foliage growth and reduced flavor. You can also amend your soil with compost or other organic materials to provide nutrients. A soil test can help you determine the specific nutrient needs of your plants.
9. Can I grow kale from seed on my balcony?
Yes, you can easily grow kale from seed on your balcony. Start seeds indoors 4-6 weeks before the last expected frost, or direct sow them into your containers after the last frost. Sow seeds about 1/4 inch deep and keep the soil moist. Once the seedlings have developed a few true leaves, thin them to the strongest plant per container. Kale seeds germinate best in cool temperatures.
10. What are some creative ways to use my balcony-grown kale?
Beyond the usual salads and smoothies, there are countless creative ways to use your balcony-grown kale. Try making kale chips by tossing the leaves with olive oil and salt and baking them in the oven. Add kale to soups, stews, and stir-fries. Use kale as a pizza topping or in a quiche. You can even blend kale into pesto or use it to make kale juice. Don’t be afraid to experiment and discover your own favorite ways to enjoy this versatile vegetable. Remember that smaller, younger kale leaves are generally more tender and mild in flavor than larger, more mature leaves.
Leave a Comment