
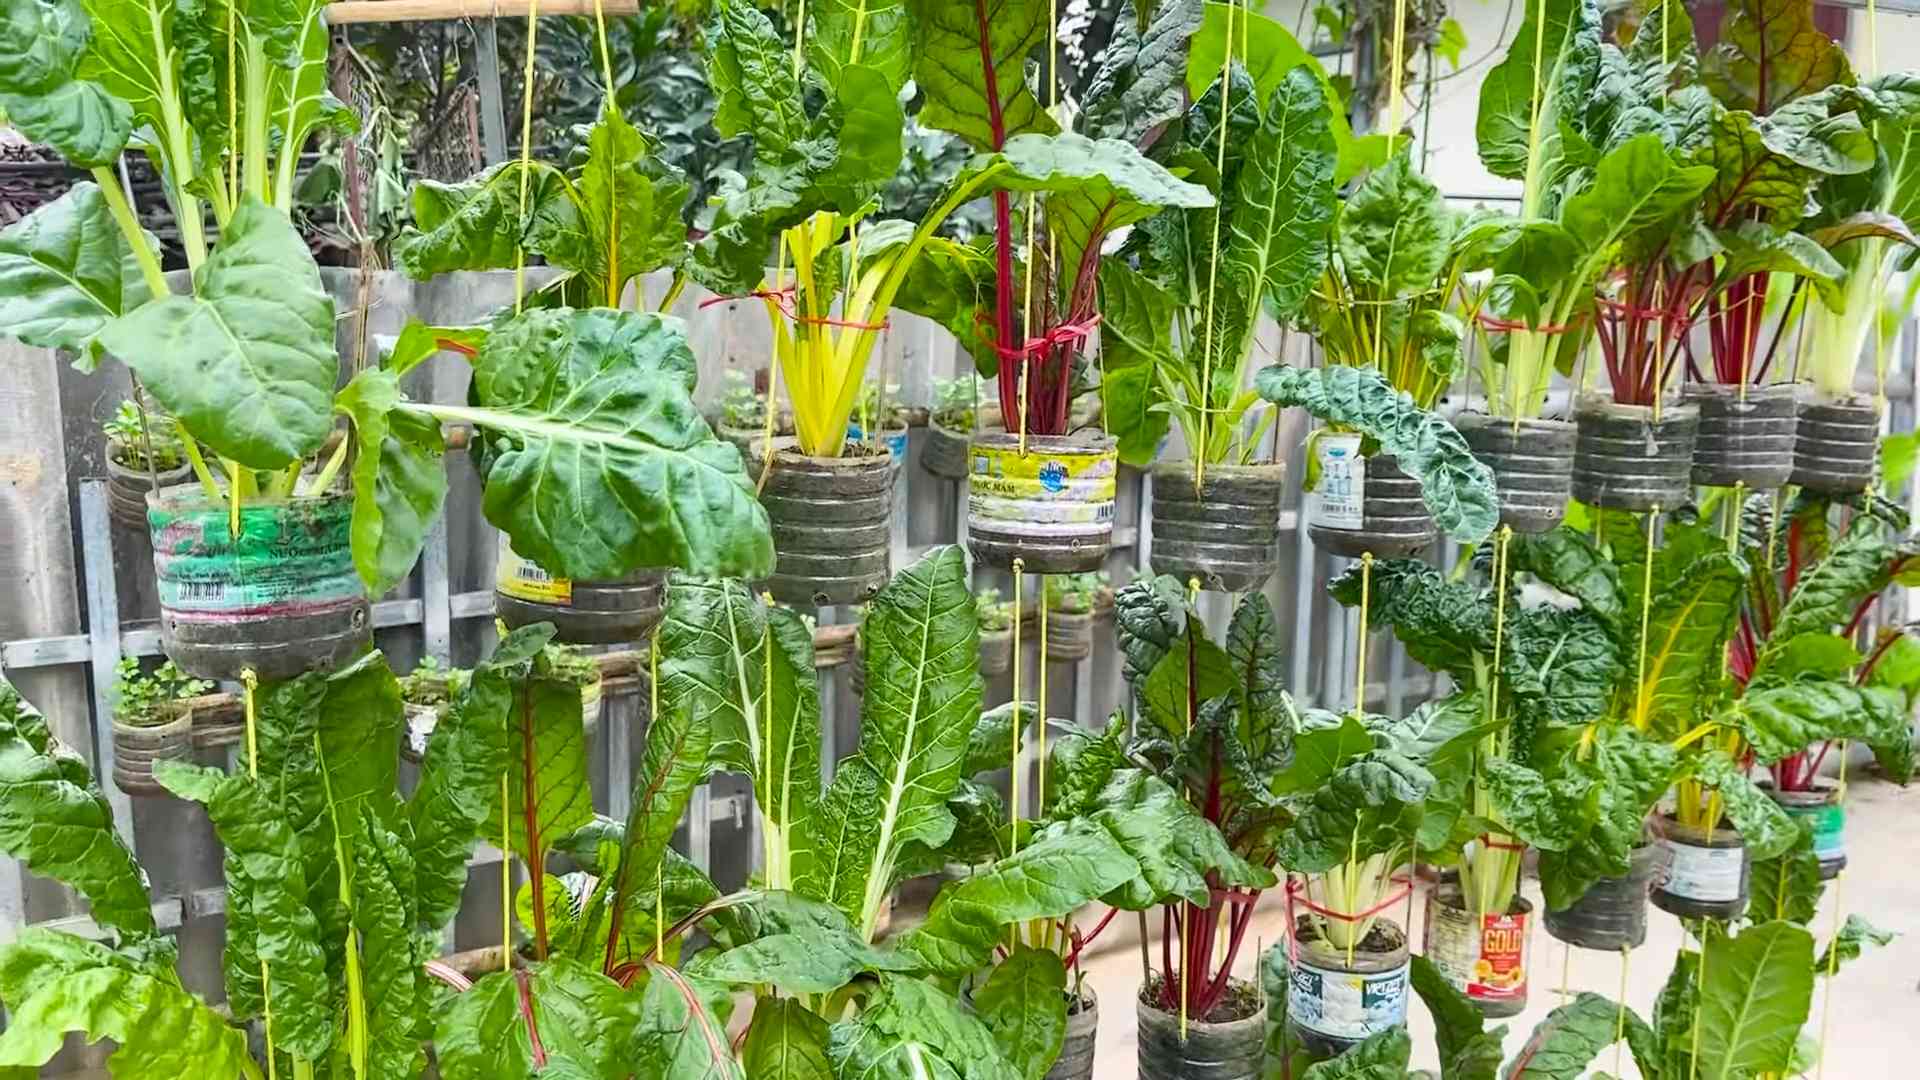
Balcony Rainbow Chard Growing might sound like a whimsical dream, but trust me, it’s totally achievable, even if you’re a complete beginner! Imagine stepping onto your balcony and being greeted by a vibrant explosion of color – not from flowers, but from edible, nutritious, and utterly gorgeous Rainbow Chard. Forget dull, predictable greens; we’re talking about a leafy rainbow right outside your door!
For centuries, leafy greens like chard have been a staple in diets around the world, prized for their health benefits and versatility in cooking. While traditionally grown in sprawling gardens, the beauty of modern gardening lies in its adaptability. We can now bring the farm-to-table experience to even the smallest urban spaces. And that’s where this DIY guide comes in.
Let’s face it, fresh, organic produce can be expensive and sometimes hard to find. Plus, there’s something incredibly satisfying about nurturing your own food from seed to plate. This article will equip you with all the knowledge you need for successful balcony rainbow chard growing. I’ll share my tried-and-true tips and tricks, from choosing the right containers and soil to warding off pests and harvesting your colorful bounty. Get ready to transform your balcony into a thriving edible oasis!
Growing Rainbow Chard on Your Balcony: A Colorful and Edible Delight!
Hey there, fellow balcony gardeners! I’m so excited to share my experience growing vibrant rainbow chard right on my balcony. It’s surprisingly easy, adds a pop of color, and provides fresh, nutritious greens for salads, stir-fries, and more. Let’s dive in!
What You’ll Need
Before we get started, let’s gather our supplies. This is what I used, and you can adapt it based on what you have available:
* Rainbow Chard Seeds: Obviously! Choose a reputable seed supplier for the best germination rates.
* Pots or Containers: I prefer containers that are at least 12 inches deep and wide to give the chard roots plenty of room. You can use terracotta pots, plastic containers, or even repurposed buckets. Just make sure they have drainage holes.
* Potting Mix: Use a high-quality potting mix that drains well. Avoid using garden soil, as it can compact in containers.
* Watering Can or Hose: For regular watering.
* Fertilizer (Optional): A balanced liquid fertilizer or compost tea can help boost growth.
* Trowel or Small Shovel: For planting and transplanting.
* Gardening Gloves (Optional): To keep your hands clean.
* Sunlight: A sunny spot on your balcony that gets at least 6 hours of direct sunlight per day.
Choosing the Right Container
The right container is crucial for successful balcony gardening. Here’s what I consider:
* Size Matters: As I mentioned, aim for at least 12 inches deep and wide. This gives the chard roots ample space to grow and prevents them from becoming root-bound.
* Drainage is Key: Make sure your containers have drainage holes to prevent waterlogging, which can lead to root rot. If your container doesn’t have drainage holes, you can drill some yourself.
* Material Considerations: Terracotta pots are breathable and help prevent overwatering, but they can dry out quickly in hot weather. Plastic containers retain moisture better but can overheat in direct sunlight. Choose what works best for your climate and watering habits.
* Weight: Keep in mind the weight of the filled containers, especially if you have weight restrictions on your balcony. Lightweight plastic containers are a good option if weight is a concern.
Planting Your Rainbow Chard
Now for the fun part! Here’s how I plant my rainbow chard seeds:
1. Prepare the Soil: Fill your containers with potting mix, leaving about an inch of space at the top. Gently pat down the soil to remove any air pockets.
2. Sow the Seeds: Sow the seeds about ½ inch deep and 1-2 inches apart. You can sow multiple seeds per spot and thin them out later if needed.
3. Water Gently: Water the soil gently to moisten it without disturbing the seeds.
4. Provide Sunlight: Place the containers in a sunny spot on your balcony.
5. Keep the Soil Moist: Keep the soil consistently moist but not waterlogged. Check the soil moisture daily and water when the top inch feels dry.
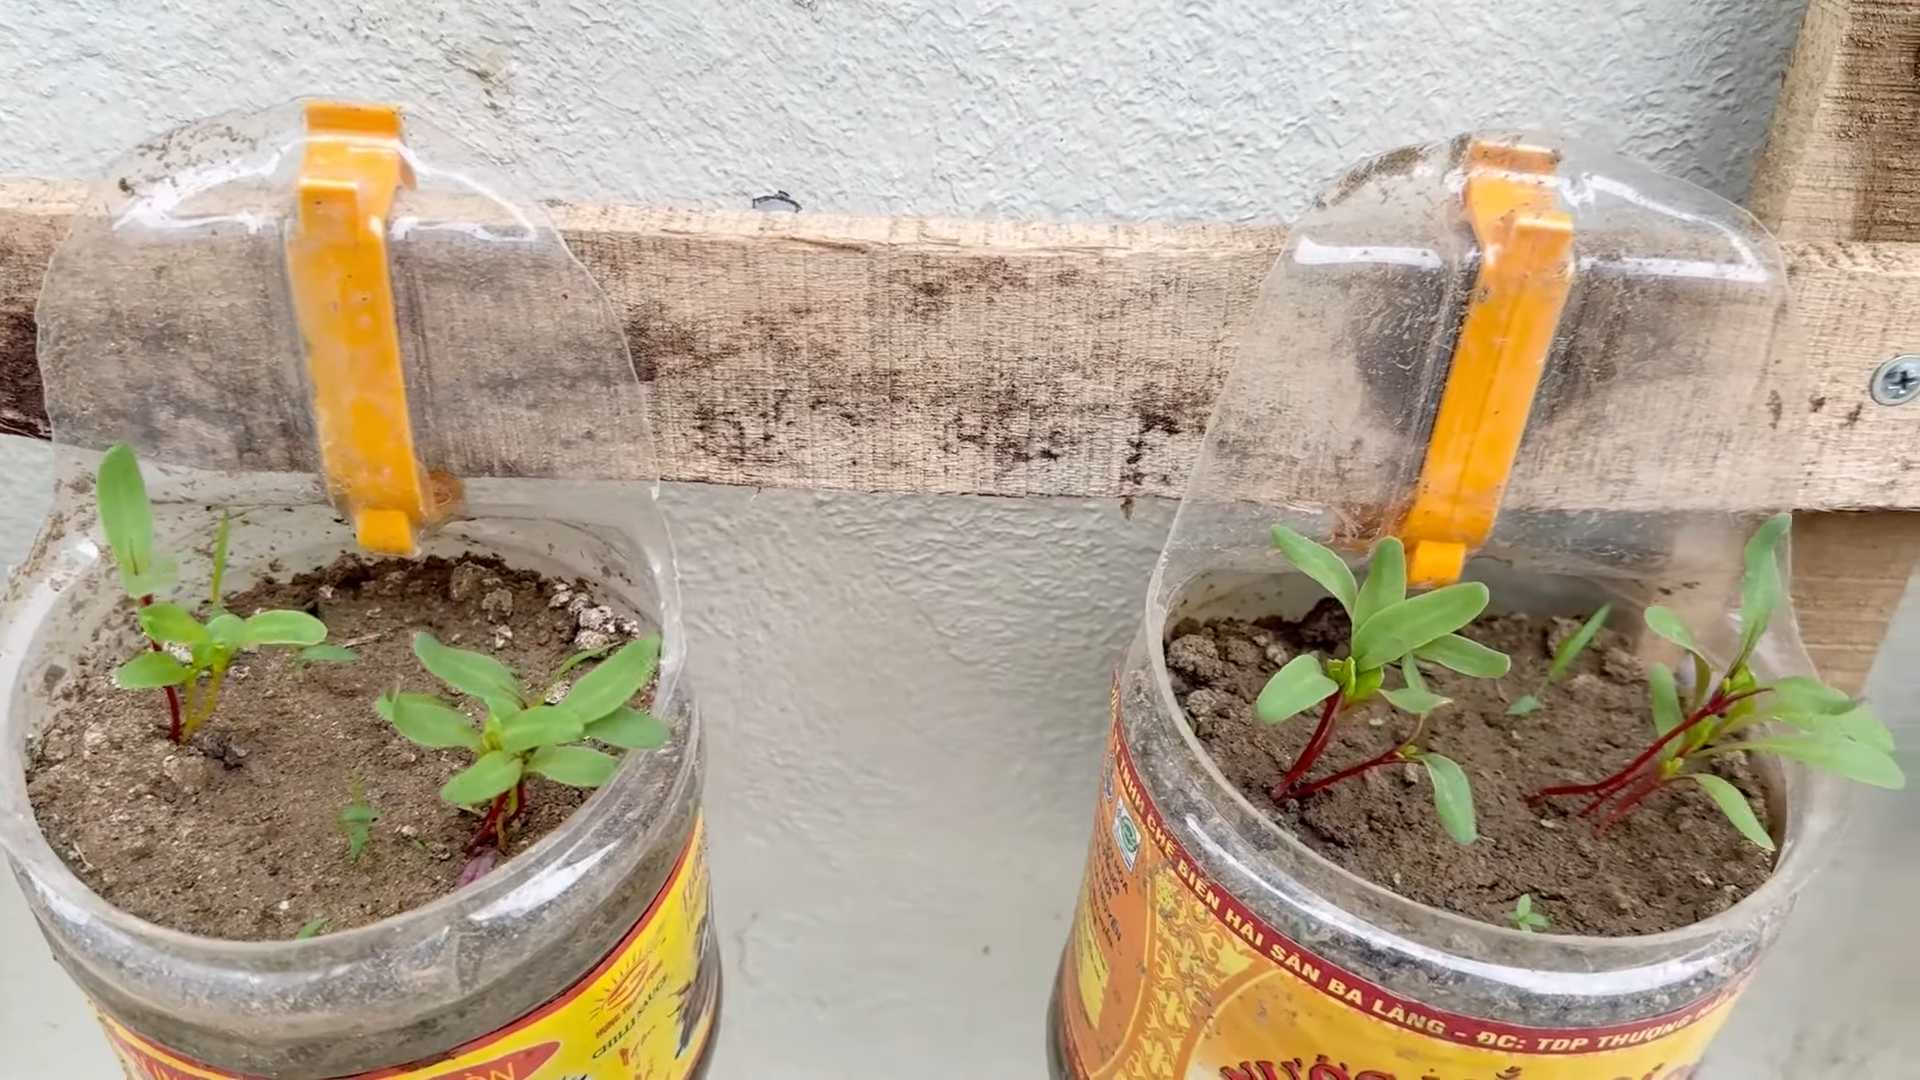
6. Germination: The seeds should germinate in about 7-14 days.
Thinning Seedlings
Once your seedlings have sprouted and have a few true leaves (the leaves that look like miniature chard leaves), it’s time to thin them out. This gives the remaining plants enough space to grow.
1. Identify the Strongest Seedlings: Choose the healthiest and strongest-looking seedlings in each spot.
2. Remove the Weaker Seedlings: Gently snip off the weaker seedlings at the soil level using scissors or small pruning shears. Avoid pulling them out, as this can disturb the roots of the remaining seedlings.
3. Space the Plants: Aim for a spacing of about 6-8 inches between plants.
Caring for Your Rainbow Chard
Rainbow chard is relatively low-maintenance, but here are a few tips to keep it thriving:
* Watering: Water regularly, especially during hot and dry weather. Check the soil moisture daily and water when the top inch feels dry. Avoid overwatering, as this can lead to root rot.
* Fertilizing (Optional): If you want to give your chard a boost, you can fertilize it every 2-3 weeks with a balanced liquid fertilizer or compost tea. Follow the instructions on the fertilizer packaging.
* Sunlight: Ensure your chard gets at least 6 hours of direct sunlight per day. If your balcony is shaded, you may need to supplement with grow lights.
* Pest Control: Keep an eye out for pests like aphids, slugs, and snails. You can control them with organic pest control methods like insecticidal soap or diatomaceous earth. I’ve found that a strong blast of water from the hose can often dislodge aphids.
* Weeding: Remove any weeds that pop up in your containers to prevent them from competing with your chard for nutrients and water.
Harvesting Your Rainbow Chard
The best part! You can start harvesting your rainbow chard when the leaves are about 6-8 inches long.
1. Harvest Outer Leaves: Harvest the outer leaves first, leaving the inner leaves to continue growing. This is called “cut-and-come-again” harvesting.
2. Cut at the Base: Cut the leaves at the base of the plant using scissors or a sharp knife.
3. Regular Harvesting: Harvest regularly to encourage continued growth.
4. Enjoy Your Harvest: Wash the leaves thoroughly and use them in salads, stir-fries, soups, or any other dish you like.
Troubleshooting
Even with the best care, you might encounter some problems. Here are a few common issues and how I deal with them:
* Yellowing Leaves: This can be caused by overwatering, underwatering, nutrient deficiencies, or pests. Check the soil moisture, fertilize if needed, and inspect for pests.
* Holes in Leaves: This is often caused by slugs or snails. Handpick them off the plants or use slug bait.
* Aphids: These tiny pests can suck the sap from your plants. Spray them with insecticidal soap or blast them off with a strong stream of water.
* Bolting: Bolting is when the plant starts to produce flowers and seeds, which can make the leaves bitter. This is often caused by hot weather or stress. To prevent bolting, provide shade during the hottest part of the day and water regularly. If your chard bolts, you can still harvest the leaves, but they may not taste as good.
Extending the Growing Season
Depending on your climate, you may be able to extend the growing season for your rainbow chard.
* Succession Planting: Sow new seeds every few weeks to ensure a continuous harvest.
* Cold Frames or Greenhouses: If you live in a cold climate, you can use cold frames or greenhouses to protect your chard from frost.
* Overwintering: In mild climates, you may be able to overwinter your chard. Cut back the leaves in the fall and cover the plants with mulch to protect them from the cold.
Rainbow Chard Varieties
While “Rainbow Chard” is a common name, there are actually several varieties that contribute to the mix of colors. Here are a few you might encounter:
* Bright Lights: This is probably the most common rainbow chard variety. It features a mix of stems in shades of red, pink, orange, yellow, and white.
* Ruby Red: This variety has vibrant red stems and dark green leaves.
* Golden Sunrise: As the name suggests, this variety has bright yellow stems and green leaves.
* Fordhook Giant: While not technically a “rainbow” variety, Fordhook Giant is a reliable and productive chard with dark green leaves and white stems. It’s a good option if you’re looking for a more traditional chard.
Creative Uses for Rainbow Chard
Beyond the usual salads and stir-fries, here are some other ways I love to use my rainbow chard:
* Chard Chips: Toss chard leaves with olive oil and salt, then bake them in the oven until crispy.
* Chard Stems: Don’t throw away the stems! They’re delicious sautéed with garlic and olive oil.
* Chard in Smoothies: Add a handful of chard leaves to your smoothies for a boost of nutrients.
* Chard Pesto: Use chard leaves instead of basil to make a unique and flavorful pesto.
* Chard in Soups and Stews: Add chopped chard to soups and stews for extra flavor and nutrients.
Why I Love Growing Rainbow Chard
Growing rainbow chard on my balcony has been such
Conclusion
So, there you have it! Growing rainbow chard on your balcony isn’t just a whimsical idea; it’s a genuinely rewarding experience that brings a burst of color and fresh, nutritious greens right to your doorstep. We’ve walked through the simple steps, highlighting how even the smallest balcony can become a thriving mini-farm. The beauty of this DIY project lies in its accessibility and the sheer joy of nurturing something from seed to table.
Why is this a must-try? Beyond the aesthetic appeal of vibrant rainbow chard leaves dancing in the sunlight, you’re gaining access to a constant supply of fresh, organic produce. No more last-minute trips to the grocery store for that essential leafy green. Plus, you’re reducing your carbon footprint by cutting down on transportation and packaging. And let’s be honest, there’s a certain satisfaction that comes from harvesting something you’ve grown yourself – a connection to nature that’s often missing in our modern lives.
But the fun doesn’t stop there! Feel free to experiment with different varieties of rainbow chard. Some boast intensely colored stems, while others offer a milder flavor. You can also companion plant your chard with herbs like basil or thyme to create a fragrant and productive balcony garden. Consider adding some marigolds to deter pests naturally and add even more color to your space.
For those with limited space, vertical gardening is your friend. Utilize stacked planters or hanging baskets to maximize your growing area. Just ensure your chosen containers have adequate drainage to prevent waterlogging. And if you’re feeling adventurous, try succession planting – sowing new seeds every few weeks to ensure a continuous harvest throughout the growing season.
We wholeheartedly encourage you to give this DIY balcony rainbow chard growing project a try. It’s a fantastic way to connect with nature, enjoy fresh produce, and add a touch of beauty to your living space. Don’t be afraid to get your hands dirty and experiment. Every balcony is unique, and the best way to learn is by doing.
Once you’ve harvested your first batch of vibrant rainbow chard, we’d love to hear about your experience! Share your photos, tips, and challenges in the comments below. Let’s create a community of balcony gardeners and inspire others to embrace the joy of growing their own food. Your success story could be the inspiration someone else needs to start their own balcony garden journey. Happy growing!
Frequently Asked Questions (FAQ)
What is the best time of year to plant rainbow chard on my balcony?
Rainbow chard is a cool-season crop, meaning it thrives in temperatures between 50°F and 70°F (10°C and 21°C). The best time to plant depends on your local climate. In areas with mild winters, you can plant in early spring or late summer for a fall/winter harvest. In colder climates, start seeds indoors 6-8 weeks before the last expected frost and transplant them outdoors once the weather warms up. You can also direct sow seeds outdoors after the last frost. Avoid planting during the hottest months of summer, as high temperatures can cause the chard to bolt (go to seed), which can make the leaves bitter.
How much sunlight does rainbow chard need on a balcony?
Rainbow chard needs at least 4-6 hours of direct sunlight per day to thrive. If your balcony is partially shaded, try to position your containers in the sunniest spot. If you’re growing chard indoors under grow lights, provide 12-14 hours of light per day. Insufficient sunlight can result in leggy growth and smaller, less vibrant leaves. Observe your plants closely and adjust their position as needed to ensure they’re getting enough light.
What type of soil is best for growing rainbow chard in containers?
Rainbow chard prefers well-draining, fertile soil with a pH between 6.0 and 7.0. A good potting mix for containers should be lightweight and retain moisture without becoming waterlogged. You can use a commercially available potting mix or create your own by combining equal parts of compost, peat moss (or coconut coir), and perlite or vermiculite. Adding some slow-release fertilizer to the potting mix at planting time will provide essential nutrients for healthy growth. Avoid using garden soil in containers, as it can become compacted and doesn’t drain well.
How often should I water my balcony rainbow chard?
Water your rainbow chard regularly, especially during hot, dry weather. The soil should be kept consistently moist but not soggy. Check the soil moisture by sticking your finger about an inch deep into the soil. If it feels dry, it’s time to water. Water deeply, allowing the water to drain out of the bottom of the container. Avoid overhead watering, as this can promote fungal diseases. Mulching around the plants with straw or wood chips can help retain moisture and suppress weeds.
What are some common pests and diseases that affect rainbow chard, and how can I prevent them?
Rainbow chard is generally resistant to pests and diseases, but it can be susceptible to aphids, slugs, snails, and leaf miners. To prevent pest problems, inspect your plants regularly and remove any pests you find by hand. You can also use insecticidal soap or neem oil to control aphids and other soft-bodied insects. Slugs and snails can be controlled with beer traps or by handpicking them off the plants at night. Leaf miners can be prevented by covering your plants with row covers. To prevent fungal diseases, ensure good air circulation around your plants and avoid overhead watering. Remove any infected leaves promptly.
How do I harvest rainbow chard from my balcony garden?
You can start harvesting rainbow chard leaves when they are about 6-8 inches long. Harvest the outer leaves first, leaving the inner leaves to continue growing. Use a sharp knife or scissors to cut the leaves near the base of the plant. Avoid pulling the leaves, as this can damage the plant. Regular harvesting will encourage the plant to produce more leaves. You can harvest rainbow chard continuously throughout the growing season.
Can I eat the stems of rainbow chard?
Yes, the stems of rainbow chard are edible and delicious! They have a slightly different texture and flavor than the leaves, but they are equally nutritious. You can cook the stems separately from the leaves, as they take longer to cook. Try sautéing them with garlic and olive oil, or adding them to soups and stews. The stems are also great pickled.
How can I store harvested rainbow chard?
To store harvested rainbow chard, wash the leaves and stems thoroughly and pat them dry. Wrap them loosely in a damp paper towel and store them in a plastic bag in the refrigerator. Rainbow chard will keep for up to a week in the refrigerator. You can also freeze rainbow chard for longer storage. To freeze, blanch the leaves and stems in boiling water for 2-3 minutes, then plunge them into ice water to stop the cooking process. Drain well and pack into freezer bags or containers. Frozen rainbow chard will keep for up to 8 months.
Can I grow rainbow chard indoors if I don’t have a balcony?
Yes, you can grow rainbow chard indoors if you don’t have a balcony. You’ll need a sunny windowsill or a grow light to provide adequate light. Choose a container that is at least 6 inches deep and wide. Use a well-draining potting mix and water regularly. Indoor-grown rainbow chard may not grow as large as outdoor-grown chard, but you can still enjoy a continuous supply of fresh leaves.
Is rainbow chard nutritious?
Yes, rainbow chard is incredibly nutritious! It’s an excellent source of vitamins A, C, and K, as well as minerals like potassium, magnesium, and iron. It’s also a good source of dietary fiber. Rainbow chard is low in calories and fat, making it a healthy addition to any diet. Eating rainbow chard can help boost your immune system, improve bone health, and protect against chronic diseases.

Leave a Comment