
Balcony Sweet Potato Growing might sound like a dream reserved for sprawling farms, but trust me, it’s totally achievable, even if your “garden” is a cozy balcony! I’m so excited to share this DIY guide with you because growing your own food, no matter how small the scale, is incredibly rewarding. Imagine harvesting vibrant, delicious sweet potatoes just steps from your kitchen – that’s the magic we’re unlocking today.
Sweet potatoes have a rich history, originating in Central and South America thousands of years ago. They were a staple food for indigenous populations and eventually spread across the globe, becoming a beloved ingredient in countless cuisines. Beyond their delicious flavor, they’re packed with nutrients, making them a healthy and satisfying addition to any diet.
But why bother with balcony sweet potato growing? Well, for starters, it’s a fantastic way to connect with nature, even in an urban environment. Plus, you get to enjoy fresh, organic produce without relying on grocery stores. And let’s be honest, there’s something incredibly satisfying about nurturing a plant from sprout to harvest. This DIY project is perfect for anyone looking to add a touch of green to their balcony, reduce their carbon footprint, and enjoy the taste of homegrown goodness. So, grab your gardening gloves, and let’s get started!
Growing Sweet Potatoes in Containers on Your Balcony: A DIY Guide
Hey there, fellow balcony gardeners! Ever thought about growing your own sweet potatoes? It might sound intimidating, but trust me, it’s totally doable, even if you’re short on space. I’ve been experimenting with container gardening for years, and sweet potatoes are surprisingly rewarding. This guide will walk you through everything you need to know to cultivate these delicious tubers right on your balcony.
What You’ll Need
Before we dive in, let’s gather our supplies. This is crucial for a smooth and successful growing experience.
* Sweet Potato Slips: These are sprouts grown from a sweet potato. You can buy them online or from a local nursery. Or, you can even grow your own (more on that later!).
* Large Containers: Sweet potatoes need room to grow. I recommend containers that are at least 20 gallons in size. The bigger, the better! Think large plastic tubs, half whiskey barrels, or even grow bags.
* Well-Draining Potting Mix: This is super important. Sweet potatoes don’t like soggy soil. A mix of potting soil, compost, and perlite or vermiculite works wonders.
* Watering Can or Hose: For keeping your sweet potatoes hydrated.
* Fertilizer: A balanced fertilizer or one specifically formulated for root vegetables will give your sweet potatoes a boost.
* Trowel or Shovel: For planting and moving soil.
* Mulch (Optional): Mulch helps retain moisture and suppress weeds. Straw or wood chips work great.
* Gloves: To keep your hands clean.
* Sunlight: Sweet potatoes need at least 6-8 hours of direct sunlight per day. Make sure your balcony gets enough!
Growing Your Own Sweet Potato Slips (Optional but Recommended!)
Okay, so you *could* just buy slips, but where’s the fun in that? Growing your own is surprisingly easy and gives you more control over the variety you’re growing. Plus, it’s just plain cool!
1. Choose a Healthy Sweet Potato: Select an organic sweet potato from the grocery store or farmer’s market. Organic is important to avoid any growth inhibitors. Look for one that’s firm and free of blemishes.
2. Prepare the Sweet Potato: There are two main methods:
* Water Method: Suspend the sweet potato in a jar or glass of water, with the bottom half submerged. You can use toothpicks to hold it in place.
* Soil Method: Bury the sweet potato horizontally in a container filled with moist potting mix, leaving the top exposed.
3. Provide Warmth and Light: Place the jar or container in a warm, sunny location. A windowsill works perfectly.
4. Wait Patiently: It can take several weeks for slips to emerge. Keep the water level consistent or the soil moist.
5. Harvest the Slips: Once the slips are 6-8 inches long, gently twist or cut them off the sweet potato.
6. Root the Slips: Place the slips in a glass of water, allowing roots to develop. This usually takes about a week. Change the water every couple of days.
7. Plant the Rooted Slips: Now you’re ready to plant your homegrown slips!
Planting Your Sweet Potato Slips
Alright, now for the main event! Let’s get those slips in the ground (or, well, in the container).
1. Prepare Your Containers: Fill your large containers with the well-draining potting mix. Leave a few inches of space at the top.
2. Water the Soil: Moisten the soil thoroughly before planting. This helps settle the soil and provides initial hydration for the slips.
3. Plant the Slips: Dig small holes in the soil, about 4-6 inches apart. Gently place the rooted slips into the holes, burying the roots and the bottom part of the stem. Leave the top leaves exposed.
4. Water Again: Water the newly planted slips gently but thoroughly.
5. Mulch (Optional): Add a layer of mulch around the base of the plants to help retain moisture and suppress weeds.
Caring for Your Sweet Potato Plants
Now that your sweet potatoes are planted, it’s time to nurture them. Consistent care is key to a bountiful harvest.
1. Watering: Sweet potatoes need consistent moisture, especially during hot weather. Water deeply whenever the top inch of soil feels dry to the touch. Avoid overwatering, as this can lead to root rot.
2. Fertilizing: Feed your sweet potato plants every 2-3 weeks with a balanced fertilizer or one specifically formulated for root vegetables. Follow the instructions on the fertilizer package.
3. Sunlight: Ensure your sweet potatoes receive at least 6-8 hours of direct sunlight per day. If your balcony is shaded, consider using grow lights.
4. Weeding: Keep the containers free of weeds. Weeds compete with your sweet potatoes for nutrients and water.
5. Pest Control: Keep an eye out for pests like aphids or spider mites. If you spot any, treat them with insecticidal soap or neem oil.
6. Vine Management: Sweet potato vines can get quite long. You can let them trail over the sides of the container or prune them back to keep them manageable. Pruning won’t affect the size of the tubers.
Harvesting Your Sweet Potatoes
The moment you’ve been waiting for! Harvesting sweet potatoes is the most rewarding part of the process.
1. Timing: Sweet potatoes typically take 90-120 days to mature. The best time to harvest is before the first frost.
2. Signs of Maturity: The leaves will start to turn yellow and the vines will begin to die back.
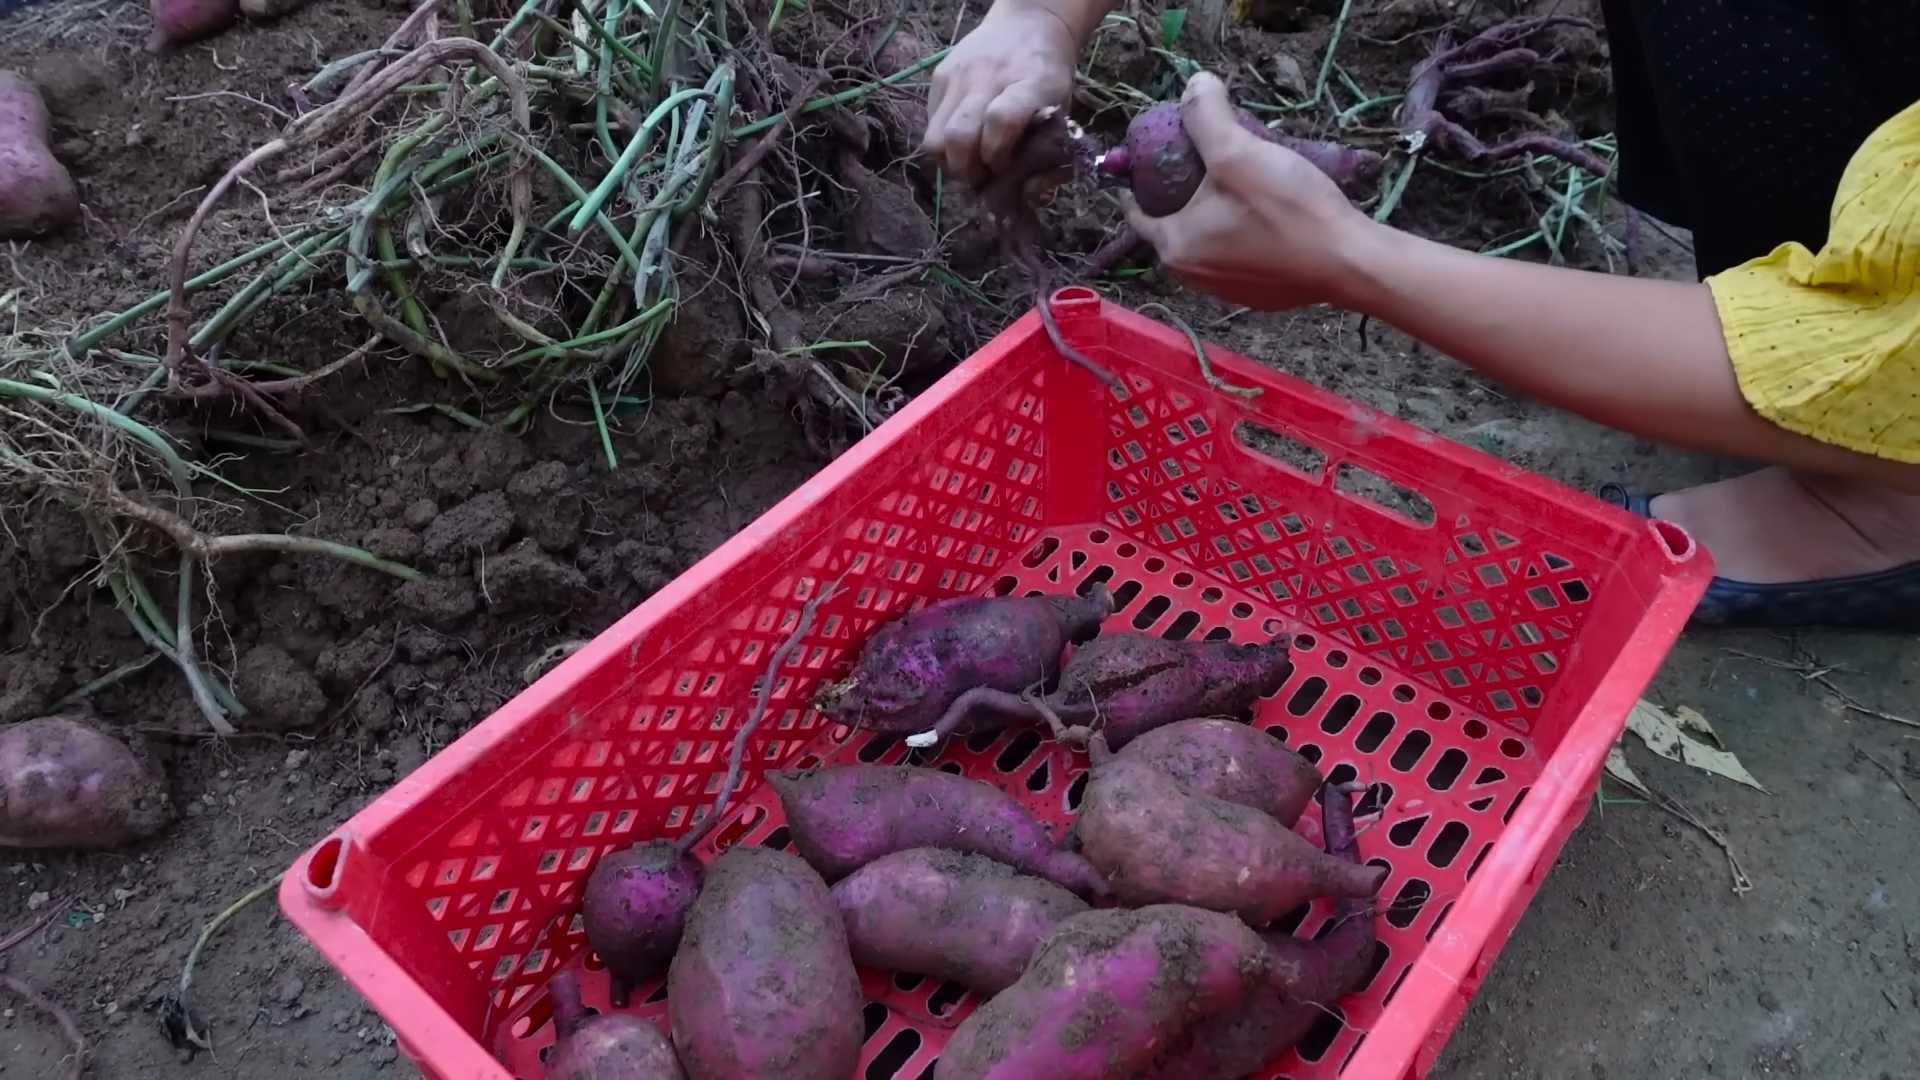
3. Harvesting: Gently dig around the base of the plant with a trowel or shovel. Be careful not to damage the tubers. Lift the plant out of the container, and carefully remove the sweet potatoes from the soil.
4. Curing: Curing is essential for developing the sweet flavor and improving the storage life of your sweet potatoes.
* Clean the Sweet Potatoes: Gently brush off any excess soil. Avoid washing them, as this can promote rot.
* Curing Environment: Place the sweet potatoes in a warm, humid location (80-85°F and 85-90% humidity) for 7-10 days. A greenhouse, garage, or even a warm room with a humidifier can work.
* Storage: After curing, store the sweet potatoes in a cool, dry, and well-ventilated place (55-60°F). They should last for several months.
Troubleshooting
Even with the best planning, things can sometimes go wrong. Here are a few common problems and how to address them:
* Yellowing Leaves: This could be a sign of overwatering, underwatering, or nutrient deficiency. Check the soil moisture and adjust your watering schedule accordingly. Fertilize with a balanced fertilizer.
* Slow Growth: This could be due to insufficient sunlight, poor soil, or cool temperatures. Ensure your sweet potatoes are getting enough sunlight and that the soil is well-draining and fertile.
* Pests: Aphids, spider mites, and other pests can damage your sweet potato plants. Treat them with insecticidal soap or neem oil.
* Root Rot: This is caused by overwatering and poor drainage. Ensure your containers have drainage holes and that the soil is well-draining.
Choosing the Right Sweet Potato Variety
Not all sweet potatoes are created equal! Some varieties are better suited for container gardening than others. Here are a few of my favorites:
* Beauregard: A popular and reliable variety with orange flesh and a sweet flavor.
* Georgia Jet: A fast-maturing variety with red skin and orange flesh.
* Centennial: A classic variety with orange skin and flesh.
* Bush Porto Rico: A compact variety that’s well-suited for containers.
Tips for Success
Here are a few extra tips to help you grow the best sweet potatoes possible:
* Start with Healthy Slips: Whether you buy them or grow them yourself, make sure your slips are healthy and vigorous.
* Use Large Containers: Sweet potatoes need plenty of room to grow. Don’t skimp on the container size.
* Provide Consistent Moisture: Sweet potatoes need consistent moisture, but avoid overwatering.
* Fertilize Regularly: Feed your sweet potato plants every 2-3 weeks with a balanced fertilizer.
* Cure Your Sweet Potatoes: Curing is essential for developing the sweet flavor and improving the storage life of your sweet potatoes.
* Don’t Be Afraid to Experiment: Gardening

Conclusion
So, there you have it! Transforming your balcony into a thriving sweet potato patch is not only achievable but also incredibly rewarding. We’ve walked you through the simple steps, from choosing the right container and soil to nurturing your sweet potato vines and anticipating that delicious harvest. But why is this DIY balcony sweet potato growing adventure a must-try?
Firstly, it’s about reclaiming control over your food source. In a world increasingly concerned with sustainability and knowing where our food comes from, growing your own sweet potatoes offers unparalleled transparency. You know exactly what goes into your plants – no harmful pesticides, no questionable fertilizers, just good old-fashioned care and attention.
Secondly, it’s a fantastic way to connect with nature, even in the heart of the city. The simple act of tending to your sweet potato vines, watching them unfurl their leaves and reach for the sun, can be incredibly therapeutic. It’s a welcome respite from the hustle and bustle of urban life, a chance to slow down and appreciate the beauty of the natural world.
Thirdly, let’s talk about the taste! Homegrown sweet potatoes are simply superior to anything you can buy in the store. They’re sweeter, more flavorful, and bursting with nutrients. Imagine roasting your own balcony-grown sweet potatoes with a drizzle of olive oil and a sprinkle of sea salt – a culinary delight that’s both healthy and satisfying.
But the benefits don’t stop there. Balcony sweet potato growing is also a fantastic way to beautify your outdoor space. The lush green vines can create a stunning visual display, adding a touch of rustic charm to your balcony. You can even train the vines to climb a trellis or railing, creating a living green wall that provides shade and privacy.
Ready to take your balcony sweet potato growing to the next level? Consider these variations:
* Vertical Gardening: Utilize vertical planters or hanging baskets to maximize space and create a cascading effect with your sweet potato vines.
* Companion Planting: Plant herbs like basil or rosemary alongside your sweet potatoes to deter pests and enhance flavor.
* Different Varieties: Experiment with different varieties of sweet potatoes, such as Beauregard, Japanese, or Okinawan, to discover your favorite flavor profile.
* Sweet Potato Greens: Don’t forget about the greens! Sweet potato leaves are edible and nutritious, offering a spinach-like flavor that’s perfect for salads, stir-fries, or soups.
We’re confident that you’ll find balcony sweet potato growing to be a fun, rewarding, and delicious experience. So, grab your supplies, get your hands dirty, and start planting! We can’t wait to hear about your success.
Share your balcony sweet potato growing journey with us! Post photos of your plants, share your tips and tricks, and let us know what you’re harvesting. Together, we can create a community of urban gardeners who are passionate about growing their own food and connecting with nature. Happy growing!
Frequently Asked Questions (FAQ)
Q: What is the best time of year to start growing sweet potatoes on my balcony?
A: Sweet potatoes are warm-weather crops, so the best time to start growing them is in late spring or early summer, after the last frost has passed. The soil temperature should be at least 65°F (18°C) for optimal growth. If you live in a region with a short growing season, you can start your sweet potato slips indoors about 6-8 weeks before the last frost.
Q: What kind of container is best for growing sweet potatoes on a balcony?
A: Choose a large container that is at least 12 inches deep and 18 inches wide. This will provide enough space for the sweet potato roots to develop. A fabric grow bag is an excellent option because it allows for good drainage and aeration. You can also use a large plastic pot or a repurposed container, as long as it has drainage holes.
Q: What type of soil should I use for growing sweet potatoes in containers?
A: Sweet potatoes prefer well-draining, sandy loam soil that is rich in organic matter. You can use a commercial potting mix specifically formulated for vegetables, or you can create your own mix by combining equal parts of garden soil, compost, and sand or perlite. Avoid using heavy clay soil, as it can become waterlogged and inhibit root growth.
Q: How often should I water my balcony sweet potato plants?
A: Water your sweet potato plants regularly, especially during hot, dry weather. The soil should be consistently moist but not waterlogged. Check the soil moisture level by sticking your finger into the soil about an inch deep. If the soil feels dry, it’s time to water. Water deeply, allowing the water to drain out of the drainage holes.
Q: Do sweet potato plants need fertilizer?
A: Yes, sweet potato plants benefit from regular fertilization. Use a balanced fertilizer with an NPK ratio of 10-10-10 or 5-10-10. Apply the fertilizer according to the package directions, usually every 2-3 weeks. You can also use organic fertilizers, such as compost tea or fish emulsion. Avoid over-fertilizing, as this can lead to excessive vine growth and reduced tuber production.
Q: How much sunlight do sweet potato plants need?
A: Sweet potato plants need at least 6-8 hours of direct sunlight per day. Choose a sunny spot on your balcony that receives plenty of sunlight throughout the day. If your balcony is partially shaded, you can supplement with grow lights.
Q: How do I deal with pests and diseases on my balcony sweet potato plants?
A: Sweet potatoes are generally resistant to pests and diseases, but they can be susceptible to certain problems, such as aphids, spider mites, and fungal diseases. Inspect your plants regularly for signs of infestation or disease. If you find any pests, you can try spraying them with insecticidal soap or neem oil. For fungal diseases, you can use a fungicide. Good air circulation and proper watering can also help prevent these problems.
Q: How long does it take for sweet potatoes to mature?
A: Sweet potatoes typically take 90-120 days to mature, depending on the variety and growing conditions. You’ll know your sweet potatoes are ready to harvest when the leaves start to turn yellow and the vines begin to die back.
Q: How do I harvest sweet potatoes from my balcony garden?
A: To harvest your sweet potatoes, gently dig around the base of the plant with a garden fork or trowel. Be careful not to damage the tubers. Lift the plant out of the container and carefully remove the sweet potatoes from the soil. Cure the sweet potatoes by placing them in a warm, humid place for 7-10 days. This will help them develop their sweetness and improve their storage life.
Q: Can I eat the leaves of my sweet potato plants?
A: Yes, sweet potato leaves are edible and nutritious. They have a mild, spinach-like flavor and can be used in salads, stir-fries, or soups. Harvest the leaves when they are young and tender. Avoid eating the leaves if they have been treated with pesticides.
Q: How do I store my harvested sweet potatoes?
A: Store your cured sweet potatoes in a cool, dry, and dark place, such as a basement or pantry. The ideal storage temperature is between 55-60°F (13-16°C). Do not refrigerate sweet potatoes, as this can cause them to develop a hard core and lose their flavor. Properly stored sweet potatoes can last for several months.
Leave a Comment