
Baseboard Cleaning Hack: Are you tired of dusty, grimy baseboards making your home look less than its best? I know I was! It felt like no matter how much I cleaned, those pesky baseboards always seemed to attract dirt and grime like magnets. For centuries, maintaining a clean home has been a symbol of pride and well-being across cultures. From ancient Roman mosaics to meticulously kept Japanese homes, cleanliness has always been valued. But let’s be honest, baseboards are often the forgotten stepchild of our cleaning routines.
That’s why I’m so excited to share this game-changing baseboard cleaning hack with you! This isn’t just another cleaning tip; it’s a simple, effective, and surprisingly fun way to keep your baseboards sparkling clean with minimal effort. We all lead busy lives, and spending hours scrubbing baseboards is simply not an option for most of us. This DIY trick will save you time, energy, and maybe even a little bit of sanity. Get ready to say goodbye to dusty baseboards and hello to a cleaner, brighter home!
DIY Baseboard Cleaning Hack: Sparkling Baseboards Without Breaking Your Back!
Okay, let’s be honest, cleaning baseboards is the chore that everyone loves to hate. Bending, scrubbing, and contorting yourself into weird positions just to get rid of dust bunnies and grime? No thanks! But fear not, my friends, because I’ve discovered a game-changing hack that will make baseboard cleaning a breeze. This method is not only effective but also saves your back and knees. Get ready to say goodbye to baseboard cleaning dread!
What You’ll Need: The Arsenal of Clean
Before we dive in, let’s gather our supplies. This hack relies on a few simple tools you probably already have around the house.
* Microfiber Cloths: These are your best friends for picking up dust and dirt. I recommend having a few on hand so you can switch them out as they get dirty.
* Spray Bottle: This will hold our cleaning solution.
* Warm Water: The base of our cleaning solution.
* Dish Soap (Mild): A little bit goes a long way in cutting through grime.
* Optional: White Vinegar: For extra cleaning power, especially on stubborn stains.
* Paint Edger Tool: This is the secret weapon! You can find these at most hardware stores or online. It’s designed for painting trim, but it works wonders for cleaning too.
* Bucket (Optional): If you prefer to dip your paint edger in a bucket of solution instead of spraying, this is handy.
* Old Towel or Drop Cloth: To protect your floors from drips.
* Gloves (Optional): If you have sensitive skin, gloves are always a good idea.
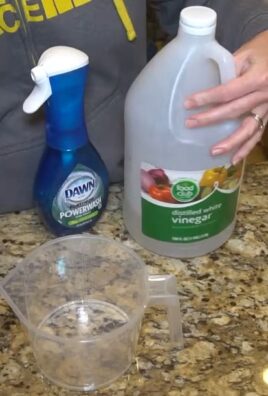
Preparing Your Cleaning Solution: The Magic Potion
The cleaning solution is super simple to make. I like to keep it gentle but effective.
1. Fill the Spray Bottle: Start by filling your spray bottle with warm water, leaving a little room at the top.
2. Add Dish Soap: Add just a squirt of mild dish soap – about a teaspoon should do the trick. Too much soap can leave a residue.
3. Optional Vinegar Boost: If your baseboards are particularly dirty or have stubborn stains, add a tablespoon or two of white vinegar. Vinegar is a natural disinfectant and helps to break down grime.
4. Mix Gently: Close the spray bottle and gently swirl the mixture to combine the ingredients. Avoid shaking vigorously, as this can create excessive bubbles.
The Step-by-Step Guide: Operation Sparkling Baseboards
Now for the fun part! Follow these steps, and you’ll have sparkling baseboards in no time.
1. Protect Your Floors: Lay down an old towel or drop cloth along the baseboards to protect your floors from drips. This is especially important if you have carpet or delicate flooring.
2. Attach Microfiber Cloth to Paint Edger: Wrap a clean microfiber cloth around the paint edger tool. Make sure it’s securely attached so it doesn’t slip off during cleaning. Some paint edgers have clips or fasteners to hold the cloth in place.
3. Spray the Baseboards: Lightly spray the baseboards with your cleaning solution. Don’t saturate them; a light mist is all you need. Alternatively, if you’re using a bucket, dip the microfiber-covered paint edger into the cleaning solution, making sure not to over-saturate it.
4. Glide Along the Baseboards: Now, gently glide the paint edger along the baseboards, applying light pressure. The microfiber cloth will pick up dust, dirt, and grime. The paint edger’s shape allows you to easily clean along the top edge and any intricate details.
5. Rinse and Repeat (Cloth): As the microfiber cloth gets dirty, remove it from the paint edger and replace it with a clean one. You’ll likely need to switch cloths several times, depending on how dirty your baseboards are.
6. Rinse and Repeat (Solution): If you notice the cleaning solution is getting too dirty, replace it with a fresh batch.
7. Tackle Stubborn Spots: For stubborn spots or stains, you can use a small scrub brush or an old toothbrush to gently scrub the area. You might also try applying a paste of baking soda and water to the stain, letting it sit for a few minutes, and then wiping it away.
8. Dry the Baseboards: Once you’ve cleaned all the baseboards, use a clean, dry microfiber cloth to wipe them down and remove any excess moisture. This will help prevent water spots and ensure a sparkling finish.
9. Admire Your Work: Step back and admire your sparkling clean baseboards! You’ve successfully conquered the baseboard cleaning challenge without breaking your back.
Extra Tips and Tricks: Level Up Your Cleaning Game
Here are a few extra tips to help you achieve baseboard cleaning perfection:
* Dust First: Before you start cleaning with the solution, use a dry duster or vacuum with a brush attachment to remove loose dust and debris. This will prevent you from just pushing the dirt around.
* Magic Eraser for Scuff Marks: For scuff marks or stubborn stains that won’t come off with the cleaning solution, try using a Magic Eraser. Be gentle, as Magic Erasers can be abrasive and may damage the paint if you scrub too hard.
* Preventative Measures: To keep your baseboards cleaner for longer, consider applying a coat of wax or sealant. This will create a protective barrier that repels dust and dirt.
* Regular Maintenance: The key to easy baseboard cleaning is regular maintenance. Try to wipe down your baseboards every few weeks to prevent dirt and grime from building up.
* Pet Hair Problems: If you have pets, you know how much hair can accumulate on baseboards. Use a rubber glove or a damp sponge to easily remove pet hair. The rubber or dampness will help to attract and lift the hair.
* Don’t Forget the Corners: Pay special attention to the corners of your baseboards, as these areas tend to accumulate the most dirt and dust. Use a small brush or cotton swab to clean these hard-to-reach spots.
* Ventilation is Key: Open windows or turn on a fan to ventilate the room while you’re cleaning. This will help the cleaning solution dry faster and prevent any lingering odors.
* Test in an Inconspicuous Area: Before applying any cleaning solution to your baseboards, test it in an inconspicuous area to make sure it doesn’t damage the paint or finish.
* Consider a Baseboard Buddy: If you really want to invest in a tool specifically designed for baseboard cleaning, consider purchasing a “Baseboard Buddy” or similar product. These tools have long handles and pivoting heads that make it even easier to clean baseboards without bending over.
* Homemade All-Purpose Cleaner: If you prefer a more natural cleaning solution, you can make your own all-purpose cleaner using equal parts white vinegar and water. Add a few drops of essential oil for a pleasant scent.
* Steam Cleaning: For a deeper clean, you can use a steam cleaner with a brush attachment to clean your baseboards. The steam will help to loosen dirt and grime, making it easier to wipe away. Be careful not to over-saturate the baseboards, as this could damage them.
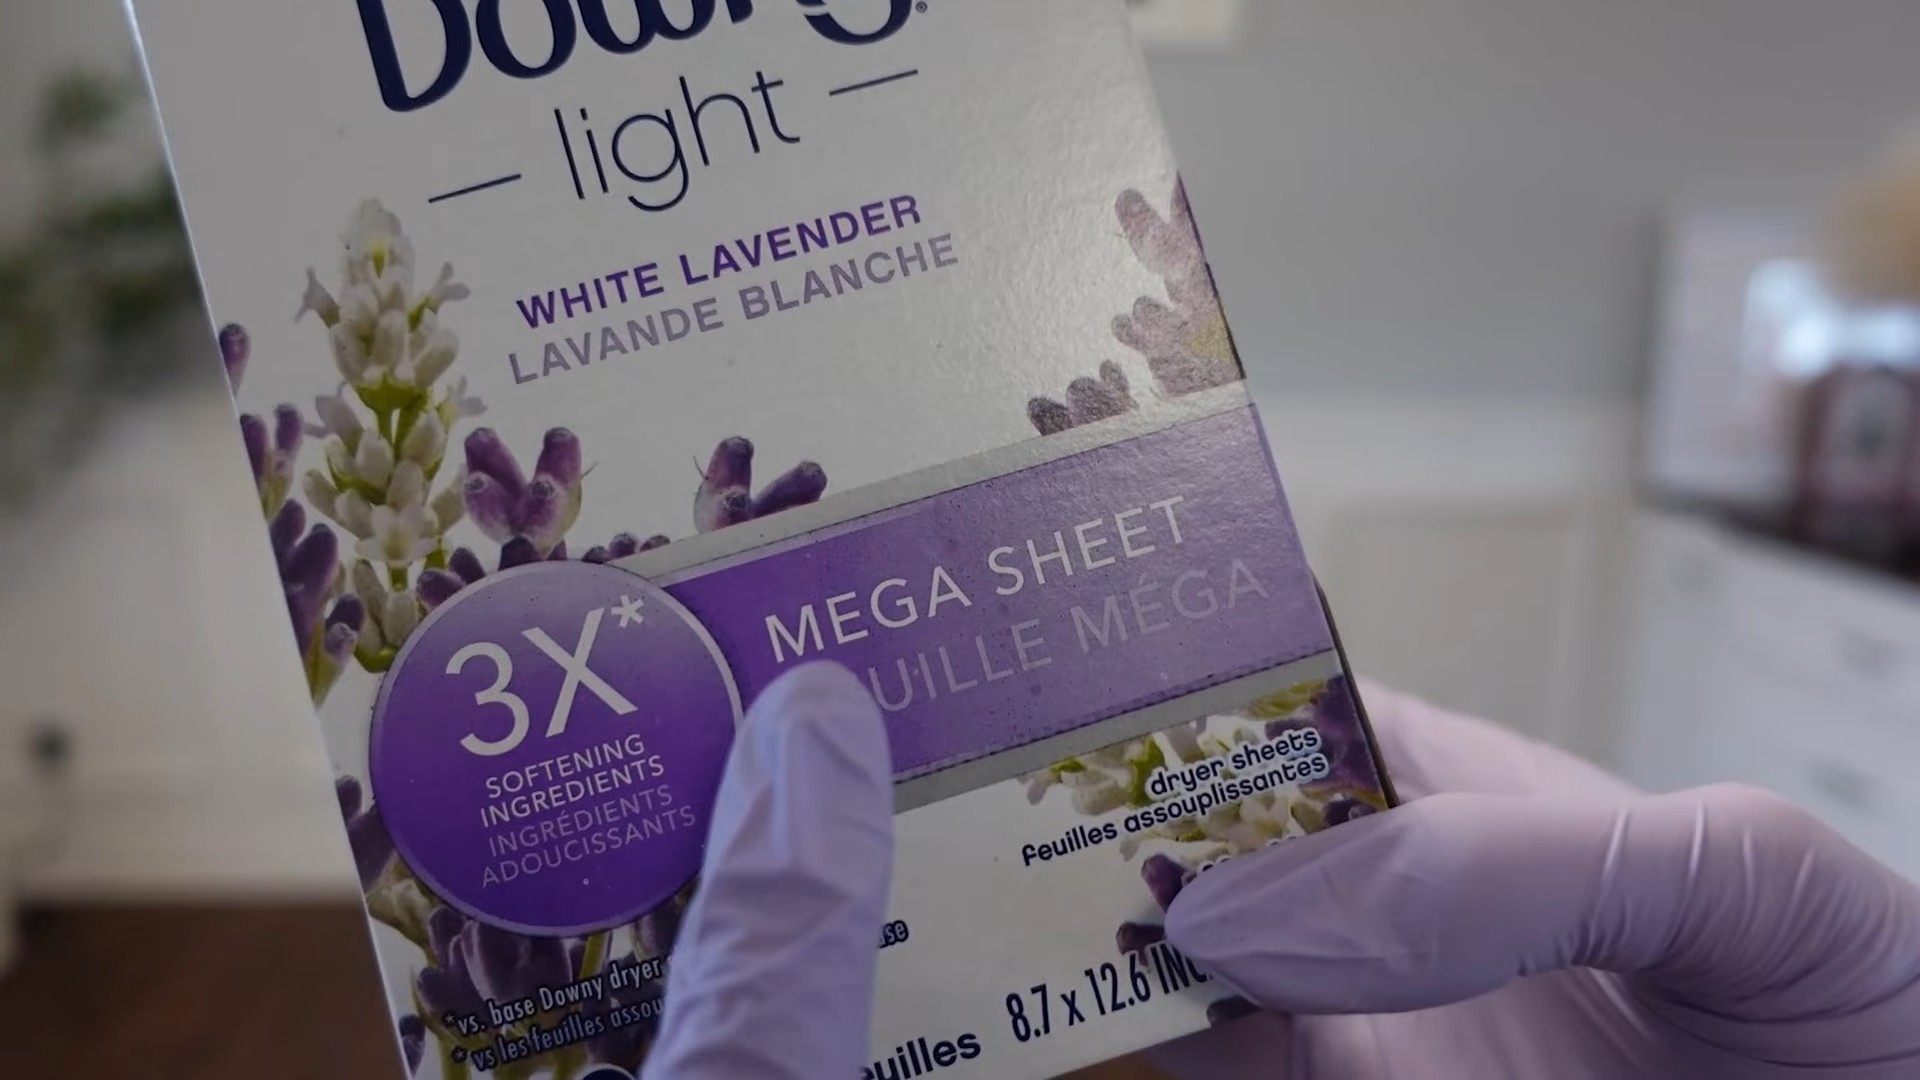
* Dryer Sheets for Dust Prevention: After cleaning your baseboards, wipe them down with a dryer sheet. The antistatic properties of the dryer sheet will help to repel dust and keep your baseboards cleaner for longer.
* Inspect Regularly: Make it a habit to inspect your baseboards regularly for any signs of damage, such as cracks, chips, or peeling paint. Addressing these issues promptly will prevent them from getting worse and extend the life of your baseboards.
* Seasonal Cleaning: Consider doing a deep cleaning of your baseboards at least twice a year, in the spring and fall. This will help to remove accumulated dirt and grime and keep your baseboards looking their best.
Dealing with Different Types of Baseboards
Not all baseboards are created equal! Here’s how to adjust your approach based on the material:
* Painted Wood Baseboards: These are the most common type. The method described above works great. Just be mindful of using gentle cleaning solutions to avoid damaging the paint.
* Stained Wood Baseboards: These require a bit more care. Avoid using harsh chemicals or abrasive cleaners, as they can strip the stain. Use a mild soap and water solution and dry thoroughly.
* Vinyl Baseboards: Vinyl is durable and easy to clean. You can use a variety of cleaning solutions, but avoid anything too harsh that could discolor the vinyl.
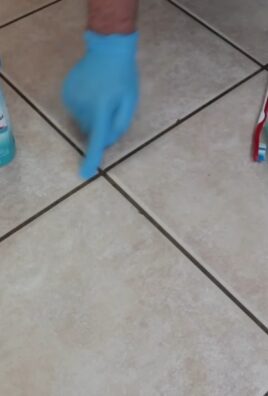
* Tile Baseboards: These are often found in bathrooms and kitchens. You can use a tile cleaner or a mixture of vinegar and water. Pay attention to the grout lines, as they can accumulate dirt and mildew.
Safety First!
While this is a relatively simple DIY project,
Conclusion
So, there you have it! This simple, yet incredibly effective baseboard cleaning hack is a game-changer for anyone looking to maintain a spotless home without breaking the bank or spending hours on their hands and knees. We’ve shown you how to leverage readily available household items to achieve professional-level results, leaving your baseboards gleaming and your home feeling fresher than ever.
Why is this a must-try? Because it’s efficient, cost-effective, and, frankly, a little bit genius. Forget harsh chemicals and back-breaking scrubbing. This method is gentle on your baseboards, tough on grime, and easy on you. It’s a win-win-win!
But don’t just take our word for it. We encourage you to experiment and personalize this baseboard cleaning hack to suit your specific needs and preferences. For instance, if you have particularly stubborn stains, consider adding a touch of baking soda to your cleaning solution for extra scrubbing power. Or, if you prefer a more natural approach, swap out the dish soap for a few drops of essential oils like lemon or tea tree for their antibacterial and deodorizing properties. You could even use a microfiber cloth wrapped around a paint edger for even more precise cleaning.
Remember, the key is to find what works best for you and your home. The beauty of this DIY approach is its adaptability. Feel free to adjust the ratios of ingredients, the type of cleaning tool you use, or even the frequency of cleaning based on your individual circumstances.
We are confident that once you try this method, you’ll be amazed by the results. It’s a truly transformative way to tackle a often-overlooked cleaning task. So, ditch the expensive cleaning products and embrace this simple, effective, and budget-friendly solution.
Now, it’s your turn! We’re eager to hear about your experiences with this baseboard cleaning hack. Did you find it as effective as we did? Did you make any modifications or discover any new tips that you’d like to share? Please, leave a comment below and let us know. Your feedback is invaluable, and it helps us to continue providing you with the best possible cleaning solutions. Let’s create a community of clean baseboard enthusiasts! Share your before-and-after photos, your favorite cleaning solution variations, and any other insights you may have. Together, we can conquer the dreaded baseboard grime and achieve a cleaner, happier home.
Frequently Asked Questions (FAQs)
1. What kind of cleaning solution should I use for this baseboard cleaning hack?
The recommended cleaning solution is a mixture of warm water and a mild dish soap. However, you can customize it based on your needs. For example, if you have painted baseboards, ensure the dish soap is pH neutral to prevent damage. For tougher stains, you can add a tablespoon of baking soda to the solution. Alternatively, a solution of equal parts water and white vinegar can be effective for removing mildew or hard water stains. Always test the solution in an inconspicuous area first to ensure it doesn’t damage the baseboard finish.
2. What type of tool is best for cleaning baseboards with this hack?
A microfiber cloth is generally the best option as it’s gentle on the baseboards and effectively picks up dirt and grime. You can wrap the microfiber cloth around a paint edger for better reach and precision, especially in tight corners. Alternatively, a soft-bristled brush can be used for scrubbing stubborn stains. Avoid using abrasive scrubbers or steel wool, as they can scratch the baseboard surface.
3. How often should I clean my baseboards using this method?
The frequency of cleaning depends on factors like foot traffic, pets, and overall cleanliness of your home. As a general guideline, cleaning your baseboards every 1-3 months is recommended. However, if you notice a build-up of dust or grime sooner, you may need to clean them more frequently. Regular cleaning prevents the build-up of stubborn stains and makes the task easier in the long run.
4. Can I use this baseboard cleaning hack on all types of baseboards?
This method is generally safe for most types of baseboards, including painted, wood, and vinyl. However, it’s always best to test the cleaning solution in an inconspicuous area first to ensure it doesn’t damage the finish. For delicate or antique baseboards, consider using a gentler cleaning solution and a softer cleaning tool. If you’re unsure about the type of baseboard you have, consult a professional cleaning service for advice.
5. What if I have stubborn stains on my baseboards that won’t come off?
For stubborn stains, try creating a paste of baking soda and water and applying it to the affected area. Let it sit for a few minutes before gently scrubbing with a soft-bristled brush. Alternatively, you can use a commercial stain remover specifically designed for the type of baseboard you have. Always follow the manufacturer’s instructions and test the product in an inconspicuous area first. For extremely stubborn stains, you may need to repeat the process or consult a professional cleaning service.
6. Is this baseboard cleaning hack safe for pets and children?
Yes, this method is generally safe for pets and children, especially if you use a mild dish soap and avoid harsh chemicals. However, it’s always best to keep pets and children away from the cleaning area until the baseboards are completely dry. If you’re concerned about potential allergies or sensitivities, consider using a natural cleaning solution like vinegar and water. Always store cleaning products out of reach of children and pets.
7. Can I use essential oils in the cleaning solution?
Yes, you can add a few drops of essential oils to the cleaning solution for their antibacterial and deodorizing properties. Lemon, tea tree, and lavender are popular choices. However, be mindful of potential allergies or sensitivities, especially if you have pets or children. Always dilute essential oils properly and test the solution in an inconspicuous area first.
8. What are some other tips for keeping my baseboards clean?
Regular dusting is key to preventing the build-up of dust and grime on your baseboards. Use a vacuum cleaner with a brush attachment or a microfiber duster to remove dust regularly. You can also use a damp cloth to wipe down your baseboards occasionally. Consider using a sealant or protectant specifically designed for baseboards to help prevent stains and make cleaning easier.
9. My baseboards are painted. Will this hack damage the paint?
Using a pH neutral dish soap and avoiding abrasive scrubbers will minimize the risk of damaging the paint. Always test the cleaning solution in an inconspicuous area first. Avoid using harsh chemicals or solvents, as they can strip the paint. If you’re concerned about damaging the paint, consider using a gentler cleaning solution like water and vinegar.
10. How can I prevent dust from accumulating on my baseboards so quickly?
Several factors contribute to dust accumulation. Regularly vacuuming or sweeping your floors helps reduce the amount of dust circulating in the air. Using an air purifier can also help remove dust particles from the air. Consider sealing gaps or cracks around windows and doors to prevent dust from entering your home. Regularly changing your furnace filter can also help improve air quality and reduce dust accumulation.

Leave a Comment