
Bell Peppers in Plastic Bottles: Sounds a little crazy, right? But trust me, this simple DIY trick can revolutionize your home garden and bring you a bountiful harvest of delicious bell peppers! I know, I know, you’re probably thinking, “Plastic bottles? Really?” But before you dismiss it, let me tell you why this method is gaining popularity and why you absolutely need to try it.
For centuries, gardeners have been experimenting with innovative techniques to maximize their yields and protect their precious plants. While the exact origins of using plastic bottles in this way are a bit murky, the concept taps into the age-old tradition of resourceful gardening – making the most of what you have. Think of it as a modern twist on the classic cloche, providing a mini-greenhouse environment for your bell peppers.
So, why should you bother with growing bell peppers in plastic bottles? Well, for starters, it’s incredibly cost-effective! Instead of buying expensive cloches or mini-greenhouses, you can repurpose something you likely already have lying around. But more importantly, this method offers several key benefits: it protects your young plants from harsh weather, extends the growing season, and helps retain moisture, leading to healthier, more productive bell pepper plants. Plus, it’s a fantastic way to reduce waste and contribute to a more sustainable lifestyle. In this article, I’m going to show you exactly how to get started, step-by-step, so you can enjoy a vibrant harvest of homegrown bell peppers, all thanks to a few humble plastic bottles!
Growing Bell Peppers Upside Down in Plastic Bottles: A DIY Guide
Hey there, fellow gardening enthusiasts! I’m so excited to share one of my favorite DIY gardening hacks with you: growing bell peppers upside down in repurposed plastic bottles. It’s a fun, space-saving, and surprisingly effective way to get a bountiful harvest. Plus, it’s a great way to recycle those plastic bottles that seem to multiply in our homes. Let’s dive in!
Why Grow Bell Peppers Upside Down?
Before we get started, you might be wondering why you’d even want to grow bell peppers upside down. Well, there are several benefits:
* Space Saving: Perfect for small patios, balconies, or anyone with limited garden space. You can hang these bottles almost anywhere!
* Pest Control: The elevated position can help deter some ground-dwelling pests.
* Better Air Circulation: Hanging the plants allows for better airflow, which can reduce the risk of fungal diseases.
* Unique Aesthetic: Let’s be honest, it looks pretty cool! It’s a conversation starter and adds a touch of whimsy to your garden.
* Easy Harvesting: The peppers hang down, making them easy to spot and harvest.
Materials You’ll Need
Okay, let’s gather our supplies. Here’s what you’ll need to create your upside-down bell pepper planters:
* Plastic Bottles: 2-liter soda bottles or similar sized bottles work best. Make sure they are clean and have their caps. You’ll need one bottle per bell pepper plant.
* Bell Pepper Seedlings: Choose healthy seedlings from your local nursery or start your own from seeds. I recommend starting with smaller plants, as they’ll adapt better to the upside-down environment.
* Potting Soil: Use a high-quality potting mix that drains well. Avoid using garden soil, as it can become compacted in the bottle.
* Landscape Fabric or Burlap: This will help prevent the soil from falling out of the bottle.
* Twine or Rope: For hanging the bottles. Make sure it’s strong enough to support the weight of the bottle, soil, and plant.
* Scissors or Utility Knife: For cutting the plastic bottles.
* Gloves: To protect your hands.
* Watering Can or Hose: For watering your plants.
* Measuring Tape or Ruler: For accurate cutting.
* Safety Glasses: When cutting plastic, it’s always good to protect your eyes.
Step-by-Step Instructions: Creating Your Upside-Down Planters
Alright, let’s get our hands dirty! Here’s how to create your upside-down bell pepper planters:
1. Preparing the Plastic Bottle
1. Clean the Bottle: Thoroughly wash the plastic bottle with soap and water to remove any residue. Rinse it well and let it dry completely.
2. Cut the Bottom: Using your scissors or utility knife, carefully cut off the bottom of the bottle. I usually cut about 2-3 inches from the bottom. Be careful not to cut yourself!
3. Drill Drainage Holes (Optional): While not strictly necessary, I like to drill a few small drainage holes in the bottle cap. This helps prevent water from accumulating at the bottom and potentially rotting the roots. If you choose to do this, use a small drill bit and be careful not to crack the cap.
4. Prepare the Hanging Mechanism: Now, we need to create a way to hang the bottle. There are a couple of ways to do this:
* Option 1 (Twine/Rope): Drill two small holes on opposite sides of the bottle, near the top (the neck of the bottle). Thread twine or rope through the holes, creating a loop for hanging. Make sure the loop is secure and strong enough to hold the weight of the planter.
* Option 2 (Wire Hanger): You can also use a wire hanger. Bend the hanger into a U-shape and insert the ends into the bottle, creating a cradle for the bottle to sit in. Secure the hanger to the bottle with tape or zip ties.
2. Planting the Bell Pepper Seedling
1. Insert Landscape Fabric/Burlap: Cut a piece of landscape fabric or burlap that’s slightly larger than the opening of the bottle cap. This will act as a barrier to prevent the soil from falling out.
2. Create a Hole for the Seedling: Carefully poke a hole in the center of the landscape fabric/burlap, large enough to accommodate the stem of your bell pepper seedling.
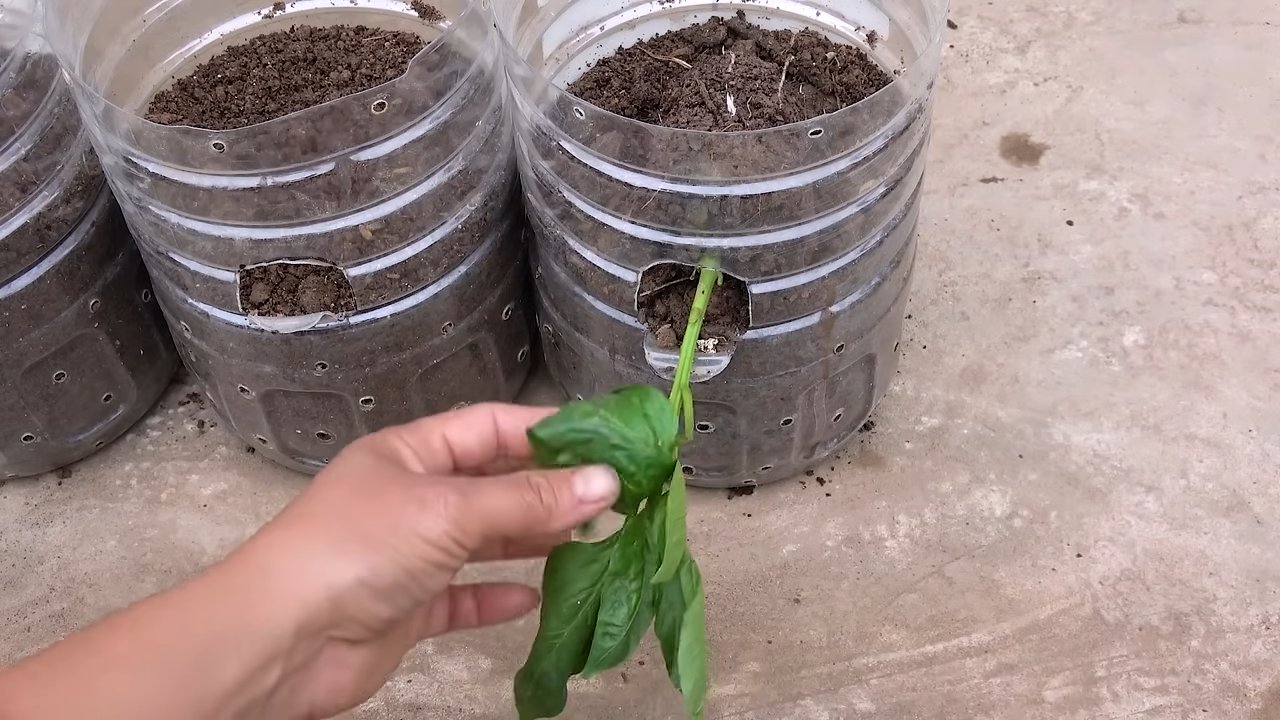
3. Gently Insert the Seedling: Gently turn the bottle upside down (cap facing down). Carefully insert the bell pepper seedling through the hole in the landscape fabric/burlap. Be very gentle to avoid damaging the roots. The leaves of the seedling should be sticking out of the bottle cap.
4. Add Potting Soil: While holding the seedling in place, carefully add potting soil to the bottle. Fill the bottle almost to the top, leaving about an inch of space. Gently pat down the soil to remove any air pockets.
5. Water Thoroughly: Once the bottle is filled with soil, water the plant thoroughly until water drains out of the drainage holes (if you drilled them) or the bottom opening. This will help settle the soil and ensure the roots are properly hydrated.
3. Hanging and Maintaining Your Upside-Down Bell Pepper Plant
1. Choose a Sunny Location: Bell peppers need at least 6-8 hours of sunlight per day, so choose a location that gets plenty of sun. A south-facing balcony or patio is ideal.
2. Hang the Bottle: Carefully hang the bottle from a sturdy hook, branch, or railing. Make sure the hanging mechanism is secure and can support the weight of the planter.
3. Water Regularly: Check the soil moisture regularly. Water when the top inch of soil feels dry to the touch. Be careful not to overwater, as this can lead to root rot. Water slowly and evenly, allowing the water to soak into the soil.
4. Fertilize Regularly: Bell peppers are heavy feeders, so fertilize them regularly with a balanced fertilizer. Follow the instructions on the fertilizer package. I like to use a liquid fertilizer diluted in water every couple of weeks.
5. Monitor for Pests and Diseases: Keep an eye out for pests and diseases. If you notice any problems, take action immediately. You can use organic pest control methods, such as insecticidal soap or neem oil.
6. Support the Plant (If Needed): As the bell pepper plant grows and produces fruit, it may become top-heavy. If this happens, you may need to provide additional support. You can use stakes or twine to support the plant.
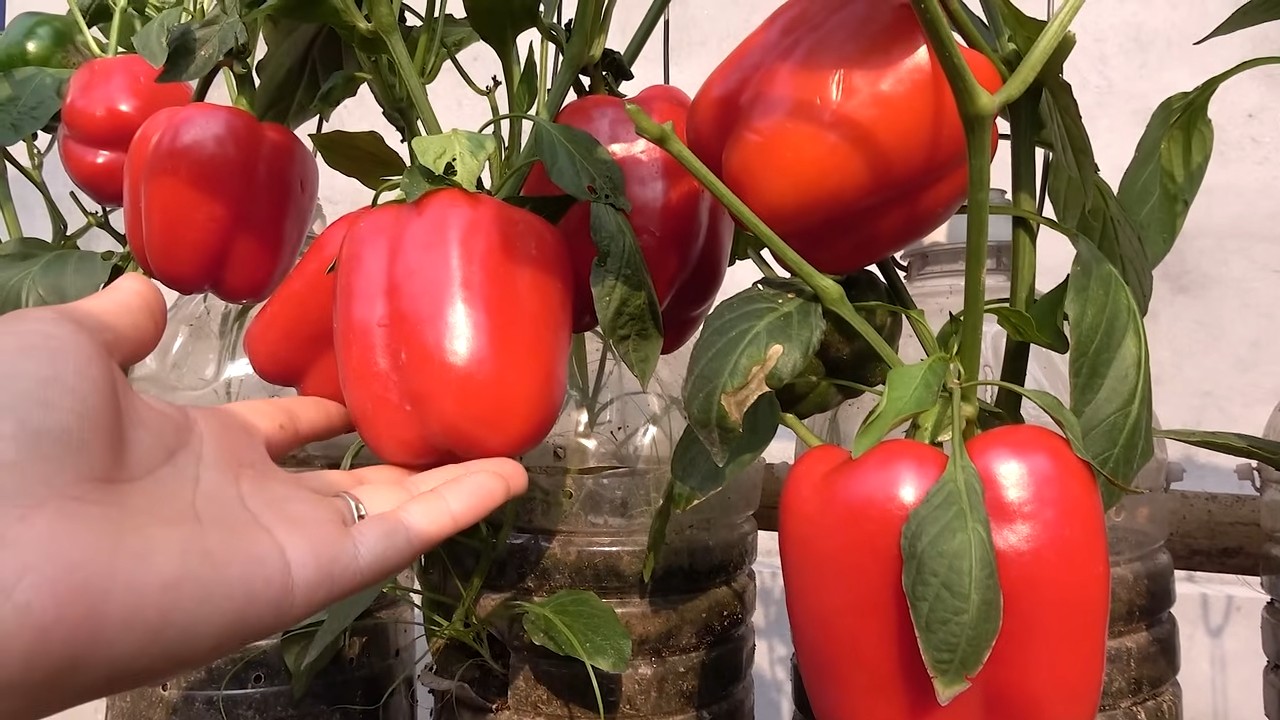
7. Harvest Your Bell Peppers: Bell peppers are ready to harvest when they are fully colored and firm to the touch. Use scissors or a knife to cut the peppers from the plant.
Troubleshooting Tips
* Soil Drying Out Too Quickly: If the soil is drying out too quickly, you can add some water-retaining crystals to the potting mix. You can also try mulching the top of the soil with straw or wood chips to help retain moisture.
* Plant Not Growing: If your bell pepper plant isn’t growing, it could be due to a lack of sunlight, nutrients, or water. Make sure the plant is getting enough sunlight, fertilize it regularly, and water it when the soil is dry.
* Yellowing Leaves: Yellowing leaves can be a sign of overwatering, underwatering, or nutrient deficiency. Check the soil moisture and adjust your watering schedule accordingly. Fertilize the plant with a balanced fertilizer.
* Pests: If you notice pests on your bell pepper plant, take action immediately. You can use organic pest control methods, such as insecticidal soap or neem oil.
Additional Tips for Success
* Choose the Right Variety: Some bell pepper varieties are better suited for container gardening than others. Look for compact varieties that don’t get too large.
* Start with Healthy Seedlings: Starting with healthy seedlings is crucial for success. Choose seedlings that are strong, vigorous, and free from pests and diseases.
* Don’t Overcrowd: Give your bell pepper plants plenty of space to grow. Don’t overcrowd them in the bottle.
* Rotate Your Crops: If you’re growing bell peppers in the same location year after year, rotate your crops to prevent soilborne diseases.
* Have Fun! Gardening should be enjoyable. Don’t be afraid to experiment and try new things.
Growing bell peppers upside down in plastic bottles is a rewarding and fun project. With a little bit of effort, you can enjoy a bountiful harvest of fresh, delicious bell peppers right in your own backyard (or balcony!). Happy gardening!
Conclusion
So, there you have it! Transforming ordinary plastic bottles into miniature greenhouses for your bell peppers is not just a quirky gardening hack; it’s a game-changer. We’ve explored how this simple DIY trick can significantly boost your pepper-growing success, offering protection from unpredictable weather, creating a warmer microclimate, and even deterring some common pests. The benefits are undeniable, and the process is surprisingly easy and cost-effective.
Why is this a must-try? Because it empowers you to extend your growing season, maximize your yield, and enjoy fresh, vibrant bell peppers even when the weather isn’t cooperating. Imagine harvesting plump, juicy peppers weeks earlier than your neighbors, all thanks to a few repurposed plastic bottles. This method is particularly beneficial for those in cooler climates or with shorter growing seasons, but even gardeners in warmer regions can appreciate the added protection against harsh sun and sudden temperature drops.
But don’t stop there! This technique is incredibly versatile. Feel free to experiment with different sizes of plastic bottles to accommodate various pepper varieties. You can also adjust the ventilation by creating more or fewer holes, depending on your local climate and the specific needs of your plants. Consider adding a layer of mulch around the base of the bottle to further insulate the soil and retain moisture. For added support, especially as your pepper plants grow taller, you can insert a small stake inside the bottle.
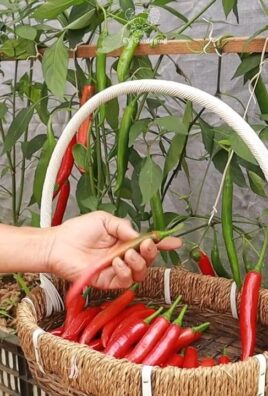
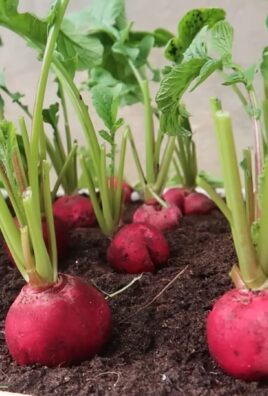
Beyond bell peppers, this method can also be adapted for other vegetables and herbs that benefit from a warm, sheltered environment. Think tomatoes, eggplants, basil, or even delicate seedlings that need a head start. The possibilities are endless!
We are confident that once you try this DIY trick, you’ll be amazed by the results. It’s a sustainable, budget-friendly, and highly effective way to nurture your bell peppers and enjoy a bountiful harvest. So, gather your plastic bottles, prepare your soil, and get ready to witness the magic of miniature greenhouses in action.
We encourage you to embrace this simple yet powerful technique and share your experiences with us! Let us know how it works for you, what variations you try, and any tips or tricks you discover along the way. Share your photos and stories on social media using #BellPepperBottleHack – we can’t wait to see your thriving pepper plants! Happy gardening! This **DIY bell pepper** trick is a winner.
Frequently Asked Questions (FAQ)
1. What types of plastic bottles are best for this method?
The ideal plastic bottles are clear, sturdy ones that have a wide enough opening to accommodate your pepper plant. Two-liter soda bottles are a popular choice, but larger water bottles or juice bottles can also work well. Avoid using bottles that are heavily colored or opaque, as they may block sunlight from reaching your plants. Make sure to thoroughly clean the bottles before using them to remove any residue or contaminants. Also, ensure the plastic is food-grade, especially if you plan to reuse the bottles for other purposes later.
2. How do I prepare the plastic bottles for planting?
First, thoroughly wash and dry the plastic bottles. Then, cut off the bottom of the bottle, leaving a few inches to create a mini-greenhouse. You can either completely remove the bottom or leave a small hinge to allow for easy ventilation. Next, create drainage holes in the bottom of the bottle to prevent waterlogging. You can use a drill, a nail, or even a hot skewer to create these holes. The number of holes will depend on your soil type and watering habits, but generally, 3-5 holes should be sufficient. Finally, remove the bottle cap for ventilation.
3. When is the best time to use this method for bell peppers?
This method is particularly useful during the early stages of growth, especially when starting seeds indoors or transplanting seedlings outdoors. It provides protection from frost, wind, and pests, allowing your pepper plants to establish themselves more quickly. You can also use it during periods of unpredictable weather or when temperatures fluctuate significantly. Once the weather stabilizes and your plants have grown larger, you can remove the bottles if desired. However, some gardeners choose to leave them on throughout the growing season for continued protection.
4. How do I water my bell peppers when they are inside the plastic bottles?
Watering can be done directly into the soil around the base of the plant. Be careful not to overwater, as the plastic bottle can trap moisture. Check the soil moisture regularly and water only when the top inch or two feels dry. You can also lift the bottle slightly to allow for better airflow and prevent the soil from becoming waterlogged. Drip irrigation can also be used for a more consistent watering schedule.
5. Will the plastic bottles get too hot and damage my bell pepper plants?
Yes, overheating can be a concern, especially in warmer climates. To prevent this, ensure adequate ventilation by removing the bottle cap and creating additional holes in the sides of the bottle. You can also shade the bottles during the hottest part of the day using shade cloth or by positioning them in a partially shaded area. Monitor the temperature inside the bottles regularly and adjust the ventilation as needed. If you notice signs of heat stress, such as wilting or scorched leaves, take immediate action to cool down the plants.
6. Can I reuse the plastic bottles for multiple seasons?
Yes, you can definitely reuse the plastic bottles for multiple seasons. However, it’s important to clean them thoroughly after each use to remove any soil, debris, or pathogens. You can wash them with soap and water or use a diluted bleach solution for disinfection. Inspect the bottles for any cracks or damage and replace them if necessary. Proper storage during the off-season will also help to prolong their lifespan.
7. What if my bell pepper plants outgrow the plastic bottles?
As your bell pepper plants grow, they may eventually outgrow the plastic bottles. When this happens, you have a few options. You can either remove the bottles completely, transplant the plants into larger containers, or carefully cut the bottles to allow for more room. If you choose to remove the bottles, do so gradually to allow the plants to acclimate to the outdoor environment.
8. Are there any downsides to using this method?
While this method offers many benefits, there are a few potential downsides to consider. Overheating can be a concern, as mentioned earlier. Additionally, the plastic bottles can create a humid environment that may promote fungal diseases. Proper ventilation and monitoring are essential to mitigate these risks. Also, the bottles may not be aesthetically pleasing to some gardeners.
9. Can I use this method for other plants besides bell peppers?
Absolutely! This method can be adapted for a wide variety of plants that benefit from a warm, sheltered environment. Tomatoes, eggplants, cucumbers, and herbs are all good candidates. Just be sure to adjust the size of the bottle and the ventilation according to the specific needs of each plant.
10. Where can I find more information and inspiration for using plastic bottles in gardening?
There are many online resources available, including gardening blogs, websites, and social media groups. Search for terms like “plastic bottle gardening,” “DIY greenhouse,” or “recycled gardening” to find a wealth of information and inspiration. You can also check out YouTube videos for visual tutorials and demonstrations. Don’t be afraid to experiment and adapt the techniques to suit your own needs and preferences.
Leave a Comment