
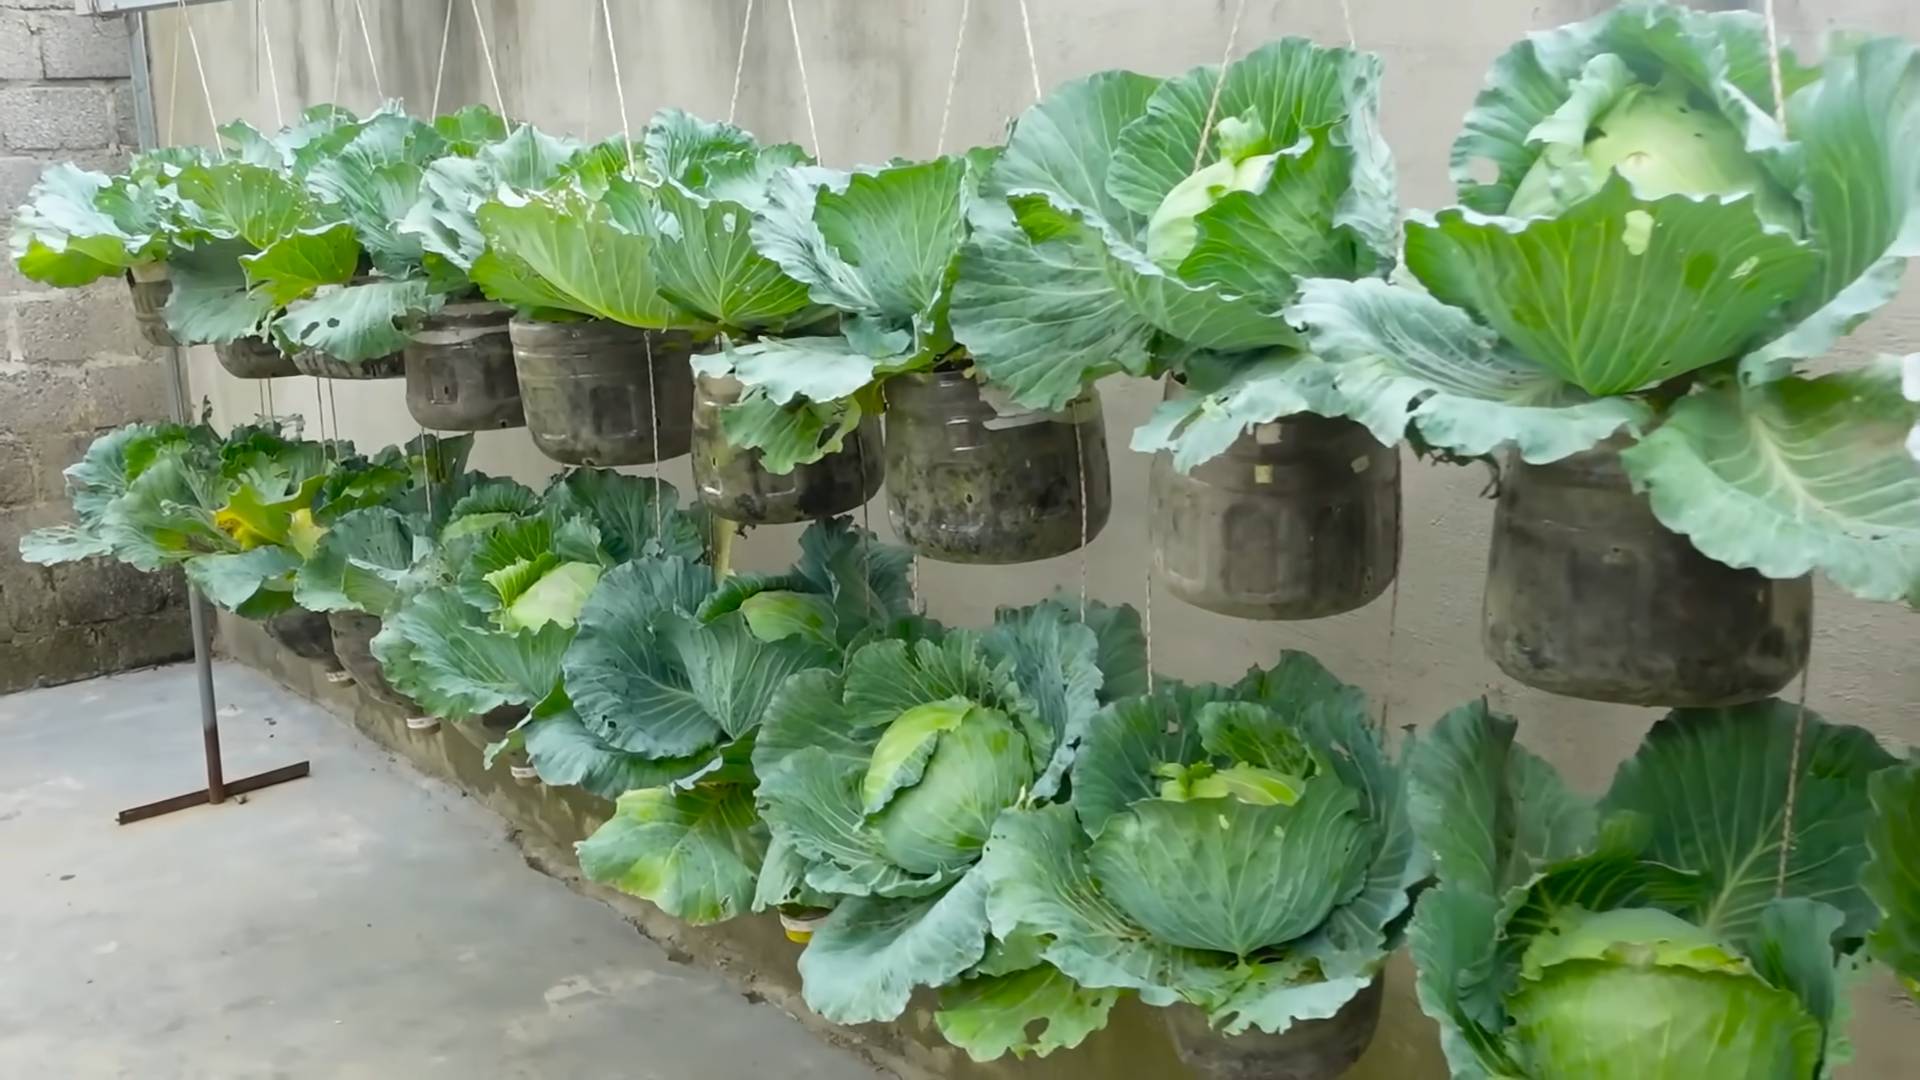
Bottle Gardening Cabbage: Sounds a little crazy, right? But trust me, it’s a game-changer! I know what you’re thinking: “Cabbage? In a bottle? Is that even possible?” Well, I’m here to tell you it’s not only possible, but it’s also a fantastic way to grow fresh, delicious cabbage, especially if you’re short on space or looking for a fun and unique gardening project.
The idea of container gardening, including using repurposed materials like bottles, has been around for centuries. Think of the ancient Hanging Gardens of Babylon – a testament to human ingenuity in cultivating plants in unconventional spaces! While we might not be building towering wonders, we can certainly borrow that spirit of innovation and apply it to our own backyards (or balconies!).
Why should you try bottle gardening cabbage? Well, for starters, it’s incredibly space-efficient. If you live in an apartment or have a small yard, this method allows you to enjoy fresh, homegrown cabbage without needing a traditional garden plot. Plus, it’s a fantastic way to recycle plastic bottles, turning waste into something beautiful and productive. But more importantly, growing your own food, even in a small way, connects you to the natural world and provides you with fresh, healthy produce. Who wouldn’t want that? So, let’s dive into the wonderful world of bottle gardening and learn how to grow your very own cabbage crop!
DIY Bottle Gardening: Grow Cabbage in Recycled Plastic
Hey there, fellow gardening enthusiasts! Ever thought about turning those empty plastic bottles into mini cabbage patches? It’s a fantastic way to recycle, save space, and enjoy fresh, homegrown cabbage. I’m going to walk you through the entire process, step-by-step, so you can create your own bottle garden and harvest delicious cabbage right from your balcony or backyard. Let’s get started!
Materials You’ll Need
Before we dive in, let’s gather all the necessary supplies. Trust me, having everything ready will make the process much smoother.
* Plastic Bottles: You’ll need large plastic bottles, like the ones used for water or soda (2-liter bottles work great). The number of bottles depends on how many cabbage plants you want to grow.
* Cabbage Seeds or Seedlings: You can start from seeds or buy small cabbage seedlings from a local nursery. Seedlings will give you a head start.
* Potting Soil: Use a good quality potting mix that drains well. Cabbage needs nutrient-rich soil to thrive.
* Scissors or Utility Knife: For cutting the plastic bottles. Be careful!
* Drill or Nail: To create drainage holes in the bottles.
* Watering Can or Spray Bottle: For watering your cabbage plants.
* Fertilizer (Optional): A balanced liquid fertilizer can help boost growth.
* Gloves (Optional): To keep your hands clean.
* Measuring Tape or Ruler: To ensure consistent cuts on the bottles.
* Permanent Marker: To mark cutting lines on the bottles.
* Small Stones or Gravel: To improve drainage at the bottom of the bottles.
Preparing the Bottles
This is where we transform those plastic bottles into cozy homes for our cabbage plants.
1. Clean the Bottles: Thoroughly wash the plastic bottles with soap and water to remove any residue. Rinse them well and let them dry completely. This is important to prevent any contamination that could harm your plants.
2. Mark the Cutting Lines: Use a permanent marker and measuring tape to mark where you want to cut the bottles. There are a few ways to do this:
* Option 1: Vertical Cut (Hanging Garden): Cut the bottle lengthwise, creating two halves. This is ideal for hanging gardens or if you want to maximize space.
* Option 2: Horizontal Cut (Pot-like Container): Cut the bottle horizontally, about two-thirds of the way up from the bottom. This creates a pot-like container. You can use the top part as a mini-greenhouse initially.
* Option 3: Stacked Bottles: Cut the bottom off several bottles and stack them on top of each other, creating a vertical tower. This requires a bit more planning and support.
I personally prefer the horizontal cut (Option 2) for growing cabbage in bottles because it provides a stable base and allows for good root development.
3. Cut the Bottles: Carefully use scissors or a utility knife to cut along the marked lines. Be extremely cautious when using a utility knife to avoid accidents. If you’re using scissors, make sure they are sharp enough to cut through the plastic cleanly.
4. Smooth the Edges: After cutting, the edges of the plastic can be sharp. Use sandpaper or a lighter (carefully!) to smooth them out. This will prevent you from accidentally cutting yourself and also make the containers look neater.
5. Create Drainage Holes: Use a drill or nail to create several drainage holes in the bottom of each bottle container. These holes are crucial for preventing waterlogging, which can lead to root rot. Aim for at least 4-5 holes, evenly spaced.
Planting the Cabbage
Now comes the fun part – planting our cabbage!
1. Add Drainage Layer: Place a layer of small stones or gravel at the bottom of each bottle container. This will further improve drainage and prevent the soil from becoming waterlogged. About an inch or two of gravel is sufficient.
2. Fill with Potting Soil: Fill the bottle containers with good quality potting soil, leaving about an inch of space at the top. Gently pat down the soil to remove any air pockets.
3. Plant the Seeds or Seedlings:
* From Seeds: Sow the cabbage seeds according to the instructions on the seed packet. Generally, you’ll want to plant them about ¼ inch deep. Water gently after planting.
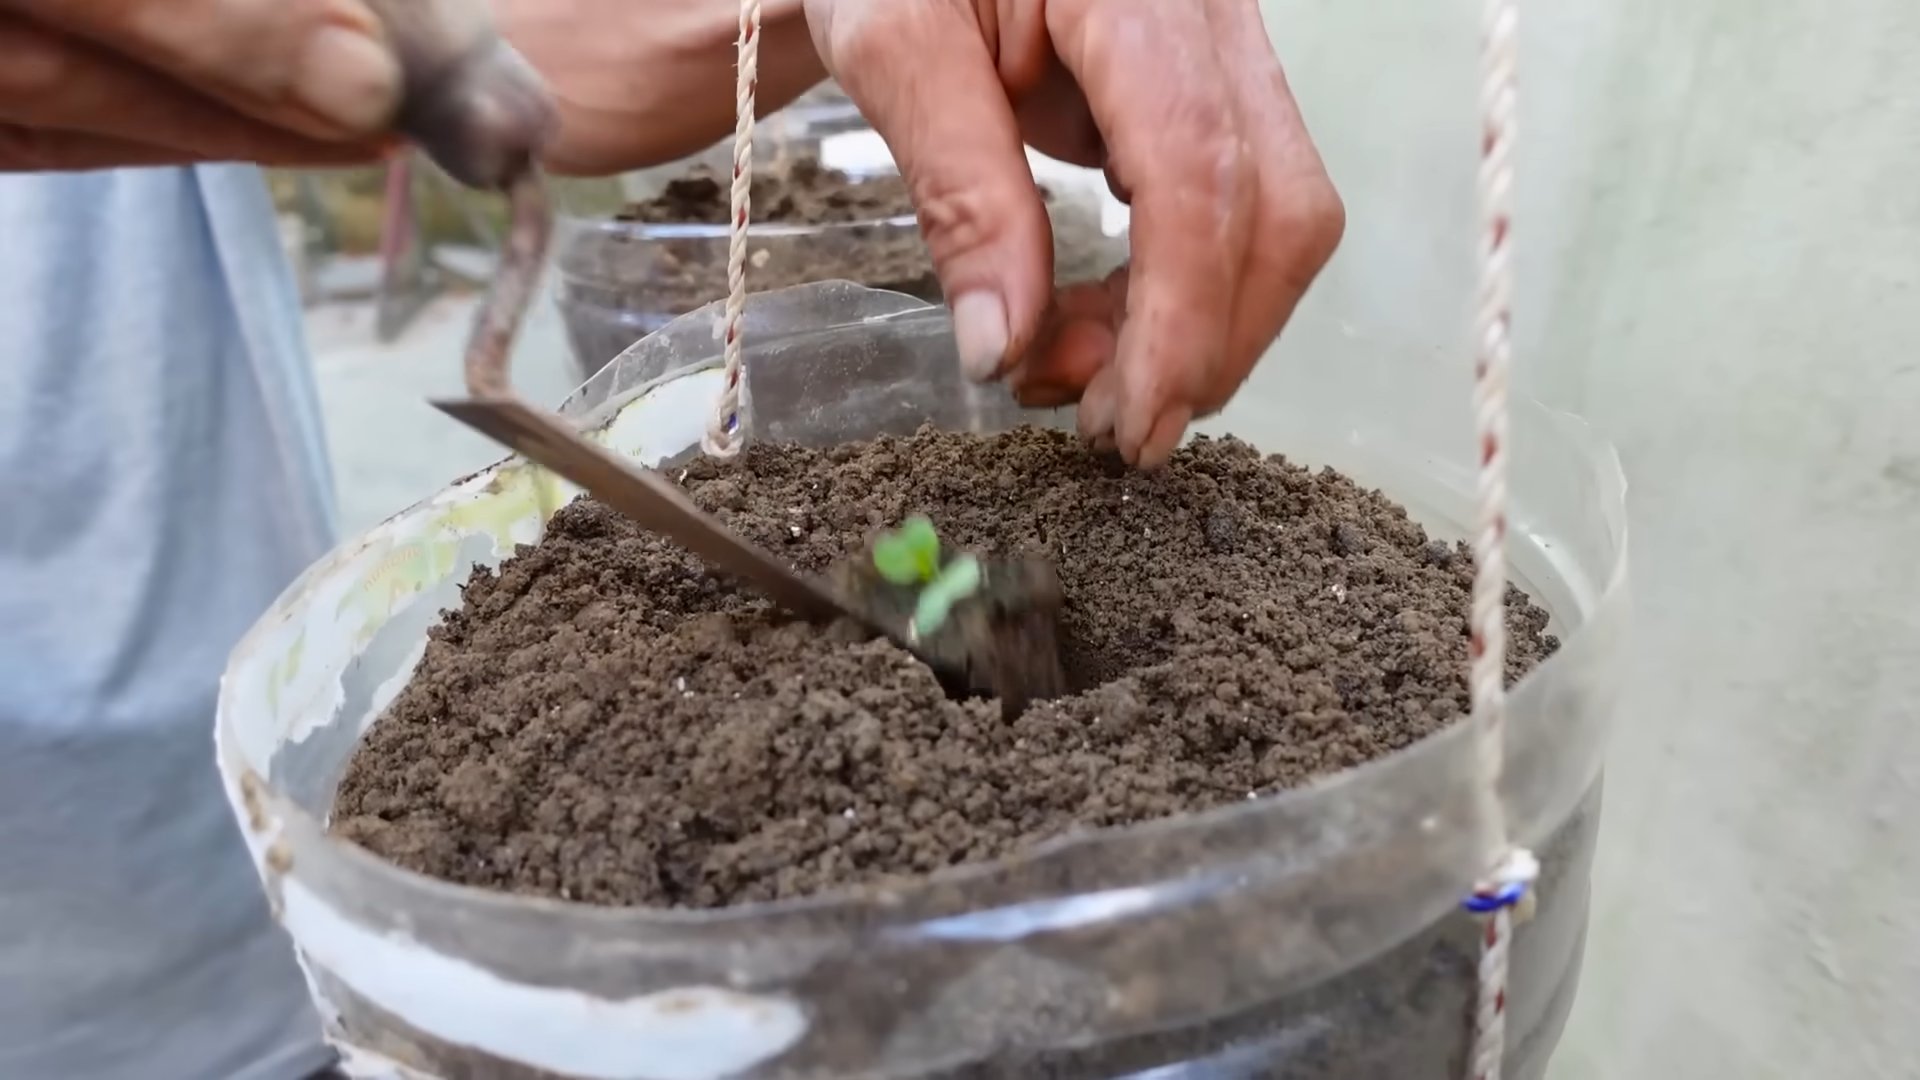
* From Seedlings: Carefully remove the cabbage seedlings from their original containers. Gently loosen the roots and plant them in the bottle containers, making sure the top of the root ball is level with the soil surface. Water thoroughly after planting.
When planting seedlings, I like to make a small hole in the soil with my finger and then gently place the seedling in the hole. This helps to avoid damaging the delicate roots.
4. Water Thoroughly: After planting, water the cabbage plants thoroughly until the water drains out of the drainage holes. This will help to settle the soil and ensure that the roots are properly hydrated.
Caring for Your Cabbage Plants
Cabbage plants need consistent care to thrive. Here’s what you need to do:
1. Sunlight: Cabbage needs at least 6 hours of sunlight per day. Place your bottle garden in a sunny location, such as a balcony, patio, or windowsill. If you don’t have enough natural sunlight, you can supplement with grow lights.
2. Watering: Water your cabbage plants regularly, especially during hot and dry weather. The soil should be consistently moist but not waterlogged. Check the soil moisture by sticking your finger into the soil. If the top inch feels dry, it’s time to water.
3. Fertilizing: Cabbage plants are heavy feeders and benefit from regular fertilization. Use a balanced liquid fertilizer every 2-3 weeks, following the instructions on the fertilizer label. You can also add compost to the soil to provide additional nutrients.
4. Pest Control: Keep an eye out for pests, such as aphids, cabbage worms, and slugs. If you notice any pests, take action immediately. You can use organic pest control methods, such as insecticidal soap or neem oil. Handpicking pests is also an effective way to control them.
5. Weeding: Remove any weeds that may grow in the bottle containers. Weeds compete with cabbage plants for nutrients and water.
6. Support (Optional): As the cabbage heads grow larger, they may become heavy and require support. You can use stakes or cages to support the plants and prevent them from falling over.
Harvesting Your Cabbage
The moment we’ve all been waiting for!
1. Check for Maturity: Cabbage is typically ready to harvest when the heads are firm and compact. The size of the head will vary depending on the variety of cabbage you’re growing.
2. Harvesting: Use a sharp knife to cut the cabbage head from the plant, leaving a few outer leaves intact.
3. Enjoy Your Harvest: Enjoy your fresh, homegrown cabbage in salads, soups, stews, or any other dish you like.
Troubleshooting
Even with the best care, you might encounter some challenges. Here are a few common issues and how to address them:
* Yellowing Leaves: This could be a sign of overwatering, underwatering, or nutrient deficiency. Adjust your watering schedule and fertilize your plants if necessary.
* Slow Growth: This could be due to insufficient sunlight, poor soil, or pests. Make sure your plants are getting enough sunlight, use good quality potting soil, and control any pests.
* Root Rot: This is caused by waterlogged soil. Make sure your bottle containers have adequate drainage holes and avoid overwatering.
* Pest Infestations: Regularly inspect your plants for pests and take action immediately if you notice any.
Tips for Success
Here are a few extra tips to help you succeed with your bottle garden:
* Choose the Right Cabbage Variety: Some cabbage varieties are better suited for container gardening than others. Look for compact varieties that don’t require a lot of space.
* Start with Seedlings: If you’re a beginner, starting with seedlings is easier than starting from seeds. Seedlings are already established and have a higher chance of survival.
* Rotate Your Crops: Avoid planting cabbage in the same bottle containers year after year. Rotating your crops will help to prevent soilborne diseases and pests.
* Monitor Your Plants Regularly: Check your plants regularly for signs of pests, diseases, or nutrient deficiencies. The sooner you identify a problem, the easier it will be to fix it.
* Don’t Be Afraid to Experiment: Gardening is all about experimentation. Don’t be afraid to try new things and see what works best for you.
Growing cabbage in recycled plastic bottles is a rewarding and sustainable way to enjoy fresh, homegrown produce. With a little effort and care,
Conclusion
So, there you have it! Transforming a simple plastic bottle into a thriving mini-garden for your cabbage is not just a fun project; it’s a sustainable, space-saving, and incredibly rewarding way to grow your own fresh produce. We’ve walked you through the process, highlighting the ease and accessibility of this method, proving that you don’t need acres of land or a green thumb to enjoy the taste of homegrown vegetables.
Why is this DIY bottle gardening cabbage trick a must-try? Because it empowers you to take control of your food source, reduces plastic waste, and connects you with the natural world in a tangible way. Imagine the satisfaction of harvesting crisp, vibrant cabbage leaves from a plant you nurtured from a seedling, all within the confines of a recycled bottle. It’s a small act with a big impact, both on your plate and on the planet.
But the beauty of this method lies in its adaptability. Feel free to experiment with different varieties of cabbage. Red cabbage, savoy cabbage, or even Chinese cabbage (Napa cabbage) can all thrive in a bottle garden. Consider companion planting by adding herbs like thyme or rosemary to the bottle; they not only enhance the flavor of your cabbage but also deter pests naturally. You can also try different types of bottles. While we focused on larger soda or water bottles, smaller bottles can be used for starting seedlings before transplanting them into larger containers.
Don’t be afraid to get creative with your bottle garden setup. Paint the bottles to add a splash of color to your balcony or patio. Create a vertical garden by hanging multiple bottle gardens from a trellis or fence. The possibilities are endless!
We understand that venturing into the world of DIY gardening can be a little daunting, but we assure you that this project is beginner-friendly and incredibly forgiving. The key is to provide your cabbage plants with adequate sunlight, well-draining soil, and consistent watering. With a little patience and care, you’ll be amazed at how quickly your bottle garden flourishes.
So, what are you waiting for? Gather your supplies, follow our simple steps, and embark on your own bottle gardening cabbage adventure. We’re confident that you’ll be delighted with the results.
And most importantly, we want to hear about your experience! Share your photos, tips, and challenges with us in the comments section below. Let’s create a community of bottle gardeners, inspiring each other to grow our own food and live more sustainably. Your insights could be invaluable to other aspiring gardeners, and we’re eager to learn from your successes (and even your failures!). Happy gardening!
Frequently Asked Questions (FAQ)
What type of cabbage is best for bottle gardening?
While most cabbage varieties can be grown in bottles, smaller, more compact varieties tend to thrive best. Consider varieties like ‘Dwarf Blue Vates’ or ‘Golden Acre’. These varieties don’t require as much space as larger cabbages, making them ideal for container gardening. However, don’t be afraid to experiment with other types! Just be mindful of the size of the bottle and the potential size of the mature cabbage head. Red cabbage and Napa cabbage can also be successfully grown, but may require a larger bottle or more frequent watering.
How often should I water my bottle garden cabbage?
Watering frequency depends on several factors, including the size of the bottle, the type of soil, the weather conditions, and the size of the cabbage plant. As a general rule, water when the top inch of soil feels dry to the touch. Avoid overwatering, as this can lead to root rot. Ensure that the bottle has adequate drainage holes to prevent water from pooling at the bottom. During hot, dry weather, you may need to water daily, while during cooler, wetter periods, you may only need to water every few days. Check the soil moisture regularly and adjust your watering schedule accordingly.
What kind of soil should I use for bottle gardening cabbage?
Use a well-draining potting mix specifically formulated for vegetables. Avoid using garden soil, as it can be too heavy and compacted for container gardening. A good potting mix will provide adequate drainage, aeration, and nutrients for your cabbage plants. You can also amend the potting mix with compost or other organic matter to improve its fertility and water-holding capacity. Consider adding perlite or vermiculite to further enhance drainage.
How much sunlight does bottle garden cabbage need?
Cabbage plants need at least 6 hours of direct sunlight per day to thrive. Choose a location for your bottle garden that receives plenty of sunlight. If you don’t have a sunny spot, you can supplement with artificial grow lights. Rotate the bottle garden regularly to ensure that all sides of the plant receive adequate sunlight. Insufficient sunlight can lead to leggy growth and reduced cabbage head formation.
How do I fertilize my bottle garden cabbage?
Cabbage plants are heavy feeders and require regular fertilization. Use a balanced liquid fertilizer specifically formulated for vegetables. Follow the instructions on the fertilizer label for application rates and frequency. Fertilize every 2-3 weeks during the growing season. You can also amend the soil with slow-release fertilizer granules at planting time. Avoid over-fertilizing, as this can burn the roots of the plant.
How do I protect my bottle garden cabbage from pests?
Cabbage plants are susceptible to various pests, including cabbage worms, aphids, and flea beetles. Inspect your plants regularly for signs of infestation. Handpick any pests that you find. You can also use organic pest control methods, such as insecticidal soap or neem oil. Companion planting with herbs like thyme or rosemary can also help deter pests. Consider covering your bottle garden with netting to prevent pests from accessing the plants.
How long does it take to grow cabbage in a bottle garden?
The time it takes to grow cabbage in a bottle garden depends on the variety of cabbage, the growing conditions, and the size of the bottle. Generally, it takes about 60-90 days from transplanting seedlings to harvest. Start with seedlings rather than seeds for a quicker harvest. Monitor the size of the cabbage head and harvest when it reaches the desired size.
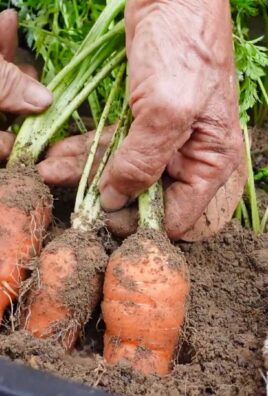
Can I grow other vegetables in a bottle garden?
Absolutely! The bottle gardening method is versatile and can be used to grow a variety of other vegetables, including lettuce, spinach, herbs, and even tomatoes (dwarf varieties). The key is to choose vegetables that are well-suited for container gardening and to provide them with the appropriate growing conditions. Experiment with different vegetables and find what works best for you.
What do I do with the bottle after harvesting the cabbage?
The beauty of bottle gardening is its sustainability. After harvesting your cabbage, you can reuse the bottle for another planting. Simply clean the bottle thoroughly and replenish the soil. Alternatively, you can recycle the bottle properly. Bottle gardening is a great way to reduce plastic waste and promote sustainable gardening practices.
My cabbage isn’t forming a head. What am I doing wrong?
Several factors can contribute to a cabbage plant not forming a head. Insufficient sunlight, lack of nutrients, and improper watering are common culprits. Ensure that your cabbage plant is receiving at least 6 hours of direct sunlight per day, is being fertilized regularly, and is being watered properly. Also, make sure that the variety of cabbage you are growing is a heading variety. Some cabbage varieties are grown for their leaves rather than their heads. If you’ve addressed these factors and your cabbage still isn’t forming a head, it may be due to environmental stress, such as extreme temperatures.
Leave a Comment