
Bottle Grown Eggplants: Imagine harvesting plump, juicy eggplants right from your windowsill, balcony, or even a small patio! Sounds like a dream, right? Well, it doesn’t have to be! For centuries, resourceful gardeners have been finding innovative ways to maximize their yields, even in limited spaces. From ancient rooftop gardens in bustling cities to modern-day urban farming initiatives, the desire to cultivate our own food is deeply ingrained in human history.
But let’s face it, not everyone has acres of land to dedicate to a sprawling vegetable garden. That’s where this DIY trick comes in! Growing eggplants in bottles is a fantastic solution for apartment dwellers, beginner gardeners, or anyone looking to add a touch of green to their lives without a huge commitment. I’m going to show you how to create a mini-eggplant paradise using recycled bottles and a few simple steps.
Why do you need this hack? Because fresh, homegrown eggplants taste infinitely better than anything you can buy at the store! Plus, it’s incredibly rewarding to nurture a plant from seed to harvest. This method is not only space-saving but also eco-friendly, giving those plastic bottles a new lease on life. So, are you ready to learn how to grow your own bottle grown eggplants and impress your friends and family with your green thumb? Let’s get started!
Growing Eggplants Upside Down in Bottles: A Fun DIY Project!
Hey there, fellow gardening enthusiasts! Ever thought about growing eggplants upside down? It’s a quirky, space-saving method that can be surprisingly effective, and I’m here to guide you through the whole process using recycled bottles! Get ready to impress your neighbors with this unique gardening hack.
Why Grow Eggplants Upside Down?
Before we dive in, let’s talk about why you might want to try this method.
* Space Saving: Perfect for small balconies, patios, or even indoors!
* Pest Control: Hanging the plant can help deter some ground-dwelling pests.
* Unique Aesthetic: Let’s be honest, it looks pretty cool!
* Good Drainage: Upside-down containers often provide excellent drainage, preventing root rot.
What You’ll Need
Gathering your supplies is the first step to success. Here’s what you’ll need:
* Large Plastic Bottles: Think 2-liter soda bottles or even larger water jugs. The bigger, the better, as eggplants need room to grow.
* Healthy Eggplant Seedling: Choose a variety that’s known to do well in containers. I’ve had good luck with ‘Black Beauty’ and ‘Ichiban’.
* Potting Mix: A good quality potting mix is crucial. Avoid using garden soil, as it can compact and hinder drainage.
* Landscape Fabric or Burlap: This will help prevent the soil from falling out of the bottle’s opening.
* Sharp Knife or Scissors: For cutting the bottle.
* Drill or Nail: To create drainage holes.
* Watering Can: For, well, watering!
* Hanging Mechanism: Strong rope, chain, or even sturdy wire hangers.
* Gloves: To keep your hands clean.
Preparing the Bottle Container
This is where we transform a simple plastic bottle into a cozy home for your eggplant.
1. Clean the Bottle: Thoroughly wash the bottle with soap and water to remove any residue. Rinse it well.
2. Cut the Bottle: Carefully cut off the bottom of the bottle. I usually cut it about 4-6 inches from the bottom, creating a wide opening. Be careful with the knife or scissors!
3. Drill Drainage Holes: Drill or poke several drainage holes in the bottle cap. This is essential to prevent waterlogging. I usually make about 4-5 holes.
4. Prepare the Landscape Fabric: Cut a circle of landscape fabric or burlap that’s slightly larger than the bottle’s opening (the neck). This will act as a barrier to keep the soil in while allowing the eggplant stem to poke through.
5. Make a Slit in the Fabric: Cut a small “X” in the center of the fabric circle. This is where you’ll gently thread the eggplant seedling through.
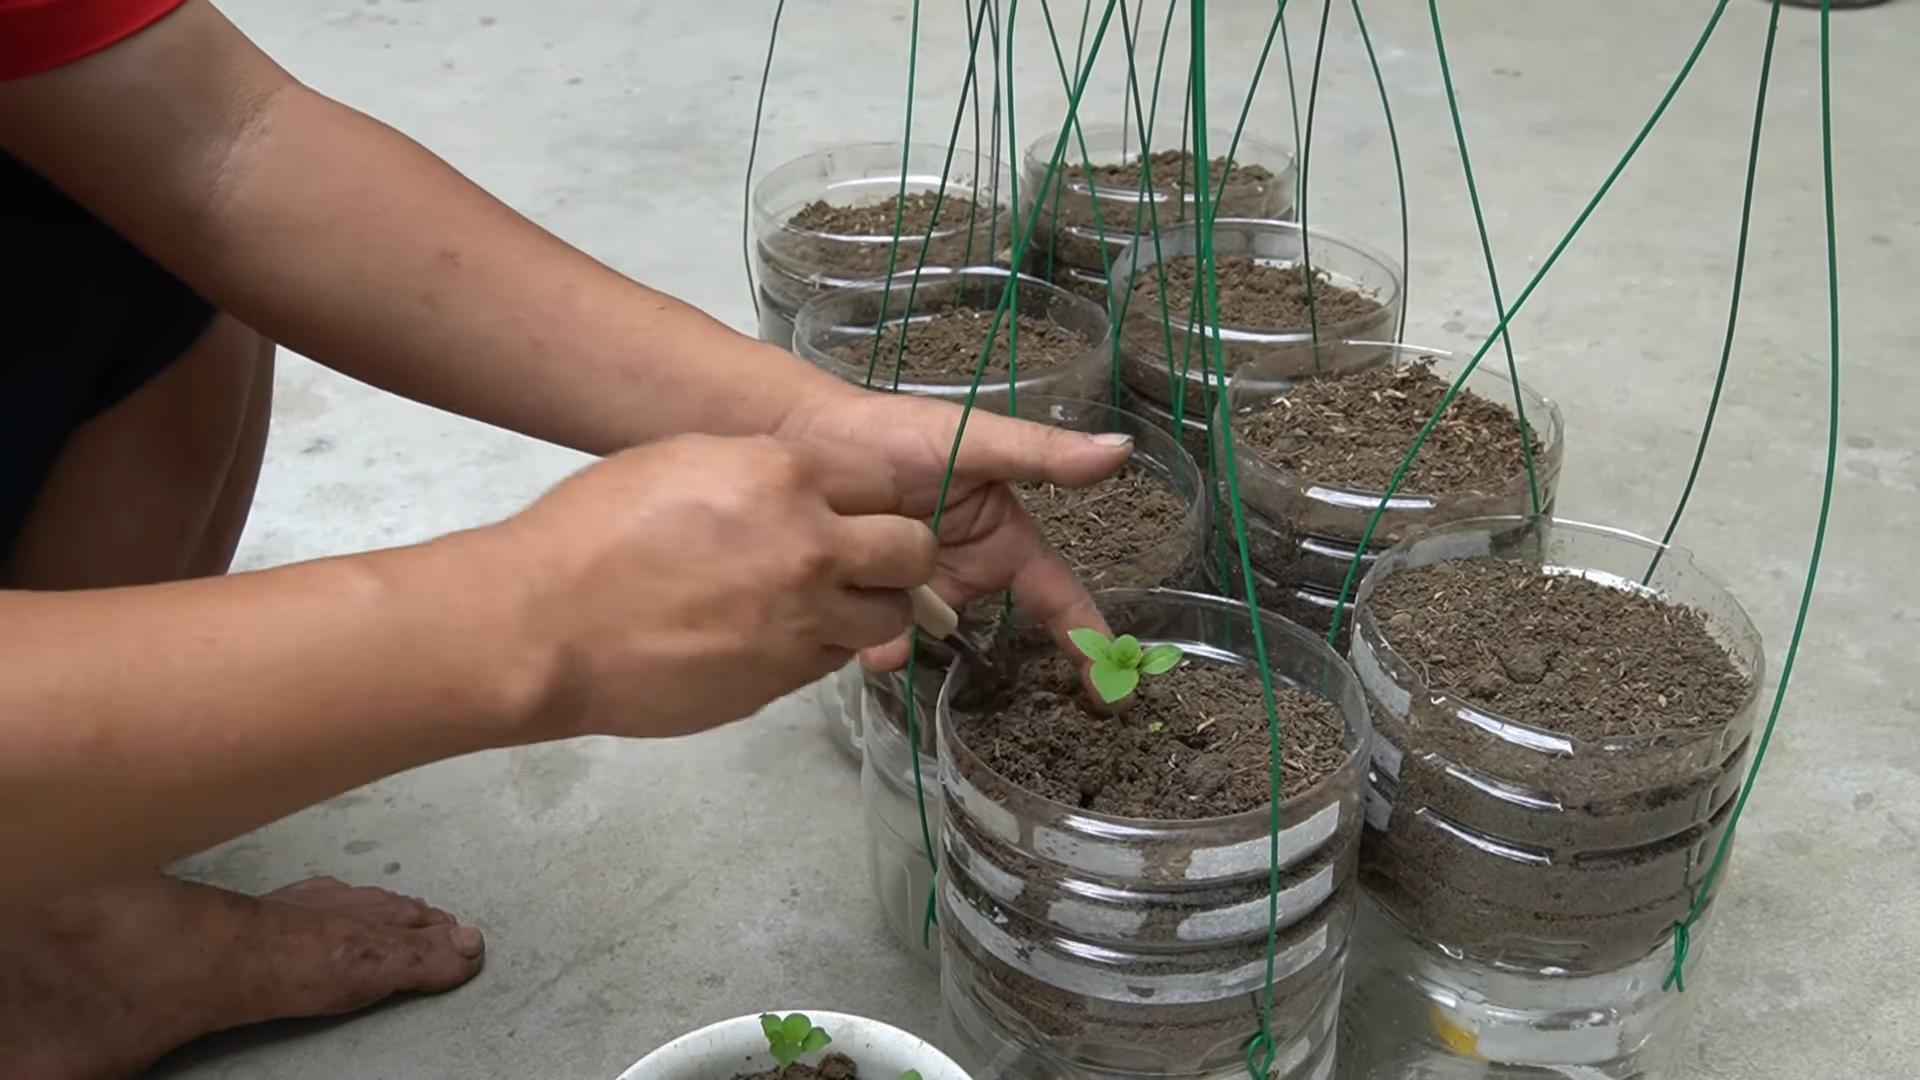
Planting Your Eggplant
Now for the fun part – getting your eggplant settled into its new upside-down home!
1. Thread the Seedling: Gently thread the eggplant seedling through the “X” you cut in the landscape fabric. Be extremely careful not to damage the stem or roots. This is the trickiest part, so take your time.
2. Position the Fabric: Place the landscape fabric circle over the bottle’s opening (the neck), with the eggplant seedling dangling down.
3. Add Potting Mix: Carefully fill the bottle with potting mix, packing it gently around the eggplant’s roots. Leave about an inch or two of space at the top.
4. Water Thoroughly: Water the potting mix thoroughly until water drains out of the drainage holes in the cap. This helps settle the soil and ensures the roots are well-hydrated.
Hanging Your Eggplant
Time to get your eggplant off the ground!
1. Attach Hanging Mechanism: Create a secure hanging system using rope, chain, or wire hangers. Make sure it’s strong enough to support the weight of the bottle, soil, and eventually, the eggplant fruit. I like to use three or four strands of rope for extra security.
2. Hang the Bottle: Find a sunny spot to hang your eggplant. It needs at least 6-8 hours of direct sunlight per day. A balcony railing, a sturdy tree branch, or even a hanging basket stand will work.
3. Ensure Stability: Make sure the bottle is hanging securely and won’t swing excessively in the wind. You might need to add some extra support to stabilize it.
Caring for Your Upside-Down Eggplant
Just like any other plant, your upside-down eggplant needs regular care to thrive.
* Watering: Water regularly, especially during hot weather. Check the soil moisture by sticking your finger into the top inch of the potting mix. If it feels dry, it’s time to water. Avoid overwatering, as this can lead to root rot.
* Fertilizing: Feed your eggplant with a balanced liquid fertilizer every 2-3 weeks. Follow the instructions on the fertilizer package. Eggplants are heavy feeders, so regular fertilization is important for good fruit production.
* Sunlight: Ensure your eggplant receives at least 6-8 hours of direct sunlight per day. If you’re growing it indoors, you might need to supplement with grow lights.
* Pest Control: Keep an eye out for pests like aphids, spider mites, and flea beetles. Treat any infestations promptly with insecticidal soap or neem oil.
* Pruning: Prune away any yellowing or dead leaves to encourage air circulation and prevent disease. You can also prune suckers (small shoots that grow from the base of the plant) to encourage more fruit production.
* Pollination: Eggplants are self-pollinating, but you can help them along by gently shaking the plant or using a small paintbrush to transfer pollen from one flower to another. This is especially important if you’re growing them indoors.
* Support: As the eggplant grows and produces fruit, it may become heavy. You might need to provide additional support to the plant to prevent it from breaking. You can use twine or plant ties to secure the branches to the hanging mechanism.
Troubleshooting
Even with the best care, you might encounter some challenges. Here are a few common problems and how to address them:
* Yellowing Leaves: This could be a sign of overwatering, underwatering, nutrient deficiency, or pest infestation. Check the soil moisture, fertilize if necessary, and inspect for pests.
* Lack of Fruit: This could be due to insufficient sunlight, poor pollination, or nutrient deficiency. Ensure your eggplant is getting enough sunlight, assist with pollination, and fertilize regularly.
* Root Rot: This is caused by overwatering and poor drainage. Make sure your bottle has adequate drainage holes and avoid overwatering. If you suspect root rot, you might need to repot the eggplant in fresh potting mix.
* Pest Infestations: Treat any pest infestations promptly with insecticidal soap or neem oil.
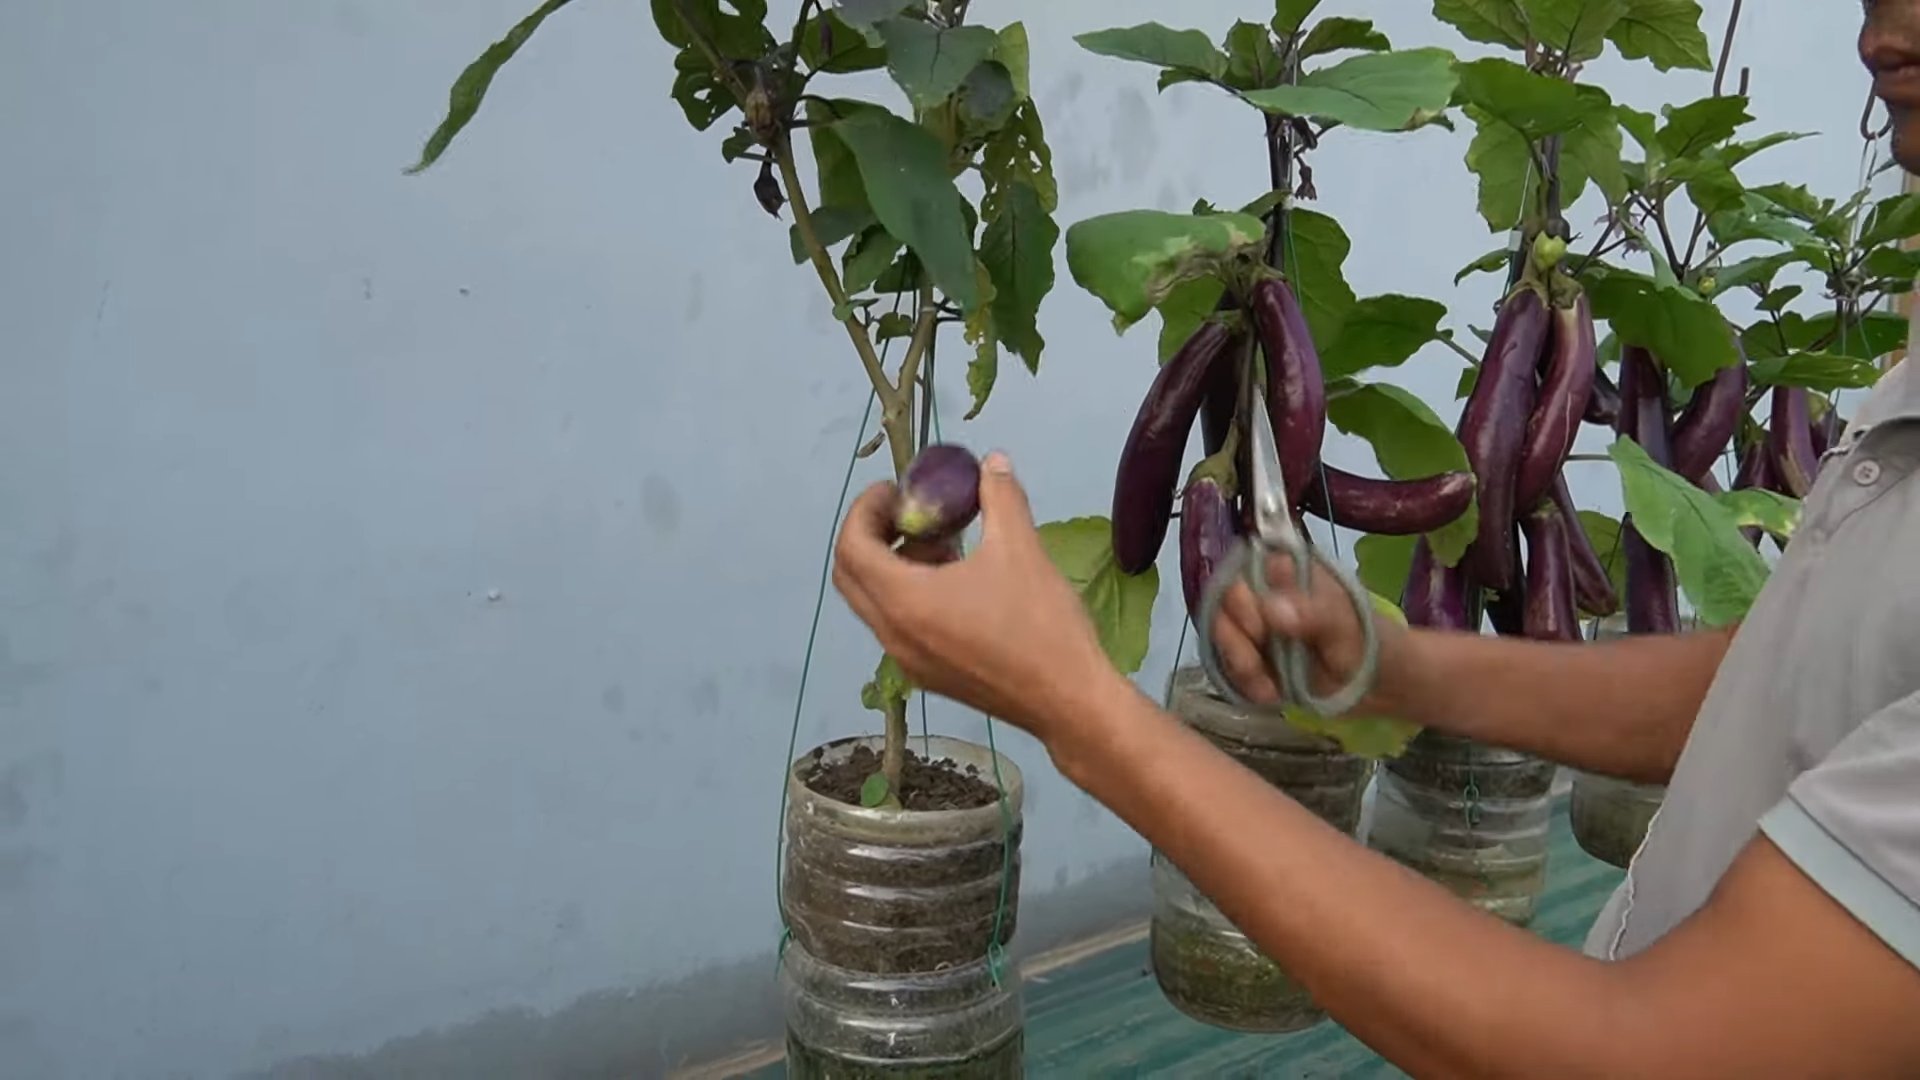
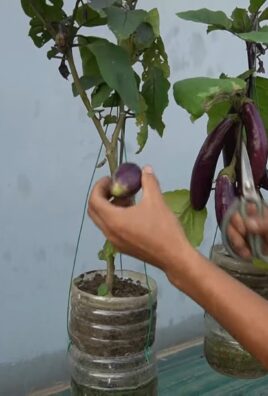
Harvesting Your Eggplants
The moment you’ve been waiting for!
1. Check for Ripeness: Eggplants are typically ready to harvest when they are firm, glossy, and have a deep, rich color. The skin should be smooth and unblemished.
2. Harvest Carefully: Use a sharp knife or pruning shears to cut the eggplant from the plant. Leave about an inch of stem attached.
3. Enjoy Your Harvest: Use your freshly harvested eggplants in your favorite recipes! They’re delicious grilled, roasted, or added to stews and curries.
Tips for Success
Here are a few extra tips to help you succeed with your upside-down eggplant project:
* Choose the Right Variety: Select an eggplant variety that’s known to do well in containers.
* Use High-Quality Potting Mix: Don’t skimp on the potting mix! A good quality mix will provide the nutrients and drainage your eggplant needs.
* Provide Adequate Sunlight: Eggplants need plenty of sunlight to thrive.
* Water Regularly: Don’t let the soil dry out completely.
* Fertilize Regularly: Eggplants are heavy feeders, so regular fertilization is important.
* Protect from Pests: Keep an eye out for pests and treat any infestations promptly.
* Be Patient: It takes time for eggplants to grow and produce fruit. Don’t get discouraged if you don’t see results right away.
Growing eggplants upside down in bottles is a fun and rewarding project. With a little care and attention, you can enjoy fresh, homegrown eggplants even if you have limited space. So, grab a bottle, a seedling, and get ready to grow! Happy gardening!
Conclusion
So, there you have it! Growing eggplants in bottles isn’t just a quirky gardening experiment; it’s a game-changer for anyone with limited space, a desire for a higher yield, or simply a love for innovative gardening techniques. This method offers a multitude of benefits, from protecting your precious seedlings from pests and harsh weather to maximizing your harvest in even the smallest of balconies or patios. It’s a testament to the fact that you don’t need acres of land to enjoy the satisfaction of growing your own food.
But the real magic of this method lies in its adaptability. Feel free to experiment with different bottle sizes to accommodate various eggplant varieties. Consider using colored bottles to potentially influence the plant’s growth or even to add a decorative element to your garden. You could also try different soil mixes to find the perfect blend for your local climate and eggplant variety. The possibilities are truly endless!
This DIY trick is a must-try because it empowers you to take control of your food source, connect with nature, and learn new skills along the way. It’s a sustainable and rewarding way to enjoy fresh, delicious eggplants right from your own home. Plus, imagine the bragging rights you’ll have when you serve up a dish made with eggplants you grew yourself, in bottles no less!
We wholeheartedly encourage you to give this bottle-grown eggplant method a try. Don’t be afraid to get your hands dirty, experiment with different techniques, and most importantly, have fun! Once you’ve experienced the joy of harvesting your own bottle-grown eggplants, we’re confident you’ll be hooked.
And don’t forget to share your experiences with us! We’d love to hear about your successes, challenges, and any variations you’ve tried. Share your photos and stories on social media using #BottleGrownEggplants and let’s create a community of innovative gardeners who are pushing the boundaries of what’s possible. Happy gardening!
Frequently Asked Questions (FAQs)
What are the best eggplant varieties to grow in bottles?
While you can technically grow any eggplant variety in a bottle, smaller, more compact varieties tend to thrive best. Consider varieties like ‘Patio Baby’, ‘Fairy Tale’, or ‘Little Fingers’. These varieties are naturally smaller and produce smaller fruits, making them well-suited for the limited space within a bottle. Larger varieties can still be grown, but you may need to provide additional support as the plant grows and the fruits develop. Also, ensure the bottle is large enough to accommodate the root system of the chosen variety.
What size bottle should I use for growing eggplants?
The ideal bottle size depends on the eggplant variety you choose. For smaller varieties like ‘Patio Baby’, a 2-liter bottle may suffice. However, for larger varieties, you’ll want to use a larger bottle, such as a 3-liter or even a 5-liter bottle. The key is to ensure that the bottle provides enough space for the roots to grow and develop properly. A good rule of thumb is to choose a bottle that is at least as tall as the mature height of the eggplant variety you’re growing. Remember to thoroughly clean the bottle before planting.
How often should I water my bottle-grown eggplants?
Watering frequency will depend on several factors, including the size of the bottle, the climate, and the eggplant variety. Generally, you’ll want to water your bottle-grown eggplants whenever the top inch of soil feels dry to the touch. During hot, dry weather, you may need to water them daily, while during cooler, wetter weather, you may only need to water them every few days. Be careful not to overwater, as this can lead to root rot. Ensure the bottle has adequate drainage holes to prevent water from accumulating at the bottom.
What type of soil should I use for bottle-grown eggplants?
Eggplants prefer well-draining, nutrient-rich soil. A good potting mix specifically formulated for vegetables is ideal. You can also create your own soil mix by combining equal parts of potting soil, compost, and perlite or vermiculite. The compost will provide essential nutrients, while the perlite or vermiculite will improve drainage and aeration. Avoid using garden soil, as it can be too heavy and may contain pests or diseases.
How much sunlight do bottle-grown eggplants need?
Eggplants need at least 6-8 hours of direct sunlight per day to thrive. Choose a sunny location for your bottle-grown eggplants, such as a south-facing balcony or patio. If you don’t have access to enough natural sunlight, you can supplement with grow lights. Rotate the bottles regularly to ensure that all sides of the plant receive adequate sunlight.
Do I need to fertilize my bottle-grown eggplants?
Yes, eggplants are heavy feeders and will benefit from regular fertilization. Use a balanced fertilizer specifically formulated for vegetables, following the instructions on the package. You can also use organic fertilizers, such as compost tea or fish emulsion. Fertilize your bottle-grown eggplants every 2-3 weeks during the growing season.
How do I protect my bottle-grown eggplants from pests and diseases?
Bottle-grown eggplants are susceptible to the same pests and diseases as eggplants grown in the ground. Common pests include aphids, flea beetles, and spider mites. Common diseases include powdery mildew and blossom-end rot. To protect your bottle-grown eggplants, inspect them regularly for signs of pests or diseases. If you find any pests, you can try spraying them with insecticidal soap or neem oil. To prevent diseases, ensure good air circulation and avoid overwatering. You can also use organic fungicides if necessary.
How do I support my bottle-grown eggplants as they grow?
As your bottle-grown eggplants grow, they may need additional support to prevent them from toppling over. You can use stakes, trellises, or cages to support the plants. Tie the stems of the eggplants to the supports using soft twine or plant ties. This will help to keep the plants upright and prevent the fruits from touching the ground.
How long does it take to harvest bottle-grown eggplants?
The time it takes to harvest bottle-grown eggplants depends on the variety and growing conditions. Generally, eggplants are ready to harvest about 60-80 days after transplanting. The fruits should be firm and glossy, with a deep, rich color. Harvest the eggplants when they are still relatively young, as they can become bitter if they are allowed to overripen.
Can I reuse the bottles for growing eggplants again next year?
Yes, you can reuse the bottles for growing eggplants again next year. However, it’s important to thoroughly clean and disinfect the bottles before reusing them. Wash the bottles with soap and water, and then rinse them with a solution of 1 part bleach to 9 parts water. This will help to kill any pests or diseases that may be lurking in the bottles. Allow the bottles to dry completely before storing them for the winter.
Leave a Comment