
Brussel Sprout Container Gardening: Ever dreamt of harvesting your own miniature cabbages, bursting with fresh, homegrown flavor, right from your patio or balcony? I know I have! For years, I thought growing these nutritional powerhouses was strictly for those with sprawling gardens. But guess what? You can absolutely cultivate your own thriving Brussel sprout crop, even in the smallest of spaces, with the magic of container gardening!
Brussel sprouts, those often-maligned vegetables, actually have a fascinating history. Originating in (you guessed it!) Brussels, Belgium, they’ve been cultivated since the 16th century. They were prized for their hardiness and ability to provide sustenance throughout the colder months. Today, they’re recognized as a superfood, packed with vitamins, fiber, and antioxidants.
But why should you bother with Brussel sprout container gardening? Well, for starters, it gives you complete control over the growing environment. No more battling unpredictable soil conditions or pesky garden pests! Plus, it’s incredibly rewarding to nurture a plant from seedling to harvest, knowing you’re providing your family with healthy, delicious food. In this article, I’m going to share my favorite DIY tricks and hacks to ensure your Brussel sprout container gardening adventure is a resounding success. Get ready to enjoy a bountiful harvest of these mini-cabbages, grown with love and a little bit of know-how!
Growing Brussels Sprouts in Containers: A DIY Guide
Hey there, fellow gardening enthusiasts! Brussels sprouts, those mini-cabbages that some love and some… well, tolerate, are surprisingly easy to grow in containers. I’ve had great success with them on my patio, and I’m excited to share my secrets with you. This guide will walk you through everything you need to know to cultivate your own bountiful Brussels sprouts harvest, even if you’re short on space.
Choosing the Right Container and Soil
First things first, let’s talk about the home for your future sprouts. Size matters! Brussels sprouts need room to grow, both above and below the soil.
* Container Size: Opt for a container that’s at least 12 inches in diameter and 12 inches deep. Bigger is generally better, so if you have the space, a 15-18 inch container will give your plants even more room to thrive. I personally prefer using large resin pots because they’re durable, lightweight, and retain moisture well.
* Drainage: This is crucial! Make sure your container has plenty of drainage holes. Brussels sprouts don’t like soggy feet. If your container doesn’t have enough holes, you can easily drill a few more.
* Soil: Forget using garden soil straight from the ground. It’s often too heavy and doesn’t drain well in containers. Instead, use a high-quality potting mix. I like to use a mix specifically formulated for vegetables, as it usually contains added nutrients. You can also amend a general-purpose potting mix with compost for extra richness.
Planting Your Brussels Sprouts
Now for the fun part: getting those little sprouts started! You have two main options: starting from seed or buying transplants.
* Starting from Seed: This gives you more control over the variety you grow and can be more economical. Start seeds indoors about 4-6 weeks before the last expected frost.
* Sow seeds about ½ inch deep in seed-starting trays or small pots filled with seed-starting mix.
* Keep the soil consistently moist but not soggy.
* Provide plenty of light, either from a sunny window or a grow light.
* Once the seedlings have a few sets of true leaves, you can transplant them into larger pots.
* Buying Transplants: This is the easier and faster option. You can find Brussels sprouts transplants at most garden centers in the spring.
* Choose healthy-looking plants with sturdy stems and green leaves. Avoid plants that are yellowed, wilted, or have signs of pests or diseases.
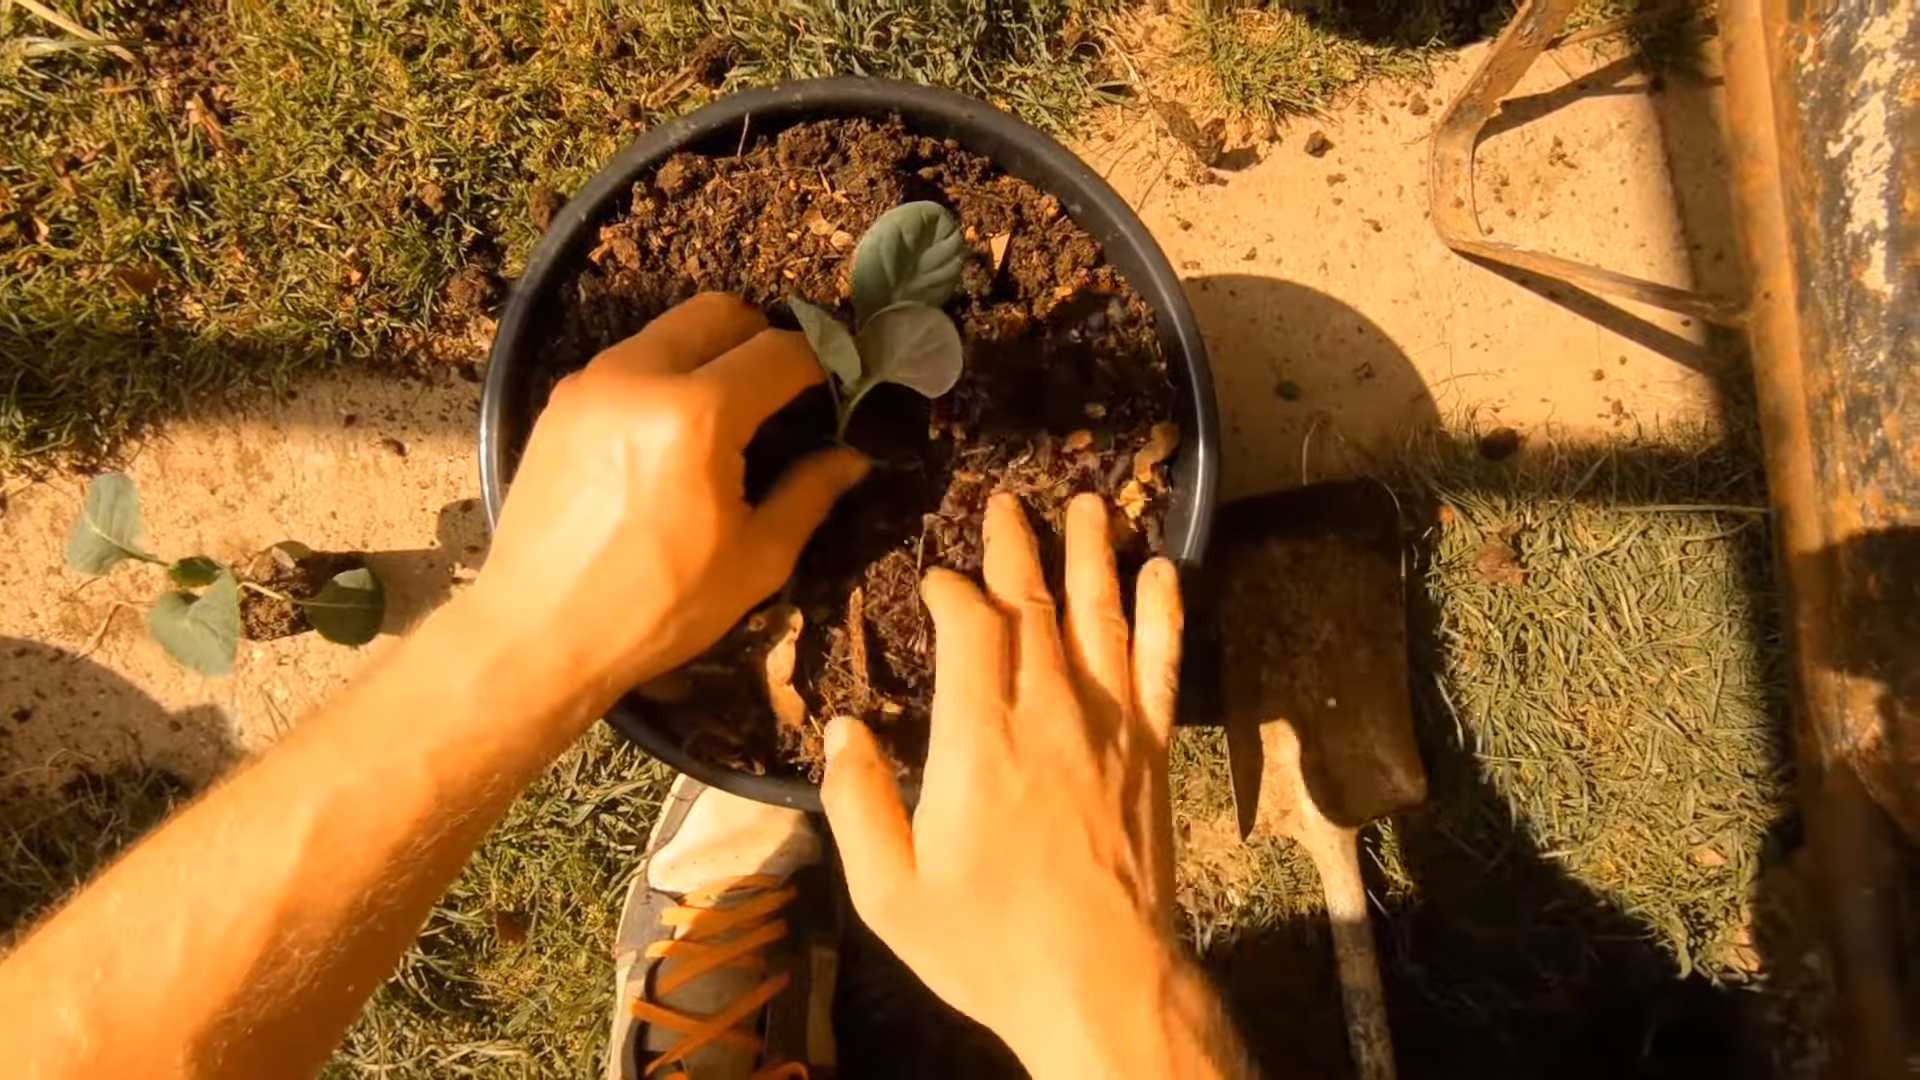
Step-by-Step Planting Instructions:
1. Prepare the Container: Fill your chosen container with potting mix, leaving about an inch or two of space at the top.
2. Dig a Hole: Dig a hole in the center of the container that’s large enough to accommodate the root ball of your transplant (or the seedling you’ve grown).
3. Plant the Sprout: Gently remove the transplant from its container and loosen the roots slightly. Place the plant in the hole, making sure the top of the root ball is level with the soil surface.
4. Backfill and Water: Fill in the hole with potting mix and gently firm the soil around the plant. Water thoroughly until the water drains out of the bottom of the container.
5. Mulch (Optional): Add a layer of mulch around the base of the plant to help retain moisture and suppress weeds. I like to use straw or shredded bark.
Caring for Your Brussels Sprouts
Once your Brussels sprouts are planted, they’ll need regular care to thrive.
* Sunlight: Brussels sprouts need at least 6 hours of sunlight per day. Place your container in a sunny spot on your patio or balcony.
* Watering: Water regularly, especially during hot, dry weather. The soil should be consistently moist but not soggy. Check the soil moisture by sticking your finger into the soil. If the top inch feels dry, it’s time to water.
* Fertilizing: Brussels sprouts are heavy feeders, so they need regular fertilization. Use a balanced fertilizer (like 10-10-10) every 2-3 weeks. You can also use a liquid fertilizer diluted according to the package directions. I personally like using a slow-release fertilizer at planting time, followed by liquid feeding every few weeks.
* Pest Control: Keep an eye out for common pests like aphids, cabbage worms, and flea beetles.
* Aphids: These tiny insects can suck the sap from your plants. You can control them with a strong spray of water or by using insecticidal soap.
* Cabbage Worms: These green caterpillars can devour your Brussels sprouts leaves. Handpick them off the plants or use Bacillus thuringiensis (Bt), a natural insecticide.
* Flea Beetles: These tiny beetles can create small holes in the leaves. Cover your plants with row covers to prevent them from reaching the plants.
* Staking (Optional): As your Brussels sprouts grow taller, they may need staking to prevent them from falling over. Use bamboo stakes or tomato cages to provide support.
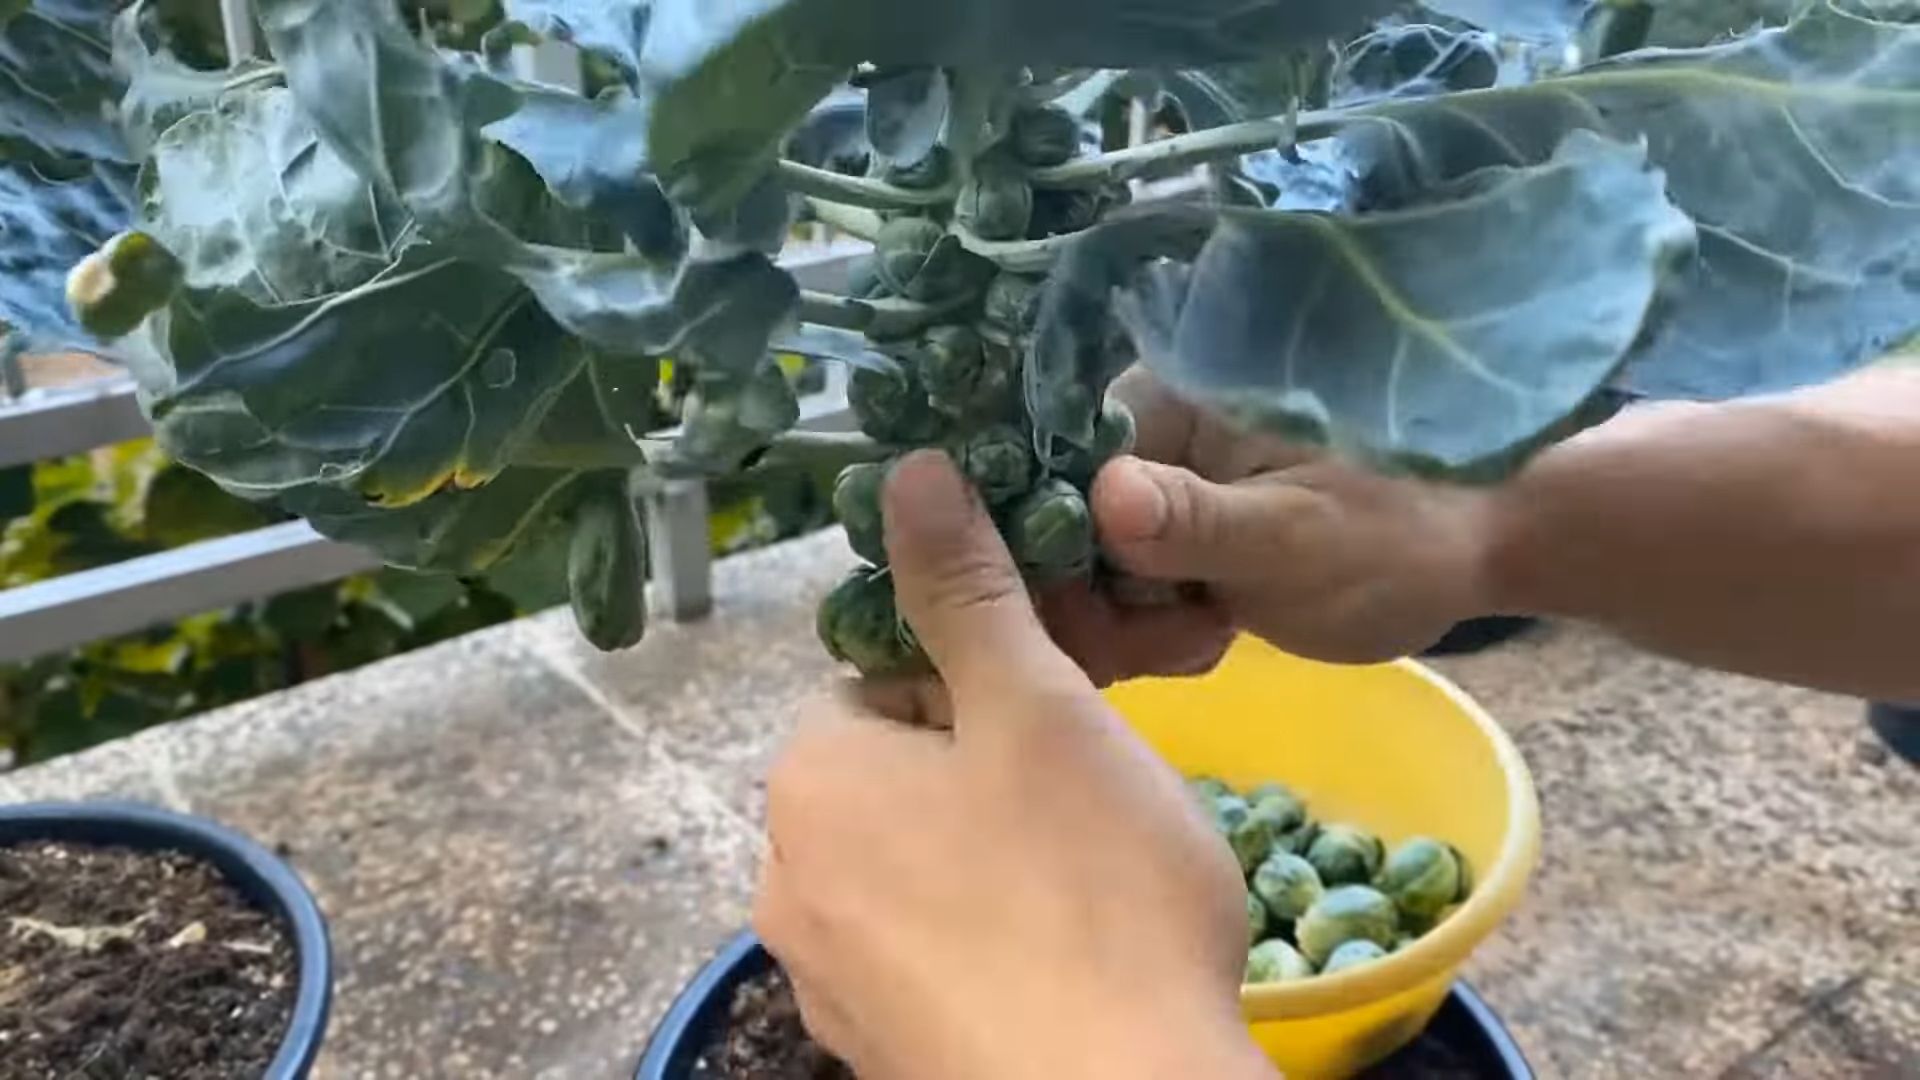
Harvesting Your Brussels Sprouts
The moment you’ve been waiting for! Harvesting your homegrown Brussels sprouts is incredibly rewarding.
* Timing: Brussels sprouts are typically ready to harvest in the fall or early winter, after they’ve been exposed to a few frosts. The cold weather actually improves their flavor, making them sweeter and less bitter.
* How to Harvest: Start harvesting the sprouts from the bottom of the plant, working your way up. The sprouts should be firm and about 1-2 inches in diameter. Twist or cut the sprouts off the stem.
* Continued Harvest: You can continue to harvest Brussels sprouts over several weeks. As you harvest the lower sprouts, the plant will continue to produce new sprouts higher up the stem.
* Topping the Plant: About a month before your expected first frost, you can top the plant by cutting off the top few inches of the stem. This will encourage the remaining sprouts to mature more quickly.
Troubleshooting
Even with the best care, you might encounter some challenges. Here are a few common problems and how to address them:
* Yellowing Leaves: This could be a sign of overwatering, underwatering, or nutrient deficiency. Check the soil moisture and adjust your watering accordingly. Fertilize regularly with a balanced fertilizer.
* Sprouts Not Forming: This could be due to insufficient sunlight, poor soil, or lack of fertilization. Make sure your plants are getting at least 6 hours of sunlight per day. Amend the soil with compost and fertilize regularly.
* Bitter Sprouts: This is often due to harvesting too early, before the sprouts have been exposed to frost. Wait until after a few frosts to harvest your sprouts.
Choosing the Right Variety
Selecting the right Brussels sprouts variety can make a big difference in your container gardening success. Here are a few varieties that I’ve found to be particularly well-suited for container growing:
* ‘Jade Cross’: This is a classic variety that produces high yields of uniform, medium-sized sprouts. It’s also relatively early-maturing, which is a bonus for container gardeners.
* ‘Long Island Improved’: Another reliable variety that produces good-sized sprouts. It’s known for its good flavor and disease resistance.
* ‘Redarling’: If you’re looking for something a little different, try ‘Redarling’. This variety produces beautiful red-purple sprouts that are not only delicious but also add a pop of color to your garden.
* ‘Franklin’: This is a newer variety that’s specifically bred for container growing. It’s compact and produces small to medium-sized sprouts.
Extra Tips for Success
Here are a few extra tips that I’ve learned over the years that can help you grow even better Brussels sprouts in containers:
* Rotate Your Crops: Don’t plant Brussels sprouts in the same container year after year. Rotating your crops helps to prevent the buildup of soilborne diseases and pests.
* Companion Planting: Plant companion plants like marigolds, nasturtiums, or thyme around your Brussels sprouts to help deter pests.
* Provide Support: As your Brussels sprouts grow taller, they may become top-heavy and prone to falling over. Provide support with stakes or a tomato cage.
* Protect from Frost: If you live in an area with harsh winters, you may need to protect your Brussels sprouts from frost. Cover them with a blanket or move the container to a sheltered location.
Enjoying Your Harvest
Finally, the best part: enjoying the fruits (or rather, vegetables) of your labor! Brussels sprouts are incredibly versatile and can be cooked in a variety of ways.
* Roasting: Roasting Brussels sprouts is a classic way to bring out their nutty flavor. Toss them with olive oil, salt, and pepper, and roast them in a hot oven until they’re tender and slightly
Conclusion
So, there you have it! Transforming your balcony, patio, or even a sunny windowsill into a thriving mini-farm with your own container-grown Brussels sprouts is not only achievable but incredibly rewarding. We’ve walked you through the simple steps, from selecting the right container and soil to nurturing your plants and harvesting those delicious, miniature cabbages.
Why is this DIY trick a must-try? Because it puts fresh, flavorful, and nutritious Brussels sprouts right at your fingertips, eliminating the need for grocery store trips and ensuring you know exactly where your food comes from. Imagine the satisfaction of serving a dish featuring Brussels sprouts you nurtured from tiny seedlings! Plus, container gardening allows even those with limited space to enjoy the joys of growing their own food. It’s a fantastic way to connect with nature, reduce your carbon footprint, and add a touch of green to your urban environment.
But the fun doesn’t stop there! Feel free to experiment with different varieties of Brussels sprouts. ‘Long Island Improved’ is a classic choice, but you might also consider ‘Redarling’ for a beautiful purple hue or ‘Jade Cross’ for its disease resistance. You can also companion plant your Brussels sprouts with herbs like rosemary or thyme, which can help deter pests and enhance the flavor of your sprouts. Another variation to consider is succession planting. By planting new seeds every few weeks, you can extend your harvest season and enjoy fresh Brussels sprouts for a longer period.
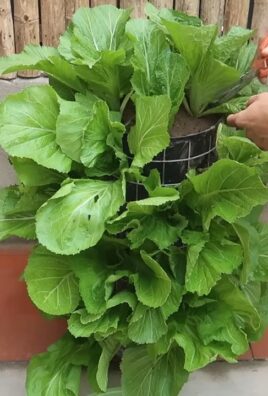
Don’t be afraid to get creative with your container design, too! Use repurposed materials like old buckets or wooden crates for a rustic look, or opt for decorative planters to complement your outdoor décor. The possibilities are endless!
Ultimately, growing your own Brussels sprouts in containers is a simple, satisfying, and sustainable way to enjoy fresh, healthy food. It’s a project that’s perfect for beginners and experienced gardeners alike. So, grab your seeds, soil, and containers, and get ready to embark on your own Brussels sprout adventure.
We’re confident that you’ll be amazed by the results. And we can’t wait to hear about your experiences! Share your photos, tips, and triumphs with us in the comments below. Let’s build a community of container gardening enthusiasts and inspire others to grow their own food, one Brussels sprout at a time. This **Brussels Sprout Container Gardening** guide is just the beginning – let your green thumb lead the way!
Frequently Asked Questions (FAQ)
What is the best size container for growing Brussels sprouts?
Brussels sprouts need room to grow, both above and below the soil. A container that is at least 12 inches in diameter and 12 inches deep is generally recommended for a single plant. However, larger is always better! A 5-gallon bucket or a similar-sized container will provide ample space for the roots to develop and support the plant’s growth. If you plan to grow multiple plants in one container, choose a larger container accordingly, ensuring each plant has at least 12 inches of space around it. Remember, adequate space promotes healthy root development, which is crucial for a bountiful harvest.
What type of soil should I use for container-grown Brussels sprouts?
Brussels sprouts thrive in well-draining, nutrient-rich soil. A good quality potting mix is essential. Avoid using garden soil, as it can become compacted in containers and hinder drainage. Look for a potting mix that contains a blend of peat moss, perlite, and vermiculite. You can also amend your potting mix with compost or well-rotted manure to provide additional nutrients. A slightly acidic to neutral pH (around 6.0 to 7.0) is ideal. Consider adding slow-release fertilizer granules to the soil at planting time to provide a steady supply of nutrients throughout the growing season.
How much sunlight do Brussels sprouts need?
Brussels sprouts require at least 6 hours of direct sunlight per day to thrive. Choose a location for your container that receives ample sunlight throughout the day. If you live in a particularly hot climate, some afternoon shade may be beneficial to prevent the plants from overheating. If you don’t have a sunny spot, you can supplement with grow lights. Rotate the container regularly to ensure all sides of the plant receive adequate sunlight. Insufficient sunlight can result in leggy growth and reduced sprout production.
How often should I water my container-grown Brussels sprouts?
Watering frequency depends on several factors, including the weather, the size of the container, and the type of soil. Generally, you should water your Brussels sprouts when the top inch of soil feels dry to the touch. Water deeply, until water drains out of the bottom of the container. Avoid overwatering, as this can lead to root rot. During hot, dry weather, you may need to water daily. Check the soil moisture regularly and adjust your watering schedule accordingly. Mulching around the base of the plant can help retain moisture and reduce the need for frequent watering.
How do I fertilize my Brussels sprouts?
Brussels sprouts are heavy feeders and require regular fertilization to produce a good crop. Start by incorporating slow-release fertilizer granules into the soil at planting time. Then, supplement with liquid fertilizer every 2-3 weeks throughout the growing season. Use a balanced fertilizer with an NPK ratio of around 10-10-10 or 14-14-14. You can also use organic fertilizers such as fish emulsion or seaweed extract. Avoid over-fertilizing, as this can lead to excessive foliage growth at the expense of sprout production.
When are Brussels sprouts ready to harvest?
Brussels sprouts are typically ready to harvest about 90-100 days after planting. The sprouts should be firm, green, and about 1-2 inches in diameter. Start harvesting from the bottom of the plant upwards, as the lower sprouts mature first. Twist or cut the sprouts off the stem, leaving the upper sprouts to continue developing. You can harvest Brussels sprouts over several weeks, as they mature at different rates. The flavor of Brussels sprouts improves after a light frost, so don’t be afraid to leave them on the plant a little longer in the fall.
What are some common pests and diseases that affect Brussels sprouts?
Common pests that affect Brussels sprouts include aphids, cabbage worms, and flea beetles. You can control these pests with insecticidal soap, neem oil, or by hand-picking them off the plants. Common diseases include clubroot and black rot. To prevent these diseases, choose disease-resistant varieties, practice crop rotation, and ensure good drainage. Inspect your plants regularly for signs of pests or diseases and take action promptly to prevent them from spreading.
Can I grow Brussels sprouts indoors?
While it’s possible to grow Brussels sprouts indoors, it can be challenging. They require a lot of light, so you’ll need to supplement with strong grow lights. You’ll also need to ensure good air circulation to prevent diseases. Indoor-grown Brussels sprouts may not produce as many sprouts as those grown outdoors. If you want to try growing them indoors, choose a small variety and provide them with optimal growing conditions.
How do I store harvested Brussels sprouts?
Freshly harvested Brussels sprouts can be stored in the refrigerator for up to a week. Store them in a plastic bag or container to prevent them from drying out. You can also freeze Brussels sprouts for longer storage. To freeze them, blanch them in boiling water for 3-5 minutes, then plunge them into ice water to stop the cooking process. Drain them well and store them in freezer bags or containers. Frozen Brussels sprouts can be stored for up to 12 months.
Can I save seeds from my Brussels sprouts plants?
Saving seeds from Brussels sprouts can be tricky, as they are cross-pollinated and may not produce true-to-type offspring. If you want to save seeds, you’ll need to isolate your plants from other brassicas to prevent cross-pollination. Allow the plants to flower and produce seed pods. Once the seed pods are dry and brown, harvest them and extract the seeds. Store the seeds in a cool, dry place. However, keep in mind that the resulting plants may not be identical to the parent plants.
Leave a Comment