
Clean chopping board naturally – sounds like a dream, right? I know, I know, keeping that kitchen workhorse spotless can feel like a never-ending battle. But what if I told you there are simple, natural ways to banish those lingering odors and unsightly stains without resorting to harsh chemicals?
For generations, resourceful cooks have relied on the power of nature to maintain their kitchen tools. Think about it – before the age of bleach and fancy cleaning solutions, our ancestors used readily available ingredients like lemon, salt, and vinegar to keep their chopping boards fresh and hygienic. This isn’t just about cleanliness; it’s about connecting with a tradition of sustainable living and respecting the tools that help us nourish ourselves and our families.
Let’s face it, a dirty chopping board isn’t just unappealing; it can be a breeding ground for bacteria, potentially leading to foodborne illnesses. And who wants that? Plus, lingering odors from garlic, onions, or even raw meat can transfer to other foods, affecting their taste. That’s why learning how to clean chopping board naturally is so important. In this article, I’m going to share some of my favorite DIY tricks and hacks that will leave your chopping board sparkling clean, smelling fresh, and ready for your next culinary adventure. Get ready to ditch the chemicals and embrace the power of nature!
DIY: Revive Your Chopping Board with Natural Cleaning Power!
Hey there, fellow DIY enthusiasts! I’m so excited to share this super simple, yet incredibly effective, method for cleaning and revitalizing your wooden chopping boards. Let’s face it, our chopping boards take a beating. They’re constantly exposed to food particles, moisture, and bacteria, which can lead to unpleasant odors and even potential health hazards. But don’t worry, you don’t need harsh chemicals to get your boards sparkling clean and fresh. This natural cleaning method uses ingredients you probably already have in your kitchen!
What You’ll Need:
* Coarse Salt: Acts as a gentle abrasive to scrub away food particles and stains. I prefer sea salt or kosher salt, but any coarse salt will do.
* Lemon: The citric acid in lemon juice is a natural disinfectant and deodorizer. Plus, it smells amazing!
* Baking Soda: Helps to neutralize odors and further scrub away stubborn stains.
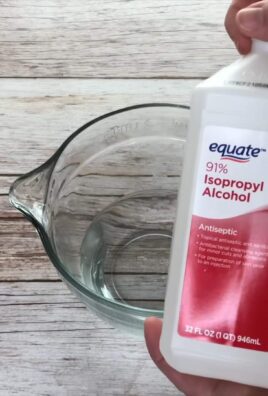
* White Vinegar: Another powerful disinfectant and deodorizer. Use it sparingly, as too much can dry out the wood.
* Food-Grade Mineral Oil or Beeswax: To rehydrate and protect the wood after cleaning. This is crucial for preventing cracking and warping.
* Clean Cloths or Paper Towels: For wiping and drying.
* Scrub Brush or Sponge: For scrubbing the board. I like to use a stiff-bristled brush for tougher stains.
* Small Bowl: For mixing the baking soda paste (optional).
Step-by-Step Cleaning Guide
Here’s the breakdown of how I tackle this cleaning process. It’s easy, trust me!
1. Rinse the Chopping Board: Start by rinsing your chopping board under warm water to remove any loose food particles. This will make the cleaning process much easier.
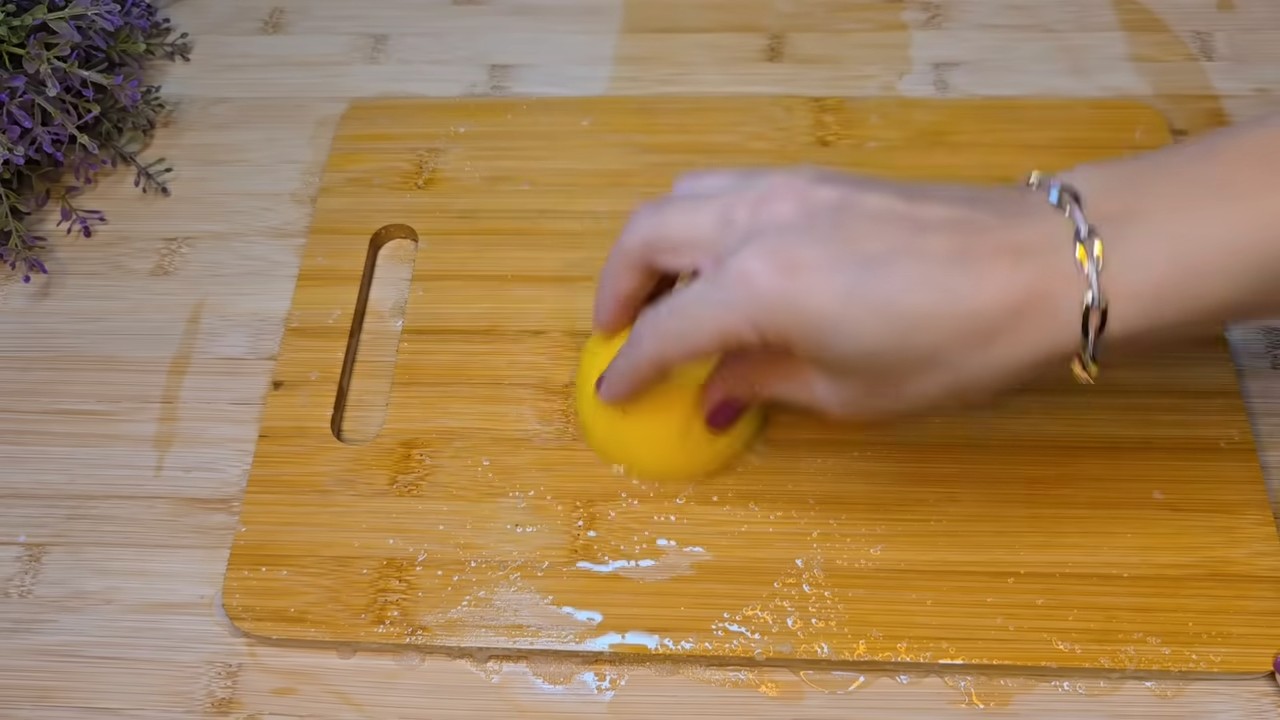
2. Salt Scrub: Generously sprinkle coarse salt all over the surface of the chopping board. Don’t be shy! You want a good layer of salt to work with.
3. Lemon Power: Cut a lemon in half. Using one half, rub the cut side firmly over the salt-covered surface of the board. Squeeze the lemon gently as you scrub to release the juice. The combination of the salt and lemon juice will create a powerful cleaning action. I usually scrub in circular motions, paying extra attention to any stained or heavily used areas.
4. Scrub-a-dub-dub: Continue scrubbing for several minutes, ensuring you cover the entire surface of the board. You’ll start to see the salt and lemon juice lifting away dirt and grime.
5. Rinse Again: Rinse the chopping board thoroughly with warm water to remove all traces of salt and lemon juice.
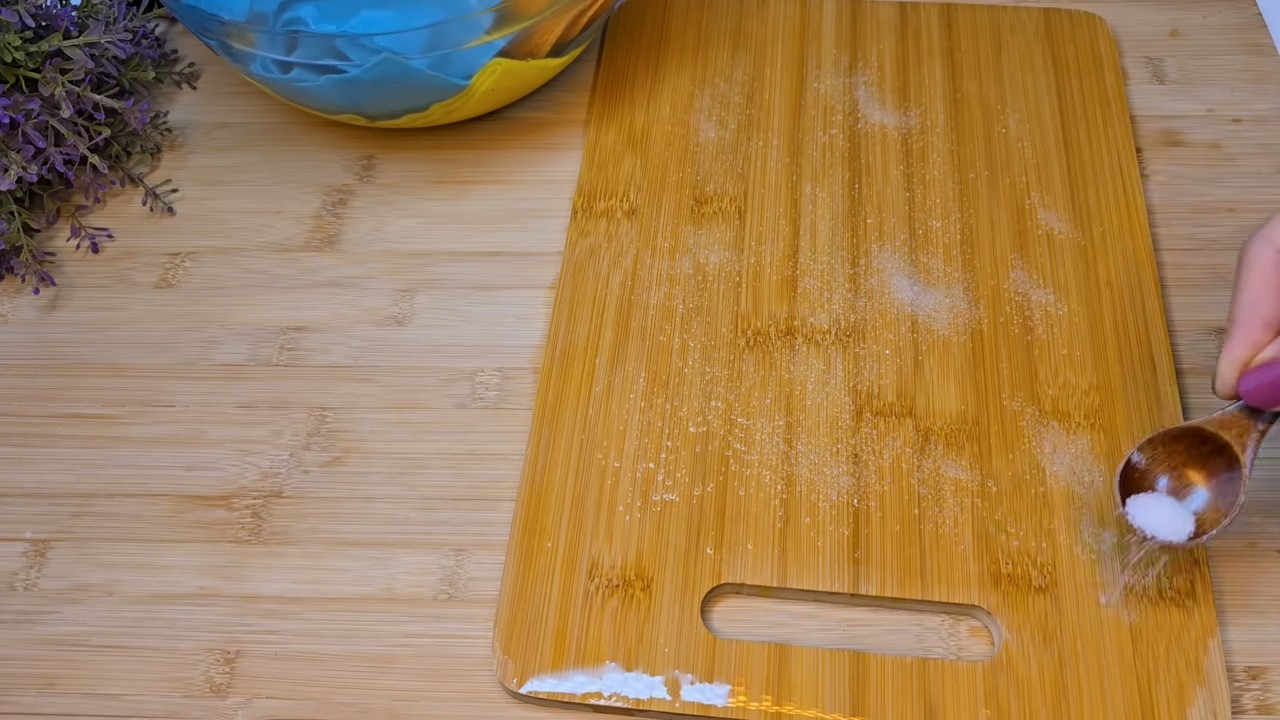
6. Baking Soda Boost (Optional): If your board has stubborn stains or lingering odors, you can create a baking soda paste. Mix a tablespoon or two of baking soda with a little water to form a thick paste. Apply the paste to the affected areas and let it sit for 5-10 minutes before scrubbing with a brush or sponge. Rinse well.
7. Vinegar Disinfection (Optional): For extra disinfection, you can lightly spray the chopping board with white vinegar. Let it sit for a minute or two, then wipe it clean with a damp cloth. Remember, don’t overdo the vinegar, as it can dry out the wood.
8. Dry Thoroughly: Use a clean cloth or paper towels to thoroughly dry the chopping board. Make sure to get into all the nooks and crannies. It’s important to dry the board completely to prevent the growth of mold and bacteria. I often prop it up on its side to allow air to circulate and ensure it dries evenly.
Rehydrating and Protecting Your Chopping Board
This is the most important step to keep your board in tip-top shape!
1. Apply Mineral Oil or Beeswax: Once the chopping board is completely dry, it’s time to rehydrate and protect the wood. I prefer using food-grade mineral oil, but beeswax is also a great option. Pour a generous amount of mineral oil onto the surface of the board.
2. Rub it In: Using a clean cloth, rub the mineral oil into the wood in circular motions. Make sure to cover the entire surface, including the edges and sides. The wood will absorb the oil, replenishing its moisture and preventing it from drying out and cracking.
3. Let it Soak: Allow the mineral oil to soak into the wood for several hours, or even overnight. The longer it soaks, the better. I usually apply the oil in the evening and let it sit overnight.
4. Wipe Away Excess: After the oil has soaked in, use a clean cloth to wipe away any excess oil. You want the board to be lightly oiled, not greasy.
5. Beeswax Alternative: If you’re using beeswax, you’ll need to melt it first. You can do this in a double boiler or in the microwave in short intervals. Once the beeswax is melted, apply it to the chopping board with a clean cloth. Rub it in well and let it cool and harden. Then, buff the board with a clean cloth to create a smooth, protective finish.
Maintaining Your Clean Chopping Board
Here are a few tips to keep your chopping board clean and in good condition:
* Wash After Each Use: Always wash your chopping board with warm, soapy water after each use. This will prevent food particles from building up and attracting bacteria.
* Separate Boards: Consider using separate chopping boards for raw meats and vegetables to prevent cross-contamination. I have one specifically for meats and another for everything else.
* Avoid the Dishwasher: Never put your wooden chopping board in the dishwasher. The high heat and harsh detergents can damage the wood and cause it to crack.
* Regular Oiling: Re-oil your chopping board every few weeks, or whenever it starts to look dry. This will help to keep the wood hydrated and protected.
* Sanitize Regularly: In addition to regular cleaning, sanitize your chopping board periodically with a diluted bleach solution (1 tablespoon of bleach per gallon of water) or white vinegar. Rinse thoroughly after sanitizing.
* Store Properly: Store your chopping board in a dry, well-ventilated area. Avoid storing it in a damp or humid environment, as this can promote the growth of mold and bacteria. I lean mine against the backsplash on the counter.
* Address Cracks Immediately: If you notice any cracks in your chopping board, address them immediately. Small cracks can be filled with wood glue or beeswax. Larger cracks may require more extensive repairs or replacement of the board.
* Sunlight is Your Friend: Occasionally, let your board sit in direct sunlight for a short period. Sunlight is a natural disinfectant and can help to kill bacteria. Just don’t leave it out for too long, as the sun can also dry out the wood.
Dealing with Specific Issues
Sometimes, your chopping board might have specific problems that need extra attention. Here’s how I handle a few common issues:
* Lingering Odors: If your chopping board has a lingering odor, such as garlic or onion, try rubbing it with a paste of baking soda and water. Let it sit for a few minutes, then rinse thoroughly. You can also try soaking the board in a solution of water and lemon juice for a few hours.
* Stubborn Stains: For stubborn stains, such as beet juice or tomato sauce, try using a paste of baking soda and hydrogen peroxide. Apply the paste to the stain and let it sit for a few minutes, then scrub with a brush or sponge. Rinse well.
* Mold or Mildew: If you find mold or mildew on your chopping board, it’s important to address it immediately. Scrub the affected area with a solution of bleach and water (1 tablespoon of bleach per gallon of water). Rinse thoroughly and allow the board to dry completely. If the mold or mildew is extensive, you may need to replace the board.
Choosing the Right Wood
The type of wood your chopping board is made from can also affect its cleanliness and durability. Here are a few popular choices:
* Maple: Maple is a hard, dense wood that is resistant to scratches and stains. It’s a popular choice for chopping boards because it’s durable and easy to clean.
* Walnut: Walnut is a beautiful, dark-colored wood that is also durable and resistant to scratches. It’s a good choice for chopping boards that will be used for both cutting and serving.
* Cherry: Cherry is a reddish-brown wood that is known for its beauty and durability. It’s a good choice for chopping boards that will be used for both cutting and serving.
* Bamboo: Bamboo is a sustainable and eco-friendly material that is also durable and resistant to scratches. It’s a good choice for chopping boards that are used for light cutting and chopping.
By following these simple steps and tips, you can keep your wooden chopping board clean, fresh, and in good condition
Conclusion
So, there you have it! Mastering the art of how to clean chopping board naturally is not only incredibly simple and cost-effective, but it’s also a significant step towards a healthier and more sustainable kitchen. We’ve explored the power of readily available ingredients like lemon, salt, and vinegar – nature’s own cleaning arsenal – to banish bacteria, eliminate odors, and restore your chopping board to its pristine glory.
Why is this DIY trick a must-try? Because it bypasses the harsh chemicals found in many commercial cleaners, which can leach into your food and pose potential health risks. Plus, it’s environmentally friendly, reducing your reliance on plastic bottles and contributing to a greener planet. Think about the peace of mind knowing that the surface you prepare your family’s meals on is truly clean and safe, without any lingering chemical residue.
But the benefits don’t stop there. This method is incredibly versatile. For tougher stains or lingering odors, consider creating a paste of baking soda and water, applying it to the board, and letting it sit for a few minutes before scrubbing. You can also experiment with different essential oils, such as tea tree or eucalyptus, for their antibacterial properties and a refreshing scent. Just add a few drops to your cleaning solution for an extra boost.
Don’t be afraid to get creative! If you have a wooden chopping board, remember to oil it regularly with food-grade mineral oil to prevent it from drying out and cracking. This will not only prolong its lifespan but also make it easier to clean in the long run. For plastic chopping boards, ensure you’re using a stiff brush to get into all the grooves and crevices where bacteria can hide.
We understand that switching to a natural cleaning routine might seem daunting at first, but trust us, the results are worth it. Not only will you have a sparkling clean chopping board, but you’ll also be contributing to a healthier and more sustainable lifestyle.
We wholeheartedly encourage you to try this DIY trick and experience the difference for yourself. It’s a simple yet powerful way to transform your kitchen cleaning routine and ensure the safety of your food preparation. Once you’ve given it a go, we’d love to hear about your experience! Share your tips, variations, and before-and-after photos in the comments below. Let’s build a community of eco-conscious cooks who are passionate about keeping their kitchens clean and healthy, naturally! We are confident that once you try this method to clean chopping board naturally, you will never go back to using harsh chemicals again.
Frequently Asked Questions (FAQ)
1. What types of chopping boards can I clean using this method?
This natural cleaning method is suitable for most types of chopping boards, including wooden, bamboo, and plastic boards. However, it’s essential to consider the specific material of your board and adjust the cleaning process accordingly. For example, wooden boards require regular oiling to prevent drying and cracking, while plastic boards may benefit from a more vigorous scrubbing to remove stains and bacteria from grooves. Always test a small, inconspicuous area first to ensure the cleaning solution doesn’t damage the surface.
2. How often should I clean my chopping board naturally?
The frequency of cleaning depends on how often you use your chopping board. For daily use, a quick rinse with soap and water after each use is sufficient. However, for more thorough cleaning, especially after cutting raw meat, poultry, or fish, it’s recommended to use the natural cleaning methods described above at least once a day. A deep clean once a week will help maintain hygiene and prevent the buildup of bacteria and odors.
3. Can I use this method to remove stubborn stains from my chopping board?
Yes, this method can be effective in removing stubborn stains. For persistent stains, create a paste of baking soda and water or lemon juice and salt. Apply the paste to the stained area, let it sit for 15-20 minutes, and then scrub vigorously with a brush or sponge. You may need to repeat the process a few times for particularly stubborn stains. For wooden boards, avoid prolonged exposure to moisture to prevent warping.
4. What if my chopping board has a strong odor?
Strong odors, especially after cutting onions or garlic, can be effectively neutralized using lemon. Cut a lemon in half and rub it all over the surface of the chopping board. Let the lemon juice sit for 10-15 minutes, then rinse with warm water. Alternatively, you can create a solution of equal parts white vinegar and water and use it to wipe down the board. Vinegar is a natural deodorizer and disinfectant.
5. Is it safe to use vinegar on my wooden chopping board?
Yes, vinegar is generally safe to use on wooden chopping boards, but it’s important to dilute it with water. Undiluted vinegar can be too acidic and may damage the wood over time. Always rinse the board thoroughly after cleaning with vinegar and apply food-grade mineral oil to prevent drying and cracking.
6. How do I prevent cross-contamination when using my chopping board?
To prevent cross-contamination, it’s best to use separate chopping boards for raw meat, poultry, and fish, and for fruits and vegetables. If you only have one chopping board, make sure to thoroughly clean and disinfect it after each use, especially after cutting raw meat. You can also use color-coded chopping boards to easily distinguish between different food groups.
7. Can I put my wooden chopping board in the dishwasher?
No, it’s not recommended to put wooden chopping boards in the dishwasher. The high heat and harsh detergents can cause the wood to warp, crack, and dry out. Always hand wash wooden chopping boards with warm, soapy water and dry them thoroughly.
8. How do I maintain my wooden chopping board to prolong its lifespan?
To maintain your wooden chopping board and prolong its lifespan, regularly oil it with food-grade mineral oil. Apply a generous amount of oil to the board and let it soak in for several hours or overnight. Wipe off any excess oil with a clean cloth. Oiling the board prevents it from drying out and cracking, and also helps to repel water and bacteria.
9. Are there any other natural cleaning agents I can use on my chopping board?
Besides lemon, salt, vinegar, and baking soda, you can also use hydrogen peroxide as a natural disinfectant. Spray hydrogen peroxide on the chopping board after cleaning it with soap and water, let it sit for a few minutes, and then rinse thoroughly. Tea tree oil and eucalyptus oil can also be added to your cleaning solution for their antibacterial properties.
10. How do I know when it’s time to replace my chopping board?
It’s time to replace your chopping board when it becomes excessively worn, cracked, or deeply grooved. These imperfections can harbor bacteria and make it difficult to clean the board effectively. Also, if the board develops a persistent odor or stain that cannot be removed with cleaning, it’s best to replace it.
Leave a Comment