
Coconut oil baking soda mix – sounds like something you’d find in a fancy spa treatment, right? Well, get ready to bring that spa-like magic to your garden! I’m so excited to share this simple yet incredibly effective DIY trick that can seriously transform your plants and help you tackle some common gardening woes.
For centuries, gardeners have been experimenting with natural remedies to nurture their plants. While the exact origins of using coconut oil and baking soda together in the garden are a bit hazy, both ingredients have long been celebrated for their individual benefits. Coconut oil, derived from the fruit of the coconut palm, has been used in traditional medicine and beauty practices across many cultures. Baking soda, a common household staple, has been a go-to cleaning agent and natural remedy for generations. Combining these two powerhouses? Pure genius!
Why do you need this coconut oil baking soda mix in your gardening arsenal? Because it’s a fantastic, eco-friendly alternative to harsh chemicals! It can help combat fungal diseases, deter pests, and even give your plants a healthy shine. Plus, it’s incredibly easy and affordable to make. I know I’m always looking for ways to keep my garden thriving without breaking the bank or harming the environment, and this DIY trick ticks all the boxes. So, let’s dive in and discover how this simple mix can revolutionize your home gardening experience!
DIY Natural Deodorant: Coconut Oil & Baking Soda Magic!
Hey there, fellow DIY enthusiasts! Are you tired of commercial deodorants packed with questionable chemicals? Do you crave a natural alternative that actually works? Well, you’ve come to the right place! I’m going to walk you through creating your very own effective and affordable deodorant using just two simple ingredients: coconut oil and baking soda. Trust me, once you try this, you might never go back to store-bought again!
Why Coconut Oil and Baking Soda?
Before we dive into the how-to, let’s talk about why these two ingredients are so awesome for deodorant.
* Coconut Oil: This isn’t just for cooking! Coconut oil is naturally antibacterial and antifungal, which helps combat odor-causing bacteria. Plus, it’s incredibly moisturizing, leaving your underarms feeling soft and smooth. It also has a lovely, subtle scent that won’t clash with your favorite perfume or cologne.
* Baking Soda: This is the workhorse of our deodorant. Baking soda is a natural deodorizer that neutralizes odors instead of just masking them. It’s also mildly abrasive, which can help exfoliate the skin and prevent ingrown hairs.
Gathering Your Supplies
Okay, let’s get started! Here’s what you’ll need:
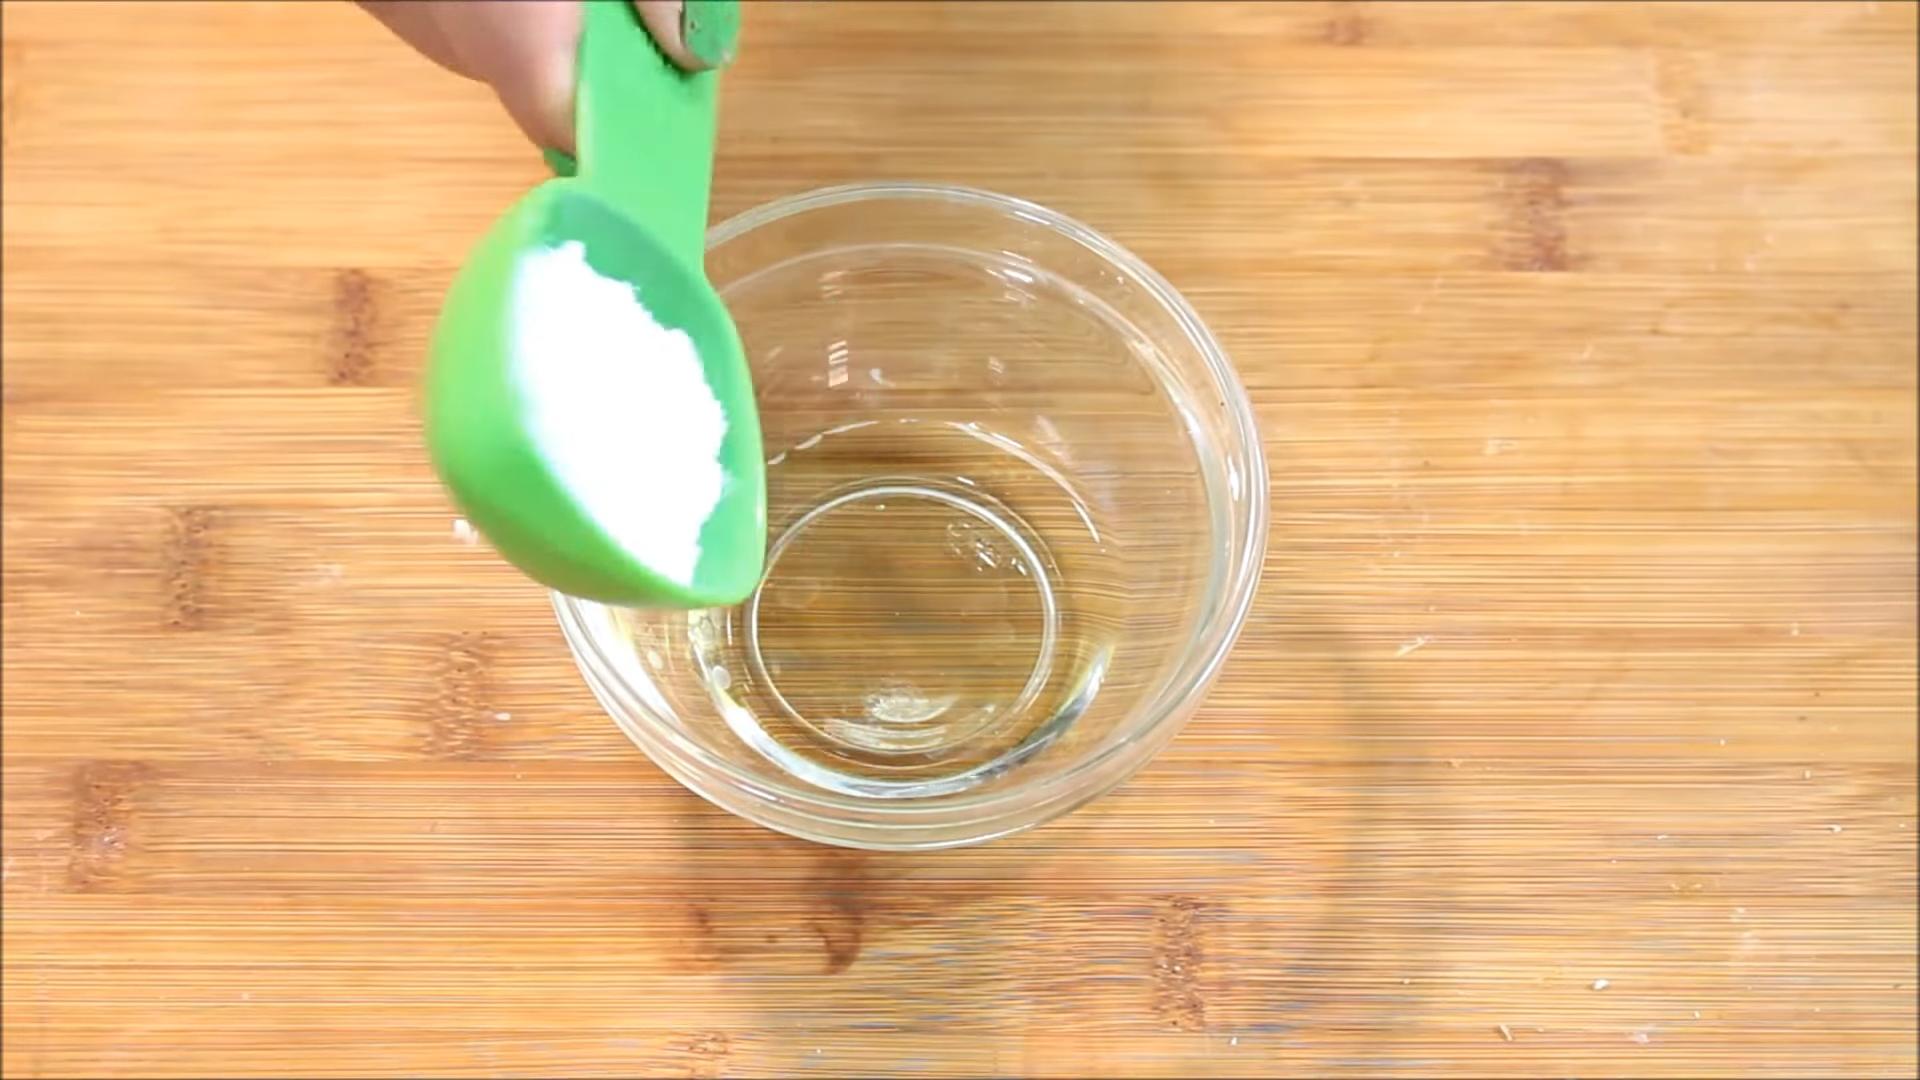
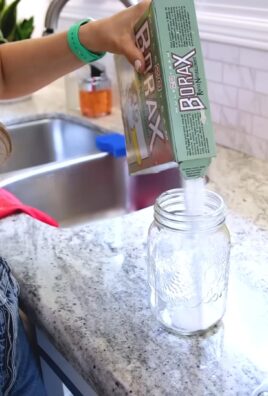
* 1/4 cup Coconut Oil (unrefined, virgin coconut oil is best)
* 1/4 cup Baking Soda (make sure it’s fresh!)
* Optional: Essential Oils (5-10 drops of your favorite scent – lavender, tea tree, lemon, or sandalwood are great choices)
* A small glass jar or container with a lid (a recycled baby food jar or small mason jar works perfectly)
* A spoon or spatula for mixing
Step-by-Step Instructions: Making Your Deodorant
Now for the fun part! Follow these steps carefully, and you’ll have your own natural deodorant in no time.
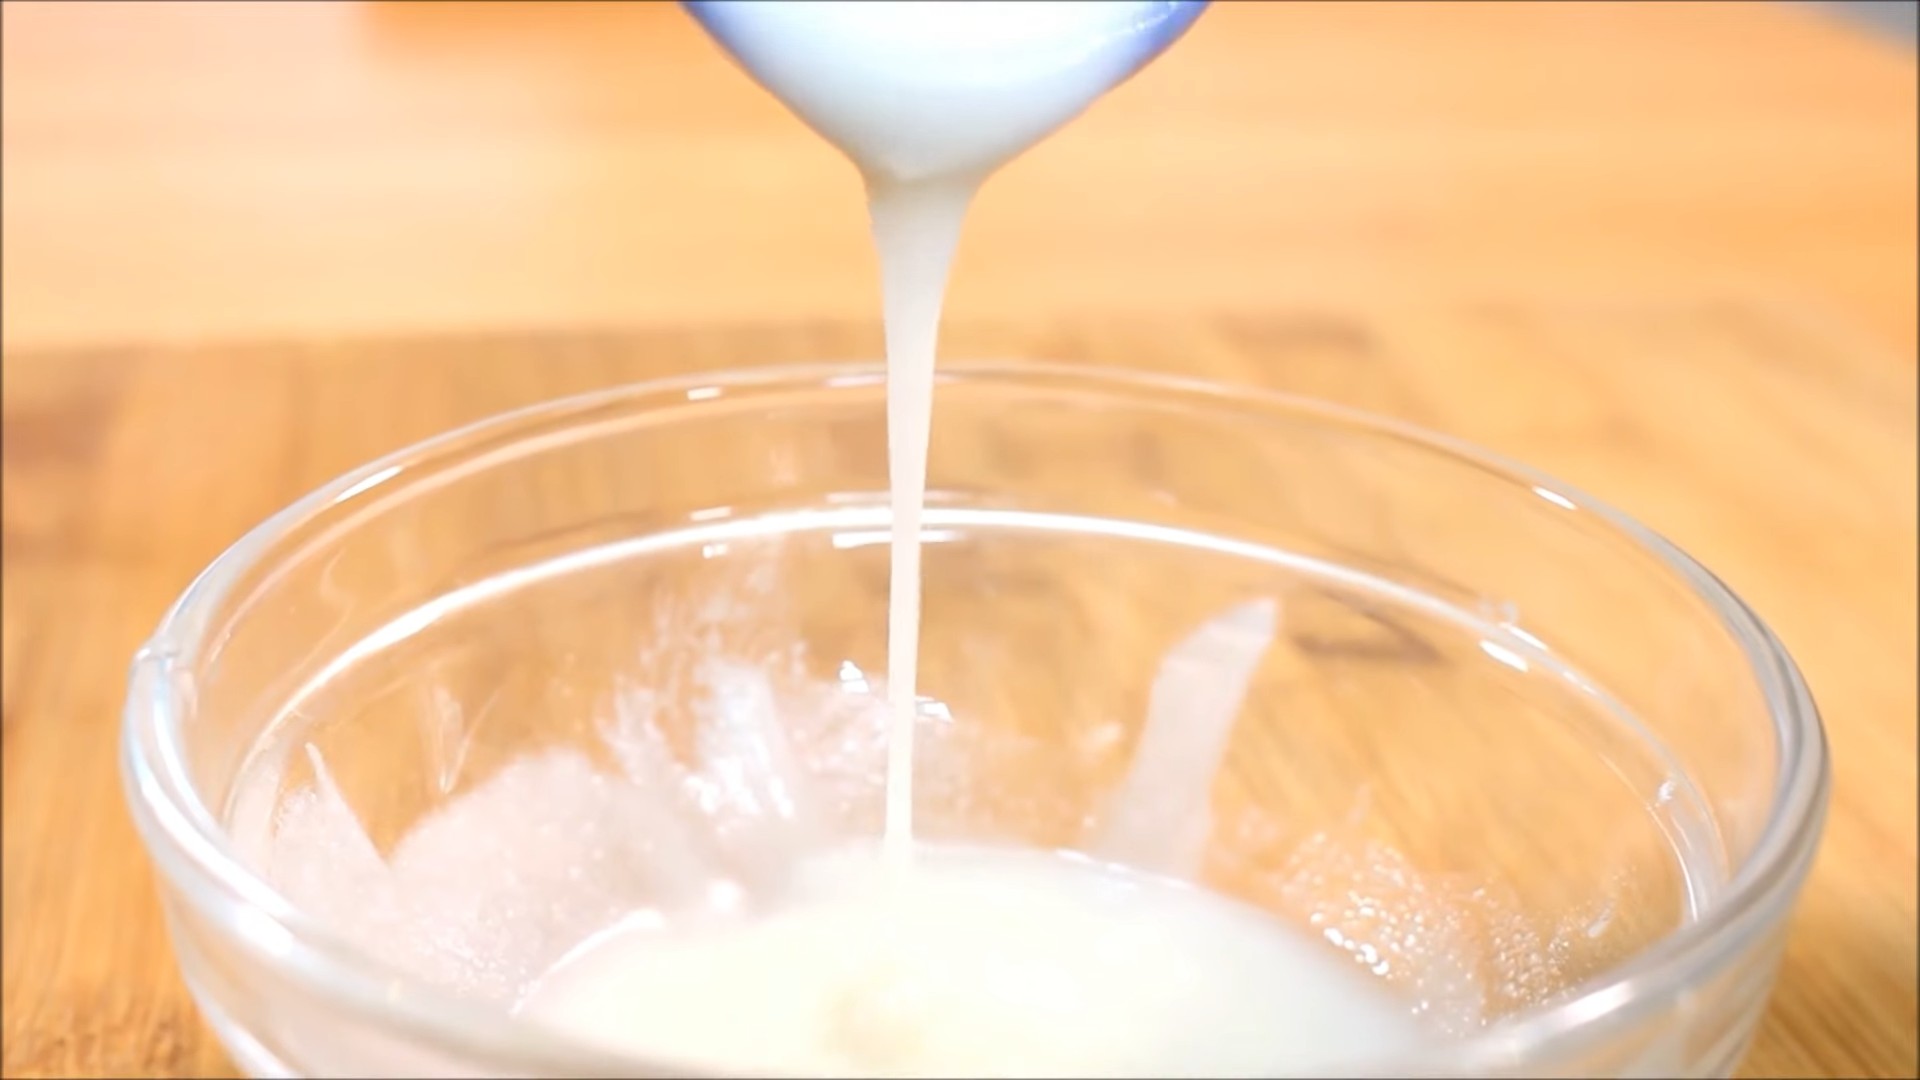
1. Melt the Coconut Oil: If your coconut oil is solid (which it probably is, especially if you live in a cooler climate), you’ll need to melt it. You can do this in a couple of ways:
* Microwave Method: Place the coconut oil in a microwave-safe bowl and heat it in 15-second intervals, stirring in between, until it’s completely melted. Be careful not to overheat it!
* Double Boiler Method: This is my preferred method because it’s gentler. Fill a saucepan with about an inch of water and bring it to a simmer. Place a heat-safe bowl on top of the saucepan, making sure the bottom of the bowl doesn’t touch the water. Add the coconut oil to the bowl and let it melt slowly, stirring occasionally.
2. Add the Baking Soda: Once the coconut oil is melted, remove it from the heat (if you used the double boiler method) or let it cool slightly (if you used the microwave). Now, carefully add the baking soda to the melted coconut oil.
3. Mix Thoroughly: This is crucial! You want to make sure the baking soda is completely incorporated into the coconut oil. Use a spoon or spatula to mix the ingredients together until you have a smooth, even paste. There shouldn’t be any clumps of baking soda.
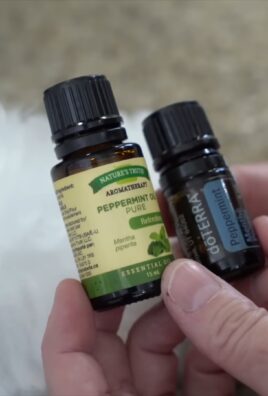
4. Add Essential Oils (Optional): If you’re using essential oils, now’s the time to add them. I usually add about 5-10 drops, depending on the strength of the oil and my personal preference. Start with a smaller amount and add more if needed. Remember, essential oils are potent, so a little goes a long way! Some of my favorite essential oils for deodorant include:
* Lavender: Calming and soothing, with a lovely floral scent.
* Tea Tree: Antibacterial and antifungal, perfect for fighting odor.
* Lemon: Refreshing and uplifting, with a bright citrus scent.
* Sandalwood: Warm and woody, with a grounding aroma.
5. Mix Again: Once you’ve added the essential oils, give the mixture another good stir to ensure everything is evenly distributed.
6. Transfer to a Container: Pour or spoon the deodorant mixture into your chosen container. A small glass jar with a lid is ideal for storage.
7. Let it Solidify: Allow the deodorant to cool and solidify completely. This usually takes a few hours at room temperature, or you can speed up the process by placing it in the refrigerator for about 30 minutes.
Using Your Homemade Deodorant
Okay, your deodorant is ready to go! Here’s how to use it:
1. Apply a Small Amount: Using your fingers, scoop out a small amount of deodorant (about the size of a pea) and apply it to each underarm.
2. Rub it In: Gently rub the deodorant into your skin until it’s fully absorbed. It should feel smooth and not greasy.
3. Wait Before Dressing: Allow the deodorant to dry completely before getting dressed to avoid staining your clothes.
Troubleshooting and Tips
While this recipe is pretty straightforward, you might encounter a few issues along the way. Here are some common problems and how to fix them:
* Irritation: Some people are sensitive to baking soda, and it can cause irritation or redness. If this happens to you, try reducing the amount of baking soda in the recipe. You can also try adding a tablespoon of arrowroot powder or cornstarch to help absorb moisture and soothe the skin. If the irritation persists, discontinue use.
* Greasy Feeling: If your deodorant feels too greasy, you might be using too much coconut oil. Try reducing the amount of coconut oil in the recipe or adding a tablespoon of arrowroot powder or cornstarch to help absorb excess oil.
* Not Effective Enough: If you find that your deodorant isn’t keeping you fresh all day, you might need to reapply it more often. You can also try adding a few drops of tea tree essential oil, which is a powerful antibacterial agent.
* Hard Deodorant: If your deodorant becomes too hard, especially in cold weather, you can soften it by warming it slightly in your hands before applying. You can also try adding a teaspoon of almond oil or jojoba oil to the recipe to make it softer.
* Grainy Texture: Sometimes, the baking soda can settle and create a grainy texture. To prevent this, make sure you mix the ingredients thoroughly and store the deodorant in a cool, dry place. If it does become grainy, you can try remelting the mixture and stirring it again.
Variations and Customizations
The beauty of DIY is that you can customize things to your liking! Here are some variations and customizations you can try:
* Arrowroot Powder or Cornstarch: As mentioned earlier, adding a tablespoon of arrowroot powder or cornstarch can help absorb moisture and soothe the skin. This is especially helpful if you live in a humid climate or tend to sweat a lot.
* Shea Butter: Adding a tablespoon of shea butter can make the deodorant even more moisturizing and creamy.
* Beeswax: Adding a teaspoon of beeswax can help solidify the deodorant and make it less likely to melt in warm weather.
* Clay: Adding a teaspoon of bentonite clay or kaolin clay can help absorb toxins and impurities from the skin.
* Different Essential Oils: Experiment with different essential oils to find your favorite scent. Some other great options include bergamot, grapefruit, rosemary, and eucalyptus.
Important Considerations
* Patch Test: Before using this deodorant regularly, it’s a good idea to do a patch test on a small area of skin to check for any allergic reactions or sensitivities.
* Transition Period: When switching from commercial deodorant to natural deodorant, you might experience a transition period where you sweat more or notice a stronger odor. This is because your body is detoxifying and adjusting to the new product. Be patient, and it should subside within a week or two.
* Storage: Store your homemade deodorant i
Hey there, fellow DIY enthusiasts! Are you tired of commercial deodorants packed with questionable chemicals? Do you crave a natural alternative that actually works? Well, you’ve come to the right place! I’m going to walk you through creating your very own effective and affordable deodorant using just two simple ingredients: coconut oil and baking soda. Trust me, once you try this, you might never go back to store-bought again!
Why Coconut Oil and Baking Soda?
Before we dive into the how-to, let’s talk about why these two ingredients are so awesome for deodorant.
* Coconut Oil: This isn’t just for cooking! Coconut oil is naturally antibacterial and antifungal, which helps combat odor-causing bacteria. Plus, it’s incredibly moisturizing, leaving your underarms feeling soft and smooth. It also has a lovely, subtle scent that won’t clash with your favorite perfume or cologne.
* Baking Soda: This is the workhorse of our deodorant. Baking soda is a natural deodorizer that neutralizes odors instead of just masking them. It’s also mildly abrasive, which can help exfoliate the skin and prevent ingrown hairs.
Gathering Your Supplies
Okay, let’s get started! Here’s what you’ll need:
* 1/4 cup Coconut Oil (unrefined, virgin coconut oil is best)
* 1/4 cup Baking Soda (make sure it’s fresh!)
* Optional: Essential Oils (5-10 drops of your favorite scent – lavender, tea tree, lemon, or sandalwood are great choices)
* A small glass jar or container with a lid (a recycled baby food jar or small mason jar works perfectly)
* A spoon or spatula for mixing
Step-by-Step Instructions: Making Your Deodorant
Now for the fun part! Follow these steps carefully, and you’ll have your own natural deodorant in no time.
1. Melt the Coconut Oil: If your coconut oil is solid (which it probably is, especially if you live in a cooler climate), you’ll need to melt it. You can do this in a couple of ways:
* Microwave Method: Place the coconut oil in a microwave-safe bowl and heat it in 15-second intervals, stirring in between, until it’s completely melted. Be careful not to overheat it!
* Double Boiler Method: This is my preferred method because it’s gentler. Fill a saucepan with about an inch of water and bring it to a simmer. Place a heat-safe bowl on top of the saucepan, making sure the bottom of the bowl doesn’t touch the water. Add the coconut oil to the bowl and let it melt slowly, stirring occasionally.
2. Add the Baking Soda: Once the coconut oil is melted, remove it from the heat (if you used the double boiler method) or let it cool slightly (if you used the microwave). Now, carefully add the baking soda to the melted coconut oil.
3. Mix Thoroughly: This is crucial! You want to make sure the baking soda is completely incorporated into the coconut oil. Use a spoon or spatula to mix the ingredients together until you have a smooth, even paste. There shouldn’t be any clumps of baking soda.
4. Add Essential Oils (Optional): If you’re using essential oils, now’s the time to add them. I usually add about 5-10 drops, depending on the strength of the oil and my personal preference. Start with a smaller amount and add more if needed. Remember, essential oils are potent, so a little goes a long way! Some of my favorite essential oils for deodorant include:
* Lavender: Calming and soothing, with a lovely floral scent.
* Tea Tree: Antibacterial and antifungal, perfect for fighting odor.
* Lemon: Refreshing and uplifting, with a bright citrus scent.
* Sandalwood: Warm and woody, with a grounding aroma.
5. Mix Again: Once you’ve added the essential oils, give the mixture another good stir to ensure everything is evenly distributed.
6. Transfer to a Container: Pour or spoon the deodorant mixture into your chosen container. A small glass jar with a lid is ideal for storage.
7. Let it Solidify: Allow the deodorant to cool and solidify completely. This usually takes a few hours at room temperature, or you can speed up the process by placing it in the refrigerator for about 30 minutes.
Using Your Homemade Deodorant
Okay, your deodorant is ready to go! Here’s how to use it:
1. Apply a Small Amount: Using your fingers, scoop out a small amount of deodorant (about the size of a pea) and apply it to each underarm.
2. Rub it In: Gently rub the deodorant into your skin until it’s fully absorbed. It should feel smooth and not greasy.
3. Wait Before Dressing: Allow the deodorant to dry completely before getting dressed to avoid staining your clothes.
Troubleshooting and Tips
While this recipe is pretty straightforward, you might encounter a few issues along the way. Here are some common problems and how to fix them:
* Irritation: Some people are sensitive to baking soda, and it can cause irritation or redness. If this happens to you, try reducing the amount of baking soda in the recipe. You can also try adding a tablespoon of arrowroot powder or cornstarch to help absorb moisture and soothe the skin. If the irritation persists, discontinue use.
* Greasy Feeling: If your deodorant feels too greasy, you might be using too much coconut oil. Try reducing the amount of coconut oil in the recipe or adding a tablespoon of arrowroot powder or cornstarch to help absorb excess oil.
* Not Effective Enough: If you find that your deodorant isn’t keeping you fresh all day, you might need to reapply it more often. You can also try adding a few drops of tea tree essential oil, which is a powerful antibacterial agent.
* Hard Deodorant: If your deodorant becomes too hard, especially in cold weather, you can soften it by warming it slightly in your hands before applying. You can also try adding a teaspoon of almond oil or jojoba oil to the recipe to make it softer.
* Grainy Texture: Sometimes, the baking soda can settle and create a grainy texture. To prevent this, make sure you mix the ingredients thoroughly and store the deodorant in a cool, dry place. If it does become grainy, you can try remelting the mixture and stirring it again.
Variations and Customizations
The beauty of DIY is that you can customize things to your liking! Here are some variations and customizations you can try:
* Arrowroot Powder or Cornstarch: As mentioned earlier, adding a tablespoon of arrowroot powder or cornstarch can help absorb moisture and soothe the skin. This is especially helpful if you live in a humid climate or tend to sweat a lot.
* Shea Butter: Adding a tablespoon of shea butter can make the deodorant even more moisturizing and creamy.
* Beeswax: Adding a teaspoon of beeswax can help solidify the deodorant and make it less likely to melt in warm weather.
* Clay: Adding a teaspoon of bentonite clay or kaolin clay can help absorb toxins and impurities from the skin.
* Different Essential Oils: Experiment with different essential oils to find your favorite scent. Some other great options include bergamot, grapefruit, rosemary, and eucalyptus.
Important Considerations
* Patch Test: Before using this deodorant regularly, it’s a good idea to do a patch test on a small area of skin to check for any allergic reactions or sensitivities.
* Transition Period: When switching from commercial deodorant to natural deodorant, you might experience a transition period where you sweat more or notice a stronger odor. This is because your body is detoxifying and adjusting to the new product. Be patient, and it should subside within a week or two.
* Storage: Store your homemade deodorant in a cool, dry place away from direct sunlight. It should last for several months.
Final Thoughts
Making your own natural deodorant is a simple, affordable, and rewarding experience. Not only will you be avoiding harmful chemicals, but you’ll also be creating a product that’s perfectly tailored to your needs and preferences. So, give it a try and see for yourself! I’m confident that you’ll love the results. Happy DIY-ing!
Conclusion
So, there you have it! This simple yet incredibly effective coconut oil baking soda mix is more than just a DIY trick; it’s a game-changer for your personal care routine. We’ve explored its potential benefits, from gentle exfoliation to natural odor control, and hopefully, you’re as excited as we are about the possibilities.
Why is this a must-try? Because it’s a natural, affordable, and customizable alternative to many commercially available products that often contain harsh chemicals and unnecessary additives. You control the ingredients, ensuring you’re only putting the best on your body. Plus, it’s incredibly versatile!
Consider these variations to tailor the mix to your specific needs:
* For Sensitive Skin: Reduce the amount of baking soda and add a teaspoon of honey for its soothing and moisturizing properties. You can also use finely ground baking soda for a gentler scrub.
* For Extra Exfoliation: Add a pinch of sea salt or finely ground coffee grounds for a more intense exfoliating experience. Be cautious, though, and avoid using this on sensitive areas.
* For Added Moisture: Incorporate a few drops of your favorite essential oil, like lavender or chamomile, for a calming and aromatic boost. Jojoba oil or almond oil can also be added for extra hydration.
* For a Deeper Clean: A squeeze of lemon juice (use sparingly and avoid direct sunlight afterward) can help brighten skin and combat blemishes.
The beauty of this coconut oil baking soda mix lies in its adaptability. Experiment with different ratios and additions to find the perfect blend that works for you. Remember to always do a patch test on a small area of skin before applying it liberally.
We wholeheartedly encourage you to give this DIY trick a try. It’s a simple, cost-effective way to embrace a more natural and sustainable approach to personal care. Ditch the harsh chemicals and embrace the power of simple, natural ingredients.
But don’t just take our word for it! We’re eager to hear about your experiences. Did you find it effective for exfoliation? Did it help with odor control? What variations did you try? Share your thoughts, tips, and tricks in the comments below. Your feedback will not only help us improve this guide but also inspire others to embark on their own DIY journey.
Let’s create a community of natural beauty enthusiasts, sharing our knowledge and empowering each other to make informed choices about our health and well-being. So, go ahead, whip up a batch of this amazing coconut oil baking soda mix, and let us know what you think! We can’t wait to hear from you.
Frequently Asked Questions (FAQ)
Is coconut oil baking soda mix safe for all skin types?
While generally safe for most skin types, it’s crucial to exercise caution, especially if you have sensitive skin. Baking soda has a pH level that is higher than the skin’s natural pH, which can potentially disrupt the skin’s acid mantle and lead to irritation or dryness in some individuals. Coconut oil, while moisturizing, can be comedogenic for some, meaning it can clog pores.
Therefore, we strongly recommend performing a patch test before applying the mix to a larger area. Apply a small amount to an inconspicuous area, such as the inside of your wrist or behind your ear, and wait 24-48 hours to observe for any adverse reactions like redness, itching, or burning. If you experience any irritation, discontinue use immediately.
For those with sensitive skin, consider reducing the amount of baking soda in the mix or opting for finely ground baking soda, which is less abrasive. Adding soothing ingredients like honey or aloe vera gel can also help mitigate potential irritation. If you have a pre-existing skin condition, such as eczema or rosacea, consult with a dermatologist before using this mix.
How often can I use coconut oil baking soda mix?
The frequency of use depends on your skin type and the intended purpose. For exfoliation, we recommend using the mix no more than 1-2 times per week. Over-exfoliating can strip the skin of its natural oils, leading to dryness, irritation, and even breakouts.
If you’re using the mix for odor control, you may be able to use it more frequently, but still, pay close attention to how your skin reacts. If you notice any dryness or irritation, reduce the frequency of use.
It’s important to listen to your skin and adjust the frequency accordingly. If you have sensitive skin, you may only be able to tolerate using the mix once a week or even less frequently. Always err on the side of caution and prioritize the health and well-being of your skin.
Can I use this mix on my face?
While some people have successfully used coconut oil baking soda mix on their face, we generally advise against it, especially for those with sensitive or acne-prone skin. The skin on your face is much more delicate than the skin on your body, and the abrasive nature of baking soda can be too harsh for facial skin. Additionally, coconut oil’s comedogenic properties can potentially clog pores and exacerbate acne.
If you’re determined to try it on your face, proceed with extreme caution. Use a very small amount of baking soda and ensure it’s finely ground. Apply the mix gently in circular motions, avoiding the delicate eye area. Rinse thoroughly with lukewarm water and follow up with a gentle moisturizer.
However, we strongly recommend exploring alternative facial exfoliants that are specifically formulated for the delicate skin on your face. Look for products containing gentler exfoliating agents like alpha-hydroxy acids (AHAs) or beta-hydroxy acids (BHAs).
How should I store the coconut oil baking soda mix?
To maintain the quality and effectiveness of your coconut oil baking soda mix, proper storage is essential. Store the mix in an airtight container in a cool, dry place away from direct sunlight and heat. This will help prevent the coconut oil from melting and the baking soda from clumping.
A glass jar or a plastic container with a tight-fitting lid is ideal. Avoid storing the mix in a humid environment, such as the bathroom, as this can promote the growth of bacteria and mold.
If you live in a warm climate, you may need to store the mix in the refrigerator to prevent the coconut oil from melting. However, keep in mind that refrigerated coconut oil can become quite hard, so you may need to let it soften slightly before using it.
Can I add essential oils to the mix?
Yes, adding essential oils to your coconut oil baking soda mix can enhance its benefits and create a more personalized experience. However, it’s crucial to use essential oils safely and responsibly.
Always use high-quality, pure essential oils from a reputable source. Dilute the essential oils properly before adding them to the mix. A general guideline is to use no more than 1-2 drops of essential oil per tablespoon of coconut oil.
Choose essential oils that are appropriate for your skin type and intended purpose. For example, lavender and chamomile are known for their calming and soothing properties, while tea tree oil is often used for its antibacterial and anti-inflammatory benefits.
Avoid using essential oils that are known to be irritating or sensitizing, such as citrus oils (which can also cause photosensitivity) or cinnamon bark oil. Always perform a patch test before using an essential oil for the first time.
What are the benefits of using coconut oil baking soda mix?
The benefits of using coconut oil baking soda mix are multifaceted, stemming from the individual properties of each ingredient. Coconut oil is a natural moisturizer, rich in fatty acids that help hydrate and nourish the skin. It also possesses antimicrobial properties, which can help combat bacteria and fungi.
Baking soda, on the other hand, is a gentle abrasive that can help exfoliate dead skin cells, revealing smoother and brighter skin. It also has deodorizing properties, making it an effective natural deodorant.
When combined, these two ingredients create a powerful DIY remedy that can be used for a variety of purposes, including:
* Exfoliating the skin
* Controlling body odor
* Removing dead skin cells
* Brightening the skin
* Soothing minor skin irritations
However, it’s important to remember that individual results may vary, and this mix may not be suitable for everyone. Always listen to your skin and adjust the recipe and frequency of use accordingly.
Leave a Comment