
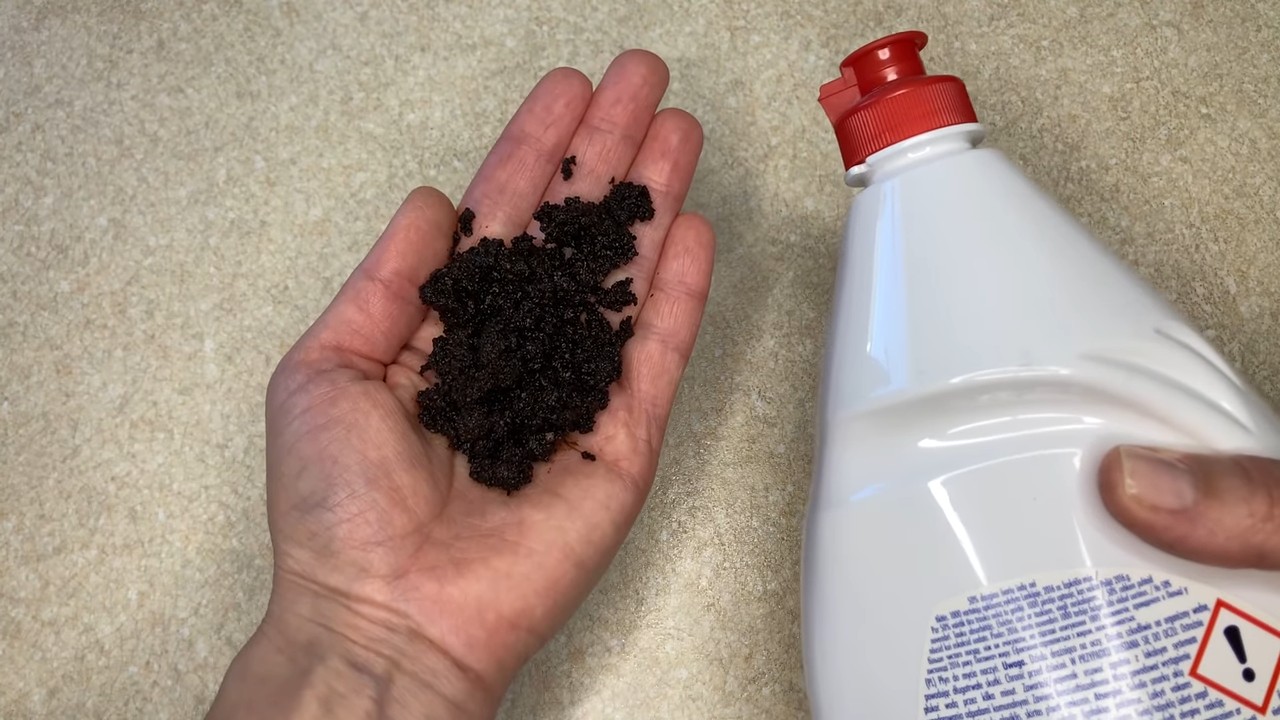
Coffee and dish soap cleaning: Sounds like an odd combination, right? But trust me, this unexpected duo is about to become your new best friend when it comes to tackling stubborn grime around your home! For generations, resourceful homemakers have sought out natural and effective cleaning solutions, often turning to everyday ingredients found right in their kitchens. Think about it – our grandmothers didn’t have a shelf full of specialized cleaners; they relied on ingenuity and readily available resources.
That’s where this DIY trick comes in. We all know the frustration of dealing with burnt-on food in pots and pans, greasy stovetops, or even stubborn stains on outdoor furniture. Store-bought cleaners can be harsh, expensive, and often filled with chemicals we’d rather avoid. But what if I told you that a simple mixture of coffee and dish soap could cut through that grime with ease? This coffee and dish soap cleaning hack is not only incredibly effective, but it’s also budget-friendly and environmentally conscious. I’m going to show you how to harness the power of these two common household items to achieve sparkling clean results without breaking the bank or exposing yourself to harsh chemicals. Get ready to ditch those expensive cleaners and embrace a natural, effective, and surprisingly satisfying cleaning solution!
Grow Your Own Peanuts: A Beginner’s Guide
Hey there, fellow gardening enthusiasts! Ever thought about growing your own peanuts? It might sound a little intimidating, but trust me, it’s a surprisingly fun and rewarding experience. Plus, nothing beats the taste of freshly harvested, homegrown peanuts! I’m going to walk you through the whole process, from choosing the right peanuts to roasting them up for a delicious snack. Let’s get started!
Choosing Your Peanuts and Preparing for Planting
Before we even think about digging in the dirt, we need to get our hands on some peanut seeds. But not just any peanuts will do!
* Raw, Unsalted Peanuts are Key: You can’t just grab a bag of roasted peanuts from the grocery store. You need raw, unsalted peanuts. These are usually available at health food stores, garden centers, or online seed suppliers. Make sure they are specifically labeled for planting or seed use.
* Virginia vs. Spanish vs. Runner: There are different types of peanuts, and some are better suited for certain climates.
* Virginia peanuts are large and often used for roasting. They need a longer growing season.
* Spanish peanuts are smaller, have a reddish skin, and mature faster. They are a good choice for cooler climates or shorter growing seasons.
* Runner peanuts are commonly used for peanut butter.
* I recommend checking your local climate and choosing a variety that is known to thrive in your area. Your local garden center can offer great advice!
* Soaking the Peanuts (Optional): Some gardeners like to soak their peanut seeds in water for a few hours before planting. This can help speed up germination. I’ve had success both with and without soaking, so it’s really up to you. If you do soak them, don’t leave them in the water for more than 8 hours, or they might start to rot.
Preparing the Soil
Peanuts are pretty particular about their soil. They need well-drained, loose soil that is rich in organic matter.
* Sunlight is Essential: Peanuts need at least 6-8 hours of direct sunlight per day. Choose a spot in your garden that gets plenty of sunshine.
* Soil Testing (Recommended): Ideally, you should test your soil to determine its pH level. Peanuts prefer a slightly acidic soil, with a pH between 6.0 and 6.5. You can purchase a soil testing kit at most garden centers.
* Amending the Soil: If your soil is heavy clay or sandy, you’ll need to amend it.
* Clay Soil: Add plenty of compost, peat moss, or other organic matter to improve drainage and aeration.
* Sandy Soil: Add compost or well-rotted manure to help retain moisture and nutrients.
* Loosening the Soil: Use a garden fork or tiller to loosen the soil to a depth of at least 12 inches. This will allow the peanut pegs (the stems that grow down into the soil and produce the peanuts) to penetrate easily.
* Adding Nutrients: Peanuts don’t need a lot of nitrogen, but they do benefit from phosphorus and potassium. You can add a fertilizer that is specifically formulated for legumes, or you can use bone meal and wood ash. I like to use a slow-release fertilizer to provide a steady supply of nutrients throughout the growing season.
Planting Your Peanuts
Now for the fun part – getting those peanuts in the ground!
1. Timing is Key: Peanuts are warm-weather crops, so you need to wait until the soil has warmed up to at least 65°F (18°C) before planting. This is usually a few weeks after the last frost. I always check my local weather forecast to make sure there’s no chance of a late frost.
2. Spacing: Plant the peanuts about 6-8 inches apart in rows that are 2-3 feet apart. This gives them enough room to spread out and develop.
3. Planting Depth: Plant the peanuts about 1-2 inches deep.
4. Covering the Seeds: Gently cover the peanuts with soil and pat it down lightly.
5. Watering: Water the soil thoroughly after planting. Keep the soil consistently moist, but not waterlogged, until the seedlings emerge.
Caring for Your Peanut Plants
Once your peanut plants start to grow, there are a few things you need to do to keep them healthy and productive.
* Watering: Water regularly, especially during dry spells. Peanuts need about 1 inch of water per week. Avoid overhead watering, as this can promote fungal diseases. I prefer to use a soaker hose or drip irrigation to water the plants at the base.
* Weeding: Keep the area around your peanut plants free of weeds. Weeds compete with the peanuts for water and nutrients. Hand-weeding is usually the best option, as herbicides can damage the peanut plants.
* Hilling: As the peanut plants grow, they will produce “pegs” that grow down into the soil. These pegs are what develop into the peanuts. To encourage peanut production, you can “hill” the soil around the base of the plants. This involves mounding up soil around the stems to provide support for the pegs and keep them covered. I usually do this a few times during the growing season.
* Fertilizing: If your peanut plants are not growing well, you can give them a boost with a fertilizer that is high in phosphorus and potassium. Avoid fertilizers that are high in nitrogen, as this can promote leafy growth at the expense of peanut production.
* Pest and Disease Control: Peanuts are generally resistant to pests and diseases, but they can be affected by aphids, spider mites, and fungal diseases. If you notice any signs of pests or diseases, treat them promptly with an appropriate insecticide or fungicide. I prefer to use organic pest control methods whenever possible.
Harvesting Your Peanuts
Harvesting is the most exciting part! You’ve put in the work, and now it’s time to reap the rewards.
1. Timing: Peanuts are usually ready to harvest about 120-150 days after planting, depending on the variety. A good indicator that they are ready is when the leaves start to turn yellow and the plants begin to die back. I also like to dig up a few plants to check the peanuts. If the shells are hard and the kernels are plump, they are ready to harvest.
2. Digging Up the Plants: Use a garden fork or shovel to carefully dig up the peanut plants. Be gentle, as you don’t want to damage the peanuts.
3. Shaking Off the Soil: Shake off as much soil as possible from the plants.
4. Drying the Peanuts: Hang the plants upside down in a dry, well-ventilated place for 2-3 weeks to dry. This allows the peanuts to cure and develop their flavor. I usually hang them in my garage or shed.
5. Picking the Peanuts: Once the plants are dry, you can pick the peanuts off the vines.
6. Cleaning the Peanuts: Wash the peanuts in water to remove any remaining soil.
7. Drying the Peanuts Again: Spread the peanuts out on a screen or tray and let them dry completely. This can take several days.
Roasting Your Homegrown Peanuts
Now for the best part – roasting and enjoying your homegrown peanuts!
1. Preheating the Oven: Preheat your oven to 350°F (175°C).
2. Spreading the Peanuts: Spread the peanuts in a single layer on a baking sheet.
3. Roasting: Roast the peanuts for 20-25 minutes, or until they are golden brown and fragrant. Stir them occasionally to ensure even roasting.
4. Cooling: Let the peanuts cool completely before eating.
5. Salting (Optional): If you like salted peanuts, you can sprinkle them with salt while they are still warm.
Storing Your Peanuts
If you have more peanuts than you can eat right away, you can store them for later.
* In-Shell Peanuts: Store in-shell peanuts in a cool, dry place for up to 6 months.
* Shelled Peanuts: Store shelled peanuts in an airtight container in the refrigerator for up to 3 months, or in the freezer for up to 6 months.
Troubleshooting
Even with the best planning, things can sometimes go wrong. Here are a few common problems and how to address them:
* Poor Germination: If your peanuts aren’t germinating, it could be due to cold soil, poor-quality seeds, or overwatering. Make sure the soil is warm enough before planting, use fresh seeds, and avoid overwatering.
* Yellowing Leaves: Yellowing leaves can be a sign of nutrient deficiency
Conclusion
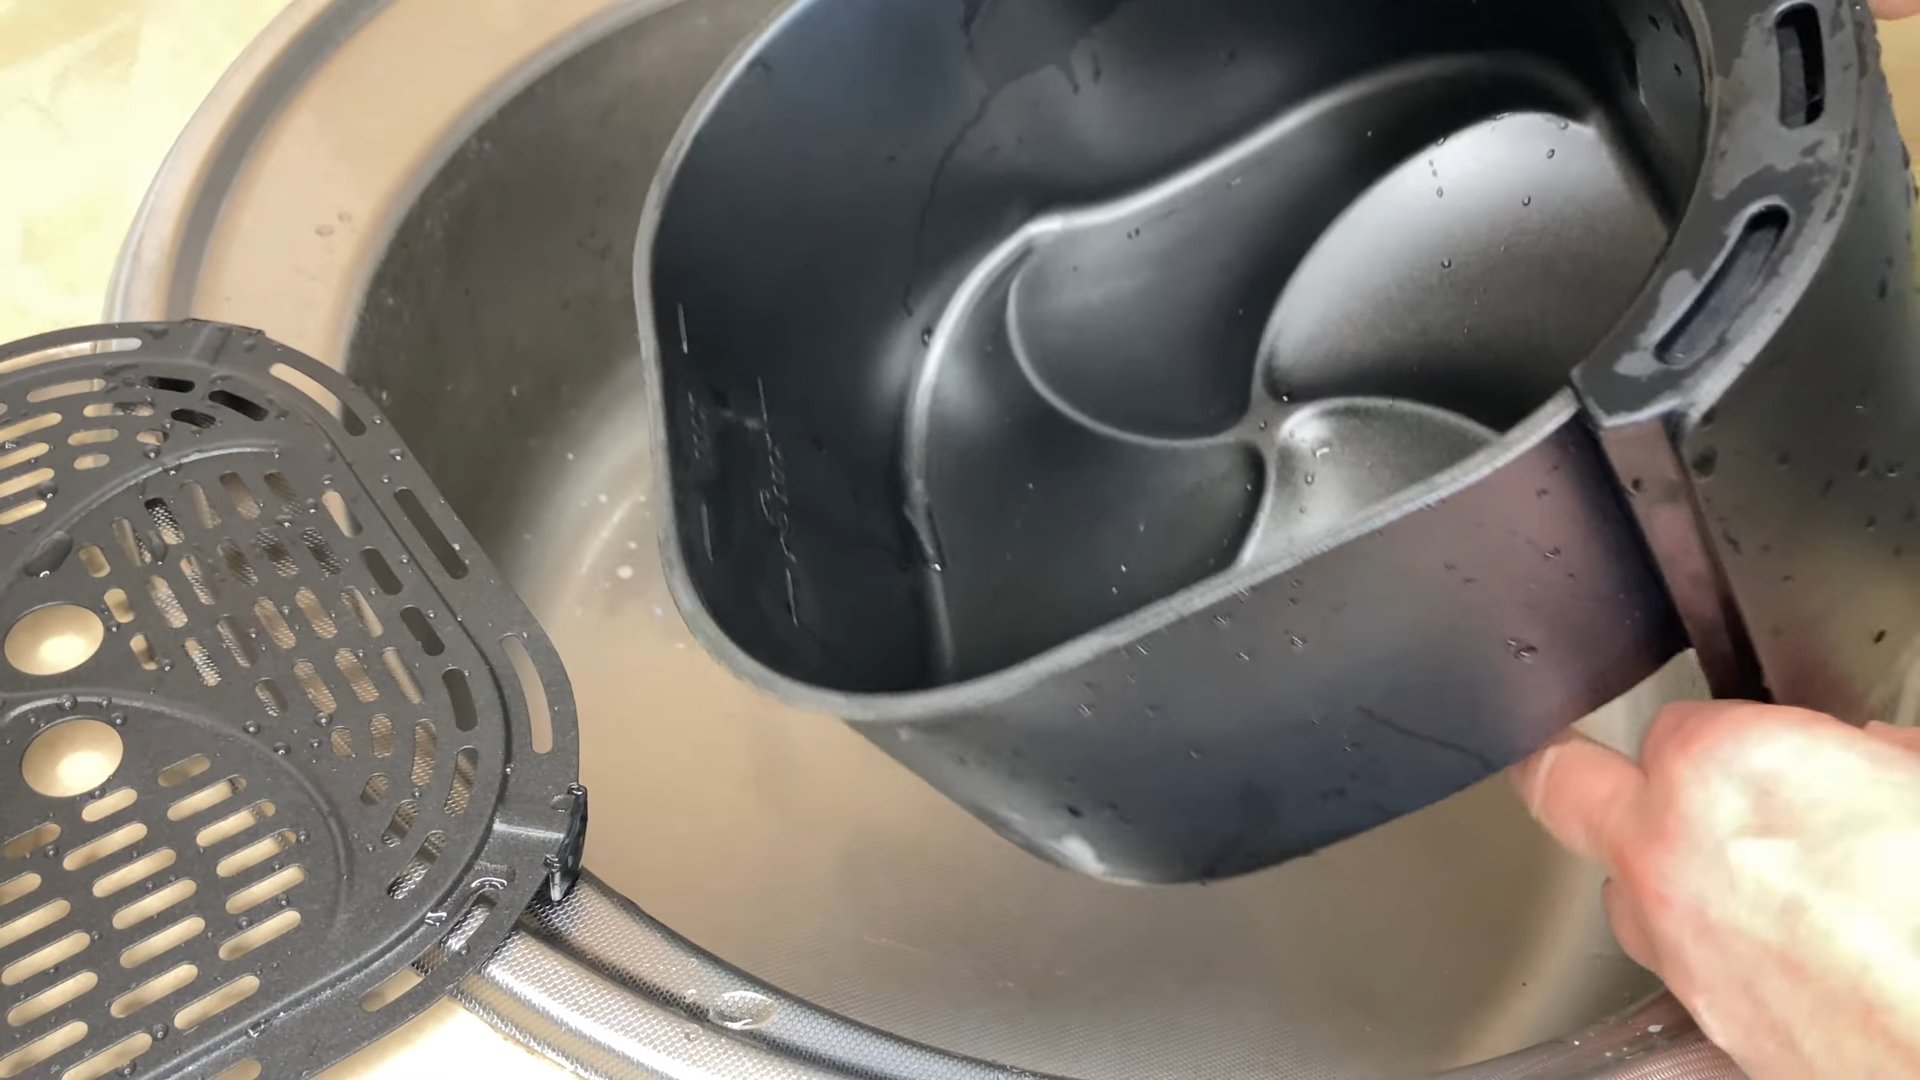
So, there you have it! This simple yet surprisingly effective DIY trick using coffee and dish soap is a game-changer for tackling stubborn grease and grime. We’ve explored how the natural abrasiveness of coffee grounds, combined with the degreasing power of dish soap, creates a potent cleaning solution that’s both eco-friendly and budget-friendly. Forget harsh chemicals and expensive specialty cleaners – this method offers a sustainable and readily available alternative that delivers impressive results.
Why is this a must-try? Because it’s not just about cleaning; it’s about cleaning smarter. It’s about repurposing coffee grounds that would otherwise end up in the trash, reducing waste and contributing to a more sustainable lifestyle. It’s about saving money by using ingredients you likely already have in your kitchen. And most importantly, it’s about achieving a sparkling clean home without exposing yourself and your family to potentially harmful chemicals.
But the beauty of this DIY trick lies in its versatility. Feel free to experiment with different types of coffee grounds. Finer grounds will provide a gentler abrasive action, ideal for delicate surfaces, while coarser grounds will offer more scrubbing power for tougher stains. You can also adjust the ratio of coffee grounds to dish soap to suit your specific cleaning needs. For heavily soiled areas, try using a higher concentration of coffee grounds. For lighter cleaning tasks, a smaller amount will suffice.
Consider adding a few drops of essential oil to your coffee and dish soap mixture for a pleasant fragrance. Lemon, orange, or tea tree oil not only smell great but also possess additional cleaning and antibacterial properties. You can also infuse the coffee grounds with citrus peels while they are drying to add a natural citrus scent to your cleaning solution.
Another variation involves using this mixture to clean your kitchen sink. The coffee grounds will help to scrub away food particles and stains, while the dish soap will cut through grease and grime. Rinse thoroughly with water, and your sink will be left sparkling clean and smelling fresh. You can also use this mixture to clean your garbage disposal. Simply pour the mixture down the drain and let it sit for a few minutes before running the disposal with cold water. This will help to remove any lingering odors and keep your disposal running smoothly.
We are confident that once you try this DIY cleaning trick, you’ll be amazed by its effectiveness and simplicity. It’s a practical, eco-conscious, and cost-effective way to keep your home clean and fresh.
Now, we want to hear from you! Give this coffee and dish soap cleaning method a try and share your experience with us. Did it work wonders on your greasy stovetop? Did it revitalize your stained sink? Let us know in the comments below! Your feedback will not only help us improve this guide but also inspire others to embrace this fantastic DIY cleaning solution. We believe in the power of shared knowledge and experiences, so don’t hesitate to share your tips, variations, and success stories. Together, we can create a cleaner, healthier, and more sustainable world, one coffee ground at a time.
Frequently Asked Questions (FAQ)
1. What kind of coffee grounds should I use?
You can use any type of coffee grounds, whether they are fresh or used. However, used coffee grounds are ideal for this DIY cleaning trick as it promotes repurposing and reduces waste. If using fresh grounds, consider using a coarser grind for better scrubbing power. Finer grounds are suitable for more delicate surfaces. Remember to let the used coffee grounds dry completely before storing them to prevent mold growth. You can spread them out on a baking sheet or paper towel and let them air dry for a few hours or overnight.
2. What type of dish soap is best?
Any standard dish soap will work effectively. However, consider using an eco-friendly dish soap to further enhance the sustainability of this cleaning method. Look for dish soaps that are biodegradable, phosphate-free, and made with plant-based ingredients. These options are gentler on the environment and your skin. Avoid using dish soaps that contain harsh chemicals or artificial fragrances, as these can be irritating and harmful.
3. Can I use this mixture on all surfaces?
While this coffee and dish soap cleaning mixture is generally safe for most surfaces, it’s always best to test it on an inconspicuous area first, especially on delicate or painted surfaces. Avoid using it on porous materials like unsealed granite or marble, as the coffee grounds may stain them. Be cautious when using it on stainless steel appliances, as the abrasive nature of the coffee grounds may scratch the surface. Always rinse the cleaned area thoroughly with water to remove any residue.
4. How do I store the coffee and dish soap mixture?
Store the mixture in an airtight container in a cool, dry place. It’s best to use it within a few days to prevent the coffee grounds from becoming moldy. If you notice any signs of mold or discoloration, discard the mixture immediately. You can also store the dried coffee grounds separately and mix them with dish soap as needed. This will help to prolong their shelf life and prevent them from clumping together.
5. Can I use this mixture to clean my coffee maker?
While you can use coffee grounds to clean certain parts of your coffee maker, such as the carafe, it’s not recommended to use this mixture to clean the internal components. The coffee grounds may clog the machine and damage its delicate parts. Instead, follow the manufacturer’s instructions for cleaning your coffee maker, which typically involves using a descaling solution or a mixture of vinegar and water.
6. Is this mixture safe for septic systems?
While small amounts of coffee grounds are generally safe for septic systems, it’s best to avoid pouring large quantities down the drain. Over time, the coffee grounds can accumulate and clog the system. If you have a septic system, consider composting the coffee grounds instead of using them for cleaning. You can also dispose of them in the trash.
7. How can I make this cleaning solution smell better?
As mentioned earlier, you can add a few drops of essential oil to the mixture for a pleasant fragrance. Lemon, orange, tea tree, lavender, and peppermint are all great options. You can also infuse the coffee grounds with citrus peels while they are drying to add a natural citrus scent. Another option is to add a small amount of vanilla extract to the mixture.
8. What are some other uses for coffee grounds?
Besides cleaning, coffee grounds have a variety of other uses. They can be used as a natural fertilizer for plants, a compost ingredient, a skin exfoliant, and an odor absorber. You can also use them to deter pests like ants and slugs. Coffee grounds are a versatile and valuable resource that can be used in many different ways.
9. What if I don’t have dish soap? Can I use something else?
While dish soap is the ideal complement to coffee grounds for cleaning due to its degreasing properties, you can experiment with other mild cleaning agents. Baking soda is a good alternative, as it also has abrasive properties and can help to deodorize. You can also try using a small amount of liquid castile soap, which is a gentle and versatile cleaner. However, keep in mind that the results may not be as effective as when using dish soap.
10. How often should I use this cleaning method?
The frequency of use depends on your cleaning needs and the surfaces you are cleaning. For heavily soiled areas, you may need to use this method more frequently. For lighter cleaning tasks, once a week or even less often may suffice. Always monitor the surfaces you are cleaning and adjust the frequency accordingly. Remember to test the mixture on an inconspicuous area first to ensure that it does not damage the surface.

Leave a Comment