
Cucumber gardening in plastic pots might sound like a challenge, but trust me, it’s easier than you think! Have you ever dreamed of plucking fresh, crisp cucumbers right from your own balcony or patio? Imagine the satisfaction of adding homegrown goodness to your salads and snacks, knowing exactly where your food came from. This DIY guide will unlock the secrets to successful cucumber cultivation, even if you’re short on space.
Cucumbers have a rich history, dating back thousands of years to their origins in India. They’ve been cultivated and enjoyed across cultures, from ancient Rome to modern-day gardens. But you don’t need a sprawling estate to enjoy this versatile veggie!
Many people are intimidated by the thought of growing their own food, especially in limited spaces. But that’s where this DIY trick comes in. Cucumber gardening in plastic pots is a fantastic way to overcome space constraints and enjoy the benefits of fresh, homegrown produce. I’ll show you how to choose the right pot, select the best cucumber variety for container gardening, and provide essential tips for watering, fertilizing, and supporting your growing vines. Get ready to embark on a rewarding gardening adventure – your taste buds will thank you!

DIY Cucumber Trellis from Plastic Pots: A Thrifty Gardener’s Dream!
Hey fellow gardeners! Are you ready to take your cucumber game to the next level? I’m going to show you how to build a fantastic cucumber trellis using something you probably already have lying around: plastic pots! This project is not only budget-friendly but also a great way to recycle and give those old pots a new purpose. Plus, a trellis will help your cucumbers grow vertically, saving space and improving air circulation, which means healthier, happier plants and more delicious cucumbers for you!
Why a Trellis for Cucumbers?
Before we dive in, let’s quickly chat about why trellising cucumbers is a good idea.
* Space Saving: Cucumbers can be sprawling vines. A trellis lets them grow up instead of out, perfect for smaller gardens or balconies.
* Improved Air Circulation: Better airflow reduces the risk of fungal diseases like powdery mildew.
* Easier Harvesting: No more bending over and searching under leaves! The cucumbers are easier to spot and pick.
* Cleaner Fruit: Trellised cucumbers are less likely to touch the soil, resulting in cleaner, unblemished fruit.
* Aesthetic Appeal: Let’s be honest, a cucumber trellis looks pretty cool!
Materials You’ll Need
Okay, let’s gather our supplies. This is what you’ll need to create your own cucumber trellis from plastic pots:
* Plastic Pots: The number depends on how tall and wide you want your trellis to be. I recommend at least 10-15 pots of similar size. The sturdier the pot, the better. Think 6-inch to 1-gallon pots.
* Bamboo Stakes or Wooden Dowels: These will be the main support structure of your trellis. You’ll need at least 3-4, depending on the width of your trellis. Aim for stakes that are at least 4-5 feet tall.
* Heavy-Duty Zip Ties or Garden Wire: For connecting the pots and stakes. Zip ties are super easy to use, but garden wire is more durable.
* Drill with Drill Bits: You’ll need a drill bit slightly larger than the diameter of your zip ties or garden wire.
* Gloves: To protect your hands.
* Measuring Tape or Ruler: To ensure even spacing.
* Scissors or Wire Cutters: For trimming zip ties or garden wire.
* Optional: Spray Paint: If you want to give your trellis a more uniform or decorative look.
Step-by-Step Instructions: Building Your Cucumber Trellis
Alright, let’s get building! Here’s how to transform those plastic pots into a functional and attractive cucumber trellis.
Phase 1: Preparing the Pots
1. Clean the Pots: Give your plastic pots a good scrub with soap and water to remove any dirt or debris. This will help the paint adhere better if you choose to paint them.
2. Drill Drainage Holes (If Needed): If your pots don’t already have drainage holes, drill a few in the bottom. This is important to prevent water from pooling inside the pots and potentially damaging the trellis structure.
3. Drill Connection Holes: This is the most crucial step. You’ll need to drill holes in the sides of the pots to connect them to each other and to the support stakes.
* Placement: Drill two holes on opposite sides of each pot, near the top rim. Make sure the holes are large enough to easily thread your zip ties or garden wire through.
* Consistency: Try to drill the holes at the same height on each pot to ensure a uniform look for your trellis. I like to use a ruler to measure and mark the hole positions before drilling.
4. (Optional) Paint the Pots: If you want to paint your pots, now is the time to do it. Choose a paint that is suitable for plastic and outdoor use. Let the paint dry completely before moving on to the next step. I personally love using a dark green or even a fun, bright color to add some personality to my garden.
Phase 2: Assembling the Trellis Frame
1. Position the Stakes: Decide where you want to place your trellis in your garden. Insert the bamboo stakes or wooden dowels into the ground, spacing them evenly apart. The distance between the stakes will depend on the width of your pots and how wide you want your trellis to be. I usually aim for about 12-18 inches between stakes. Make sure the stakes are firmly planted in the ground to provide a stable base for the trellis.
2. Attach the First Row of Pots: Take your first row of pots and attach them to the stakes using zip ties or garden wire.
* Threading: Thread the zip ties or wire through the holes you drilled in the pots and around the stakes.
* Securing: Tighten the zip ties or twist the garden wire to secure the pots to the stakes. Make sure the pots are level and evenly spaced.
* Placement: Position the first row of pots a few inches above the ground. This will prevent the pots from sitting directly on the soil and potentially rotting.
3. Add Subsequent Rows: Continue adding rows of pots, attaching them to the stakes and to each other using zip ties or garden wire.
* Overlapping: You can overlap the pots slightly to create a more stable and visually appealing structure.
* Staggering: Consider staggering the pots in each row to create a more interesting design and to allow for better airflow.
* Tightening: As you add each row, make sure to tighten the zip ties or wire to keep the trellis structure secure.
4. Reinforce the Structure: Once you’ve added all the pots, go back and reinforce the structure by adding extra zip ties or wire to any weak points. Pay particular attention to the connections between the pots and the stakes.
Phase 3: Planting and Training Your Cucumbers
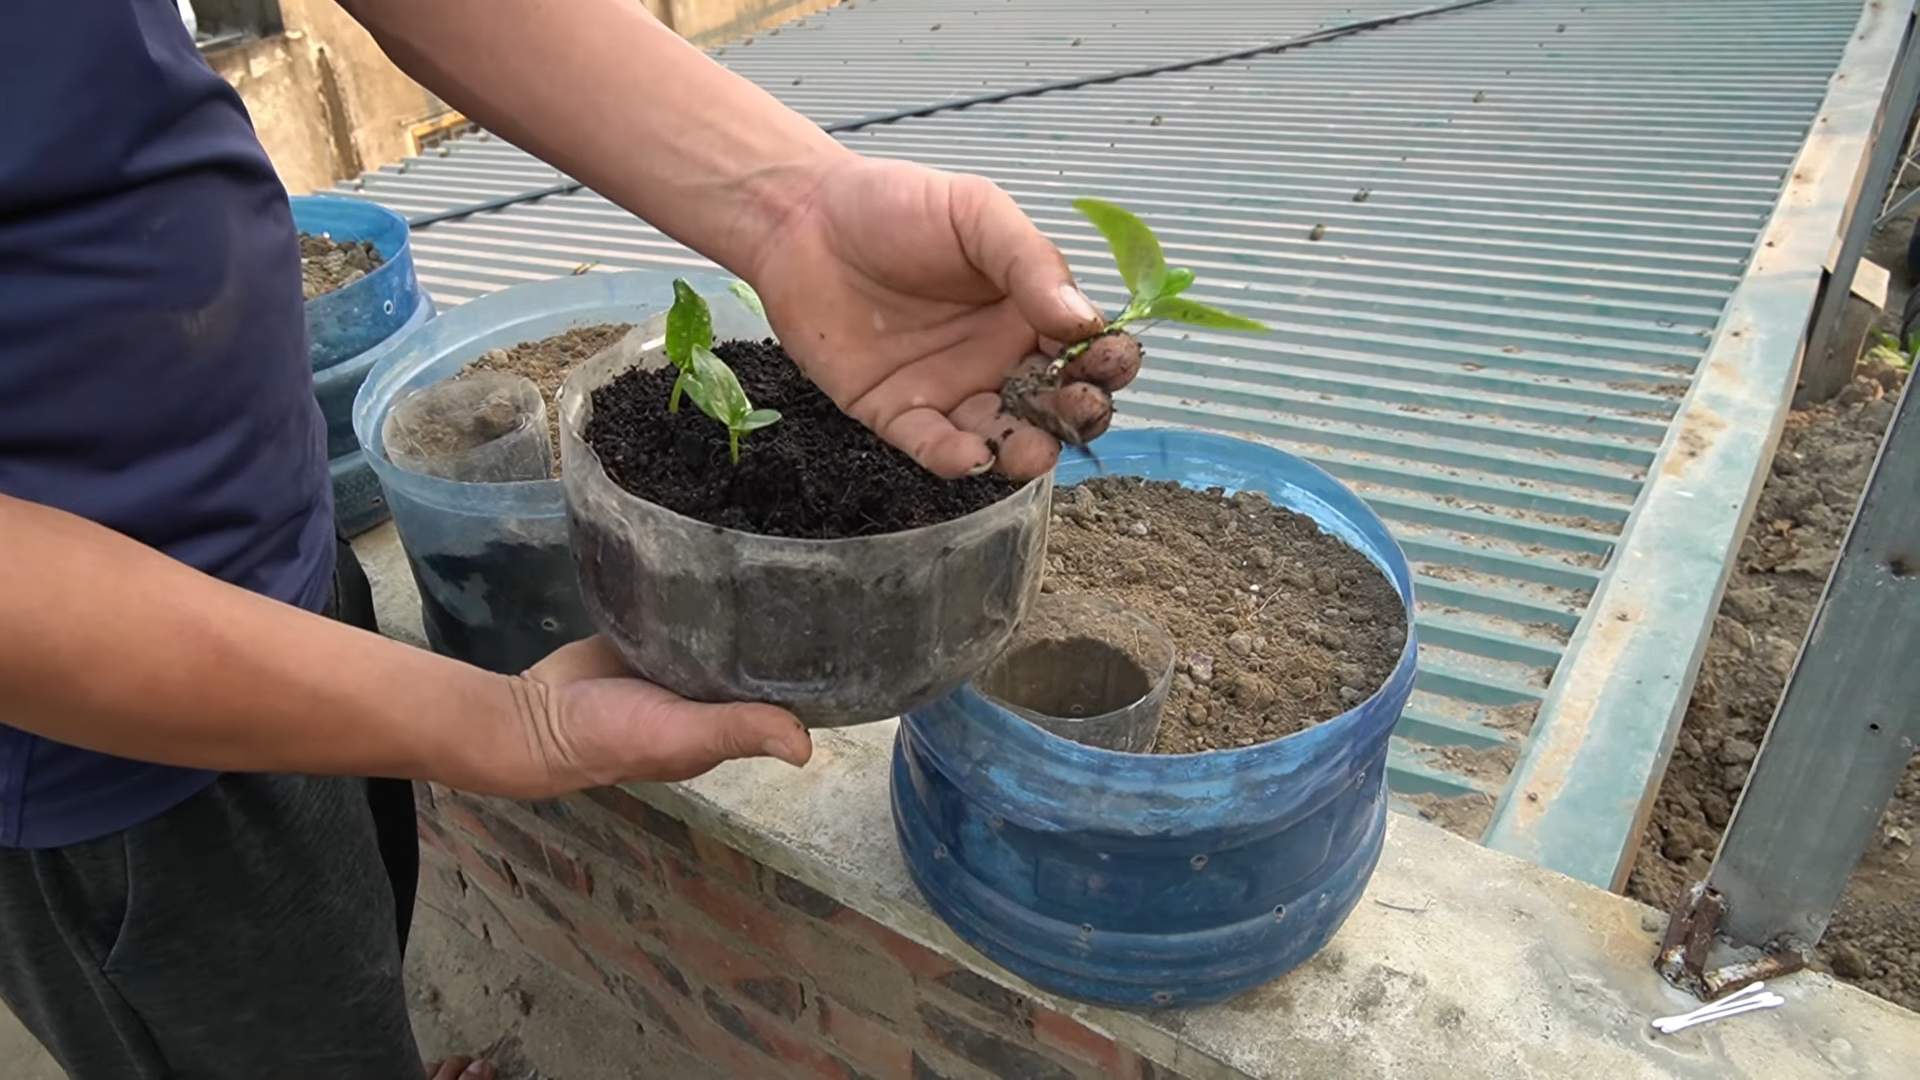
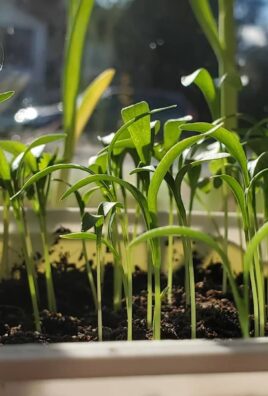
1. Plant Your Cucumber Seedlings: Plant your cucumber seedlings at the base of the trellis, spacing them according to the instructions on the seed packet or plant label. I usually plant 2-3 seedlings per stake.
2. Water Thoroughly: Water the seedlings thoroughly after planting.
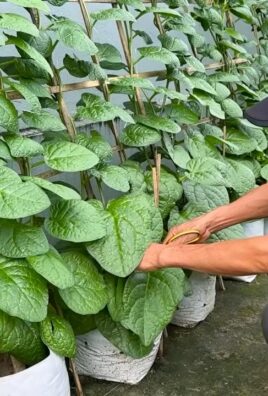
3. Train the Vines: As the cucumber vines grow, gently guide them up the trellis, weaving them through the pots and around the stakes.
* Tying: If necessary, you can use soft plant ties to secure the vines to the trellis. Be careful not to tie them too tightly, as this can damage the vines.
* Direction: Encourage the vines to grow upwards by directing them towards the top of the trellis.
* Pruning: You may need to prune the vines occasionally to encourage branching and to prevent them from becoming too dense.
4. Water and Fertilize Regularly: Water your cucumber plants regularly, especially during hot, dry weather. Fertilize them every few weeks with a balanced fertilizer.
5. Monitor for Pests and Diseases: Keep an eye out for pests and diseases, such as aphids, cucumber beetles, and powdery mildew. Treat any problems promptly to prevent them from spreading.
Tips and Tricks for Success
* Choose the Right Pots: Sturdy pots are key! Thin, flimsy pots won’t hold up well.
* Consider the Weight: Remember that the trellis will become heavier as the cucumbers grow. Make sure your stakes are strong enough to support the weight.
* Adjust as Needed: Don’t be afraid to adjust the design or construction of your trellis as needed. This is a DIY project, so get creative!
* Sunlight: Ensure your trellis is placed in a location that receives at least 6-8 hours of sunlight per day. Cucumbers need plenty of sun to thrive.
* Watering: Cucumbers are thirsty plants! Water deeply and regularly, especially during hot weather. Consider using a soaker hose or drip irrigation to deliver water directly to the roots.
* Fertilizing: Feed your cucumber plants regularly with a balanced fertilizer. This will help them produce more fruit.
* Pollination: Cucumbers need to be pollinated to produce fruit. If you’re growing cucumbers indoors or in an area with limited pollinators, you may need to hand-pollinate them.
* Harvesting: Harvest your cucumbers when they are the desired size and color. Regular harvesting will encourage the plants to produce more fruit.
Troubleshooting
* Trellis is unstable: Add more stakes or reinforce the connections between the pots and stakes.
* Vines are not climbing: Gently guide the vines up the trellis and tie them in place if necessary.
* Pests or diseases: Treat any problems promptly with appropriate insecticides or fungicides.
* Poor fruit production: Ensure your plants are receiving enough sunlight, water, and fertilizer. Also, check
Conclusion
So, there you have it! Growing cucumbers in plastic pots isn’t just a viable option; it’s a game-changer for gardeners with limited space, challenging soil conditions, or simply a desire for greater control over their growing environment. We’ve walked you through the process, from selecting the right pot size and cucumber variety to providing the essential care for a bountiful harvest.
But why is this DIY trick a must-try? It boils down to several key advantages. First, the portability of plastic pots allows you to chase the sun, ensuring your cucumber plants receive the optimal amount of light throughout the day. This is especially crucial in areas with unpredictable weather patterns or limited sunlight exposure. Second, you have complete control over the soil composition, eliminating the risk of nutrient deficiencies or soilborne diseases that can plague in-ground gardens. Third, container gardening minimizes weed competition, reducing the need for constant weeding and allowing your cucumbers to thrive without unnecessary stress. Finally, growing cucumbers in plastic pots offers a cleaner, more organized gardening experience, perfect for balconies, patios, or small urban spaces.
Don’t be afraid to experiment with variations to personalize your cucumber gardening experience. Consider adding companion plants like marigolds or basil to deter pests and attract pollinators. You can also explore different trellising methods to maximize vertical space and improve air circulation. For a truly unique touch, try growing miniature cucumber varieties specifically bred for container gardening. These compact plants produce smaller, bite-sized cucumbers that are perfect for snacking or adding to salads.
Remember, the key to success lies in consistent watering, proper fertilization, and diligent pest control. Keep a close eye on your plants, and don’t hesitate to adjust your care routine as needed. With a little patience and attention, you’ll be rewarded with a steady supply of fresh, homegrown cucumbers all season long.
We wholeheartedly encourage you to give this DIY trick a try. It’s a rewarding and accessible way to enjoy the taste of homegrown cucumbers, regardless of your gardening experience or available space. And most importantly, we want to hear about your experiences! Share your photos, tips, and challenges in the comments below. Let’s build a community of cucumber-growing enthusiasts and learn from each other’s successes and failures. Your insights could be invaluable to other gardeners embarking on their own cucumber-growing journey. So, grab your plastic pots, select your favorite cucumber variety, and get ready to enjoy the delicious fruits (or rather, vegetables!) of your labor. Happy gardening!
Frequently Asked Questions (FAQ)
What size plastic pot is best for growing cucumbers?
The ideal size for growing cucumbers in plastic pots is at least 5 gallons, but 10 gallons is even better. Cucumbers have extensive root systems and need ample space to develop properly. A larger pot provides more room for root growth, which translates to a healthier and more productive plant. Smaller pots can restrict root development, leading to stunted growth and reduced yields. Make sure the pot has adequate drainage holes to prevent waterlogging, which can lead to root rot.
Which cucumber varieties are best suited for growing in plastic pots?
While you can grow most cucumber varieties in plastic pots, some are better suited than others. Bush varieties, such as Spacemaster, Bush Champion, and Salad Bush, are particularly well-suited for container gardening due to their compact size and shorter vines. These varieties require less space and are easier to manage in pots. Vining varieties, such as Straight Eight and Marketmore, can also be grown in pots, but they will require a sturdy trellis or support system to climb on. Look for varieties that are labeled as “compact,” “bush,” or “container-friendly” for the best results. Miniature cucumber varieties, like Patio Snacker, are also excellent choices for container gardening.
How often should I water my cucumber plants in plastic pots?
Watering frequency depends on several factors, including the weather, the size of the pot, and the type of soil you’re using. Generally, you should water your cucumber plants deeply whenever the top inch of soil feels dry to the touch. During hot, dry weather, you may need to water them daily, or even twice a day. Avoid overwatering, as this can lead to root rot. Ensure that the pot has good drainage to prevent water from pooling at the bottom. A good rule of thumb is to water until you see water draining out of the bottom of the pot.
What type of soil should I use for growing cucumbers in plastic pots?
Use a well-draining potting mix specifically formulated for container gardening. Avoid using garden soil, as it can become compacted in pots and restrict drainage. A good potting mix should contain a blend of peat moss, perlite, and vermiculite. You can also add compost to the mix to provide additional nutrients. The ideal soil pH for cucumbers is between 6.0 and 7.0. You can test the pH of your soil using a soil testing kit and adjust it as needed.
How much sunlight do cucumber plants need?
Cucumbers need at least 6-8 hours of direct sunlight per day to thrive. Choose a location that receives plenty of sunlight throughout the day. If you live in a hot climate, you may need to provide some afternoon shade to prevent the plants from overheating. If you’re growing cucumbers indoors, you’ll need to supplement with grow lights to provide adequate light. Rotate the pots regularly to ensure that all sides of the plant receive equal sunlight.
How often should I fertilize my cucumber plants in plastic pots?
Cucumbers are heavy feeders and require regular fertilization to produce a bountiful harvest. Start fertilizing your plants about two weeks after transplanting them into the pots. Use a balanced fertilizer with a ratio of 10-10-10 or 14-14-14. Follow the instructions on the fertilizer label for application rates. You can also use a liquid fertilizer diluted to half strength and apply it every 2-3 weeks. Avoid over-fertilizing, as this can burn the roots.
How do I prevent pests and diseases from affecting my cucumber plants in plastic pots?
Regularly inspect your plants for signs of pests and diseases. Common cucumber pests include aphids, cucumber beetles, and squash bugs. You can control these pests by handpicking them off the plants, using insecticidal soap, or applying neem oil. Common cucumber diseases include powdery mildew, downy mildew, and bacterial wilt. You can prevent these diseases by providing good air circulation, avoiding overhead watering, and using disease-resistant varieties. If you notice any signs of disease, remove the affected leaves or plants immediately.
Do I need to prune my cucumber plants in plastic pots?
Pruning can help improve air circulation and encourage fruit production. Remove any yellowing or dead leaves from the bottom of the plant. You can also prune the side shoots that develop from the main stem to encourage the plant to focus its energy on producing fruit. For vining varieties, pinch off the tips of the vines once they reach the top of the trellis to encourage branching.
How long does it take for cucumbers to mature in plastic pots?
The time it takes for cucumbers to mature depends on the variety and growing conditions. Generally, cucumbers mature in 50-70 days from planting. You can harvest cucumbers when they are firm and have reached the desired size. Check the seed packet or plant tag for specific information on the maturity time for your chosen variety.
Can I grow cucumbers in plastic pots indoors?
Yes, you can grow cucumbers in plastic pots indoors, but you’ll need to provide adequate light and pollination. Use grow lights to supplement natural sunlight, providing at least 12-14 hours of light per day. You’ll also need to hand-pollinate the flowers, as there will be no bees or other pollinators indoors. Use a small paintbrush to transfer pollen from the male flowers to the female flowers. Female flowers have a small cucumber-like structure behind the flower, while male flowers do not.

Leave a Comment