
DIY Microgreens Setup: Ever dreamt of having a tiny, vibrant garden bursting with flavor right on your kitchen counter? I know I have! Imagine snipping fresh, nutrient-packed greens to sprinkle on your salads, sandwiches, or even smoothies, all grown by your own two hands. This isn’t just a foodie fantasy; it’s totally achievable with a simple DIY microgreens setup!
Microgreens, those adorable little seedlings, have been gaining popularity for years, and for good reason. While their history isn’t as ancient as, say, cultivating tomatoes, their rise reflects a growing awareness of healthy eating and sustainable practices. They pack a nutritional punch far exceeding their mature counterparts, offering concentrated vitamins and minerals in a small, delicious package. Plus, they’re incredibly fun to grow!
Why do you need this DIY trick in your life? Well, for starters, store-bought microgreens can be pricey. Creating your own DIY microgreens setup is a budget-friendly way to enjoy these superfoods regularly. More importantly, you control exactly what goes into your greens – no pesticides, no questionable growing practices, just pure, homegrown goodness. I’m going to show you how to create a simple, effective, and affordable microgreens garden that will have you harvesting fresh greens in just a week or two. Get ready to unleash your inner gardener and enjoy the delicious rewards!
DIY Microgreens Setup: Grow Your Own Nutrient Powerhouse!
Hey there, fellow green thumbs! I’m so excited to share my super simple and affordable DIY microgreens setup. Forget those expensive store-bought containers – we’re going to create a thriving microgreen garden right in your kitchen, using materials you probably already have! Microgreens are packed with nutrients and add a burst of flavor to salads, sandwiches, and just about anything. Let’s get growing!
What You’ll Need: The Supply List
Before we dive in, let’s gather our supplies. The beauty of this project is its flexibility – feel free to substitute materials based on what you have on hand.
* Two Shallow Trays: I recommend using two identical plastic trays. One will act as the growing tray, and the other as a drainage tray. Think takeout containers, seedling trays, or even repurposed storage containers. Just make sure one can nest inside the other with a little space in between.
* Growing Medium: You have a few options here. I personally love using coconut coir (also known as coco coir) because it’s sustainable and holds moisture well. You can also use seed starting mix, potting soil (make sure it’s fine and doesn’t contain large chunks), or even paper towels.
* Microgreen Seeds: This is where the fun begins! Choose your favorite microgreen varieties. Radish, broccoli, sunflower, pea shoots, and kale are all popular and easy to grow. You can find microgreen seeds online or at your local garden center.
* Spray Bottle: A simple spray bottle is essential for keeping your microgreens moist.
* Water: Tap water is fine, but filtered water is even better.
* Optional: Grow Light: While not strictly necessary, a grow light can significantly improve your microgreen yield, especially if you don’t have a sunny windowsill.
* Optional: Humidity Dome: A clear plastic lid or even plastic wrap can help create a humid environment for germination.
Step-by-Step Instructions: From Seed to Sprout
Okay, let’s get our hands dirty! Here’s a detailed breakdown of how to set up your DIY microgreen garden:
1. Prepare Your Growing Medium: If you’re using coconut coir, you’ll need to hydrate it. Place the coir brick or block in a large container and add water according to the package instructions. It will expand significantly! Once it’s fully hydrated, fluff it up with your hands. If you’re using seed starting mix or potting soil, simply moisten it with water until it’s damp but not soggy.
2. Fill the Growing Tray: Take your growing tray (the one that will hold the soil) and fill it with your prepared growing medium. Aim for a depth of about 1-2 inches. Gently pat down the surface to create a level planting bed.
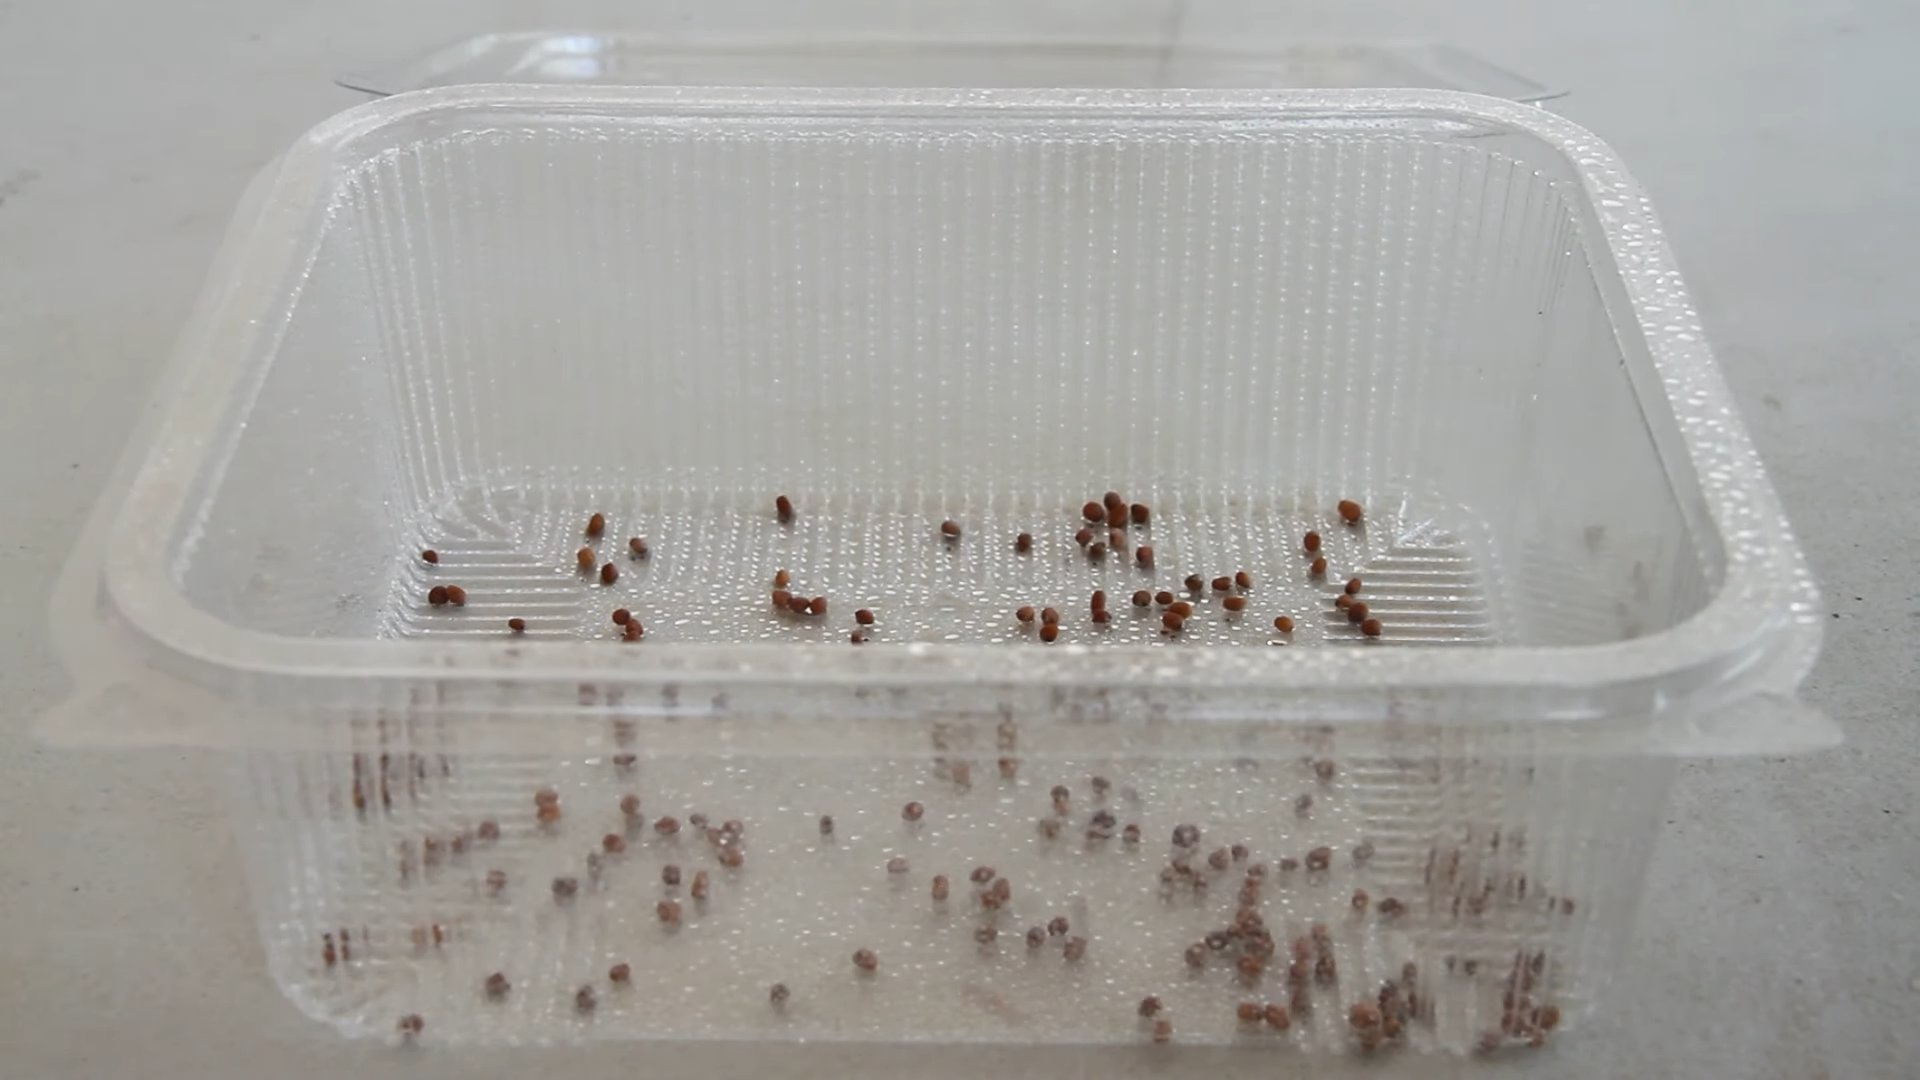
3. Sow the Seeds: This is where the magic happens! Sprinkle your microgreen seeds evenly over the surface of the growing medium. Don’t be afraid to be generous – microgreens are grown densely. For smaller seeds like radish or broccoli, you can aim for a fairly thick layer. For larger seeds like sunflower or pea shoots, you can space them out a little more.
4. Gently Press the Seeds: After sowing, gently press the seeds into the growing medium. This helps ensure good contact between the seeds and the moisture. You can use your fingers or a flat object like a spatula.
5. Mist with Water: Using your spray bottle, thoroughly mist the surface of the growing medium with water. You want to make sure the seeds are well-moistened.
6. Cover with a Humidity Dome (Optional): If you have a humidity dome or plastic wrap, cover the tray to create a humid environment. This will help the seeds germinate faster. If you’re using plastic wrap, make sure to poke a few holes for ventilation.
7. Blackout Period: This is a crucial step for many microgreen varieties. Place the tray in a dark place for 2-3 days. This encourages the seeds to sprout and develop strong stems. You can use a cupboard, a closet, or even cover the tray with a dark towel.
8. Check for Germination: After 2-3 days, check for germination. You should see tiny sprouts emerging from the soil.
9. Introduce Light: Once the seeds have germinated, remove the humidity dome (if you used one) and move the tray to a location with bright, indirect light. A sunny windowsill is ideal, but if you don’t have one, a grow light will work wonders.
10. Water Regularly: Keep the growing medium consistently moist, but not soggy. Water from the bottom by pouring water into the drainage tray (the one underneath the growing tray). The growing medium will absorb the water through the drainage holes. Alternatively, you can continue to mist the surface with your spray bottle.
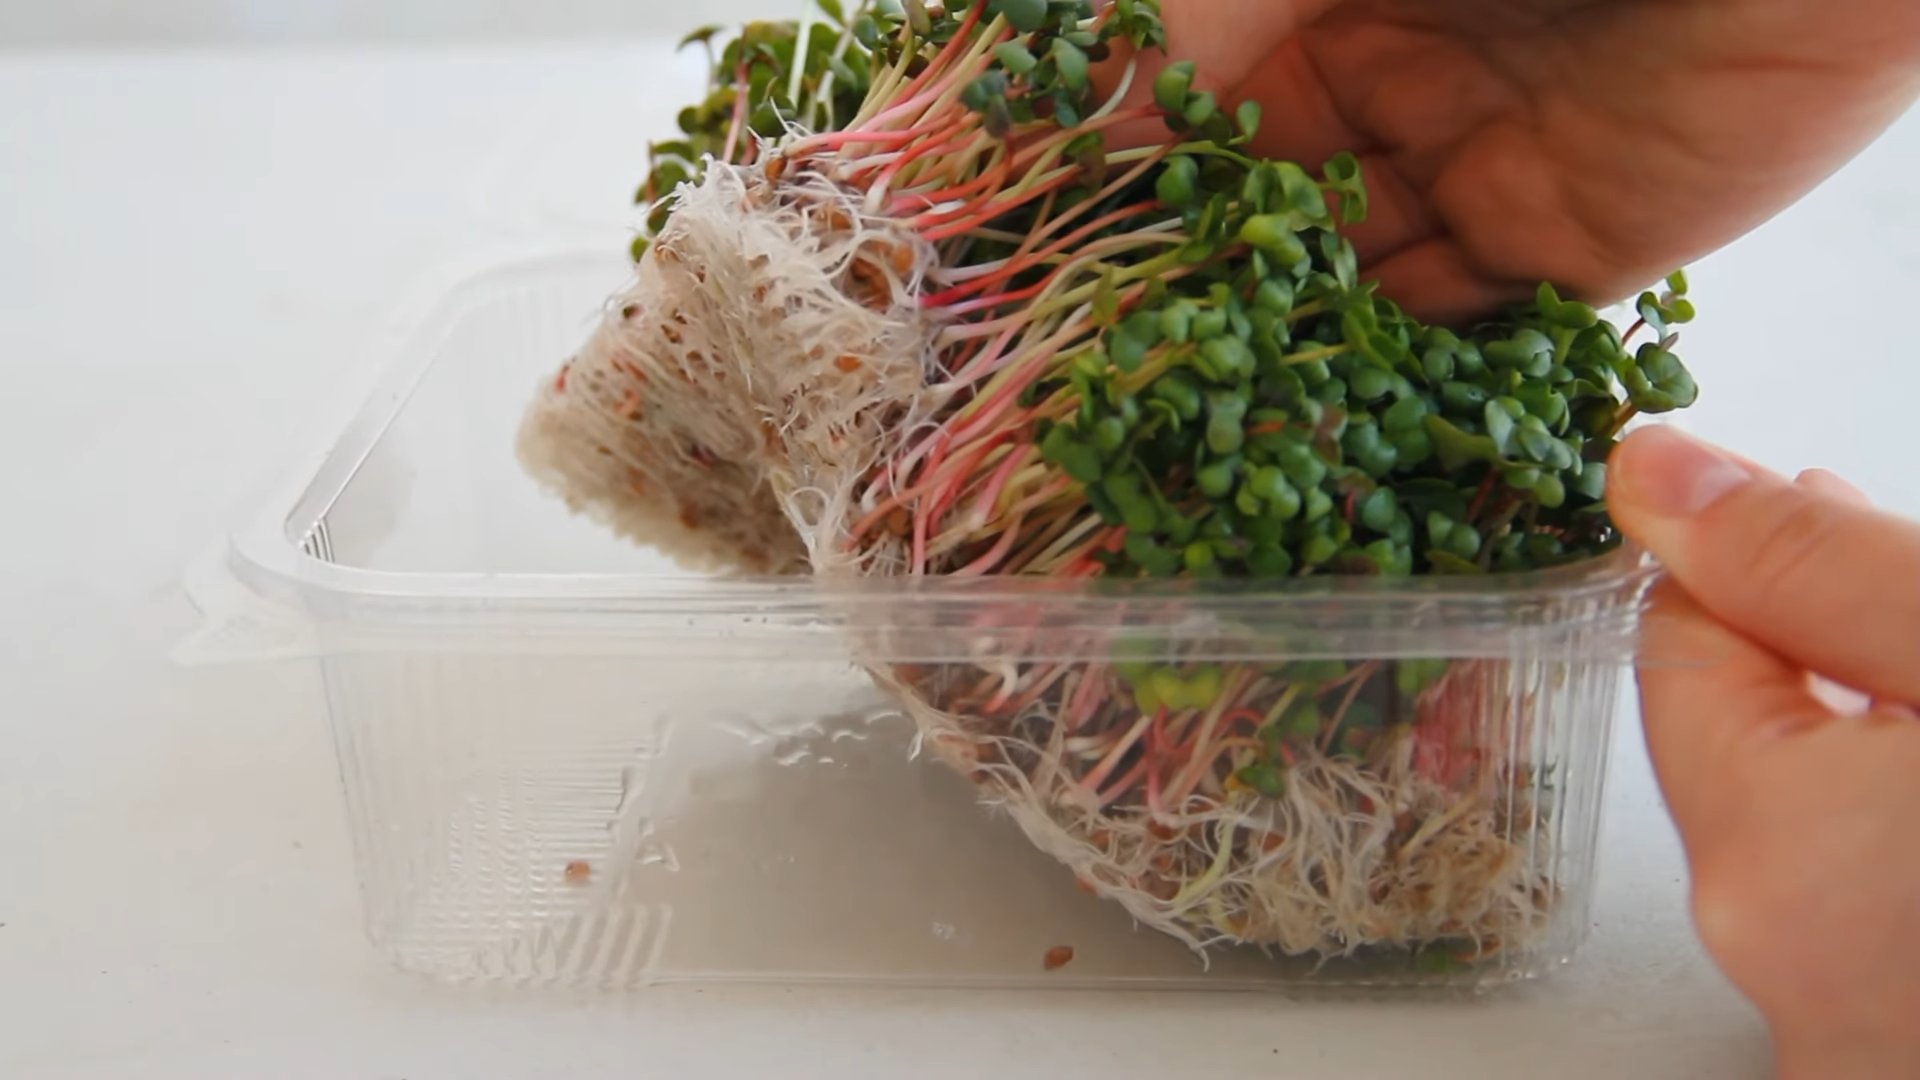
11. Harvest Time! Your microgreens will be ready to harvest in about 7-14 days, depending on the variety. They’re ready when they have developed their first set of true leaves (the leaves that appear after the initial seed leaves).
12. Harvesting Your Microgreens: To harvest, simply use scissors or a sharp knife to cut the microgreens just above the soil line. Wash them gently and enjoy!
Troubleshooting Tips: Common Issues and Solutions
Even with the best intentions, things don’t always go according to plan. Here are some common issues you might encounter and how to fix them:
* Mold: Mold can sometimes appear on the surface of the growing medium, especially if it’s too wet. To prevent mold, ensure good ventilation and avoid overwatering. If you see mold, you can try spraying the affected area with a diluted hydrogen peroxide solution (1 part hydrogen peroxide to 10 parts water).
* Leggy Microgreens: Leggy microgreens are tall and spindly, with long stems and small leaves. This is usually caused by insufficient light. Move your tray to a brighter location or use a grow light.
* Slow Germination: If your seeds are taking a long time to germinate, it could be due to several factors, including cold temperatures, dry growing medium, or old seeds. Make sure the temperature is warm enough (around 65-75°F), keep the growing medium consistently moist, and use fresh seeds.
* Uneven Growth: Uneven growth can be caused by uneven watering or uneven light exposure. Make sure to water evenly and rotate the tray regularly to ensure all sides receive equal light.
Choosing the Right Seeds: A Microgreen Variety Guide
The world of microgreens is vast and exciting! Here’s a quick guide to some popular varieties and their flavor profiles:
* Radish: Spicy and peppery. A classic microgreen that adds a kick to any dish.
* Broccoli: Mild and slightly sweet. A nutritional powerhouse packed with vitamins and antioxidants.
* Sunflower: Nutty and crunchy. A delicious and satisfying microgreen that’s great in salads and sandwiches.
* Pea Shoots: Sweet and tender. A delicate microgreen that tastes like fresh peas.
* Kale: Earthy and slightly bitter. A healthy and flavorful microgreen that’s rich in vitamins and minerals.
* Arugula: Peppery and slightly bitter. A flavorful microgreen that adds a zesty touch to salads and pizzas.
* Mustard: Spicy and pungent. A bold microgreen that adds a fiery kick to any dish.
* Beet: Earthy and slightly sweet. A colorful microgreen that adds a vibrant touch to salads and sandwiches.
Maintaining Your Microgreen Garden: Tips for Success
Here are a few extra tips to help you keep your microgreen garden thriving:
* Rotate Your Crops: After harvesting a batch of microgreens, it’s best to start with fresh growing medium. This helps prevent the buildup of diseases and pests.
Hey there, fellow green thumbs! I’m so excited to share my super simple and affordable DIY microgreens setup. Forget those expensive store-bought containers – we’re going to create a thriving microgreen garden right in your kitchen, using materials you probably already have! Microgreens are packed with nutrients and add a burst of flavor to salads, sandwiches, and just about anything. Let’s get growing!
What You’ll Need: The Supply List
Before we dive in, let’s gather our supplies. The beauty of this project is its flexibility – feel free to substitute materials based on what you have on hand.
* Two Shallow Trays: I recommend using two identical plastic trays. One will act as the growing tray, and the other as a drainage tray. Think takeout containers, seedling trays, or even repurposed storage containers. Just make sure one can nest inside the other with a little space in between.
* Growing Medium: You have a few options here. I personally love using coconut coir (also known as coco coir) because it’s sustainable and holds moisture well. You can also use seed starting mix, potting soil (make sure it’s fine and doesn’t contain large chunks), or even paper towels.
* Microgreen Seeds: This is where the fun begins! Choose your favorite microgreen varieties. Radish, broccoli, sunflower, pea shoots, and kale are all popular and easy to grow. You can find microgreen seeds online or at your local garden center.
* Spray Bottle: A simple spray bottle is essential for keeping your microgreens moist.
* Water: Tap water is fine, but filtered water is even better.
* Optional: Grow Light: While not strictly necessary, a grow light can significantly improve your microgreen yield, especially if you don’t have a sunny windowsill.
* Optional: Humidity Dome: A clear plastic lid or even plastic wrap can help create a humid environment for germination.
Step-by-Step Instructions: From Seed to Sprout
Okay, let’s get our hands dirty! Here’s a detailed breakdown of how to set up your DIY microgreen garden:
1. Prepare Your Growing Medium: If you’re using coconut coir, you’ll need to hydrate it. Place the coir brick or block in a large container and add water according to the package instructions. It will expand significantly! Once it’s fully hydrated, fluff it up with your hands. If you’re using seed starting mix or potting soil, simply moisten it with water until it’s damp but not soggy.
2. Fill the Growing Tray: Take your growing tray (the one that will hold the soil) and fill it with your prepared growing medium. Aim for a depth of about 1-2 inches. Gently pat down the surface to create a level planting bed.
3. Sow the Seeds: This is where the magic happens! Sprinkle your microgreen seeds evenly over the surface of the growing medium. Don’t be afraid to be generous – microgreens are grown densely. For smaller seeds like radish or broccoli, you can aim for a fairly thick layer. For larger seeds like sunflower or pea shoots, you can space them out a little more.
4. Gently Press the Seeds: After sowing, gently press the seeds into the growing medium. This helps ensure good contact between the seeds and the moisture. You can use your fingers or a flat object like a spatula.
5. Mist with Water: Using your spray bottle, thoroughly mist the surface of the growing medium with water. You want to make sure the seeds are well-moistened.
6. Cover with a Humidity Dome (Optional): If you have a humidity dome or plastic wrap, cover the tray to create a humid environment. This will help the seeds germinate faster. If you’re using plastic wrap, make sure to poke a few holes for ventilation.
7. Blackout Period: This is a crucial step for many microgreen varieties. Place the tray in a dark place for 2-3 days. This encourages the seeds to sprout and develop strong stems. You can use a cupboard, a closet, or even cover the tray with a dark towel.
8. Check for Germination: After 2-3 days, check for germination. You should see tiny sprouts emerging from the soil.
9. Introduce Light: Once the seeds have germinated, remove the humidity dome (if you used one) and move the tray to a location with bright, indirect light. A sunny windowsill is ideal, but if you don’t have one, a grow light will work wonders.
10. Water Regularly: Keep the growing medium consistently moist, but not soggy. Water from the bottom by pouring water into the drainage tray (the one underneath the growing tray). The growing medium will absorb the water through the drainage holes. Alternatively, you can continue to mist the surface with your spray bottle.
11. Harvest Time! Your microgreens will be ready to harvest in about 7-14 days, depending on the variety. They’re ready when they have developed their first set of true leaves (the leaves that appear after the initial seed leaves).
12. Harvesting Your Microgreens: To harvest, simply use scissors or a sharp knife to cut the microgreens just above the soil line. Wash them gently and enjoy!
Troubleshooting Tips: Common Issues and Solutions
Even with the best intentions, things don’t always go according to plan. Here are some common issues you might encounter and how to fix them:
* Mold: Mold can sometimes appear on the surface of the growing medium, especially if it’s too wet. To prevent mold, ensure good ventilation and avoid overwatering. If you see mold, you can try spraying the affected area with a diluted hydrogen peroxide solution (1 part hydrogen peroxide to 10 parts water).
* Leggy Microgreens: Leggy microgreens are tall and spindly, with long stems and small leaves. This is usually caused by insufficient light. Move your tray to a brighter location or use a grow light.
* Slow Germination: If your seeds are taking a long time to germinate, it could be due to several factors, including cold temperatures, dry growing medium, or old seeds. Make sure the temperature is warm enough (around 65-75°F), keep the growing medium consistently moist, and use fresh seeds.
* Uneven Growth: Uneven growth can be caused by uneven watering or uneven light exposure. Make sure to water evenly and rotate the tray regularly to ensure all sides receive equal light.
Choosing the Right Seeds: A Microgreen Variety Guide
The world of microgreens is vast and exciting! Here’s a quick guide to some popular varieties and their flavor profiles:
* Radish: Spicy and peppery. A classic microgreen that adds a kick to any dish.
* Broccoli: Mild and slightly sweet. A nutritional powerhouse packed with vitamins and antioxidants.
* Sunflower: Nutty and crunchy. A delicious and satisfying microgreen that’s great in salads and sandwiches.
* Pea Shoots: Sweet and tender. A delicate microgreen that tastes like fresh peas.
* Kale: Earthy and slightly bitter. A healthy and flavorful microgreen that’s rich in vitamins and minerals.
* Arugula: Peppery and slightly bitter. A flavorful microgreen that adds a zesty touch to salads and pizzas.
* Mustard: Spicy and pungent. A bold microgreen that adds a fiery kick to any dish.
* Beet: Earthy and slightly sweet. A colorful microgreen that adds a vibrant touch to salads and sandwiches.
Maintaining Your Microgreen Garden: Tips for Success
Here are a few extra tips to help you keep your microgreen garden thriving:
* Rotate Your Crops: After harvesting a batch of microgreens, it’s best to start with fresh growing medium. This helps prevent the buildup of diseases and pests.
* Clean Your Trays: Before reusing your trays, wash them thoroughly with soap and water to remove any lingering bacteria or mold spores.
* Experiment with Different Varieties: Don’t be afraid to try different microgreen varieties to find your favorites. You can even create your own custom blends!
* Enjoy the Process! Growing microgreens is a fun and rewarding experience. Enjoy watching your tiny seeds transform into a vibrant and nutritious harvest.
Harvesting and Using Your Microgreens: From Garden to Plate
Now that you’ve successfully grown your microgreens, it’s time to enjoy the fruits (or rather, the greens!) of your labor. Here are some ideas for harvesting and using your microgreens:
* Harvesting: As mentioned earlier, harvest your microgreens when they have developed their first set of true leaves. Use scissors or a sharp knife to cut them just above the soil line.
* Washing: Gently wash your microgreens in cool water to remove any dirt or debris.
* Storing: Store your harvested micro
Conclusion
So, there you have it! Creating your own DIY microgreens setup isn’t just a fun project; it’s a gateway to fresh, nutrient-packed greens right at your fingertips. Forget those expensive, pre-packaged containers from the grocery store. With a little ingenuity and minimal investment, you can cultivate a thriving microgreen garden in your own home, regardless of your space or gardening experience.
The beauty of this DIY approach lies in its adaptability. Feel free to experiment with different containers. Upcycle plastic takeout containers, repurpose old trays, or even get creative with mason jars for a charming, rustic look. The key is ensuring proper drainage and adequate light.
Speaking of light, while a sunny windowsill can work, consider investing in a small LED grow light, especially if you live in an area with limited sunlight or want to grow microgreens year-round. The consistent light source will promote faster and more even growth, resulting in a more bountiful harvest.
Don’t be afraid to branch out and try different microgreen varieties! Radish, broccoli, sunflower, pea shoots, and mustard greens are all excellent choices for beginners. Each offers a unique flavor profile and nutritional benefits, adding exciting variety to your salads, sandwiches, and smoothies. You can even create your own custom blends for a truly personalized culinary experience.
Beyond the cost savings and the sheer enjoyment of watching your little greens sprout and flourish, growing your own microgreens offers a significant health boost. These tiny plants are packed with vitamins, minerals, and antioxidants, far exceeding the nutritional value of their mature counterparts. Incorporating them into your diet is a simple and delicious way to enhance your overall well-being.
This DIY microgreens setup is more than just a gardening project; it’s an investment in your health, your creativity, and your connection to nature. It’s a sustainable and rewarding way to bring fresh, vibrant flavors to your table, all while minimizing your environmental impact.
We wholeheartedly encourage you to give this DIY project a try. It’s easier than you might think, and the rewards are well worth the effort. Once you’ve experienced the satisfaction of harvesting your own homegrown microgreens, you’ll never look at store-bought greens the same way again.
And most importantly, we want to hear about your experiences! Share your photos, tips, and challenges in the comments below. Let’s build a community of microgreen enthusiasts and inspire others to embark on this exciting journey. What varieties did you try? What containers worked best for you? What challenges did you overcome? Your insights can help others succeed and further refine this DIY microgreens setup. Happy growing!
Frequently Asked Questions (FAQ)
What exactly are microgreens, and why should I grow them?
Microgreens are young vegetable greens that are typically harvested 7-14 days after germination, when the first true leaves have emerged. They are essentially baby versions of mature vegetables and herbs, packed with a concentrated dose of nutrients. Growing them yourself ensures freshness, saves money compared to buying them at the store, and allows you to control the growing environment, ensuring they are free from pesticides and herbicides. Plus, they add a burst of flavor and visual appeal to any dish!
What kind of container should I use for my DIY microgreens setup?
The beauty of a DIY setup is its flexibility. You can use almost any shallow container with drainage holes. Recycled plastic takeout containers, seedling trays, propagation trays, or even repurposed plastic storage bins work well. Just make sure the container is clean and has adequate drainage to prevent waterlogging, which can lead to mold and fungal growth. If you’re using a container without drainage holes, you’ll need to be extra careful with watering to avoid overwatering. A layer of gravel at the bottom can help with drainage in such cases, but it’s still not ideal.
What kind of soil should I use for growing microgreens?
A soilless growing medium is generally recommended for microgreens. This helps to prevent soilborne diseases and pests. Options include coconut coir, peat moss, vermiculite, or a commercially available seed starting mix. Avoid using garden soil, as it can be too dense and may contain pathogens. Ensure the growing medium is well-draining and retains moisture. Pre-moisten the medium before sowing the seeds for optimal germination.
How much light do microgreens need?
Microgreens need plenty of light to thrive. A sunny windowsill that receives at least 4-6 hours of direct sunlight per day can work, but a supplemental grow light is highly recommended, especially if you live in an area with limited sunlight or want to grow microgreens year-round. LED grow lights are energy-efficient and provide the full spectrum of light needed for healthy growth. Position the light a few inches above the microgreens and adjust as they grow.
How often should I water my microgreens?
Watering is crucial for successful microgreen cultivation. Keep the growing medium consistently moist, but not waterlogged. Water from the bottom by placing the container in a tray of water and allowing the medium to absorb the moisture. Alternatively, you can gently mist the surface of the medium with a spray bottle. Avoid overwatering, as this can lead to fungal growth and damping-off disease. Check the moisture level daily and adjust watering as needed.
What are some common problems I might encounter, and how can I fix them?
One common problem is mold or fungal growth, which is often caused by overwatering or poor ventilation. To prevent this, ensure proper drainage, avoid overwatering, and provide adequate airflow. If you see mold, remove the affected areas and consider using a diluted hydrogen peroxide solution to spray the remaining microgreens. Another common issue is leggy growth, which is usually caused by insufficient light. Ensure your microgreens are receiving enough light, either from a sunny windowsill or a grow light. Pests are less common with indoor microgreens, but if you encounter any, try using a natural insecticidal soap.
How long does it take for microgreens to grow?
The germination and growth time for microgreens varies depending on the variety. Generally, most microgreens are ready to harvest within 7-14 days after germination. Radish and mustard greens tend to grow quickly, while sunflower and pea shoots may take a bit longer. Keep an eye on your microgreens and harvest them when they have developed their first true leaves and are about 1-3 inches tall.
How do I harvest my microgreens?
Harvesting microgreens is easy! Simply use a pair of clean scissors or a sharp knife to cut the stems just above the growing medium. Wash the microgreens gently before using them. It’s best to harvest microgreens just before you plan to use them for the freshest flavor and optimal nutritional value.
Can I reuse the growing medium after harvesting my microgreens?
It’s generally not recommended to reuse the growing medium after harvesting microgreens. This is because the medium may contain residual roots, seeds, and potential pathogens. It’s best to start with fresh growing medium for each batch of microgreens to ensure optimal growth and prevent disease.
What are some creative ways to use microgreens in my cooking?
Microgreens are incredibly versatile and can be used in a wide variety of dishes. Add them to salads, sandwiches, wraps, and tacos for a burst of flavor and texture. Use them as a garnish for soups, stews, and entrees. Blend them into smoothies for a nutritional boost. Incorporate them into omelets, frittatas, and quiches. The possibilities are endless! Experiment with different varieties to find your favorite flavor combinations.

Leave a Comment