
DIY plastic bottle planters: who knew turning trash into treasure could be so rewarding? I’m so excited to share some amazing and easy ways to create beautiful planters from something you probably already have lying around – plastic bottles! For generations, resourceful gardeners have sought innovative ways to nurture their plants, and repurposing materials has always been a key part of that ingenuity. Think about it – from ancient civilizations using clay pots to modern-day gardeners upcycling containers, the spirit of making the most of what you have is deeply rooted in our gardening heritage.
But why should you bother with DIY plastic bottle planters? Well, for starters, it’s incredibly budget-friendly! Gardening can sometimes feel expensive, but this is a fantastic way to save money and reduce waste simultaneously. Plus, it’s a fun and engaging project for the whole family. Imagine the satisfaction of watching your seedlings sprout in a planter you created yourself! Beyond the cost savings and the fun factor, these planters are surprisingly versatile. You can customize them to fit any space, from a sunny windowsill to a sprawling balcony. So, let’s dive in and transform those discarded bottles into vibrant homes for your favorite plants!
DIY Delight: Transforming Plastic Bottles into Adorable Planters
Hey there, fellow DIY enthusiasts! I’m so excited to share this super fun and eco-friendly project with you: turning those discarded plastic bottles into charming little planters. Not only is this a great way to recycle, but it also adds a touch of personality to your home or garden. Plus, it’s incredibly easy and budget-friendly! Let’s dive in!
What You’ll Need: The Essential Supplies
Before we get started, let’s gather all the necessary materials. Trust me, having everything ready beforehand will make the process much smoother.
* Plastic Bottles: The stars of our show! Any size or shape will work, but I personally love using 2-liter soda bottles or larger juice containers. Just make sure they’re clean and dry.
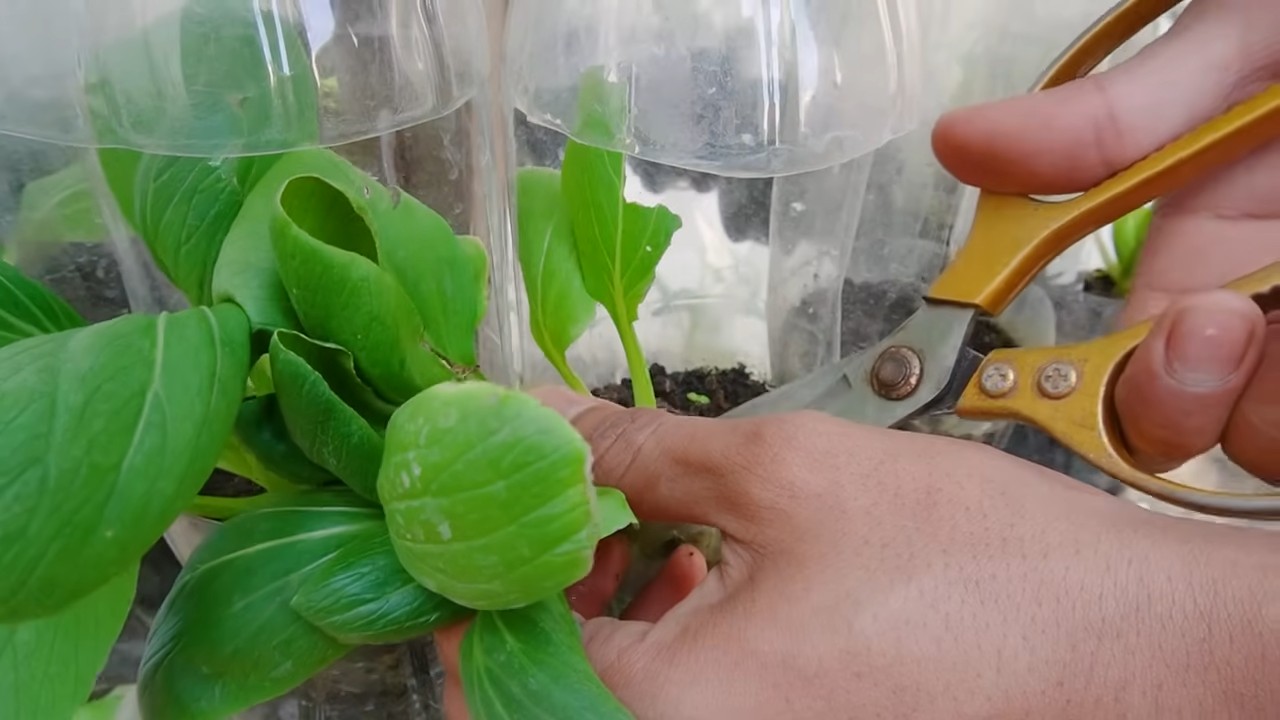
* Scissors or Utility Knife: For cutting the bottles. A sharp utility knife works best for thicker plastic, but scissors are perfectly fine for thinner ones. Be careful when using sharp objects!
* Paint: Acrylic paint is my go-to for this project. It’s durable, water-resistant, and comes in a huge range of colors. You can also use spray paint for a quicker and more even finish.
* Paintbrushes: A variety of sizes will come in handy for different details.
* Potting Soil: To give your plants a happy home.
* Plants or Seeds: Choose plants that are suitable for the size of your planters. Herbs, succulents, and small flowers are all great options.
* Optional:
* Markers: For adding details and designs. Permanent markers work best.
* Sandpaper: To smooth out any rough edges after cutting.
* Primer: If you’re using spray paint, a primer will help the paint adhere better.
* Googly Eyes: For adding a touch of whimsy!
* Twine or Rope: For hanging your planters.
* Drill or Awl: To create drainage holes.
Step-by-Step Guide: Creating Your Plastic Bottle Planters
Okay, let’s get our hands dirty! Here’s a detailed guide to creating your own adorable plastic bottle planters.
1. Prepare the Bottle:
* Rinse the plastic bottle thoroughly with soap and water to remove any residue.
* Dry the bottle completely. This is important for the paint to adhere properly.
* Remove the label. Some labels peel off easily, while others might require a bit of soaking in warm, soapy water.
2. Cut the Bottle:
* Decide where you want to cut the bottle. You can cut it in half, leaving the bottom portion as the planter, or you can cut out a section from the side to create a unique shape.
* If you’re cutting the bottle in half, use a marker to draw a line around the bottle where you want to cut.
* Carefully cut along the line using scissors or a utility knife. Remember to be extra cautious when using sharp tools!
* If you’re cutting out a section from the side, draw the shape you want to create (e.g., an oval, a rectangle, or even a fun animal shape) and then cut along the lines.
3. Smooth the Edges (Optional):
* After cutting, the edges of the plastic bottle might be a bit rough. To smooth them out, use sandpaper to gently sand the edges until they’re smooth to the touch. This will prevent any accidental cuts later on.
4. Create Drainage Holes:
* Drainage is crucial for healthy plant growth. Without drainage, the roots can become waterlogged and rot.
* Use a drill or an awl to create a few drainage holes in the bottom of the planter. I usually make about 3-4 holes, depending on the size of the planter.
* If you don’t have a drill or awl, you can also use a hot nail or a screwdriver to carefully poke holes in the plastic. Be careful not to burn yourself!
5. Prime the Bottle (Optional):
* If you’re using spray paint, applying a primer beforehand will help the paint adhere better and create a more even finish.
* Apply a thin, even coat of primer to the entire surface of the planter.
* Let the primer dry completely according to the manufacturer’s instructions.
6. Paint the Bottle:
* Now comes the fun part: painting! You can use acrylic paint or spray paint, depending on your preference.
* If you’re using acrylic paint, apply a thin, even coat to the entire surface of the planter. You might need to apply multiple coats to achieve the desired color intensity.
* If you’re using spray paint, hold the can about 10-12 inches away from the planter and spray in short, even bursts. Avoid spraying too much paint in one area, as this can cause drips.
* Let the paint dry completely between coats.
7. Add Decorations (Optional):
* Once the paint is dry, you can add decorations to your planter. This is where you can really let your creativity shine!
* Use markers to draw patterns, designs, or even faces on the planter.
* Glue on googly eyes for a whimsical touch.
* Wrap twine or rope around the planter for a rustic look.
* Get creative and experiment with different materials and techniques!
8. Plant Your Plants:
* Now it’s time to give your plants a new home!
* Fill the planter with potting soil, leaving about an inch of space at the top.
* Carefully remove your plant from its original container and gently loosen the roots.
* Place the plant in the center of the planter and add more potting soil around the roots.
* Water the plant thoroughly.
9. Hang Your Planters (Optional):
* If you want to hang your planters, you can use twine or rope.
* Cut two pieces of twine or rope to the desired length.
* Tie one end of each piece of twine or rope to opposite sides of the planter.
* Hang the planter in a sunny spot and enjoy!
Creative Ideas: Taking Your Planters to the Next Level
Want to make your plastic bottle planters even more unique and eye-catching? Here are a few creative ideas to inspire you:
* Animal Planters: Cut the bottle into the shape of an animal, such as a cat, dog, or bunny. Paint the planter to match the animal’s colors and add details like ears, eyes, and a nose.
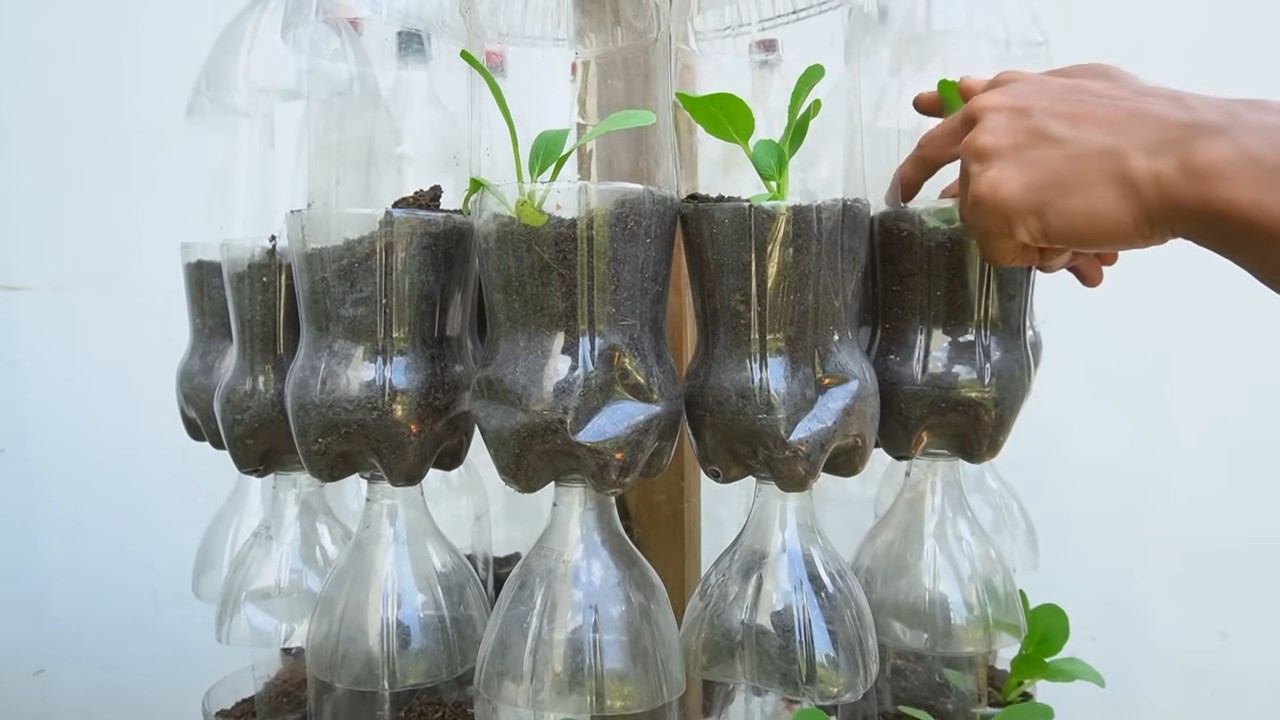
* Hanging Planters: Create a series of hanging planters by cutting the bottles in half and attaching them to a piece of wood or a metal rod. This is a great way to create a vertical garden.
* Self-Watering Planters: Create a self-watering planter by cutting the bottle in half and inverting the top half into the bottom half. Fill the bottom half with water and the top half with potting soil. The water will slowly wick up into the soil, keeping your plants hydrated.
* Chalkboard Planters: Paint the planter with chalkboard paint and use chalk to write the name of the plant or a fun message on the planter.
* Mosaic Planters: Glue small pieces of tile, glass, or beads onto the planter to create a mosaic design.
Troubleshooting Tips: Addressing Common Issues
Sometimes, things don’t go exactly as planned. Here are a few troubleshooting tips to help you overcome common issues:
* Paint not adhering: Make sure the bottle is clean and dry before painting. You can also try sanding the surface of the bottle lightly to create a better surface for the paint to adhere to. Using a primer also helps.
* Drips in the paint: Avoid spraying too much paint in one area. Apply thin, even coats and let the paint dry completely between coats.
* Drainage holes too small: Use a larger drill bit or awl to create larger drainage holes.
* Plants wilting: Make sure your plants are getting enough sunlight and water. Also, check the drainage holes to make sure they’re not clogged.
Safety First: Important Precautions
Before you start this project, it’s important to keep safety in mind.
* Sharp Objects: Be extremely careful when using scissors or a utility knife. Always cut away from yourself and use a cutting board or mat to protect your work surface.
* Hot Glue Gun: If you’re using a hot glue gun, be careful not to burn yourself. Always use a glue gun mat or a piece of cardboard to protect your work surface.
* Spray Paint: When using spray paint, work in a well-ventilated area and wear a mask
Conclusion
So, there you have it! Transforming discarded plastic bottles into charming and functional planters is not just a clever way to recycle; it’s a rewarding and surprisingly simple project that anyone can undertake. We’ve walked you through the process, highlighting the ease and affordability of creating your own miniature gardens from something that would otherwise end up in a landfill.
But why is this DIY plastic bottle planters trick a must-try? Beyond the obvious environmental benefits, these planters offer a unique opportunity to personalize your living space. Imagine a vibrant collection of herbs thriving on your kitchen windowsill, or a splash of color brightening up your balcony with cascading flowers, all nurtured in planters you crafted yourself. The satisfaction of growing your own plants is amplified when you know you’ve also contributed to a more sustainable lifestyle.
Furthermore, these planters are incredibly versatile. They’re perfect for small spaces, making them ideal for apartment dwellers or anyone with limited gardening area. They’re also lightweight and easy to move, allowing you to rearrange your green oasis as you please. And let’s not forget the cost savings! Forget expensive store-bought planters; with a little creativity and some readily available materials, you can create a whole garden for next to nothing.
Looking for variations? Consider painting your planters with vibrant colors or intricate designs to match your décor. You could also experiment with different bottle sizes and shapes to create a tiered garden or a unique wall display. For a more rustic look, try wrapping the planters with twine or burlap. Get the kids involved and let them decorate their own planters – it’s a fantastic way to teach them about recycling and gardening. You can even use different types of soil mixes depending on the plants you intend to grow. Succulents, for example, thrive in well-draining soil, while herbs often prefer a richer, more moisture-retentive mix.
Don’t be afraid to experiment with different plants, too. Herbs like basil, mint, and chives are excellent choices for plastic bottle planters, as are small flowering plants like pansies and petunias. You can even try growing vegetables like lettuce or spinach in larger bottles. The possibilities are endless!
We wholeheartedly encourage you to give this DIY plastic bottle planters project a try. It’s a fun, eco-friendly, and budget-friendly way to add a touch of green to your life. Once you’ve created your own upcycled planters, we’d love to see your creations! Share your photos and experiences with us on social media using [Your Hashtag Here]. Let’s inspire others to embrace sustainable living and transform their trash into treasure. Happy planting!
Frequently Asked Questions (FAQ)
What types of plastic bottles are best for making planters?
The best types of plastic bottles for making planters are those made from thicker, more durable plastic, such as soda bottles or water bottles. Avoid using bottles that are too thin or flimsy, as they may not be able to support the weight of the soil and plants. Clear or translucent bottles are ideal because they allow you to monitor the soil moisture levels more easily. However, you can use colored bottles as well, especially if you plan to paint or decorate them. Just be mindful that darker colors may absorb more heat, which could affect the soil temperature.
How do I ensure proper drainage in my plastic bottle planters?
Proper drainage is crucial for the health of your plants. To ensure adequate drainage, you need to create drainage holes in the bottom of the bottle. You can do this by using a drill, a hot nail, or a pair of scissors. Make sure to create several holes to allow excess water to escape. You can also add a layer of gravel or small stones to the bottom of the planter before adding the soil. This will help to prevent the drainage holes from becoming clogged and improve overall drainage.
What kind of soil should I use for my plastic bottle planters?
The type of soil you use will depend on the plants you intend to grow. In general, a good quality potting mix is a suitable choice for most plants. Avoid using garden soil, as it can be too heavy and may not drain well in a container. For succulents and cacti, use a well-draining soil mix specifically formulated for these types of plants. For herbs, a slightly richer soil mix with added compost is often beneficial. You can also amend your potting mix with perlite or vermiculite to improve drainage and aeration.
How often should I water my plants in plastic bottle planters?
The frequency of watering will depend on several factors, including the type of plant, the size of the planter, the climate, and the type of soil. As a general rule, water your plants when the top inch of soil feels dry to the touch. Avoid overwatering, as this can lead to root rot. When watering, water thoroughly until water drains out of the drainage holes. During hot weather, you may need to water more frequently. Check the soil moisture levels regularly to ensure your plants are getting the right amount of water.
Are plastic bottle planters safe for growing edible plants?
This is a common concern, and it’s important to address it. While some plastics can leach chemicals into the soil, the risk is generally low with the types of plastic used for most beverage bottles (PET or HDPE). However, to be extra cautious, avoid using bottles that have been exposed to high temperatures or harsh chemicals. You can also line the inside of the planter with a food-grade plastic liner to create a barrier between the soil and the plastic. Ultimately, the decision of whether or not to use plastic bottle planters for edible plants is a personal one. If you have concerns, you may want to consider using alternative materials, such as terracotta pots or fabric planters.
How do I prevent my plastic bottle planters from tipping over?
Plastic bottle planters can be lightweight and prone to tipping over, especially when filled with soil and plants. To prevent this, you can add weight to the bottom of the planter. This can be done by placing a layer of gravel or small stones at the bottom of the bottle before adding the soil. You can also place the planters inside a larger, heavier container for added stability. Another option is to create a stand or base for the planters to sit on.
How do I clean my plastic bottle planters?
To clean your plastic bottle planters, simply wash them with soap and water. You can use a mild dish soap or a specialized cleaning solution for plants. Rinse the planters thoroughly to remove any soap residue. If you notice any algae or mold growth, you can scrub the planters with a brush and a solution of water and bleach (1 part bleach to 10 parts water). Be sure to rinse the planters thoroughly after using bleach to remove any traces of the chemical.
Can I use plastic bottle planters indoors and outdoors?
Yes, you can use plastic bottle planters both indoors and outdoors. However, there are a few things to consider. When using them outdoors, make sure to choose a location that is protected from strong winds, as they can easily tip over. Also, be aware that plastic can degrade over time when exposed to sunlight, so the planters may not last as long outdoors as they would indoors. When using them indoors, make sure to provide adequate light for your plants. You may need to supplement natural light with artificial grow lights.
How long will my plastic bottle planters last?
The lifespan of your plastic bottle planters will depend on several factors, including the type of plastic, the climate, and how well you care for them. In general, they can last for several months to a few years. To extend their lifespan, avoid exposing them to extreme temperatures or harsh chemicals. Clean them regularly and protect them from strong winds. When they eventually start to crack or degrade, you can simply recycle them and make new ones!


Leave a Comment