
Watermelon Gardening Hacks: Grow Juicy Melons Like a Pro!
Watermelon gardening hacks are my absolute favorite! There’s something incredibly rewarding about nurturing a tiny seed into a plump, juicy watermelon, bursting with summer sweetness. This isn’t just about growing a fruit; it’s about connecting with nature and enjoying the fruits (pun intended!) of your labor. For generations, watermelon cultivation has been a source of sustenance and celebration across cultures, from ancient Egypt, where depictions of watermelons adorn tomb walls, to modern-day backyard gardens. But let’s be honest, growing a successful watermelon crop can sometimes feel like a gamble. That’s why I’ve compiled these Watermelon Gardening Hacks – a collection of clever tips and tricks to help you achieve a bountiful harvest, even if you’re a gardening novice.
Why bother with all this effort? Because nothing beats the taste of a homegrown watermelon, sun-ripened and bursting with flavor. Store-bought melons often lack that intense sweetness and satisfying crunch. Plus, there’s a deep satisfaction in knowing exactly where your food comes from and how it was grown. These Watermelon Gardening Hacks will guide you through everything from choosing the right seeds and preparing the soil to dealing with common pests and diseases. We’ll explore simple, yet effective DIY solutions to common watermelon growing challenges, ensuring you get the most out of your gardening experience.
Get Ready to Grow the Sweetest Watermelons Ever!
Whether you have a sprawling backyard or a small balcony, these hacks will empower you to cultivate delicious watermelons with minimal fuss. So, let’s dive in and unlock the secrets to a successful watermelon harvest!
Amazing Rubber Band Crafts: A Comprehensive Guide
I’ve always loved the versatility of rubber bands. They’re cheap, readily available, and surprisingly capable of creating some really cool things! This guide will walk you through several fun rubber band crafts, perfect for all skill levels. Let’s get started!
Section 1: The Classic Rubber Band Ball
This is a great introductory project, perfect for kids and adults alike. It’s simple, satisfying, and a fantastic way to use up those extra rubber bands lying around.
- Materials: Lots of rubber bands (at least 100, more is better!), and your hands!
- Skill Level: Beginner
- Time Commitment: 30-60 minutes (depending on the size of the ball you want)
- Start with a small group of about 6-8 rubber bands. Twist them together to form a loose knot. Don’t worry about making it perfect; it’s just a starting point.
- Add another 6-8 rubber bands, twisting them around the initial knot. Try to keep the twists relatively even to create a more uniform ball.
- Continue adding rubber bands, grouping them in sets of 6-8, and twisting them around the growing ball. As the ball gets bigger, you might need to adjust the number of rubber bands in each group.
- Keep adding rubber bands until you reach your desired size. The more rubber bands you use, the denser and more solid the ball will become.
- Once you’re happy with the size, carefully tuck in any loose ends. You can use your fingers or a small tool to help with this. The goal is to create a smooth, round ball.
- Pro Tip: Use a variety of colors to create a visually appealing ball. You can even create patterns by strategically placing different colored rubber bands.
Section 2: Rainbow Rubber Band Bracelet
This project is a bit more intricate, but still very manageable for beginners. The result is a colorful and stylish bracelet that you can customize to your liking.
- Materials: Rubber bands in various colors, a small hook (a crochet hook works well), and a safety pin.
- Skill Level: Beginner-Intermediate
- Time Commitment: 45-90 minutes
- Start by creating a loop with one rubber band. Secure the loop by hooking it onto itself.
- Add another rubber band, creating a second loop around the first one. This will form the base of your bracelet.
- Continue adding rubber bands, one at a time, creating loops around the previous ones. Each new rubber band should create a new loop, building upon the previous layers.
- To change colors, simply switch to a different colored rubber band when you want to create a new section of color.
- As the bracelet grows, you’ll notice it starts to take shape. Keep adding rubber bands until you reach your desired length.
- Once you’ve reached the desired length, carefully remove the bracelet from the hook. Attach a safety pin to create a clasp.
- Pro Tip: Watch a video tutorial online for a visual demonstration. This can be incredibly helpful, especially when learning the technique for the first time.
Section 3: Rubber Band Loom Bracelets
This is a more advanced project that requires a rubber band loom. These looms are inexpensive and readily available online or in craft stores. The possibilities are endless with this technique!
- Materials: Rubber band loom, rubber bands in various colors, a hook.
- Skill Level: Intermediate-Advanced
- Time Commitment: Varies greatly depending on the design and complexity.
- Setting up the Loom: Familiarize yourself with your loom’s instructions. Each loom is slightly different, but the basic principle is the same: you’ll be using the pegs to create the structure for your bracelet.
- Creating the Base: Start by creating a base of rubber bands on the loom, following the instructions provided with your specific loom.
- Weaving the Pattern: This is where the creativity comes in! There are countless patterns you can create using different techniques and color combinations. Many free patterns are available online.
- Finishing the Bracelet: Once you’ve completed your desired pattern, carefully remove the bracelet from the loom. Secure the ends with a knot or a clasp.
- Experiment with Designs: Don’t be afraid to experiment with different colors, patterns, and techniques. The beauty of rubber band loom bracelets is their endless possibilities.
- Pro Tip: Start with simple patterns before attempting more complex designs. Practice makes perfect!
Section 4: Rubber Band Animals
With a little creativity and some extra materials, you can even create small rubber band animals! This requires more advanced techniques and often involves using additional materials like pipe cleaners or small beads.
- Research Designs: Find simple animal designs online. Many tutorials are available on YouTube and other craft websites.
- Gather Materials: Besides rubber bands, you might need pipe cleaners for legs and antennae, small beads for eyes, and possibly glue.
- Follow Tutorials: Carefully follow the steps outlined in your chosen tutorial. These projects often involve twisting and knotting rubber bands in specific ways to create the animal’s shape.
- Practice and Patience: Creating rubber band animals can be challenging, so be patient and don’t be discouraged if your first attempt isn’t perfect.
- Experiment with Different Animals: Once you’ve mastered a few basic designs, try creating more complex animals or even your own unique creations.
Conclusion
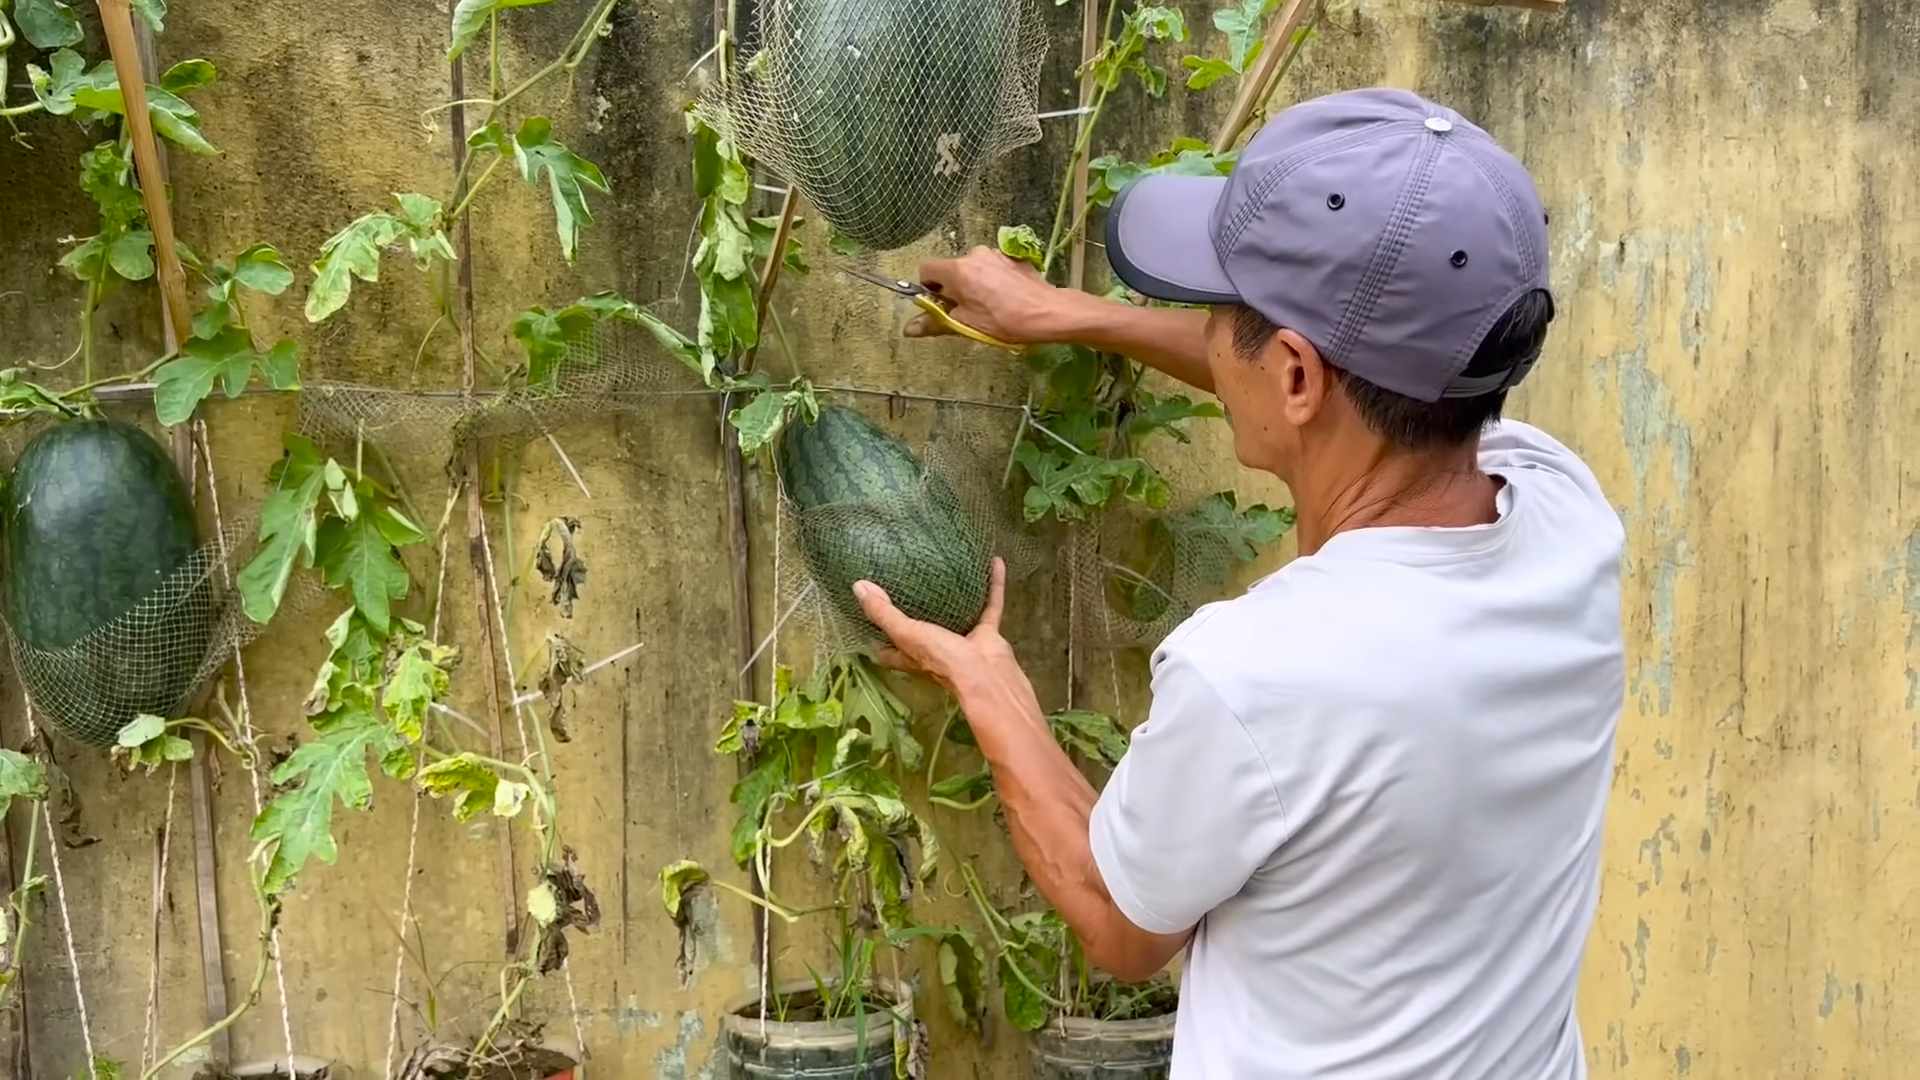
So there you have it – a collection of surprisingly effective watermelon gardening hacks designed to boost your yield and improve the overall quality of your fruit. From maximizing sunlight exposure with strategic planting to utilizing readily available household items for pest control, these DIY tricks are not just clever; they’re essential for any serious watermelon enthusiast. This isn’t about complicated, expensive solutions; it’s about leveraging simple, readily accessible methods to achieve extraordinary results. By implementing these watermelon gardening hacks, you’ll be well on your way to a bumper crop of juicy, sweet watermelons, all while minimizing your environmental impact and maximizing your gardening satisfaction.
The beauty of these hacks lies in their adaptability. Feel free to experiment and tailor them to your specific needs and growing conditions. For instance, if you’re dealing with particularly sandy soil, consider adding more organic matter to improve water retention. If you have limited space, vertical gardening techniques, as mentioned, can be a game-changer. Similarly, the type of mulch you use can be adjusted based on what’s readily available in your area – straw, grass clippings, or even shredded newspaper can all work effectively. The key is to observe your plants, understand their needs, and adapt these hacks accordingly. Don’t be afraid to get creative and find what works best for your unique gardening situation. Perhaps you’ll even discover your own innovative watermelon gardening hack to share with the community!
Ultimately, the success of your watermelon harvest hinges on understanding the plant’s requirements and providing the optimal growing conditions. These watermelon gardening hacks provide a practical and effective pathway to achieving that goal. They empower you to take control of your garden, fostering a deeper connection with the growing process and resulting in a rewarding harvest. So, ditch the expensive, complicated solutions and embrace the simplicity and effectiveness of these DIY methods. You’ll be amazed at the difference they make.
We strongly encourage you to try these watermelon gardening hacks and share your experiences with us! Whether it’s a picture of your bountiful harvest, a tip you’ve discovered, or a question you have, we’d love to hear from you. Join the conversation and let’s build a thriving community of watermelon gardeners, sharing knowledge and celebrating the joy of growing our own delicious fruit. Your success story could inspire others to embark on their own watermelon gardening journey!
Frequently Asked Questions
Q: How much sunlight do watermelons need?
Watermelons are sun-worshippers! They need at least six to eight hours of direct sunlight per day to thrive. Choose a sunny location in your garden, free from shade from trees or buildings. This is crucial for optimal fruit development and sweetness.
Q: What type of soil is best for watermelons?
Watermelons prefer well-drained, sandy loam soil that is rich in organic matter. Amend heavy clay soils with compost or other organic materials to improve drainage and aeration. Poor drainage can lead to root rot, a significant problem for watermelons.
Q: When is the best time to plant watermelons?
The best time to plant watermelons is after the last frost, when the soil temperature has warmed to at least 70°F (21°C). This ensures that the seeds germinate and the seedlings grow vigorously. Check your local frost dates for the most accurate planting time in your region.
Q: How often should I water my watermelons?
Watermelons need consistent moisture, especially during the fruiting stage. Aim for deep, infrequent watering rather than shallow, frequent watering. Water deeply at the base of the plant, avoiding wetting the leaves to prevent fungal diseases. The frequency will depend on your climate and soil type, but generally, watering once or twice a week is sufficient during dry periods.
Q: What are some common watermelon pests and diseases, and how can I prevent them?
Common watermelon pests include aphids, squash bugs, and cucumber beetles. Regularly inspect your plants for signs of infestation and use appropriate pest control methods, such as handpicking pests, using insecticidal soap, or introducing beneficial insects. Diseases like powdery mildew and anthracnose can also affect watermelons. Good air circulation, proper spacing between plants, and avoiding overhead watering can help prevent these diseases.
Q: How can I tell when my watermelons are ripe?
Ripe watermelons typically have a dull, rather than shiny, skin. The tendril closest to the watermelon will turn brown and dry. When you thump the watermelon, it should produce a deep, hollow sound. Finally, a ripe watermelon will have a sweet aroma near the stem.
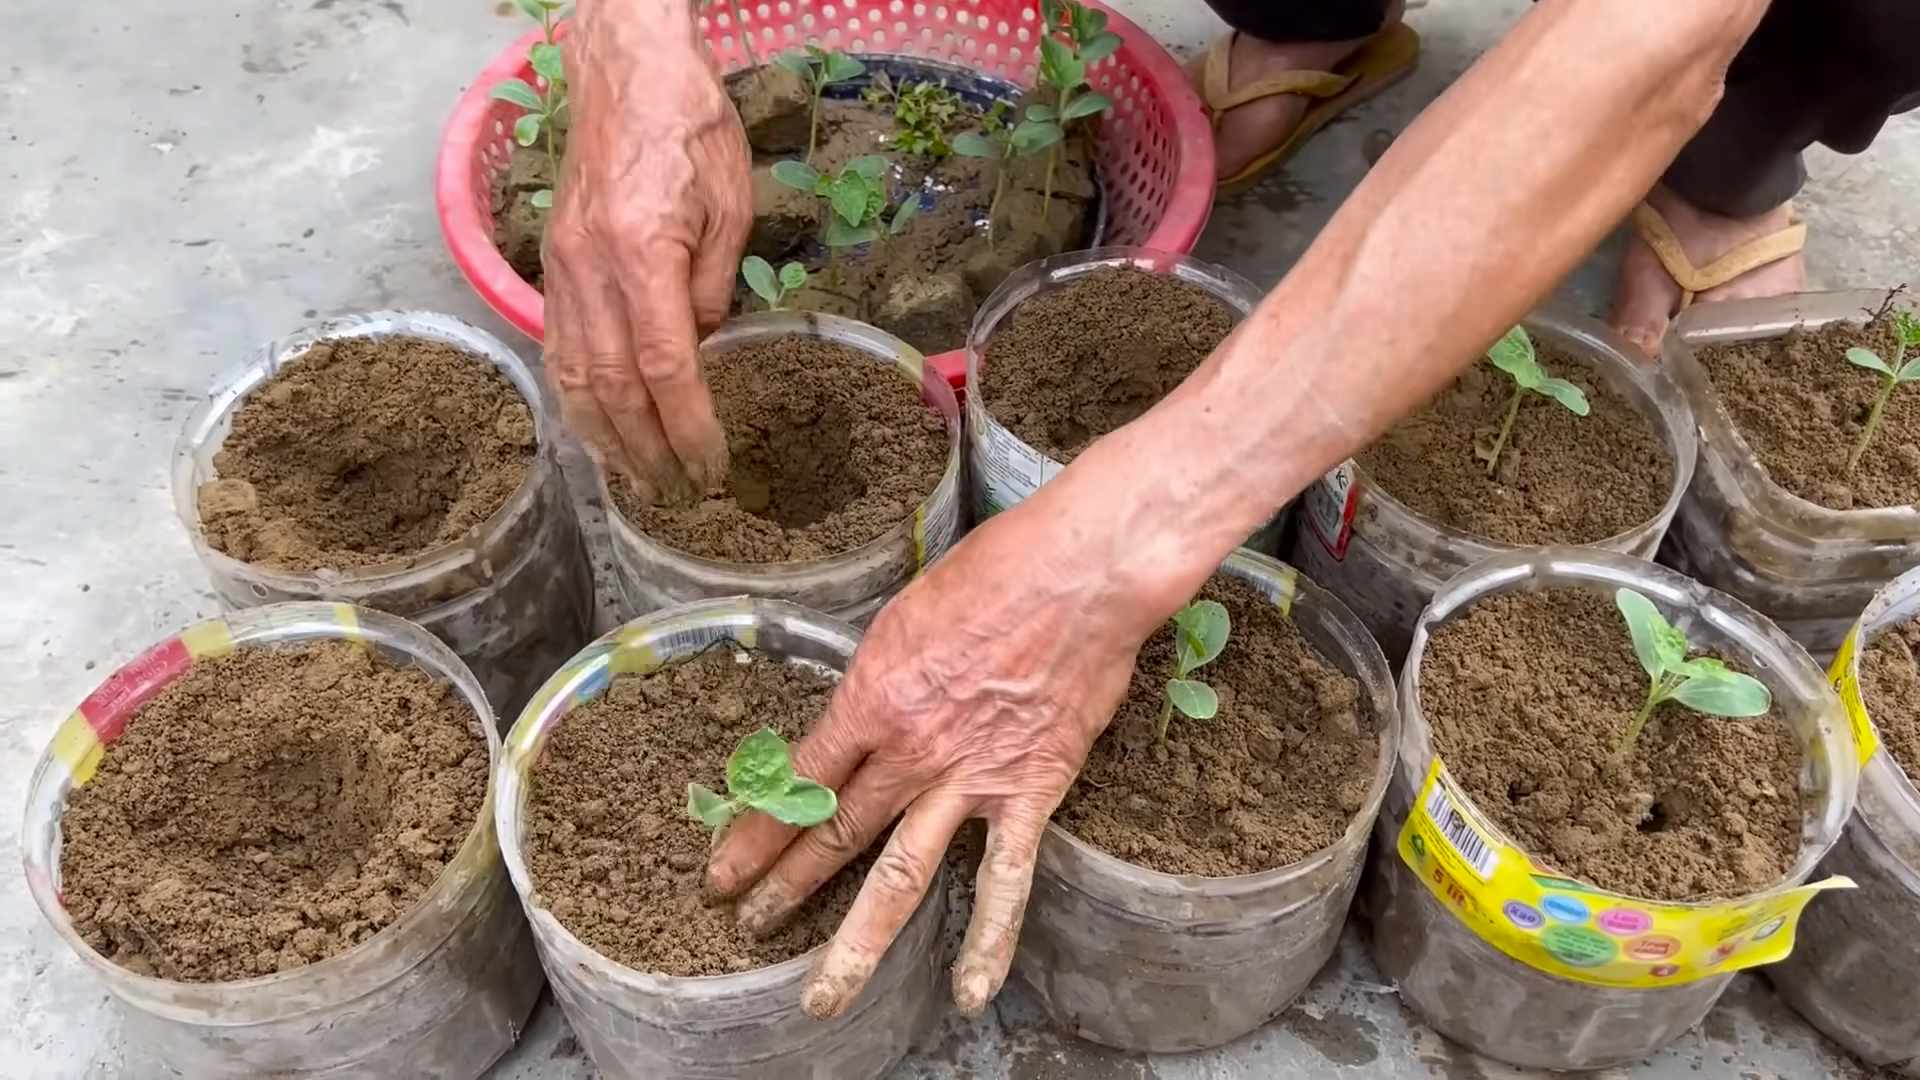
Q: Can I grow watermelons in containers?
Yes, you can grow watermelons in containers, but you’ll need large containers (at least 15 gallons) to accommodate their extensive root systems. Choose a container with drainage holes and use a well-draining potting mix. Consider using a compact watermelon variety for best results in containers.
Q: What are some tips for harvesting watermelons?
Harvest watermelons when they are fully ripe, using the methods described above. Cut the watermelon from the vine with a sharp knife, leaving a few inches of stem attached. Handle the watermelon carefully to avoid bruising.

Leave a Comment