
Dust Free Furniture Tips: Are you tired of constantly battling dust bunnies and spending your weekends wiping down every surface in your home? I know I am! It feels like the moment you finish dusting, another layer settles right back down. But what if I told you there are simple, DIY tricks and hacks that can dramatically reduce the amount of dust clinging to your beloved furniture?
For centuries, maintaining a clean and dust-free home has been a sign of prosperity and good health. In many cultures, meticulous cleaning rituals were passed down through generations, reflecting a deep respect for the living space. While we may not be following the exact methods of our ancestors, the desire for a clean and healthy home remains strong.
Let’s face it, nobody enjoys dusting! It’s a chore that seems never-ending. But beyond the aesthetic annoyance, dust can trigger allergies, irritate respiratory systems, and even harbor harmful bacteria. That’s why mastering these dust free furniture tips is so important. In this article, I’m going to share some of my favorite DIY solutions and simple strategies that will help you keep your furniture looking its best and your home feeling fresher, longer. Get ready to say goodbye to constant dusting and hello to a cleaner, healthier, and happier home!
DIY Dust-Free Furniture: A Guide to Sparkling Clean Surfaces
Okay, let’s face it, dusting is the bane of many people’s existence. It’s a never-ending battle, and just when you think you’ve conquered it, those pesky dust bunnies reappear! But fear not, my friends! I’m here to share some tried-and-true DIY methods to keep your furniture dust-free for longer, saving you time and energy. We’re going to tackle this dust problem head-on with some simple, effective techniques.
Understanding the Enemy: Why Dust Accumulates
Before we dive into the solutions, let’s quickly understand why dust accumulates in the first place. Knowing the source helps us target the problem more effectively.
* Airborne Particles: Dust is primarily composed of dead skin cells (yikes!), pet dander, pollen, textile fibers, dirt, and other airborne particles. These particles float around in the air and eventually settle on surfaces.
* Static Electricity: Many furniture surfaces, especially those made of wood or plastic, can develop static electricity. This static charge acts like a magnet, attracting and holding onto dust particles.
* Poor Ventilation: Inadequate ventilation traps dust indoors, allowing it to accumulate more quickly.
* Textiles: Carpets, rugs, upholstery, and curtains are notorious for trapping dust and releasing it back into the air.
The Arsenal: What You’ll Need
To wage war on dust, you’ll need the right tools and supplies. Here’s what I recommend:
* Microfiber Cloths: These are your best friends! Microfiber cloths are excellent at trapping dust without scratching surfaces. Avoid using old rags or paper towels, as they can simply spread the dust around.
* Vacuum Cleaner with Attachments: A vacuum cleaner with a brush attachment is essential for cleaning upholstery, carpets, and hard-to-reach areas.
* Dusting Spray (DIY Recipe Included!): A good dusting spray helps to loosen dust and prevent it from resettling quickly.
* Soft-Bristled Brush: This is useful for cleaning delicate items and intricate carvings.
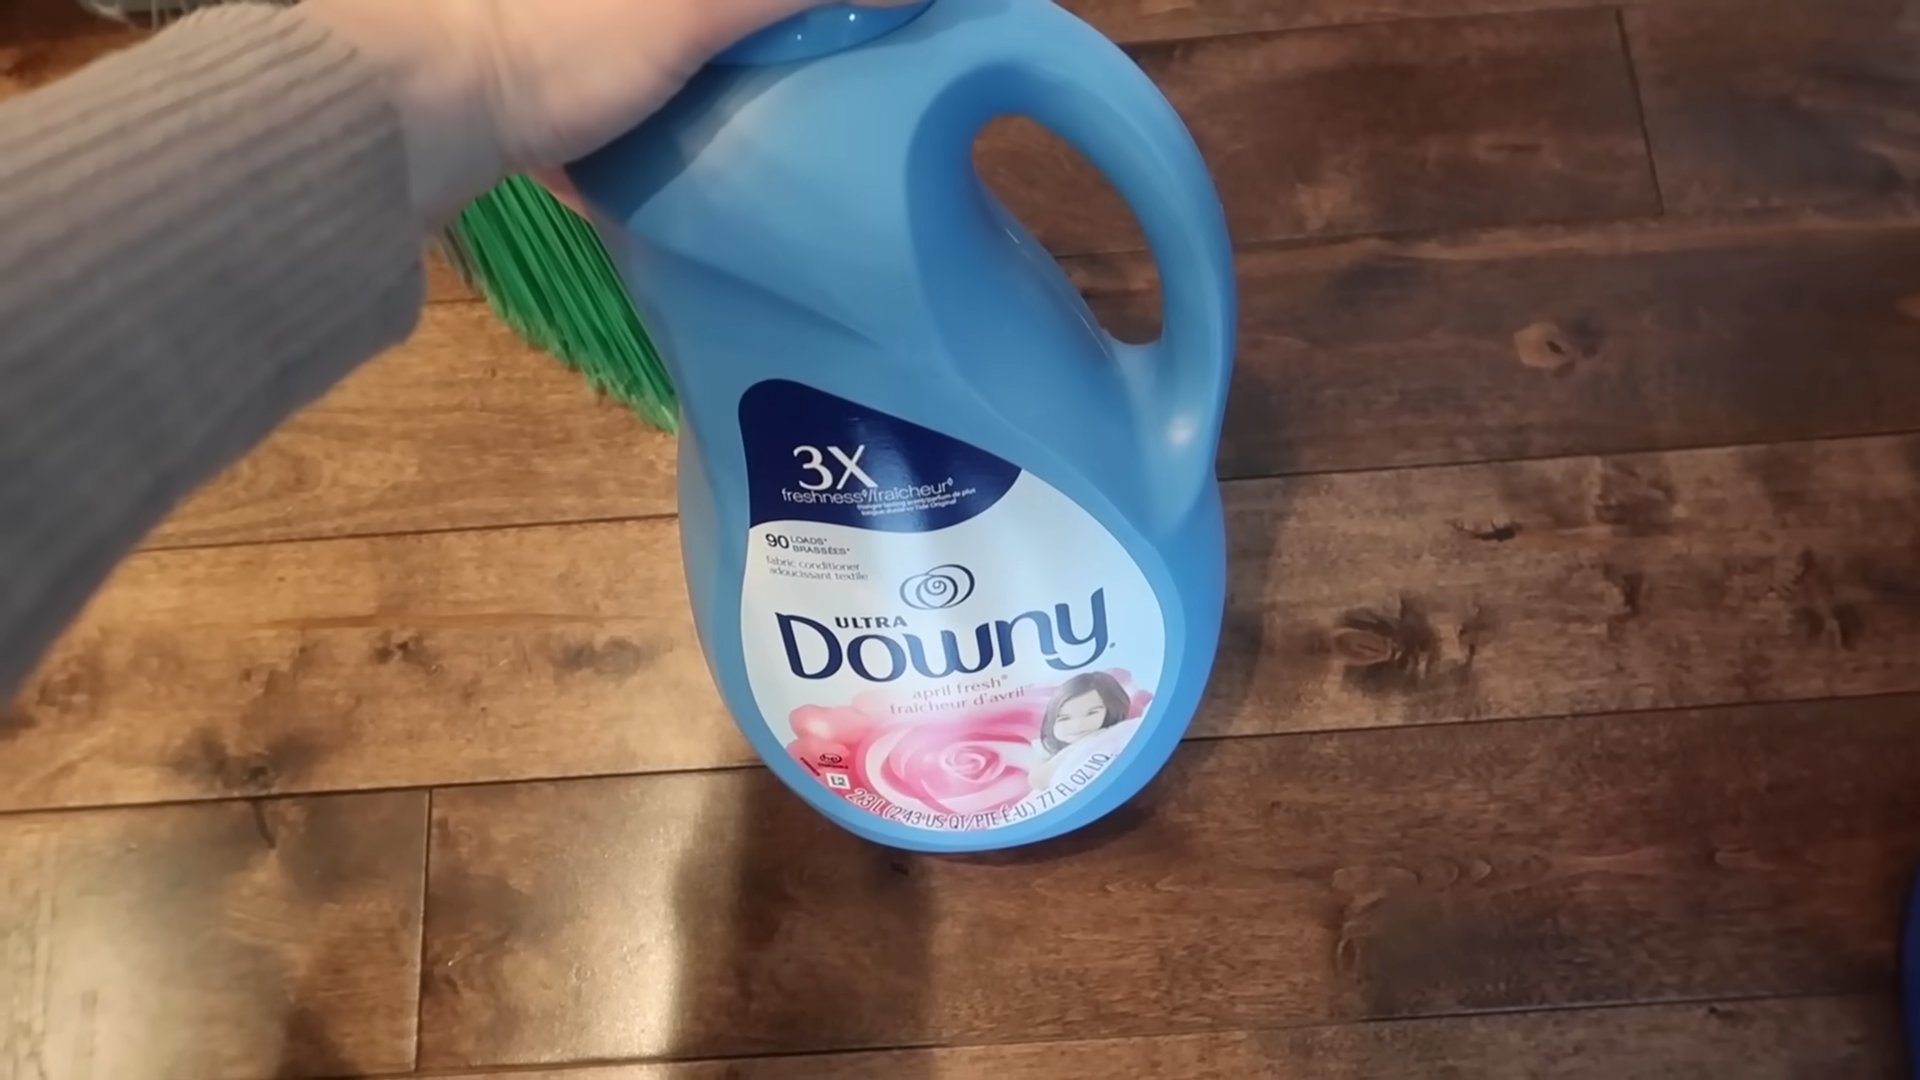
* Lemon Oil or Furniture Polish: For wood furniture, lemon oil or furniture polish can help to condition the wood and create a protective barrier against dust.
* Humidifier (Optional): A humidifier can help to reduce static electricity by increasing the humidity in the air.
* Air Purifier (Optional): An air purifier can help to remove dust and other allergens from the air.
DIY Dusting Spray: My Secret Weapon
Forget those expensive store-bought dusting sprays! I’ve got a simple and effective recipe that you can make at home with ingredients you probably already have. This spray not only cleans but also helps to repel dust.
Ingredients:
* 1 cup water
* 1/4 cup white vinegar
* 2 tablespoons olive oil
* 10-15 drops of essential oil (lemon, lavender, or eucalyptus are great choices)
Instructions:
1. Combine Ingredients: In a spray bottle, combine the water, white vinegar, olive oil, and essential oil.
2. Shake Well: Shake the bottle vigorously to ensure that all the ingredients are thoroughly mixed.
3. Test on a Small Area: Before spraying the entire surface, test the spray on a small, inconspicuous area to make sure it doesn’t damage the finish.
4. Spray and Wipe: Lightly spray the furniture surface with the dusting spray and immediately wipe it clean with a microfiber cloth.
5. Buff to Shine: Use a clean, dry microfiber cloth to buff the surface to a shine.
The Dusting Process: A Step-by-Step Guide
Now that you have your supplies ready, let’s get down to the nitty-gritty of dusting. Follow these steps for a thorough and effective cleaning:
1. Gather Your Supplies: Make sure you have everything you need within easy reach: microfiber cloths, dusting spray, vacuum cleaner, brush, and furniture polish (if applicable).
2. Start High: Always start dusting from the highest surfaces and work your way down. This prevents dust from falling onto surfaces you’ve already cleaned. Dust ceiling fans, light fixtures, and shelves first.
3. Dust with a Damp Cloth: Lightly dampen your microfiber cloth with water or your DIY dusting spray. This helps to trap the dust instead of just spreading it around.
4. Wipe in One Direction: Wipe the furniture surface in one direction, overlapping each stroke slightly. This ensures that you’re picking up all the dust.
5. Rinse and Repeat: Rinse your microfiber cloth frequently in clean water. If the cloth becomes heavily soiled, replace it with a clean one.
6. Vacuum Upholstery: Use the brush attachment on your vacuum cleaner to vacuum upholstery, paying attention to crevices and seams where dust tends to accumulate.
7. Dust Hard-to-Reach Areas: Use a soft-bristled brush to dust delicate items, intricate carvings, and hard-to-reach areas.
8. Polish Wood Furniture: After dusting wood furniture, apply a small amount of lemon oil or furniture polish to a clean microfiber cloth and buff the surface to a shine. This will help to condition the wood and create a protective barrier against dust.
9. Clean Floors: After dusting all the furniture, vacuum or sweep the floors to remove any dust that has fallen.
10. Air It Out: Open windows (weather permitting) to ventilate the room and remove any lingering dust particles.
Maintaining a Dust-Free Home: Prevention is Key
While dusting is important, preventing dust from accumulating in the first place is even more effective. Here are some tips to help you maintain a dust-free home:
* Regularly Change Bedding: Wash your bedding at least once a week in hot water to kill dust mites and remove allergens.
* Wash Curtains and Drapes: Wash your curtains and drapes regularly, following the manufacturer’s instructions.
* Vacuum Frequently: Vacuum carpets and rugs at least once a week, and more often in high-traffic areas.
* Use Doormats: Place doormats at all entrances to trap dirt and dust before it enters your home.
* Control Humidity: Maintain a humidity level between 40% and 50% to reduce static electricity and prevent dust mites from thriving.
* Declutter: The less clutter you have, the less dust will accumulate. Get rid of items you don’t need or use.
* Air Purifier: Consider investing in an air purifier with a HEPA filter to remove dust and other allergens from the air.
* Dust Regularly: Even with preventative measures, regular dusting is still necessary. Aim to dust your furniture at least once a week.
* Groom Your Pets Regularly: Brush your pets regularly to remove loose fur and dander, which can contribute to dust accumulation.
* Change Air Filters: Change the air filters in your furnace and air conditioner regularly to improve air quality and reduce dust.
Tackling Specific Furniture Types: A Tailored Approach
Different types of furniture require different cleaning methods. Here’s a breakdown of how to dust specific furniture types:
Wood Furniture
* Use a soft microfiber cloth and a wood-specific dusting spray or lemon oil.
* Avoid using abrasive cleaners or harsh chemicals, as they can damage the finish.
* For antique wood furniture, consult a professional before using any cleaning products.
Upholstered Furniture
* Vacuum regularly with a brush attachment to remove dust and debris.
* Spot clean stains immediately with a mild detergent and water.
* Consider having your upholstery professionally cleaned every year or two.
Leather Furniture
* Dust regularly with a soft microfiber cloth.
* Condition the leather every few months with a leather conditioner to prevent it from drying out and cracking.
* Avoid using harsh chemicals or abrasive cleaners.
Glass Furniture
* Use a glass cleaner and a microfiber cloth to remove fingerprints and smudges.
* Avoid using paper towels, as they can leave streaks.
Metal Furniture
* Dust regularly with a soft microfiber cloth.
* Use a metal polish to remove tarnish and restore shine.
* Avoid using abrasive cleaners, as they can scratch the surface.
Dealing with Stubborn Dust: Advanced Techniques
Sometimes, regular dusting just isn’t enough. Here are some advanced techniques for dealing with stubborn dust:
* Use a Lint Roller: A lint roller is great for removing dust and pet hair from upholstery and other fabrics. Before we dive into the solutions, let’s quickly understand why dust accumulates in the first place. Knowing the source helps us target the problem more effectively. * Airborne Particles: Dust is primarily composed of dead skin cells (yikes!), pet dander, pollen, textile fibers, dirt, and other airborne particles. These particles float around in the air and eventually settle on surfaces. To wage war on dust, you’ll need the right tools and supplies. Here’s what I recommend: * Microfiber Cloths: These are your best friends! Microfiber cloths are excellent at trapping dust without scratching surfaces. Avoid using old rags or paper towels, as they can simply spread the dust around. Forget those expensive store-bought dusting sprays! I’ve got a simple and effective recipe that you can make at home with ingredients you probably already have. This spray not only cleans but also helps to repel dust. Ingredients: * 1 cup water Instructions: 1. Combine Ingredients: In a spray bottle, combine the water, white vinegar, olive oil, and essential oil. Now that you have your supplies ready, let’s get down to the nitty-gritty of dusting. Follow these steps for a thorough and effective cleaning: 1. Gather Your Supplies: Make sure you have everything you need within easy reach: microfiber cloths, dusting spray, vacuum cleaner, brush, and furniture polish (if applicable). While dusting is important, preventing dust from accumulating in the first place is even more effective. Here are some tips to help you maintain a dust-free home: * Regularly Change Bedding: Wash your bedding at least once a week in hot water to kill dust mites and remove allergens. Different types of furniture require different cleaning methods. Here’s a breakdown of how to dust specific furniture types: * Use a soft microfiber cloth and a wood-specific dusting spray or lemon oil. * Vacuum regularly with a brush attachment to remove dust and debris. * Dust regularly with a soft microfiber cloth. * Use a glass cleaner and a microfiber cloth to remove fingerprints and smudges. * Dust regularly with a soft microfiber cloth. Sometimes, regular dusting just isn’t enough. Here are some advanced techniques for dealing with stubborn dust: * Use a Lint Roller: A lint roller is great for removing dust and pet hair from upholstery and other fabrics. By following these tips and techniques, you can create a dust-free home that is both clean and healthy. Remember, consistency is key So, there you have it! This simple yet incredibly effective DIY dust-free furniture trick is a game-changer for anyone tired of constantly battling dust bunnies. We’ve walked you through the easy steps, explained the science behind why it works, and hopefully, convinced you that it’s worth a try. Why is this a must-try? Because it’s not just about aesthetics; it’s about creating a healthier and more comfortable living environment. Less dust means fewer allergens circulating in your home, which can significantly improve air quality and reduce allergy symptoms. Plus, let’s be honest, who doesn’t want to spend less time dusting and more time enjoying their beautifully clean furniture? This DIY dust-free furniture solution is also incredibly versatile. While we’ve focused on using a specific combination of ingredients, feel free to experiment with variations to suit your preferences and the type of furniture you’re cleaning. For instance, if you’re dealing with delicate wood, you might want to use a gentler oil like almond oil instead of olive oil. Or, if you prefer a different scent, swap out the essential oil for your favorite fragrance. Just remember to always test any new solution on an inconspicuous area first to ensure it doesn’t damage the finish. Consider adding a few drops of tea tree oil for its antibacterial properties, especially if you have pets or small children. For leather furniture, a dedicated leather conditioner after using the dust-repelling solution will keep it supple and prevent cracking. You can even create a larger batch of the solution and store it in a spray bottle for easy application. Just be sure to label it clearly and keep it out of reach of children and pets. The beauty of this DIY dust-free furniture method lies in its simplicity and effectiveness. It’s a cost-effective way to keep your furniture looking its best while also improving the air quality in your home. It’s a win-win situation! We genuinely believe that this DIY trick will make a noticeable difference in your dusting routine. It’s not a magic bullet, of course, but it will significantly reduce the amount of dust that accumulates on your furniture, saving you time and effort in the long run. So, what are you waiting for? Gather your supplies, follow the steps, and experience the joy of dust-free furniture! We’re confident that you’ll be amazed by the results. And most importantly, we want to hear about your experience! Did you try this DIY dust-free furniture trick? What variations did you use? Did it work for you? Share your thoughts, tips, and photos in the comments below. Your feedback will not only help us improve this guide but also inspire others to give it a try. Let’s create a community of dust-free homes together! We are eager to learn from your experiences and see how this simple trick can transform your cleaning routine. Don’t be shy – share your success stories and any challenges you encountered. Your insights are invaluable! The key to this trick lies in the combination of ingredients. The oil creates a smooth, slightly oily surface that prevents dust from clinging to the furniture. Dust particles are naturally attracted to static electricity, and the oil helps to neutralize that static charge. The vinegar acts as a mild cleaner and helps to remove any existing grime or buildup. The essential oil adds a pleasant scent and can also have antibacterial properties. Together, these ingredients create a protective barrier that repels dust and keeps your furniture looking cleaner for longer. While this solution is generally safe for most types of furniture, it’s always best to test it on an inconspicuous area first, especially if you have antique or delicate pieces. Avoid using it on unfinished wood, as the oil can stain the surface. For leather furniture, use a very small amount of the solution and follow up with a dedicated leather conditioner. If you’re unsure about the suitability of the solution for a particular piece of furniture, consult with a professional furniture cleaner. The frequency of application will depend on several factors, including the amount of dust in your home, the type of furniture you have, and your personal preferences. As a general guideline, we recommend applying the solution every 2-4 weeks. You may need to apply it more frequently in high-traffic areas or if you have pets. Over time, you’ll develop a sense of how often your furniture needs to be treated to maintain its dust-free appearance. Yes, you can experiment with different types of oil to find what works best for you. Olive oil is a good all-purpose option, but you can also use almond oil, jojoba oil, or even mineral oil. Just be sure to choose an oil that is safe for your furniture and that you don’t mind the scent of. Avoid using vegetable oil, as it can become sticky and attract more dust. Yes, you can still make the solution without essential oils. The essential oils primarily add a pleasant scent, but they also have some antibacterial properties. If you don’t have essential oils, simply omit them from the recipe. The oil and vinegar will still provide the dust-repelling and cleaning benefits. If your furniture feels oily after applying the solution, you likely used too much oil. Next time, use a smaller amount of the solution and be sure to wipe off any excess with a clean, dry cloth. You can also try diluting the solution with more water or vinegar. Remember, a little goes a long way! Yes, the vinegar in the solution acts as a mild cleaner and helps to remove existing dust and grime. However, if your furniture is heavily soiled, you may need to clean it with a dedicated furniture cleaner before applying the dust-repelling solution. No, this solution is not recommended for use on electronics. The moisture can damage sensitive electronic components. Use a dry microfiber cloth to dust your electronics. While the ingredients in this solution are generally considered safe, it’s always best to keep it out of reach of children and pets. Essential oils can be toxic if ingested, so be sure to store the solution in a safe place. If you have pets that tend to lick furniture, you may want to avoid using essential oils altogether. Store the leftover solution in a tightly sealed spray bottle or container in a cool, dark place. Be sure to label the container clearly and keep it out of reach of children and pets. The solution should last for several months. If you notice any changes in color or odor, discard it.
* Steam Cleaning:Understanding the Enemy: Why Dust Accumulates
* Static Electricity: Many furniture surfaces, especially those made of wood or plastic, can develop static electricity. This static charge acts like a magnet, attracting and holding onto dust particles.
* Poor Ventilation: Inadequate ventilation traps dust indoors, allowing it to accumulate more quickly.
* Textiles: Carpets, rugs, upholstery, and curtains are notorious for trapping dust and releasing it back into the air.The Arsenal: What You’ll Need
* Vacuum Cleaner with Attachments: A vacuum cleaner with a brush attachment is essential for cleaning upholstery, carpets, and hard-to-reach areas.
* Dusting Spray (DIY Recipe Included!): A good dusting spray helps to loosen dust and prevent it from resettling quickly.
* Soft-Bristled Brush: This is useful for cleaning delicate items and intricate carvings.
* Lemon Oil or Furniture Polish: For wood furniture, lemon oil or furniture polish can help to condition the wood and create a protective barrier against dust.
* Humidifier (Optional): A humidifier can help to reduce static electricity by increasing the humidity in the air.
* Air Purifier (Optional): An air purifier can help to remove dust and other allergens from the air.DIY Dusting Spray: My Secret Weapon
* 1/4 cup white vinegar
* 2 tablespoons olive oil
* 10-15 drops of essential oil (lemon, lavender, or eucalyptus are great choices)
2. Shake Well: Shake the bottle vigorously to ensure that all the ingredients are thoroughly mixed.
3. Test on a Small Area: Before spraying the entire surface, test the spray on a small, inconspicuous area to make sure it doesn’t damage the finish.
4. Spray and Wipe: Lightly spray the furniture surface with the dusting spray and immediately wipe it clean with a microfiber cloth.
5. Buff to Shine: Use a clean, dry microfiber cloth to buff the surface to a shine.The Dusting Process: A Step-by-Step Guide
2. Start High: Always start dusting from the highest surfaces and work your way down. This prevents dust from falling onto surfaces you’ve already cleaned. Dust ceiling fans, light fixtures, and shelves first.
3. Dust with a Damp Cloth: Lightly dampen your microfiber cloth with water or your DIY dusting spray. This helps to trap the dust instead of just spreading it around.
4. Wipe in One Direction: Wipe the furniture surface in one direction, overlapping each stroke slightly. This ensures that you’re picking up all the dust.
5. Rinse and Repeat: Rinse your microfiber cloth frequently in clean water. If the cloth becomes heavily soiled, replace it with a clean one.
6. Vacuum Upholstery: Use the brush attachment on your vacuum cleaner to vacuum upholstery, paying attention to crevices and seams where dust tends to accumulate.
7. Dust Hard-to-Reach Areas: Use a soft-bristled brush to dust delicate items, intricate carvings, and hard-to-reach areas.
8. Polish Wood Furniture: After dusting wood furniture, apply a small amount of lemon oil or furniture polish to a clean microfiber cloth and buff the surface to a shine. This will help to condition the wood and create a protective barrier against dust.
9. Clean Floors: After dusting all the furniture, vacuum or sweep the floors to remove any dust that has fallen.
10. Air It Out: Open windows (weather permitting) to ventilate the room and remove any lingering dust particles.Maintaining a Dust-Free Home: Prevention is Key
* Wash Curtains and Drapes: Wash your curtains and drapes regularly, following the manufacturer’s instructions.
* Vacuum Frequently: Vacuum carpets and rugs at least once a week, and more often in high-traffic areas.
* Use Doormats: Place doormats at all entrances to trap dirt and dust before it enters your home.
* Control Humidity: Maintain a humidity level between 40% and 50% to reduce static electricity and prevent dust mites from thriving.
* Declutter: The less clutter you have, the less dust will accumulate. Get rid of items you don’t need or use.
* Air Purifier: Consider investing in an air purifier with a HEPA filter to remove dust and other allergens from the air.
* Dust Regularly: Even with preventative measures, regular dusting is still necessary. Aim to dust your furniture at least once a week.
* Groom Your Pets Regularly: Brush your pets regularly to remove loose fur and dander, which can contribute to dust accumulation.
* Change Air Filters: Change the air filters in your furnace and air conditioner regularly to improve air quality and reduce dust.Tackling Specific Furniture Types: A Tailored Approach
Wood Furniture
* Avoid using abrasive cleaners or harsh chemicals, as they can damage the finish.
* For antique wood furniture, consult a professional before using any cleaning products.Upholstered Furniture
* Spot clean stains immediately with a mild detergent and water.
* Consider having your upholstery professionally cleaned every year or two.Leather Furniture
* Condition the leather every few months with a leather conditioner to prevent it from drying out and cracking.
* Avoid using harsh chemicals or abrasive cleaners.Glass Furniture
* Avoid using paper towels, as they can leave streaks.Metal Furniture
* Use a metal polish to remove tarnish and restore shine.
* Avoid using abrasive cleaners, as they can scratch the surface.Dealing with Stubborn Dust: Advanced Techniques
* Steam Cleaning: Steam cleaning can be an effective way to remove dust and allergens from carpets and upholstery.
* Professional Cleaning: For heavily soiled furniture, consider hiring a professional cleaning service.The Final Polish: Enjoy Your Dust-Free Sanctuary

Conclusion
Frequently Asked Questions (FAQ)
What exactly makes this DIY dust-free furniture trick work?
Is this DIY solution safe for all types of furniture?
How often should I apply this DIY dust-free furniture solution?
Can I use different types of oil in this DIY solution?
What if I don’t have essential oils? Can I still make this solution?
My furniture feels oily after applying the solution. What did I do wrong?
Will this DIY solution remove existing dust and grime?
Can I use this solution on electronics?
Is this solution safe for pets and children?
How do I store the leftover solution?

Leave a Comment