
Grout Cleaning: Oxiclean vs Toilet Cleaner – Which Reigns Supreme?
Let’s face it, grimy grout is the bane of every homeowner’s existence! Those once pristine lines between your tiles can quickly become a breeding ground for dirt, mildew, and stubborn stains. You’ve probably tried countless products, scrubbing until your arms ache, only to be met with disappointing results. But what if I told you the secret to sparkling grout might already be hiding in your cleaning cabinet?
For generations, keeping homes clean has been a constant battle. From ancient civilizations using natural remedies to modern-day cleaning solutions, the quest for a spotless home is timeless. Today, we’re diving into a head-to-head comparison of two popular contenders: Oxiclean and toilet bowl cleaner. While seemingly unconventional, using toilet bowl cleaner for grout cleaning has gained traction as a quick fix. But is it safe? Is it effective? And more importantly, is it better than the trusted power of Oxiclean?
This DIY guide is your ultimate resource for tackling that stubborn grout. We’ll explore the pros and cons of using both Oxiclean and toilet bowl cleaner for grout cleaning, providing you with step-by-step instructions, safety precautions, and expert tips to achieve professional-level results without breaking the bank. Say goodbye to dingy grout and hello to a sparkling clean home! Let’s get started!
DIY: Supercharge Your Corn Harvest with Soil Bag Expansion!
Hey there, fellow gardeners! Are you dreaming of a bumper corn crop but limited by space or soil quality? I’ve got a fantastic DIY hack that will help you maximize your corn yield using simple soil bags. This method allows you to create larger, more nutrient-rich growing environments for your corn, leading to bigger, healthier plants and, ultimately, more delicious corn on the cob!
Why Expand Your Soil Bags for Corn?
Corn is a heavy feeder, meaning it needs a lot of nutrients to thrive. Standard soil bags, while convenient, often don’t provide enough space for the root system to fully develop and access all the nutrients the plant needs. Expanding your soil bags offers several key advantages:
* Increased Root Space: More room for roots to grow means better nutrient uptake and a stronger, more stable plant.
* Improved Drainage: Expanding the bag can improve drainage, preventing waterlogging and root rot.
* Enhanced Nutrient Availability: You can amend the soil with compost, fertilizer, and other beneficial ingredients to create a super-charged growing medium.
* Better Stability: Larger bags provide a more stable base for tall corn stalks, reducing the risk of them toppling over in wind or storms.
* Cost-Effective: It’s a budget-friendly way to create a larger growing space compared to building raised beds or purchasing large containers.
Materials You’ll Need
Before we dive in, let’s gather our supplies. This is a pretty straightforward project, so you likely have many of these items already:
* Soil Bags: Choose high-quality soil bags designed for gardening. I prefer bags that are at least 2 cubic feet in size to start with.
* Heavy-Duty Landscape Fabric: This will be used to create the expansion collar. Make sure it’s thick and durable.
* Measuring Tape or Ruler: For accurate measurements.
* Scissors or Utility Knife: For cutting the landscape fabric.
* Stapler or Heavy-Duty Tape: To secure the landscape fabric collar. A stapler is more durable, but heavy-duty tape can work in a pinch.
* Potting Mix or Garden Soil: To supplement the existing soil in the bag.
* Compost: A fantastic soil amendment that adds nutrients and improves drainage.
* Slow-Release Fertilizer: Specifically formulated for vegetables.
* Gloves: To protect your hands.
* Safety Glasses: To protect your eyes from dust and debris.
* Watering Can or Hose: For watering your corn plants.
Step-by-Step Guide to Expanding Your Soil Bags
Alright, let’s get our hands dirty! Here’s how to expand your soil bags for a super corn harvest:
1. Preparing the Soil Bag
1. Choose Your Location: Select a sunny spot in your garden that receives at least 6-8 hours of direct sunlight per day. Corn needs plenty of sunshine to thrive. Place the soil bag in its final location before you start cutting. Moving a filled, expanded bag is much harder!
2. Cut the Top of the Bag: Carefully cut open the top of the soil bag. I usually cut around three sides, leaving one side attached like a hinge. This allows you to fold the top back and easily access the soil inside. Be careful not to cut too deep and damage the soil bag itself.
3. Loosen the Soil: Gently loosen the soil inside the bag with your hands or a small trowel. This will help improve drainage and allow the roots to penetrate the soil more easily. Don’t compact the soil; you want it to be loose and airy.
2. Creating the Landscape Fabric Collar
1. Measure the Circumference: Measure the circumference of the open soil bag. This will determine the length of landscape fabric you need for the collar. Add a few extra inches for overlap.
2. Determine the Height: Decide how much taller you want to make the soil bag. I usually aim for an additional 12-18 inches of height. This will provide ample space for the corn roots to grow.
3. Cut the Landscape Fabric: Cut a piece of landscape fabric to the measured length and height. For example, if the circumference of your soil bag is 48 inches and you want a 12-inch collar, you’ll cut a piece of fabric that is 48 inches long and 12 inches wide (plus a few extra inches for overlap).
4. Form the Collar: Wrap the landscape fabric around the top of the soil bag, overlapping the ends by a few inches.
5. Secure the Collar: Secure the overlapping ends of the landscape fabric with staples or heavy-duty tape. Make sure the collar is firmly attached to the soil bag. I like to use a stapler and then reinforce the seam with tape for extra durability.
3. Amending the Soil
1. Mix the Soil Amendments: In a wheelbarrow or large container, mix together the potting mix or garden soil, compost, and slow-release fertilizer. I usually use a ratio of 1 part potting mix, 1 part compost, and follow the instructions on the fertilizer package.
2. Add the Amended Soil: Carefully add the amended soil to the expanded soil bag, filling it up to the top of the landscape fabric collar. Gently pat down the soil to remove any air pockets.
3. Water Thoroughly: Water the soil thoroughly until it is evenly moist. This will help settle the soil and ensure that the nutrients are distributed throughout the growing medium.
4. Planting Your Corn
1. Planting Depth: Corn seeds should be planted about 1-2 inches deep.
2. Spacing: Space the corn seeds about 6-8 inches apart within the bag. Corn needs to be planted in blocks rather than rows for proper pollination.
3. Planting Technique: Use your finger or a small trowel to create a small hole in the soil. Drop the corn seed into the hole and cover it with soil. Gently pat down the soil around the seed.
4. Water Again: Water the planted seeds gently to ensure good soil contact.
5. Mulch (Optional): Add a layer of mulch around the base of the corn plants to help retain moisture and suppress weeds. I like to use straw or wood chips.
5. Ongoing Care
1. Watering: Corn needs consistent watering, especially during hot, dry weather. Water deeply whenever the top inch of soil feels dry to the touch.
2. Fertilizing: Corn is a heavy feeder, so you’ll need to fertilize it regularly. I recommend using a liquid fertilizer every 2-3 weeks, following the instructions on the package.
3. Weeding: Keep the area around the corn plants free of weeds. Weeds can compete with the corn for nutrients and water.
4. Pollination: Corn is wind-pollinated, so you may need to help the process along by gently shaking the stalks when the tassels (male flowers) are shedding pollen and the silks (female flowers) are emerging from the ears.
5. Pest Control: Keep an eye out for common corn pests, such as corn earworms and aphids. Treat any infestations promptly with appropriate organic pest control methods.
6. Support: As the corn plants grow taller, you may need to provide support to prevent them from toppling over. You can use stakes or cages to support the stalks.
Troubleshooting Tips
* Poor Drainage: If the soil bag is not draining well, add some perlite or vermiculite to the soil mix to improve drainage.
* Nutrient Deficiencies: If the corn plants are showing signs of nutrient deficiencies (e.g., yellowing leaves), fertilize them with a balanced fertilizer.
* Pest Problems: Regularly inspect the corn plants for pests and treat any infestations promptly.
* Wind Damage: If the corn plants are susceptible to wind damage, provide support with stakes or cages.
Alternative Methods for Expanding Soil Bags
While the landscape fabric collar method is my go-to, here are a few other options you can consider:
* Stacking Soil Bags: Cut the bottom out of one soil bag and place it on top of another filled soil bag. This creates a taller growing space.
* Using Wire Mesh: Create a cylindrical collar using wire mesh and secure it around the top of the soil bag.
* Repurposed Containers: Cut the bottom out of a large plastic container and place it on top of the soil bag.
Enjoy Your Bumper Corn Harvest!
That’s it! With a little effort, you can easily expand your soil bags and create a thriving environment for your corn plants. I’ve found this method to be incredibly effective in boosting my corn harvest, and I’m confident it will work for you too. Get ready to enjoy the sweet taste of homegrown corn on the cob! Happy gardening!
Conclusion
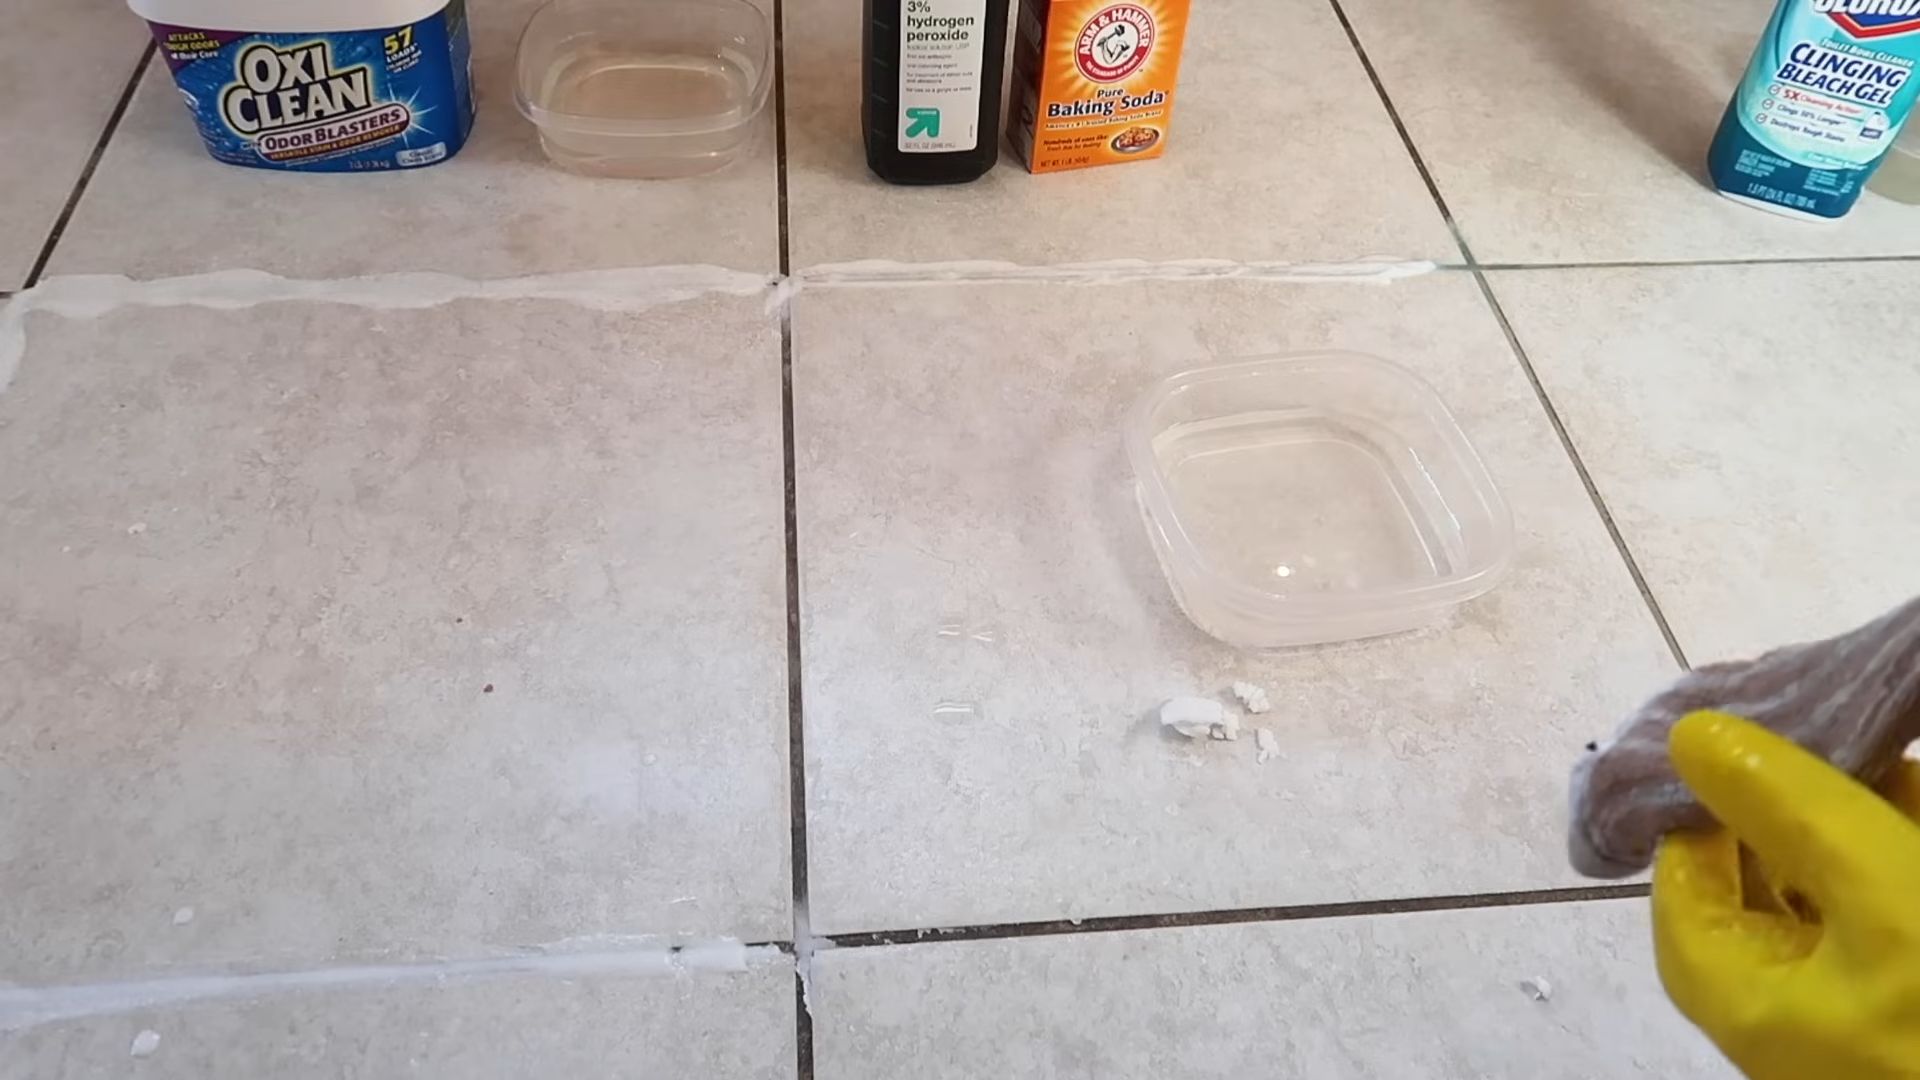
So, there you have it! We’ve explored a powerful and surprisingly simple method for tackling grimy grout: a DIY grout cleaning solution using either Oxiclean or toilet bowl cleaner. While the idea of using toilet bowl cleaner might seem unconventional, the results speak for themselves. Both options offer a potent cleaning action that can lift stubborn stains and discoloration, restoring your grout to its former glory.
Why is this DIY trick a must-try? Because it’s effective, affordable, and readily accessible. You likely already have one of these cleaners in your home, saving you a trip to the store and the expense of specialized grout cleaning products. Plus, it’s a fantastic way to avoid harsh chemicals and fumes often found in commercial cleaners. The satisfaction of seeing your grout transform before your eyes is an added bonus!
But remember, safety first! Always wear gloves and eye protection when working with these cleaners, and ensure proper ventilation in the area you’re cleaning. Test the solution in an inconspicuous area first to ensure it doesn’t damage your tiles or grout.
Now, let’s talk variations and suggestions. For particularly stubborn stains, consider letting the solution dwell on the grout for a longer period, up to 15-20 minutes, before scrubbing. You can also use an old toothbrush or a specialized grout brush for more targeted cleaning. If you’re concerned about the strength of the toilet bowl cleaner, opt for a gentler formula or dilute it slightly with water. For those with sensitive noses, adding a few drops of essential oil, like lemon or tea tree, can help mask the cleaner’s scent.
Another variation to consider is the application method. While spraying is convenient, applying the solution directly to the grout lines with a small brush can provide more concentrated cleaning power. You can also create a paste by mixing Oxiclean with a small amount of water for a thicker, more targeted application.
Ultimately, the best approach depends on the severity of your grout stains and your personal preferences. Experiment with different techniques and dwell times to find what works best for you.
We’re confident that this DIY grout cleaning method will become your go-to solution for maintaining sparkling clean grout. It’s a game-changer for anyone looking to revitalize their bathrooms, kitchens, or any tiled surface.
So, what are you waiting for? Grab your Oxiclean or toilet bowl cleaner, put on your gloves, and get ready to transform your grout! We encourage you to try this DIY grout cleaning trick and share your experience with us. Let us know which cleaner you used, what variations you tried, and how it worked for you. Share your before-and-after photos and tips in the comments below. We can’t wait to see your amazing results! Your feedback will help other readers discover the power of this simple yet effective cleaning solution. Let’s banish grimy grout together!
Frequently Asked Questions (FAQ)
Q: Is it safe to use toilet bowl cleaner on grout?
A: Yes, it can be safe to use toilet bowl cleaner on grout, but with precautions. Toilet bowl cleaners contain chemicals that can effectively break down stains and grime. However, it’s crucial to wear gloves and eye protection to avoid skin and eye irritation. Ensure the area is well-ventilated to minimize exposure to fumes. Always test the cleaner on a small, inconspicuous area of the grout first to check for any adverse reactions, such as discoloration or damage to the grout or tiles. Avoid using toilet bowl cleaner on colored grout, as it may cause fading. After cleaning, thoroughly rinse the grout with water to remove any residue.
Q: Can I use Oxiclean on all types of grout?
A: Oxiclean is generally safe for most types of grout, including cementitious and epoxy grout. However, it’s always best to test it in an inconspicuous area first, especially if you have colored grout or delicate tiles. Oxiclean is a gentler option compared to toilet bowl cleaner, making it suitable for more sensitive surfaces. If you’re unsure about the type of grout you have, consult a professional or refer to the tile manufacturer’s recommendations.
Q: How long should I let the cleaner sit on the grout?
A: The dwell time depends on the severity of the stains. For light stains, 5-10 minutes may be sufficient. For more stubborn stains, you can let the cleaner sit for up to 15-20 minutes. However, avoid letting it dry completely, as this can make it harder to remove and may leave a residue. Keep an eye on the area and rinse thoroughly after the recommended dwell time.
Q: What kind of brush should I use to scrub the grout?
A: An old toothbrush is a great option for scrubbing grout, as it’s small and allows you to target the grout lines effectively. You can also use a specialized grout brush, which has stiffer bristles and a narrower head for better cleaning power. Avoid using abrasive brushes or scouring pads, as they can scratch or damage the grout and tiles.
Q: How do I prevent grout from getting dirty in the first place?
A: Prevention is key to keeping your grout clean. Regularly wipe down tiled surfaces after use to remove spills and splatters. Use a squeegee in the shower after each use to prevent water buildup and mildew growth. Seal your grout every 1-2 years to protect it from stains and moisture. Consider using a grout pen to touch up any areas that are starting to show signs of discoloration.
Q: What if the Oxiclean or toilet bowl cleaner doesn’t remove all the stains?
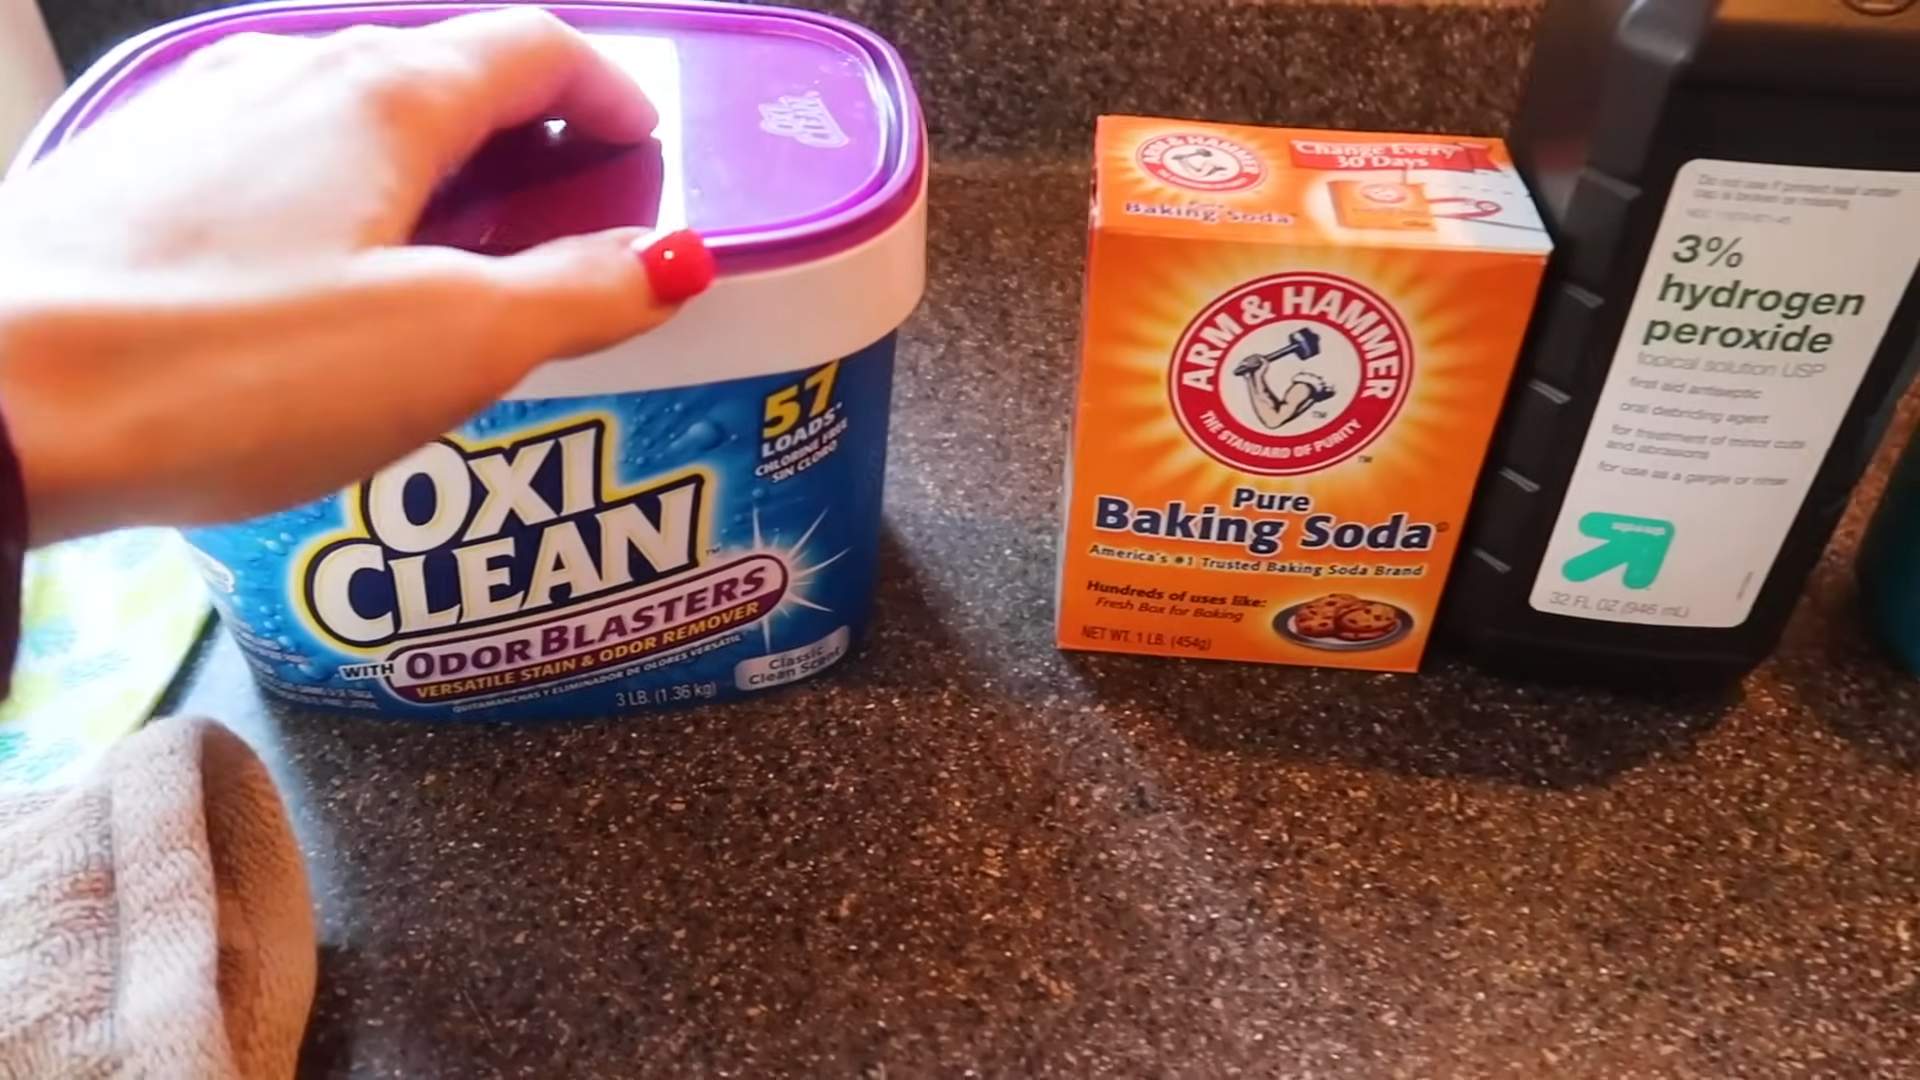
A: If the stains are particularly stubborn, you may need to repeat the cleaning process or try a different approach. Consider using a stronger cleaner, such as a commercial grout cleaner specifically designed for tough stains. You can also try making a paste of baking soda and water and applying it to the grout lines, letting it sit for a few minutes before scrubbing. For extremely stubborn stains, you may need to resort to professional grout cleaning services.
Q: Can I use this method on vertical grout lines, like in a shower?
A: Yes, you can use this method on vertical grout lines. However, you may need to apply the cleaner in smaller sections to prevent it from running down the wall. Consider using a gel-based toilet bowl cleaner, as it will cling to the grout better than a liquid cleaner. You can also use a sponge or cloth to apply the cleaner directly to the grout lines.
Q: Is there a natural alternative to Oxiclean or toilet bowl cleaner for grout cleaning?
A: Yes, there are several natural alternatives for grout cleaning. A mixture of baking soda and vinegar can be effective for removing mild stains and grime. Simply sprinkle baking soda on the grout lines, then spray with vinegar. Let it fizz for a few minutes, then scrub with a brush and rinse with water. You can also use a paste of baking soda and hydrogen peroxide for a stronger cleaning action. Lemon juice is another natural option, as its acidity can help break down stains.
Q: How often should I clean my grout?
A: The frequency of grout cleaning depends on the amount of traffic and exposure to moisture in the area. In high-traffic areas like bathrooms and kitchens, you may need to clean your grout every few weeks. In less frequently used areas, you can clean your grout every few months. Regular cleaning will help prevent stains from setting in and make the cleaning process easier.
Q: What are the signs that my grout needs to be resealed?
A: Signs that your grout needs to be resealed include water beading up on the surface, stains that are difficult to remove, and grout that is crumbling or cracking. Resealing your grout will help protect it from moisture and stains, extending its lifespan and keeping it looking its best.
Leave a Comment