
Grow Kohlrabi at Home: Your Guide to a Delicious and Easy Harvest
Growing kohlrabi at home might seem daunting, but I promise you, it’s easier than you think! This article is your complete guide to successfully Grow Kohlrabi at Home, packed with simple DIY tricks and hacks that will transform your garden and your dinner plate. Forget expensive grocery store produce – let’s unlock the secrets to cultivating this delicious, nutritious root vegetable right in your own backyard.
Kohlrabi, a member of the cabbage family, boasts a fascinating history, tracing its origins back centuries to the Mediterranean region. It’s been a staple in many cultures for its unique flavor and versatility, and now, it’s your turn to experience the joy of harvesting your own homegrown kohlrabi. I’ve always loved the satisfying crunch and slightly sweet taste of kohlrabi, and I’m excited to share my tips and tricks with you.
Why Grow Your Own Kohlrabi?
There are so many reasons to embark on this rewarding gardening adventure! Growing your own kohlrabi ensures you have access to fresh, pesticide-free produce, bursting with flavor and nutrients. Plus, there’s an undeniable satisfaction in nurturing a plant from seed to harvest. You’ll be amazed at how easy it is to Grow Kohlrabi at Home, and the delicious results will make it all worthwhile. This DIY guide will walk you through every step, from seed selection to harvesting, ensuring a bountiful crop for your kitchen.
So, whether you’re a seasoned gardener or a complete beginner, get ready to roll up your sleeves and discover the simple pleasures of growing your own kohlrabi. Let’s get started!
Harvesting Your Okra: A Guide to a Bountiful Crop
Okra is a rewarding vegetable to grow, but knowing when and how to harvest it is key to enjoying its delicious pods. Follow these steps for a successful okra harvest!
Assessing Okra Maturity
- Size Matters: Generally, you want to harvest okra pods when they’re about 2-3 inches long. Any smaller, and they’ll be tough and stringy. Much larger, and they’ll be tough and seedy.
- Tenderness Test: Gently squeeze the pod. It should feel tender and slightly firm, not hard or woody. If it feels tough, it’s past its prime.
- Color Check: The color of mature okra varies depending on the variety, but it’s usually a vibrant green. Avoid pods that are starting to turn yellow or brown, as these are overripe.
- Daily Checks: Okra grows quickly, so it’s best to check your plants daily, especially during peak growing season. The more frequently you harvest, the more the plant will produce.
Harvesting Your Okra: A Step-by-Step Guide
- Gather Your Tools: You’ll only need a sharp knife or garden shears. A pair of gardening gloves is also a good idea, especially if you have sensitive skin, as the okra plant can be slightly prickly.
- Locate Mature Pods: Carefully examine your okra plants, looking for pods that meet the criteria mentioned above (2-3 inches long, tender, vibrant green). Remember to check both the upper and lower parts of the plant.
- Snip or Cut the Pods: Using your sharp knife or shears, carefully cut or snip the okra pod from the plant just above the stem. Avoid pulling the pods off, as this can damage the plant and reduce future yields. A clean cut prevents the spread of diseases.
- Inspect the Cut: After cutting, take a quick look at the cut end of the stem. If you see any signs of disease or pests, take note and address it accordingly. This is a great opportunity for early pest detection.
- Harvest Regularly: This is crucial. The more frequently you harvest, the more okra your plant will produce. Aim to harvest every 1-2 days, or even more often during peak production. Leaving mature pods on the plant for too long will slow down the production of new pods.
- Proper Storage: Once harvested, place your okra in a plastic bag and refrigerate it. Okra is best used within a few days of harvesting for optimal flavor and texture. Avoid washing the okra until you’re ready to use it, as washing it too early can cause it to spoil faster.
Dealing with Different Okra Plant Stages
Young Plants
When your okra plants are young and just starting to produce, don’t be tempted to harvest too early. Let the pods grow to a good size before harvesting. Harvesting too early will result in small, tough pods and can stunt the plant’s growth. Patience is key in the early stages.
Mature Plants
Once your plants are mature and producing heavily, you’ll need to be diligent about harvesting. Remember, the more you harvest, the more the plant will produce. Don’t let the pods get too large; aim for that 2-3 inch sweet spot. Regular harvesting keeps the plant producing and prevents it from putting its energy into producing seeds instead of pods.
Overripe Plants
If you notice your okra pods are becoming yellow or brown, it’s a sign that they’re overripe. While you can still use them in some recipes (like stews or soups where texture isn’t as important), they won’t be as tender or flavorful. It’s best to harvest regularly to avoid this situation. Overripe pods also indicate that you may need to adjust your watering or fertilization schedule.
Troubleshooting Common Issues
Small or Tough Pods
If you’re harvesting small or tough pods, it could be due to several factors: harvesting too early, inconsistent watering, nutrient deficiencies, or pest infestations. Ensure you’re following the guidelines above and consider adjusting your plant care accordingly. Check for pests and diseases regularly.
Reduced Yield
If your okra plant isn’t producing as much as you’d like, it could be due to insufficient sunlight, improper watering, nutrient deficiencies, or pest problems. Make sure your plants are getting at least 6-8 hours of sunlight per day and that they’re receiving adequate water and nutrients. Regularly inspect your plants for pests and diseases.
Pest and Disease Management
Okra plants can be susceptible to various pests and diseases. Regularly inspect your plants for signs of infestation or disease. If you notice any problems, take appropriate action, such as using organic pest control methods or contacting your local agricultural extension office for advice. Early detection and treatment are crucial for maintaining a healthy and productive okra plant.
Beyond the Harvest: Using Your Okra
Once you’ve harvested your okra, the fun begins! Okra is incredibly versatile and can be used in a wide variety of dishes. From frying to stewing, grilling to pickling, the possibilities are endless. Experiment with different recipes and discover your favorite ways to enjoy this delicious vegetable.
Remember, consistent harvesting is key to a bountiful okra crop. With a little attention and care, you’ll be enjoying fresh, homegrown okra all season long!
Conclusion
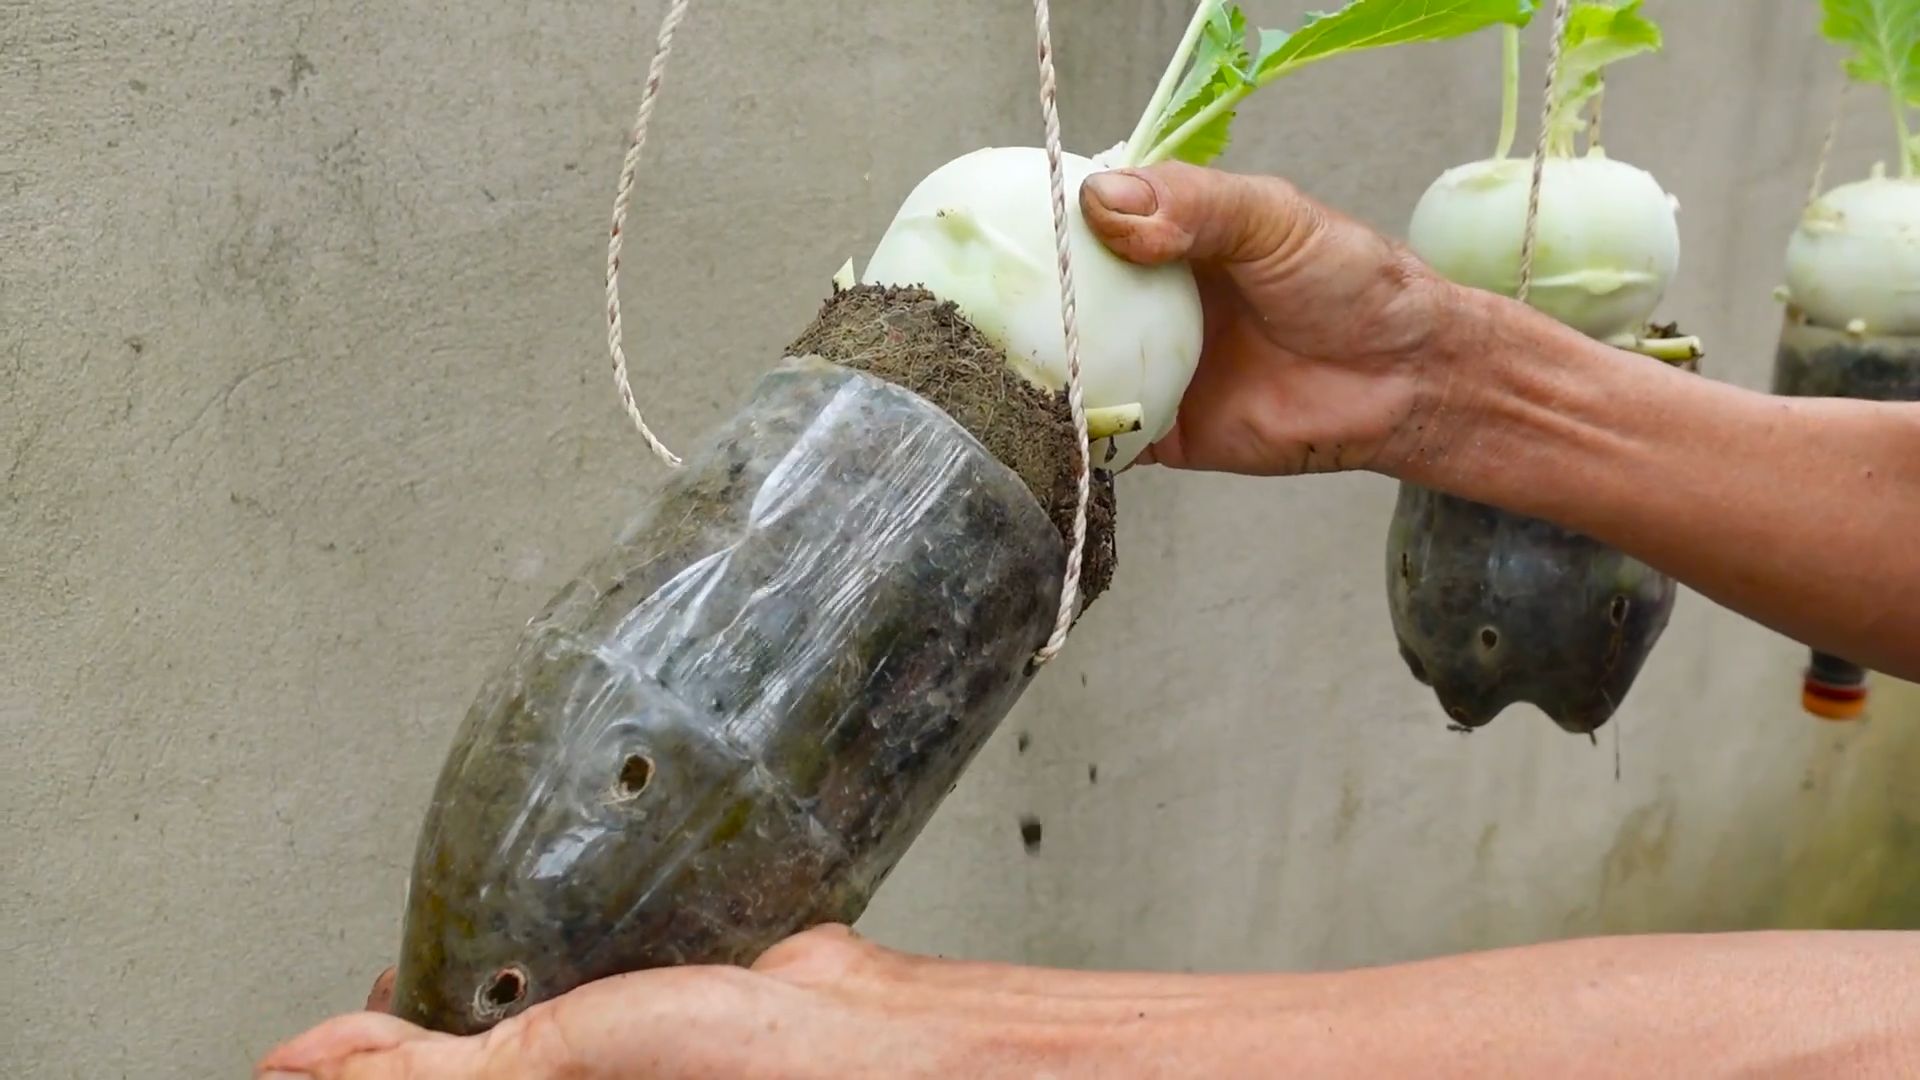
Growing your own kohlrabi is a truly rewarding experience, offering a unique connection to your food and a delicious harvest you won’t find in the supermarket. This DIY method, focusing on simple techniques and readily available materials, makes home kohlrabi cultivation accessible to everyone, regardless of gardening experience. The ease of growing kohlrabi from seed, combined with the exceptional flavor and nutritional value of the homegrown bulbs, makes this a must-try for any aspiring gardener or even seasoned green thumbs looking to expand their garden repertoire. You’ll be amazed at the satisfying crunch and delicate sweetness of kohlrabi grown right in your backyard, balcony, or even a sunny windowsill. The sense of accomplishment is unparalleled, and the taste? Simply unforgettable.
Beyond the basic method outlined, there are numerous ways to customize your kohlrabi growing adventure. Experiment with different varieties – from the classic round purple kohlrabi to the elongated white varieties. Consider companion planting; incorporating herbs like dill or chamomile near your kohlrabi can help deter pests and improve overall plant health. For those with limited space, vertical gardening techniques can be highly effective. Using trellises or hanging planters allows you to maximize your yield even in small areas. Don’t be afraid to get creative! The possibilities are as diverse as the kohlrabi itself.
We encourage you to embark on this exciting journey of growing your own kohlrabi. Share your experiences with us – whether it’s your first successful harvest or a lesson learned along the way. Post pictures of your thriving plants and delicious kohlrabi dishes on social media using #GrowKohlrabiAtHome. Let’s build a community of home gardeners, sharing tips, tricks, and the joy of cultivating this unique and flavorful vegetable. Remember, even small successes contribute to a larger movement towards sustainable and healthy food choices. So, grab some seeds, prepare your soil, and get ready to experience the satisfaction of harvesting your own homegrown kohlrabi. You won’t regret it!
Frequently Asked Questions
What type of soil is best for growing kohlrabi?
Kohlrabi thrives in loose, well-draining soil rich in organic matter. Amend heavy clay soils with compost or other organic materials to improve drainage and aeration. A slightly acidic to neutral pH (6.0-7.0) is ideal.
How much sunlight does kohlrabi need?
Kohlrabi requires at least six hours of direct sunlight per day for optimal growth. Choose a sunny location in your garden or ensure your indoor setup provides adequate light. Insufficient sunlight can lead to smaller, less flavorful bulbs.
When is the best time to plant kohlrabi seeds?
The best time to plant kohlrabi seeds depends on your climate. In cooler climates, sow seeds directly outdoors after the last frost. In warmer climates, you can start seeds indoors 4-6 weeks before the last frost or sow seeds in the fall for a cool-season crop. Always check your local frost dates for the most accurate planting schedule.
How often should I water my kohlrabi?
Keep the soil consistently moist, but not waterlogged. Water deeply and regularly, especially during dry periods. Aim for about 1 inch of water per week, adjusting based on rainfall and weather conditions. Mulching around the plants can help retain soil moisture.
What are some common pests and diseases that affect kohlrabi?
Kohlrabi can be susceptible to pests like aphids, flea beetles, and cabbage worms. Regularly inspect your plants for signs of infestation. Use organic pest control methods such as insecticidal soap or neem oil to manage pests. Good garden hygiene and crop rotation can also help prevent diseases.
How long does it take for kohlrabi to mature?
The time it takes for kohlrabi to mature depends on the variety and growing conditions. Most varieties are ready for harvest in 50-70 days from sowing. Harvest the bulbs when they are firm and about 2-3 inches in diameter for the best flavor and texture.
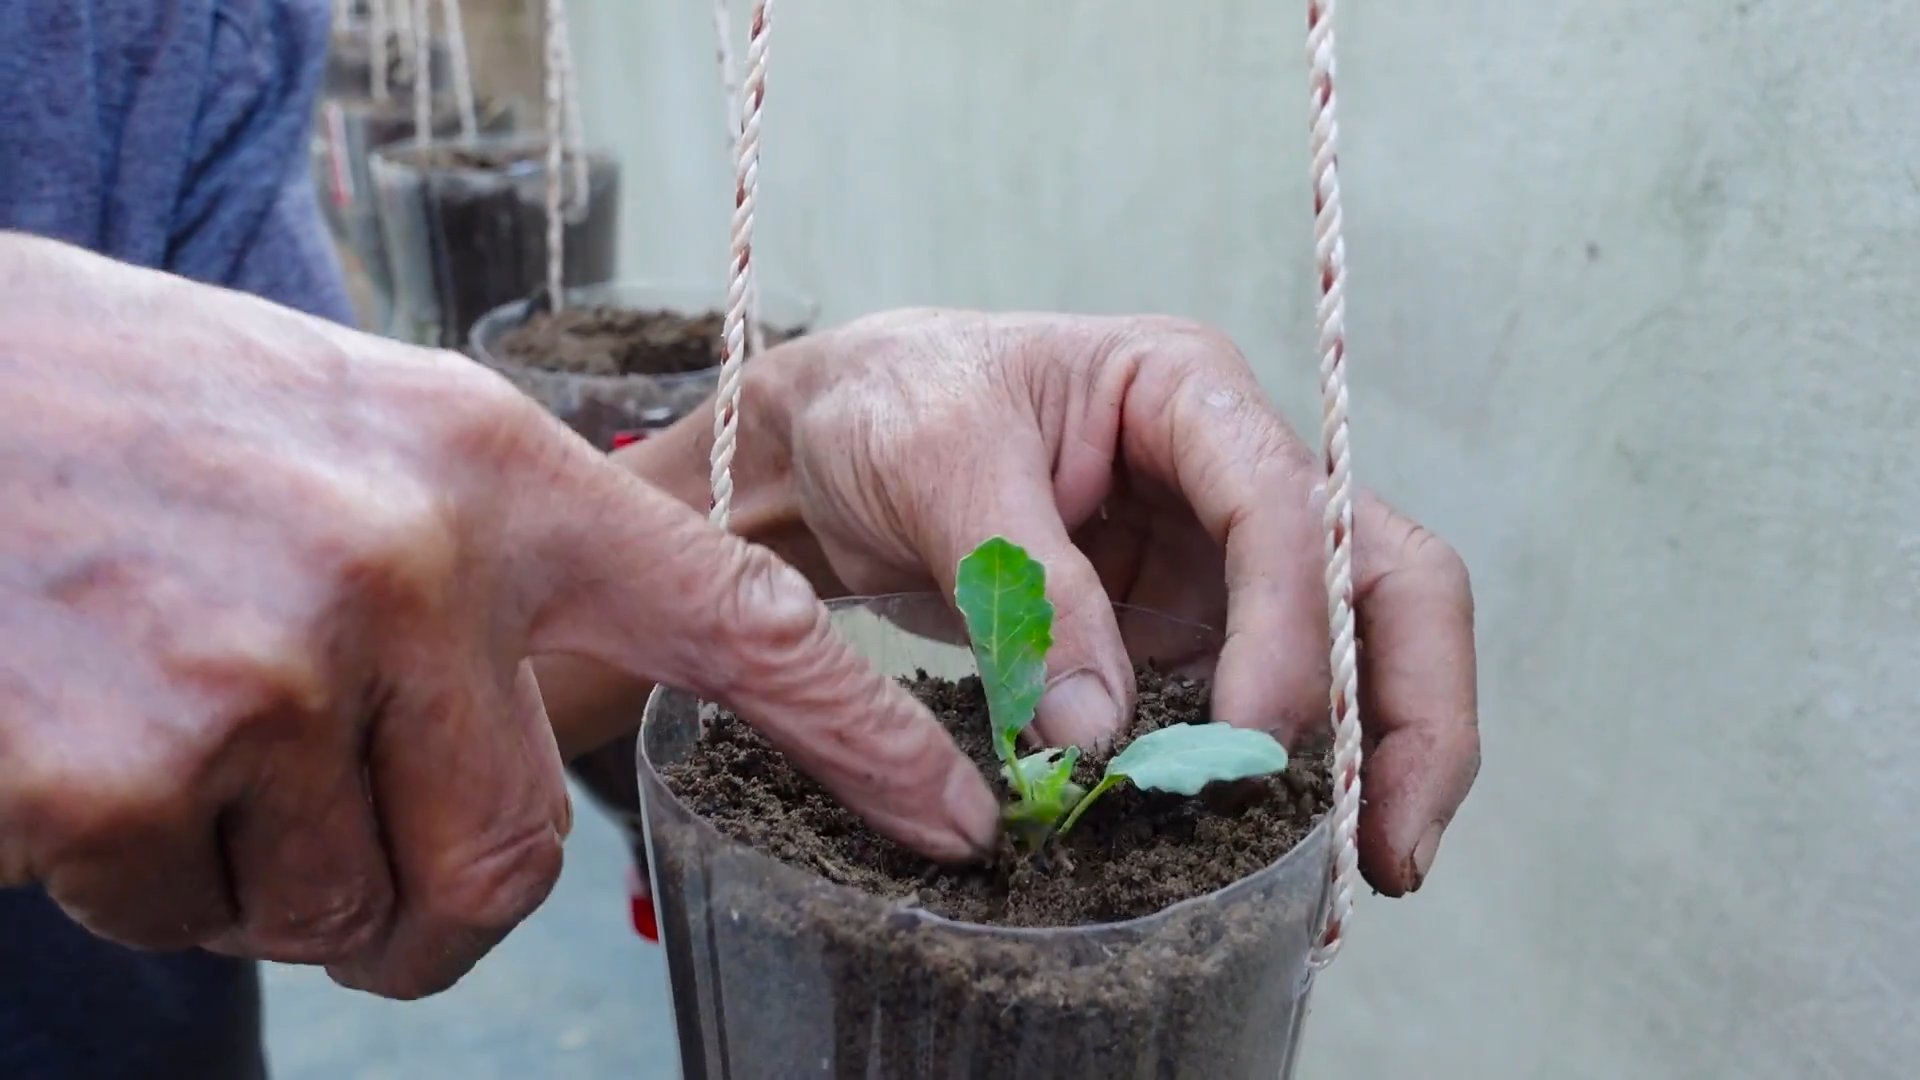
Can I grow kohlrabi in containers?
Yes, absolutely! Kohlrabi can be successfully grown in containers, making it a great option for those with limited garden space. Choose containers at least 12 inches deep and wide to allow for adequate root development. Ensure the containers have drainage holes to prevent waterlogging.
What should I do with my harvested kohlrabi?
Kohlrabi can be eaten raw, added to salads, stir-fries, or roasted. The young leaves are also edible and can be used like spinach. Store harvested kohlrabi in the refrigerator for up to a week for optimal freshness. You can also freeze kohlrabi for longer storage.
My kohlrabi bulbs are small. What went wrong?
Small kohlrabi bulbs can be due to several factors, including insufficient sunlight, poor soil drainage, overcrowding, or inconsistent watering. Ensure your plants receive adequate sunlight, have well-draining soil, and are spaced appropriately. Consistent watering is also crucial for optimal bulb development.
Can I save seeds from my homegrown kohlrabi to plant next year?
While you can attempt to save seeds from your kohlrabi, it’s important to note that kohlrabi is a hybrid plant, meaning the seeds may not produce plants identical to the parent plant. For consistent results, it’s best to purchase fresh seeds each year from a reputable seed supplier.
Leave a Comment