
Grow Calendula Flowers from Seeds and unlock a world of vibrant color and natural healing right in your own backyard! Have you ever dreamed of transforming your garden into a haven buzzing with life and bursting with sunshine-yellow and fiery-orange blooms? Well, you’re in the right place! This isn’t just about planting seeds; it’s about embarking on a rewarding DIY journey that connects you with nature and provides a wealth of benefits.
Calendula, also known as pot marigold, boasts a rich history, dating back to ancient civilizations where it was revered for its medicinal properties. From soothing skin irritations to adding a pop of color to culinary creations, this flower has been a trusted companion for centuries. But why should you learn to grow Calendula flowers from seeds? In today’s world, where we’re increasingly conscious of what we put on and in our bodies, having a readily available source of natural remedies and edible petals is invaluable. Plus, it’s incredibly satisfying to nurture a plant from a tiny seed to a flourishing flower!
I’m here to guide you through every step of the process, sharing my tried-and-true tips and tricks to ensure your Calendula plants thrive. Whether you’re a seasoned gardener or a complete beginner, this DIY guide will empower you to cultivate these beautiful and beneficial flowers with confidence. Get ready to roll up your sleeves, get your hands dirty, and experience the joy of growing your own Calendula – it’s easier than you think!
Grow Calendula Flowers from Seeds: A Beginner’s Guide
Hey there, fellow gardening enthusiasts! I’m so excited to share my experience with growing calendula flowers from seeds. These cheerful, sunny blooms are not only beautiful but also incredibly useful in the garden and for homemade remedies. Trust me, even if you’re a complete newbie, you can totally nail this!
Why Grow Calendula?
Before we dive into the how-to, let’s quickly chat about why calendula is such a fantastic addition to your garden.
* Easy to Grow: Calendula is super forgiving and thrives in a variety of conditions.
* Long Blooming Season: You’ll get to enjoy their vibrant colors for months!
* Beneficial for the Garden: They attract pollinators like bees and butterflies, and they can even help repel some unwanted pests.
* Medicinal Properties: Calendula has been used for centuries for its soothing and healing properties. You can use the petals to make infused oils, salves, and teas.
* Edible Petals: Add a pop of color and a slightly peppery flavor to your salads and other dishes.
Getting Started: What You’ll Need
Okay, let’s gather our supplies. Here’s what you’ll need to grow calendula from seeds:
* Calendula Seeds: Choose your favorite variety! There are single and double-flowered types, in shades of yellow, orange, and even apricot. I personally love the ‘Pacific Beauty’ mix for its range of colors.
* Seed Starting Trays or Small Pots: These will be your seed’s first home.
* Seed Starting Mix: This is a light and airy soil mix specifically designed for seedlings. Don’t use regular garden soil, as it can be too heavy.
* Watering Can or Spray Bottle: For gentle watering.
* Grow Lights (Optional): If you don’t have a sunny windowsill, grow lights can help your seedlings thrive.
* Plant Labels: To keep track of what you’ve planted.
* Small Trowel or Spoon: For transplanting.
* Gardening Gloves (Optional): To keep your hands clean.
Phase 1: Starting Seeds Indoors (Optional)
Starting seeds indoors gives you a head start on the growing season, especially if you live in a colder climate. I usually start my calendula seeds indoors about 4-6 weeks before the last expected frost.
1. Prepare Your Seed Starting Trays: Fill your seed starting trays or small pots with seed starting mix. Gently tap the trays to settle the mix.
2. Sow the Seeds: Make a small indentation (about 1/4 inch deep) in the soil with your finger or a pencil. Place 2-3 seeds in each indentation. This increases the chances of at least one seed germinating.
3. Cover the Seeds: Gently cover the seeds with a thin layer of seed starting mix.
4. Water Gently: Use a spray bottle or watering can with a gentle nozzle to moisten the soil. Be careful not to overwater, as this can cause the seeds to rot. The soil should be moist but not soggy.
5. Provide Warmth and Light: Place the trays in a warm location (around 70-75°F or 21-24°C). A heat mat can be helpful if your home is cool. If you don’t have a sunny windowsill, use grow lights. Keep the lights on for about 14-16 hours per day.
6. Keep the Soil Moist: Check the soil daily and water as needed to keep it consistently moist.
7. Wait for Germination: Calendula seeds typically germinate in 5-14 days. Be patient!
8. Thin the Seedlings: Once the seedlings have emerged and have a couple of sets of true leaves (the leaves that look like miniature versions of the adult plant’s leaves), thin them to one seedling per cell or pot. Use small scissors to snip off the weaker seedlings at the soil line. Don’t pull them out, as this can disturb the roots of the remaining seedling.
Phase 2: Direct Sowing Outdoors
If you live in a warmer climate or prefer a more hands-off approach, you can direct sow calendula seeds directly into your garden bed. I’ve had great success with this method!
1. Choose a Sunny Location: Calendula prefers full sun (at least 6 hours of sunlight per day), but it can tolerate partial shade.
2. Prepare the Soil: Loosen the soil with a garden fork or tiller. Amend the soil with compost or other organic matter to improve drainage and fertility.
3. Sow the Seeds: Sow the seeds about 1/4 inch deep and 6-8 inches apart.
4. Water Gently: Water the soil gently to moisten it.
5. Keep the Soil Moist: Keep the soil consistently moist until the seeds germinate.
6. Wait for Germination: Germination typically takes 5-14 days.
7. Thin the Seedlings: Once the seedlings have emerged and have a couple of sets of true leaves, thin them to 6-8 inches apart.
Phase 3: Transplanting Seedlings (If Starting Indoors)
Once your seedlings have grown large enough and the weather has warmed up, it’s time to transplant them into your garden.
1. Harden Off the Seedlings: Before transplanting, you need to “harden off” the seedlings. This means gradually exposing them to outdoor conditions over a period of 7-10 days. Start by placing the seedlings in a sheltered location outdoors for a few hours each day, gradually increasing the amount of time they spend outside. This will help them acclimate to the sun, wind, and temperature changes.
2. Choose a Sunny Location: As mentioned before, calendula prefers full sun.
3. Prepare the Soil: Loosen the soil and amend it with compost or other organic matter.
4. Dig Holes: Dig holes that are slightly larger than the root balls of the seedlings. Space the holes 6-8 inches apart.
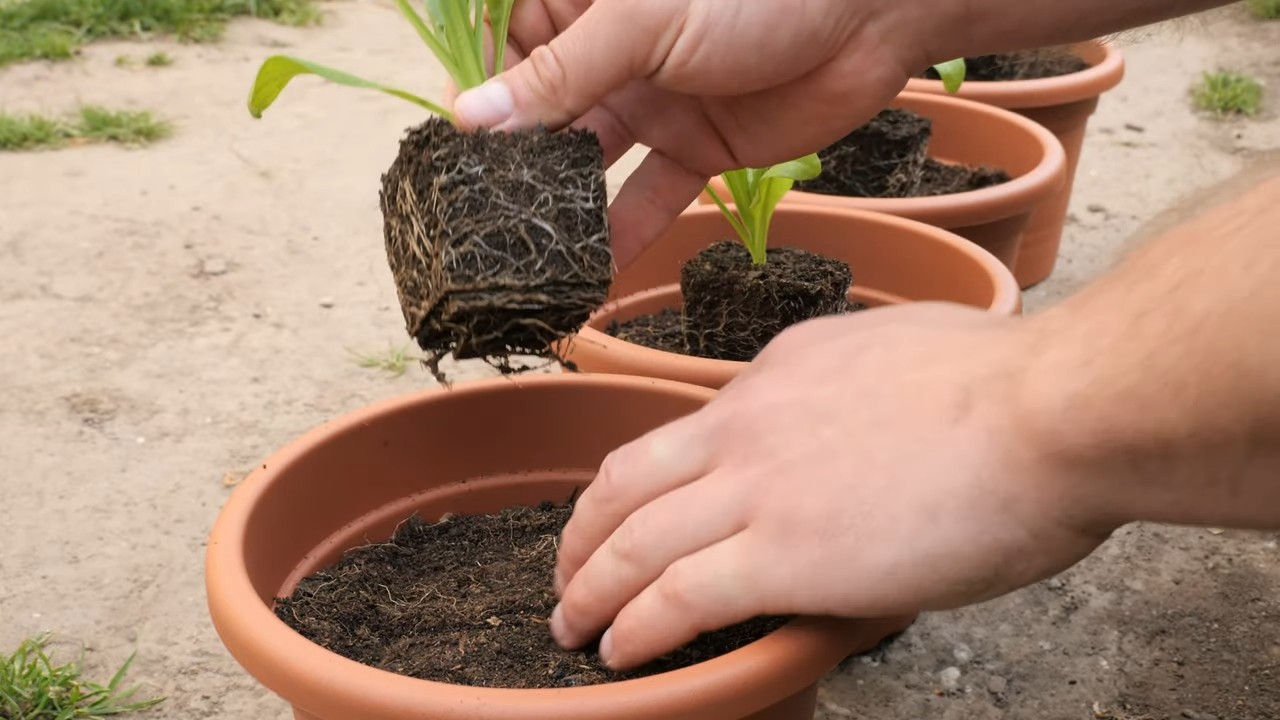
5. Remove the Seedlings from Their Containers: Gently remove the seedlings from their seed starting trays or pots. Be careful not to damage the roots.
6. Place the Seedlings in the Holes: Place the seedlings in the holes and backfill with soil. Gently firm the soil around the base of the plants.
7. Water Thoroughly: Water the seedlings thoroughly after transplanting.
8. Mulch (Optional): Apply a layer of mulch around the plants to help retain moisture and suppress weeds.
Phase 4: Caring for Your Calendula Plants
Once your calendula plants are established, they’re relatively low-maintenance.
* Watering: Water regularly, especially during dry periods. Avoid overwatering, as this can lead to root rot.
* Fertilizing: Calendula doesn’t need a lot of fertilizer. You can apply a balanced fertilizer once or twice during the growing season. I like to use a liquid seaweed fertilizer.
* Deadheading: Deadhead (remove) spent flowers regularly to encourage more blooms. Simply snip off the flower heads just below the flower.
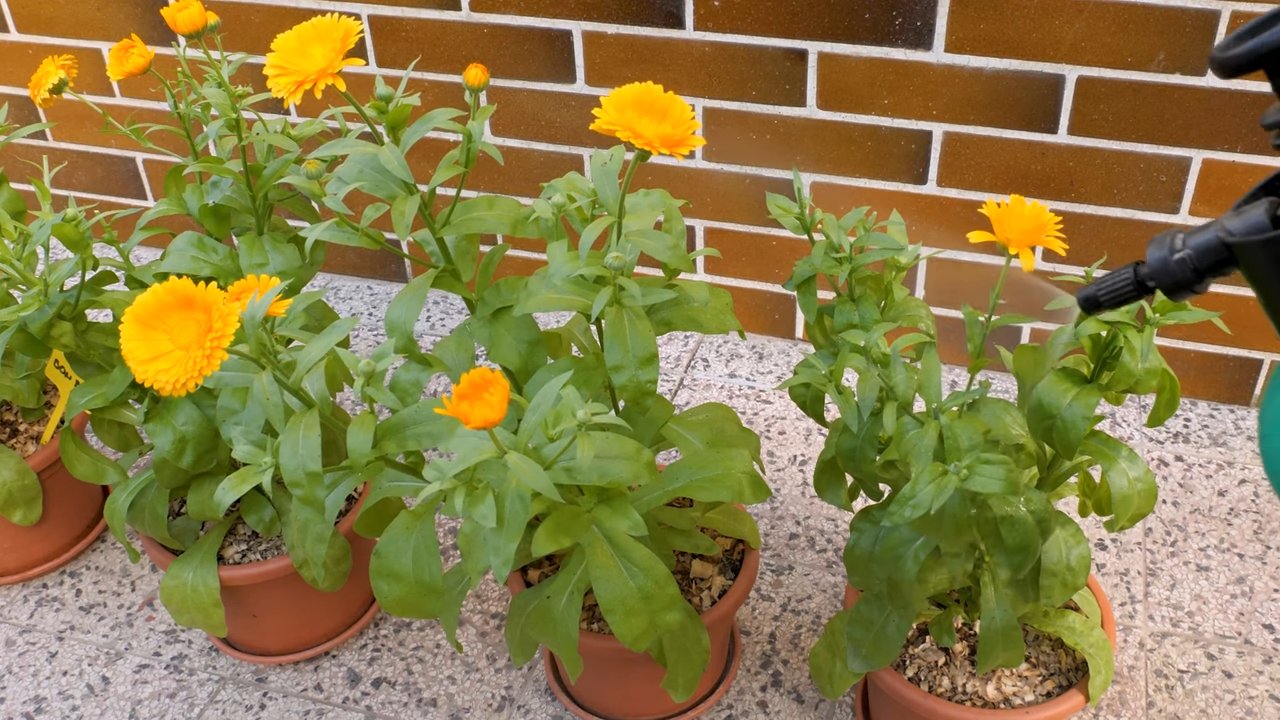
* Pest Control: Calendula is generally pest-resistant, but it can sometimes be affected by aphids or spider mites. If you notice any pests, you can spray the plants with insecticidal soap or neem oil.
* Disease Control: Calendula can sometimes be affected by powdery mildew, especially in humid conditions. To prevent powdery mildew, make sure the plants have good air circulation and avoid overhead watering. If you notice powdery mildew, you can spray the plants with a fungicide.
Harvesting Calendula Flowers
You can start harvesting calendula flowers as soon as they open. The best time to harvest is in the morning, after the dew has dried.
1. Choose Fully Opened Flowers: Select flowers that are fully open and have bright, vibrant petals.
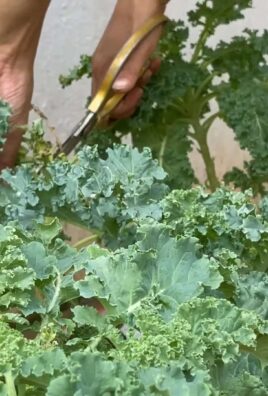
2. Cut the Flowers: Use scissors or pruning shears to cut the flower heads just below the flower.
3. Dry the Flowers (Optional): If you want to use the flowers for medicinal purposes or for crafts, you’ll need to dry them. You can dry them by hanging them upside down in a cool, dark, and well-ventilated place, or you can use a dehydrator.
4. Store the Dried Flowers: Store the dried flowers in an airtight container in a cool, dark place.
Using Your Calendula Flowers
Now for the fun part! There are so many ways to use your homegrown calendula flowers.
* Medicinal Uses: Use the petals to make infused oils, salves, and teas. Calendula is known for its anti-inflammatory, antiseptic, and wound-healing properties.
* Culinary Uses:
Conclusion
So, there you have it! Growing calendula flowers from seeds is not only incredibly rewarding, but it’s also surprisingly simple. We’ve walked you through each step, from selecting the right seeds and preparing your soil to nurturing your seedlings and transplanting them into their final home. But why should you bother with this DIY project when you could just buy calendula plants from a nursery? The answer is multifaceted.
First, growing from seed gives you unparalleled control over the entire process. You know exactly what kind of soil your plants are growing in, what kind of care they’re receiving, and you can ensure they’re free from harmful pesticides or chemicals. This is especially important if you plan to use your calendula flowers for medicinal purposes or in culinary creations.
Second, it’s significantly more cost-effective. A packet of calendula seeds is far cheaper than buying multiple mature plants, allowing you to cultivate a vibrant and abundant garden without breaking the bank. Imagine the sheer joy of harvesting basketfuls of these sunny blooms, knowing you nurtured them from tiny seeds!
Third, and perhaps most importantly, it’s an incredibly satisfying experience. There’s something truly magical about watching a tiny seed sprout and grow into a beautiful, flowering plant. It’s a connection to nature that’s both grounding and uplifting.
But the benefits don’t stop there. Consider the variations you can explore. Try growing different varieties of calendula, each with its unique color and petal arrangement. Experiment with companion planting, pairing your calendula with vegetables like tomatoes or cabbage to deter pests and attract beneficial insects. You can even dry the petals and infuse them into oils, balms, and teas, harnessing their potent medicinal properties.
Don’t be afraid to get creative! Perhaps you want to start your seeds indoors in recycled egg cartons or yogurt containers. Or maybe you want to create a dedicated calendula patch in your garden, complete with decorative stones and whimsical garden art. The possibilities are endless.
We strongly encourage you to give this DIY trick a try. It’s a fantastic way to connect with nature, save money, and enjoy the beauty and benefits of calendula flowers. And remember, even if you encounter a few challenges along the way, don’t give up! Gardening is a learning process, and every mistake is an opportunity to grow (pun intended!).
Once you’ve successfully grown your own calendula flowers from seeds, we’d love to hear about your experience. Share your photos, tips, and stories in the comments below. Let’s create a community of calendula enthusiasts and inspire others to embark on this rewarding journey. Your insights could be invaluable to someone just starting out. So, grab your seeds, get your hands dirty, and prepare to be amazed by the magic of calendula! This **calendula** growing adventure awaits!
Frequently Asked Questions (FAQ)
1. What is the best time of year to plant calendula seeds?
Calendula is a cool-season flower, so the best time to plant seeds is in early spring or late summer/early fall. For a spring planting, start seeds indoors 6-8 weeks before the last expected frost. For a fall planting, sow seeds directly into the garden about 8-10 weeks before the first expected frost. This allows the plants to establish themselves before the winter months. In warmer climates, you can often grow calendula year-round.
2. How long does it take for calendula seeds to germinate?
Calendula seeds typically germinate within 5-14 days, depending on the temperature and moisture levels. Keep the soil consistently moist but not waterlogged during this period. Providing a warm environment (around 65-75°F or 18-24°C) can speed up the germination process.
3. What kind of soil is best for growing calendula?
Calendula prefers well-draining soil that is rich in organic matter. A slightly acidic to neutral pH (around 6.0-7.0) is ideal. Before planting, amend your soil with compost or well-rotted manure to improve its fertility and drainage. Avoid heavy clay soils, as they can become waterlogged and lead to root rot.
4. How much sunlight does calendula need?
Calendula thrives in full sun, which means at least 6 hours of direct sunlight per day. However, in hotter climates, it can benefit from some afternoon shade to prevent the flowers from scorching. If you’re growing calendula indoors, place it near a sunny window or use grow lights to provide adequate illumination.
5. How often should I water calendula plants?
Water calendula plants regularly, especially during dry periods. Keep the soil consistently moist but not waterlogged. Avoid overhead watering, as this can promote fungal diseases. Instead, water at the base of the plant. Mulching around the plants can help retain moisture and suppress weeds.
6. Do I need to fertilize calendula plants?
Calendula is not a heavy feeder, so you don’t need to fertilize it excessively. However, a light feeding with a balanced organic fertilizer can help promote healthy growth and abundant blooms. Apply the fertilizer according to the package instructions, usually every 4-6 weeks during the growing season. Avoid using high-nitrogen fertilizers, as they can encourage leafy growth at the expense of flowers.
7. How do I harvest calendula flowers?
Harvest calendula flowers in the morning, after the dew has dried. Choose flowers that are fully open and have bright, vibrant petals. Gently pluck the entire flower head from the stem. You can use the fresh flowers immediately or dry them for later use. To dry calendula flowers, spread them out in a single layer on a screen or tray in a cool, dark, and well-ventilated place. They should be completely dry in about 1-2 weeks.
8. What are some common pests and diseases that affect calendula?
Calendula is generally a hardy plant, but it can be susceptible to certain pests and diseases, such as aphids, spider mites, powdery mildew, and root rot. To prevent these problems, provide good air circulation, avoid overwatering, and inspect your plants regularly for signs of infestation or disease. If you notice any problems, treat them promptly with organic pest control methods or fungicides.
9. Can I use calendula flowers for medicinal purposes?
Calendula flowers have been used for centuries for their medicinal properties. They are known for their anti-inflammatory, antiseptic, and wound-healing properties. You can use calendula flowers to make infused oils, balms, teas, and tinctures. However, it’s important to consult with a healthcare professional before using calendula for medicinal purposes, especially if you have any underlying health conditions or are taking any medications.
10. Are calendula flowers edible?
Yes, calendula flowers are edible and can be used to add color and flavor to salads, soups, and other dishes. The petals have a slightly peppery taste. However, it’s important to only eat calendula flowers that have been grown organically and are free from pesticides or other chemicals. Remove the green base of the flower, as it can be bitter.
11. Can I save seeds from my calendula plants to grow next year?
Yes, you can easily save seeds from your calendula plants to grow next year. Allow the flower heads to dry completely on the plant. Once they are dry and brown, you can collect the seeds. The seeds are crescent-shaped and brown or black in color. Store the seeds in a cool, dry, and dark place until you are ready to plant them.
12. My calendula plants are not flowering. What could be the reason?
There are several reasons why your calendula plants might not be flowering. It could be due to insufficient sunlight, over-fertilization with nitrogen, poor soil drainage, or stress from pests or diseases. Make sure your plants are getting at least 6 hours of direct sunlight per day, avoid using high-nitrogen fertilizers, and ensure that the soil is well-draining. Also, check your plants for signs of pests or diseases and treat them accordingly. Deadheading spent flowers can also encourage more blooms.
Leave a Comment