
Grow Kale in Pots: Unlock the secrets to a thriving, leafy green bounty, even without a sprawling garden! Have you ever dreamt of snipping fresh, vibrant kale leaves right outside your kitchen door? I know I have! It’s easier than you think, and this DIY guide is your passport to a container gardening adventure that will transform your balcony, patio, or even a sunny windowsill into a kale-producing powerhouse.
Kale, a nutritional powerhouse, has a rich history dating back to ancient Greece and Rome, where it was a staple food. Over centuries, it has spread across the globe, becoming a symbol of healthy eating and sustainable living. But let’s face it, not everyone has the space for a traditional garden. That’s where the magic of container gardening comes in!
In today’s fast-paced world, access to fresh, healthy produce can be a challenge. Store-bought kale can be expensive and may not always be the freshest. That’s why learning how to grow kale in pots is a game-changer. Imagine the satisfaction of harvesting your own organic kale, knowing exactly where it came from and how it was grown. Plus, it’s a fantastic way to reduce your carbon footprint and connect with nature, even in the heart of the city. This DIY guide will provide you with simple, step-by-step instructions and insider tips to ensure your potted kale thrives, providing you with a continuous supply of delicious and nutritious greens. Let’s get started!
Grow Your Own Delicious Kale in Pots: A Beginner’s Guide
Hey there, fellow gardening enthusiasts! I’m so excited to share my experience with growing kale in pots. It’s surprisingly easy, even if you don’t have a huge backyard. Fresh, homegrown kale is packed with nutrients and tastes amazing in salads, smoothies, and stir-fries. Let’s get started!
Choosing the Right Kale Variety
First things first, let’s talk about kale varieties. There are tons to choose from, but some are better suited for container gardening than others. Here are a few of my favorites:
* **Dwarf Blue Curled Vates:** This is a compact variety that’s perfect for smaller pots. It’s also very cold-hardy.
* **Red Russian:** This kale has beautiful reddish-purple stems and flat, tender leaves. It’s a bit more heat-tolerant than some other varieties.
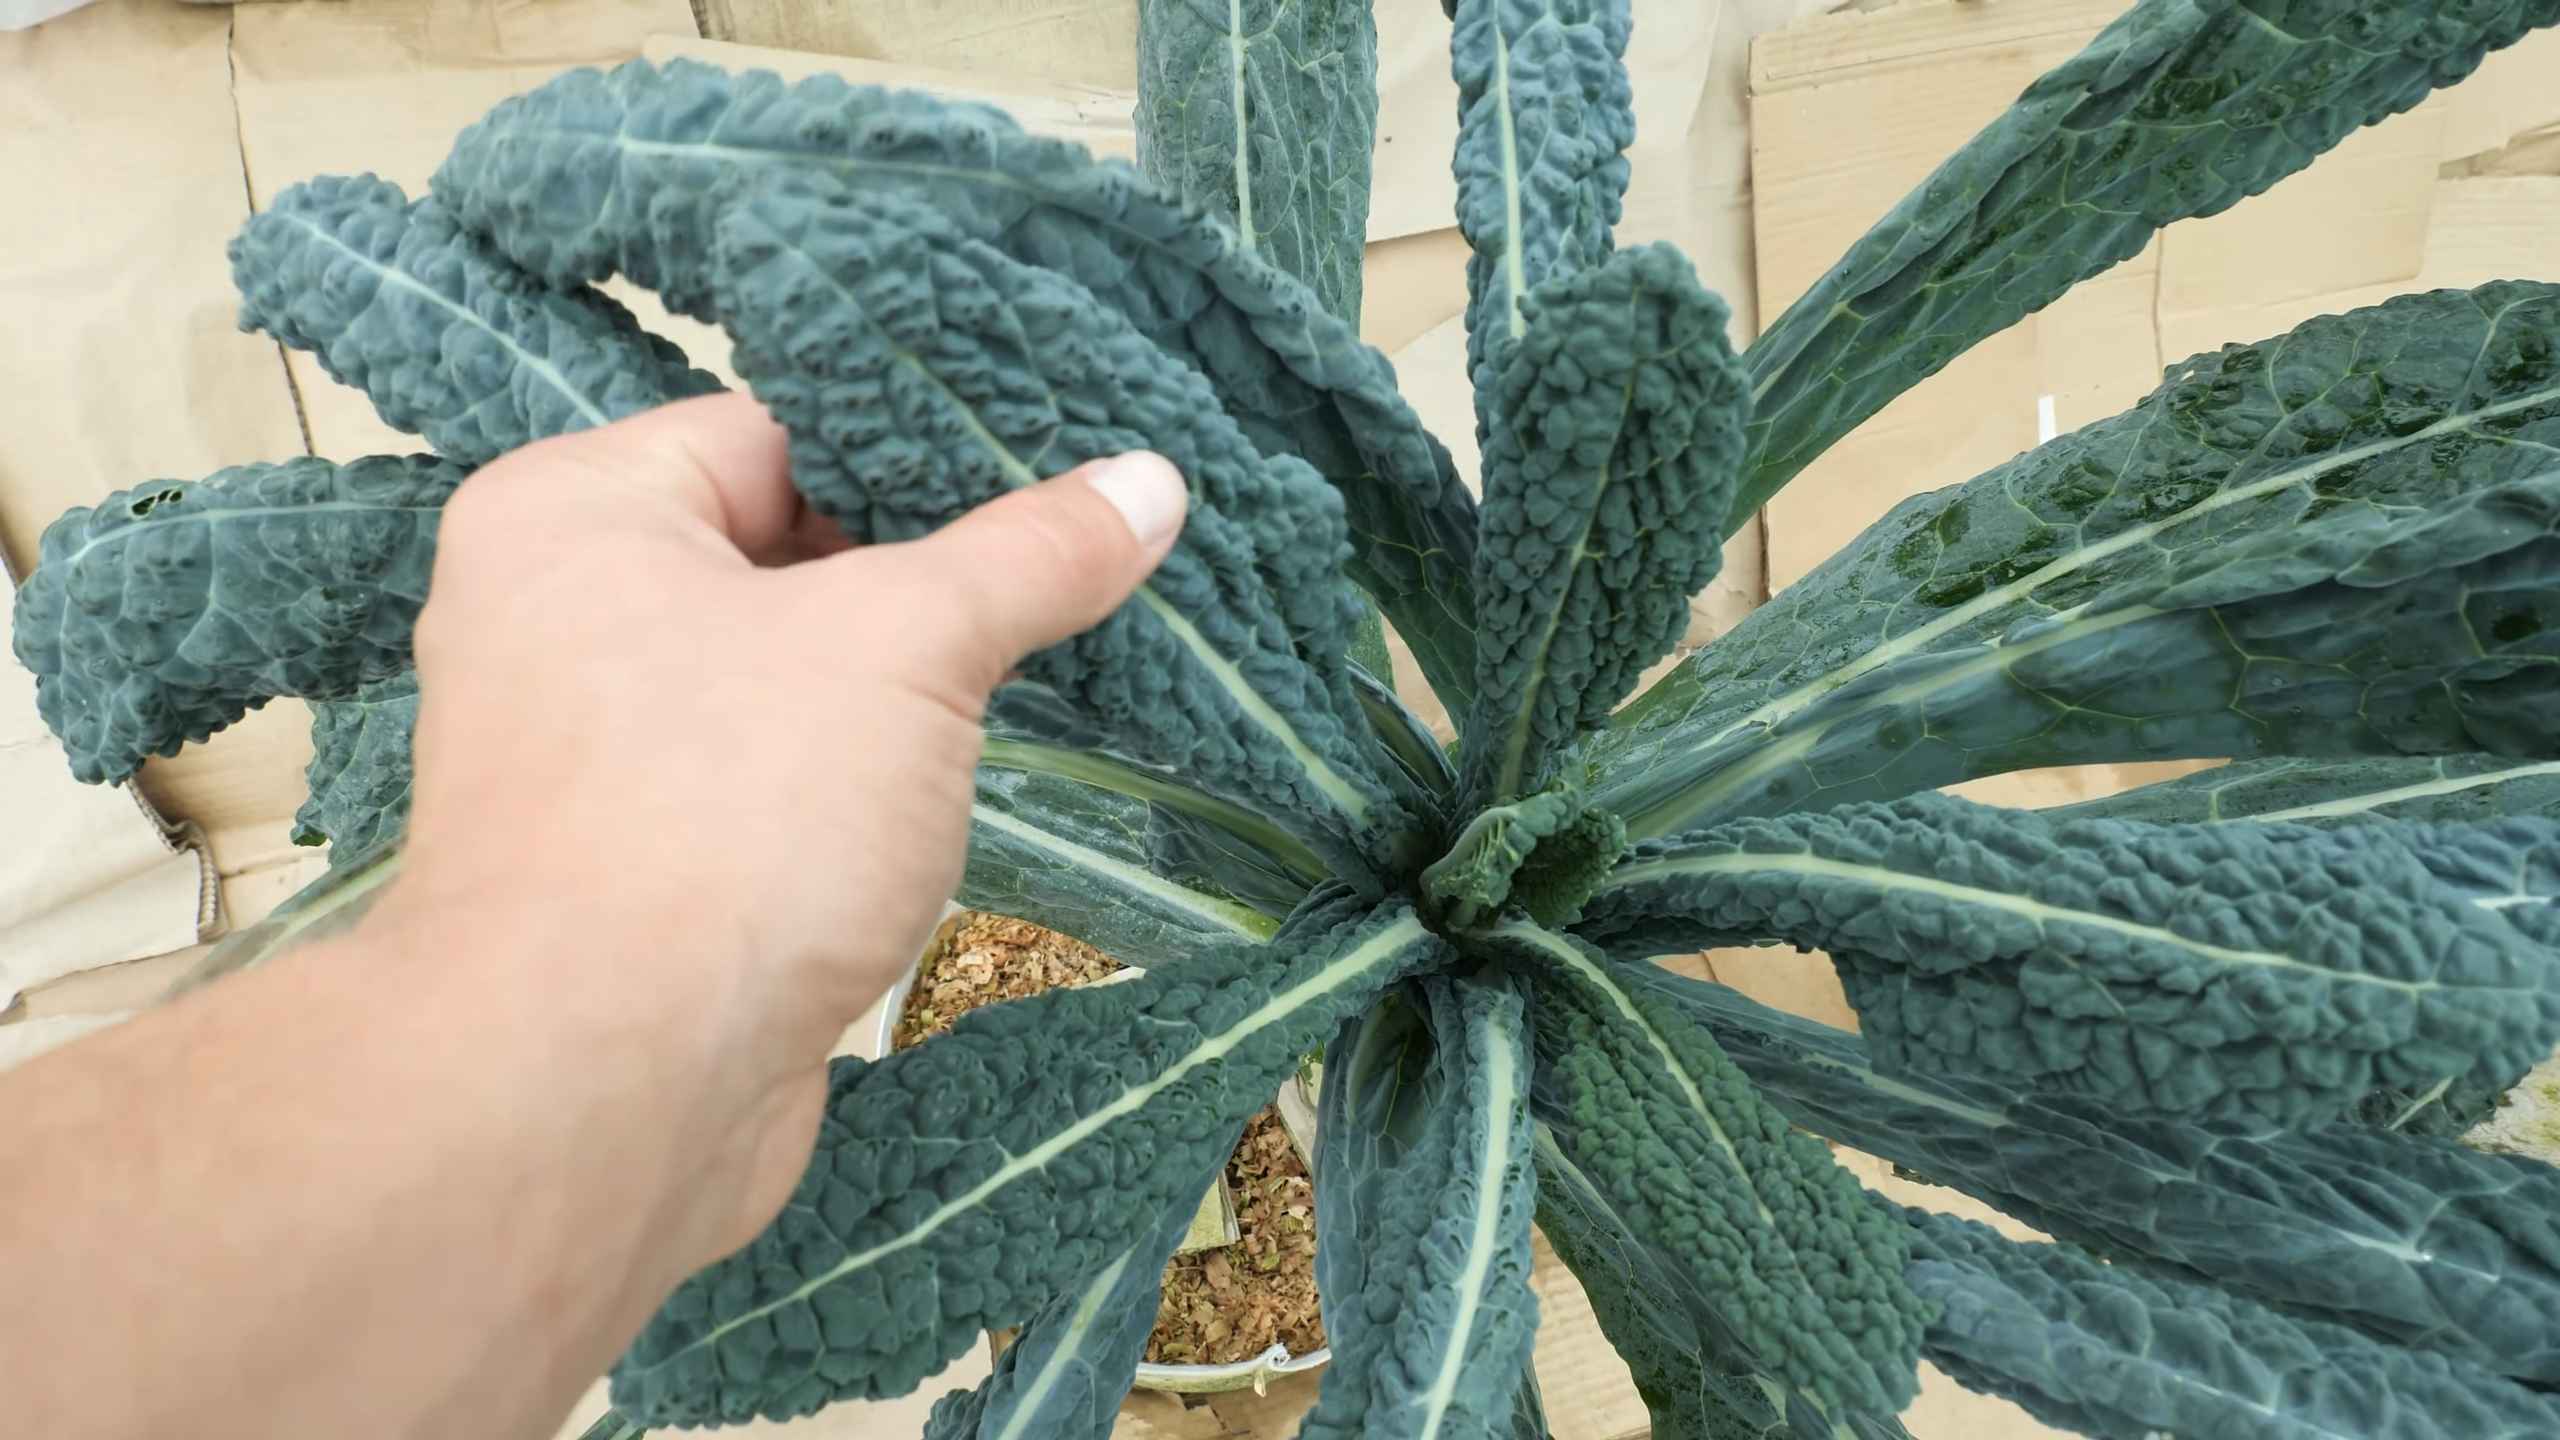
* **Lacinato (Dinosaur Kale):** This kale has long, dark green, bumpy leaves. It can get a bit tall, so make sure you have a pot that’s deep enough.
* **Redbor:** This is a stunning kale with deeply fringed, purple leaves. It adds a pop of color to any garden.
Gathering Your Supplies
Okay, now that we’ve picked our kale, let’s gather our supplies. You’ll need:
* **Pots:** Choose pots that are at least 12 inches in diameter and 12 inches deep. Bigger is generally better, as it gives the kale roots more room to grow. Make sure the pots have drainage holes!
* **Potting Mix:** Don’t use garden soil! It’s too heavy and doesn’t drain well in containers. Use a high-quality potting mix that’s specifically designed for container gardening. I like to use a mix that contains peat moss, perlite, and vermiculite.
* **Kale Seeds or Seedlings:** You can start kale from seed or buy seedlings from a local nursery. Starting from seed is cheaper, but it takes longer.
* **Fertilizer:** Kale is a heavy feeder, so you’ll need to fertilize it regularly. I recommend using a balanced, slow-release fertilizer or a liquid fertilizer that’s specifically formulated for leafy greens.
* **Watering Can or Hose:** You’ll need to water your kale regularly, especially during hot weather.
* **Optional: Mulch:** Mulch helps to retain moisture in the soil and suppress weeds. You can use straw, wood chips, or shredded leaves.
Planting Your Kale
Alright, let’s get our hands dirty! Here’s how to plant your kale:
1. **Prepare the Pots:** Fill your pots with potting mix, leaving about an inch of space at the top.
2. **Plant Seeds (if starting from seed):** Sow the seeds about 1/4 inch deep and 1 inch apart. Gently water the soil.
3. **Transplant Seedlings (if using seedlings):** Dig a hole in the potting mix that’s slightly larger than the root ball of the seedling. Gently remove the seedling from its container and place it in the hole. Backfill with potting mix and gently firm the soil around the base of the plant.
4. **Water Thoroughly:** Water the kale plants thoroughly after planting.
5. **Add Mulch (optional):** Spread a layer of mulch around the base of the plants to help retain moisture and suppress weeds.
Caring for Your Kale
Now that your kale is planted, it’s time to take care of it. Here’s what you need to do:
1. **Watering:** Kale needs consistent moisture, especially during hot weather. Water deeply whenever the top inch of soil feels dry to the touch. Avoid overwatering, as this can lead to root rot.
2. **Fertilizing:** Fertilize your kale every 2-3 weeks with a balanced, slow-release fertilizer or a liquid fertilizer. Follow the instructions on the fertilizer package.
3. **Sunlight:** Kale needs at least 6 hours of sunlight per day. Place your pots in a sunny location.
4. **Pest Control:** Kale can be susceptible to pests like aphids, cabbage worms, and flea beetles. Inspect your plants regularly for pests and take action if you see any. You can use insecticidal soap, neem oil, or handpick the pests off the plants.
5. **Weeding:** Keep the pots free of weeds. Weeds compete with the kale for nutrients and water.
6. **Pruning:** You can prune your kale to encourage bushier growth. Simply pinch off the top of the plant.
Harvesting Your Kale
The best part! You can start harvesting kale leaves when they are about 4-6 inches long. Here’s how:
1. **Harvest Outer Leaves:** Harvest the outer leaves first, leaving the inner leaves to continue growing.
2. **Cut or Snap Leaves:** You can either cut the leaves off with a knife or snap them off with your fingers.
3. **Harvest Regularly:** Harvest your kale regularly to encourage continued production.
4. **Enjoy!** Wash the kale leaves thoroughly before eating.
Troubleshooting
Sometimes, things don’t go exactly as planned. Here are a few common problems you might encounter when growing kale in pots and how to fix them:
* **Yellowing Leaves:** This could be a sign of overwatering, underwatering, or nutrient deficiency. Check the soil moisture and adjust your watering schedule accordingly. Fertilize your kale with a balanced fertilizer.
* **Pests:** As mentioned earlier, kale can be susceptible to pests. Inspect your plants regularly and take action if you see any pests.
* **Bolting:** Bolting is when the kale plant starts to produce flowers and seeds. This usually happens when the weather gets too hot. To prevent bolting, try to plant your kale in early spring or late summer. You can also provide shade for your kale during the hottest part of the day. If your kale does bolt, the leaves will become bitter.
* **Slow Growth:** This could be due to lack of sunlight, poor soil, or nutrient deficiency. Make sure your kale is getting enough sunlight and fertilize it regularly. You may also need to repot your kale into a larger pot with fresh potting mix.
Extending the Growing Season
Want to enjoy fresh kale for as long as possible? Here are a few tips for extending the growing season:
* **Start Seeds Indoors:** Start your kale seeds indoors 6-8 weeks before the last frost. This will give you a head start on the growing season.
* **Use Cold Frames or Row Covers:** Cold frames and row covers can protect your kale from frost and extend the growing season into the fall and winter.
* **Choose Cold-Hardy Varieties:** Some kale varieties are more cold-hardy than others. Choose varieties like Dwarf Blue Curled Vates or Red Russian for fall and winter growing.
* **Succession Planting:** Plant new kale seeds every few weeks to ensure a continuous harvest.
Choosing the Right Pot
Let’s dive a little deeper into choosing the right pot, because it’s more important than you might think!
* **Material Matters:** Plastic pots are lightweight and inexpensive, but they can dry out quickly. Terracotta pots are more breathable, but they’re also heavier and can crack in freezing temperatures. Glazed ceramic pots are attractive and retain moisture well, but they can be expensive. I personally like using a combination of plastic and terracotta, depending on the variety of kale and the location of the pot.
* **Drainage is Key:** I can’t stress this enough! Make sure your pot has plenty of drainage holes. Kale doesn’t like to sit in soggy soil. If your pot doesn’t have enough drainage holes, you can drill some yourself.
* **Size Considerations:** As I mentioned earlier, bigger is generally better. A 12-inch pot is a good starting point, but if you’re growing a larger variety like Lacinato, you might want to go with a 15-inch or even 18-inch pot. The larger the pot, the more room the roots have to grow, and the more water and nutrients the plant can access.
Soil Secrets: Getting the Mix Right
The potting mix is the foundation of your container garden, so it’s important to get it right.
* **Avoid Garden Soil:** I know I’ve said this before, but it’s worth repeating. Garden soil is too heavy and doesn’t drain well in containers. It can also contain pests and diseases that can harm your kale plants.
* **Choose a High-Quality Potting Mix:** Look for a potting mix that’s specifically designed for container gardening. These mixes are typically made from a blend of peat moss, perlite, and vermiculite.
* **Amendments:** You can also amend your potting mix with compost or other organic matter. Compost adds nutrients to the soil and improves drainage.
* **pH Levels:** Kale prefers a slightly acidic soil with a pH of 6.0 to 7.0. You can test the pH of your soil

Conclusion
So, there you have it! Growing kale in pots is not only achievable, but it’s also a remarkably rewarding experience, even for those with limited space or gardening expertise. We’ve walked you through the essential steps, from selecting the right pot and soil to nurturing your kale plants and harvesting those vibrant, nutrient-packed leaves.
Why is this DIY trick a must-try? Because it puts fresh, healthy, and delicious kale right at your fingertips. Imagine stepping outside your door and snipping off a handful of kale for your morning smoothie, a lunchtime salad, or a hearty dinner side dish. No more trips to the grocery store for wilted, overpriced greens! Plus, growing your own food is incredibly satisfying and connects you to the natural world in a meaningful way.
But the benefits don’t stop there. Growing kale in pots allows for greater control over the growing environment. You can easily move your pots to chase the sun, protect them from harsh weather, or even bring them indoors during the colder months to extend your harvest. This level of control is simply not possible with in-ground gardening.
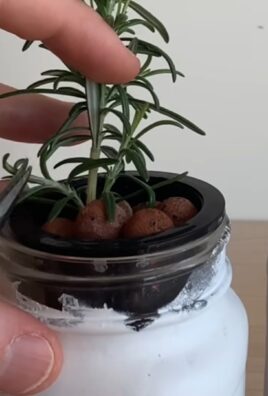
Looking for variations? Absolutely! Consider experimenting with different varieties of kale. Curly kale is a classic choice, but you might also enjoy the milder flavor of Tuscan kale (also known as Lacinato or dinosaur kale) or the ornamental appeal of Red Russian kale. You can also companion plant your kale with herbs like rosemary, thyme, or sage to deter pests and enhance the flavor of your greens. Another fun variation is to try succession planting. Sow new seeds every few weeks to ensure a continuous supply of fresh kale throughout the growing season.
Don’t be intimidated if you’re a beginner. Growing kale in pots is surprisingly forgiving. Just remember to provide adequate sunlight, well-draining soil, and consistent watering, and you’ll be well on your way to a bountiful harvest. And remember, even if you encounter a few challenges along the way, the learning process is part of the fun.
We are confident that you’ll find growing kale in pots to be a worthwhile and enjoyable endeavor. The taste of homegrown kale is simply unmatched, and the satisfaction of nurturing your own food from seed to table is truly rewarding.
So, what are you waiting for? Grab a pot, some soil, and some kale seeds, and get started today! We encourage you to try this DIY trick and share your experiences with us. Tell us about your successes, your challenges, and your favorite ways to use your homegrown kale. Share your photos and tips on social media using #HomegrownKale or tag us in your posts. We can’t wait to see what you create! Let’s build a community of pot-grown kale enthusiasts and inspire others to embrace the joys of gardening, one pot at a time. Remember, fresh, delicious, and healthy kale is just a pot away!
Frequently Asked Questions (FAQ)
What is the best size pot for growing kale?
A pot that is at least 12 inches in diameter and 12 inches deep is generally recommended for growing kale. This size provides enough space for the roots to develop properly and allows the plant to grow to a reasonable size. However, if you plan to grow multiple kale plants in the same pot, you’ll need a larger container. A 20-inch pot can comfortably accommodate 2-3 kale plants. Remember to choose a pot with drainage holes to prevent waterlogging.
What type of soil should I use for growing kale in pots?
Kale thrives in well-draining, nutrient-rich soil. A good potting mix specifically formulated for vegetables is ideal. You can also create your own mix by combining equal parts of compost, peat moss (or coconut coir), and perlite or vermiculite. Compost provides essential nutrients, peat moss or coconut coir helps retain moisture, and perlite or vermiculite improves drainage. Avoid using garden soil in pots, as it can become compacted and doesn’t drain well.
How much sunlight does kale need when grown in pots?
Kale needs at least 6 hours of direct sunlight per day to thrive. Choose a sunny location for your pots, such as a south-facing balcony or patio. If you live in a particularly hot climate, some afternoon shade can be beneficial to prevent the leaves from scorching. If you don’t have enough natural sunlight, you can supplement with grow lights.
How often should I water kale grown in pots?
Water kale regularly, especially during hot, dry weather. The soil should be kept consistently moist, but not waterlogged. Check the soil moisture by sticking your finger about an inch into the soil. If it feels dry, it’s time to water. Water deeply, until water drains out of the drainage holes. Avoid overhead watering, as this can lead to fungal diseases.
How often should I fertilize kale grown in pots?
Kale is a heavy feeder, so regular fertilization is important. Start fertilizing about 2-3 weeks after transplanting the seedlings or when the plants have developed a few true leaves. Use a balanced, water-soluble fertilizer according to the package directions. You can also supplement with organic fertilizers like compost tea or fish emulsion. Fertilize every 2-3 weeks throughout the growing season.
What are some common pests and diseases that affect kale, and how can I prevent them?
Common pests that affect kale include aphids, cabbage worms, flea beetles, and slugs. To prevent pest problems, inspect your plants regularly and remove any pests you find by hand. You can also use insecticidal soap or neem oil to control infestations. Row covers can also be used to protect your plants from pests. Common diseases that affect kale include downy mildew and black rot. To prevent diseases, provide good air circulation, avoid overhead watering, and remove any infected leaves promptly.
When is the best time to harvest kale?
You can start harvesting kale leaves when they are about 4-6 inches long. Harvest the outer leaves first, leaving the inner leaves to continue growing. You can harvest kale continuously throughout the growing season. The flavor of kale is often improved by a light frost.
Can I grow kale indoors?
Yes, you can grow kale indoors, but you’ll need to provide adequate light. Place your pots near a sunny window or use grow lights. You’ll also need to ensure good air circulation and monitor for pests and diseases.
What are some creative ways to use homegrown kale?
The possibilities are endless! You can use kale in salads, smoothies, soups, stews, stir-fries, and even baked goods. Kale chips are a healthy and delicious snack. You can also add kale to omelets, frittatas, and quiches. Don’t be afraid to experiment and find your favorite ways to enjoy your homegrown kale!
Can I grow kale in pots during the winter?
Yes, kale is a cold-hardy vegetable and can be grown in pots during the winter in many climates. In mild climates, you can simply leave your pots outdoors. In colder climates, you may need to protect your plants from frost by covering them with a blanket or moving them to a sheltered location. You can also bring your pots indoors and grow kale under grow lights.
Leave a Comment