
Grow Lemongrass Quickly and effortlessly? Absolutely! Imagine stepping into your backyard and snipping fresh, fragrant lemongrass for your favorite Thai curry or a soothing cup of tea. No more trips to the grocery store or settling for wilted, lackluster stalks. This DIY guide is your secret weapon to cultivating a thriving lemongrass patch right at home.
Lemongrass, with its vibrant citrusy aroma, has been a staple in Asian cuisine and traditional medicine for centuries. Originating in Southeast Asia, it’s revered not only for its culinary uses but also for its potential health benefits, from aiding digestion to relieving stress. I’ve always admired how this humble grass can add so much flavor and fragrance to dishes and drinks.
But let’s be honest, sometimes growing lemongrass can feel like a slow and frustrating process. That’s where these DIY tricks and hacks come in! I’m going to share my tried-and-true methods to help you grow lemongrass quickly, even if you’re a complete beginner. Whether you’re short on space, time, or gardening experience, these simple techniques will empower you to enjoy a bountiful harvest of this amazing herb. Get ready to transform your garden and your kitchen with the magic of homegrown lemongrass!
Grow Lemongrass Like a Pro: A DIY Guide to Rapid Rooting
Hey there, fellow plant enthusiasts! Ever dreamt of having a constant supply of fresh, fragrant lemongrass right at your fingertips? I know I have! And guess what? It’s totally achievable, even if you don’t have a green thumb. I’m going to walk you through my tried-and-true method for quickly rooting lemongrass stalks, so you can enjoy this amazing herb in your cooking and teas in no time. Let’s get started!
Choosing Your Lemongrass Stalks
Before we dive into the rooting process, it’s crucial to select the right lemongrass stalks. This is the foundation of your success, so pay close attention!
* Look for Healthy Stalks: Choose stalks that are firm, green, and free from blemishes, spots, or signs of rot. Avoid any that look dried out or damaged.
* Consider the Source: Ideally, get your lemongrass from a reputable source like a local farmers market or Asian grocery store. These are more likely to be fresh and viable. Supermarket lemongrass can sometimes work, but the success rate is lower.
* Check for a Root Base (Optional): If you can find stalks with a small root base already forming, that’s a huge bonus! It’ll significantly speed up the rooting process.
* Size Matters (Sort Of): While you don’t need giant stalks, aim for ones that are at least 6-8 inches long. This gives them enough energy reserves to develop roots.
The Water Propagation Method: My Go-To Technique
This is my favorite method because it’s simple, effective, and allows you to monitor the root growth every step of the way.
Materials You’ll Need:
* Lemongrass stalks (as described above)
* A clean glass or jar
* Water (tap water is fine, but filtered water is even better)
* A sharp knife or scissors
* Rooting hormone (optional, but it can boost your success rate)
Step-by-Step Instructions:
1. Prepare the Stalks: Using your sharp knife or scissors, trim the top of the lemongrass stalks, removing any dry or brown leaves. Leave about 2-3 inches of green leaves at the top. This helps the plant focus its energy on root development.
2. Optional: Rooting Hormone Dip: If you’re using rooting hormone, dip the bottom inch of each stalk into the powder or liquid. This isn’t essential, but it can encourage faster and more robust root growth. I’ve had great success both with and without it.
3. Place in Water: Fill your glass or jar with enough water to cover the bottom 2-3 inches of the lemongrass stalks. Make sure the leaves are not submerged in water, as this can cause them to rot.
4. Find the Right Spot: Place the jar in a warm, sunny location. A windowsill that receives indirect sunlight is ideal. Avoid direct, harsh sunlight, which can scorch the leaves.
5. Change the Water Regularly: This is crucial! Change the water every 1-2 days to prevent bacteria growth and keep the water fresh. This also provides the lemongrass with a fresh supply of oxygen.
6. Monitor Root Growth: Keep a close eye on the stalks. You should start to see small roots emerging from the bottom within a week or two. Be patient; sometimes it takes a little longer.
7. Wait for Root Development: Allow the roots to grow to at least 2-3 inches long before transplanting. This ensures they’re strong enough to survive in soil.
Planting Your Rooted Lemongrass
Once your lemongrass has developed a good root system, it’s time to move it to its permanent home in soil.
Materials You’ll Need:
* A pot or container (at least 6 inches in diameter)
* Well-draining potting mix (I recommend a mix of potting soil, perlite, and compost)
* Watering can or hose
Step-by-Step Instructions:
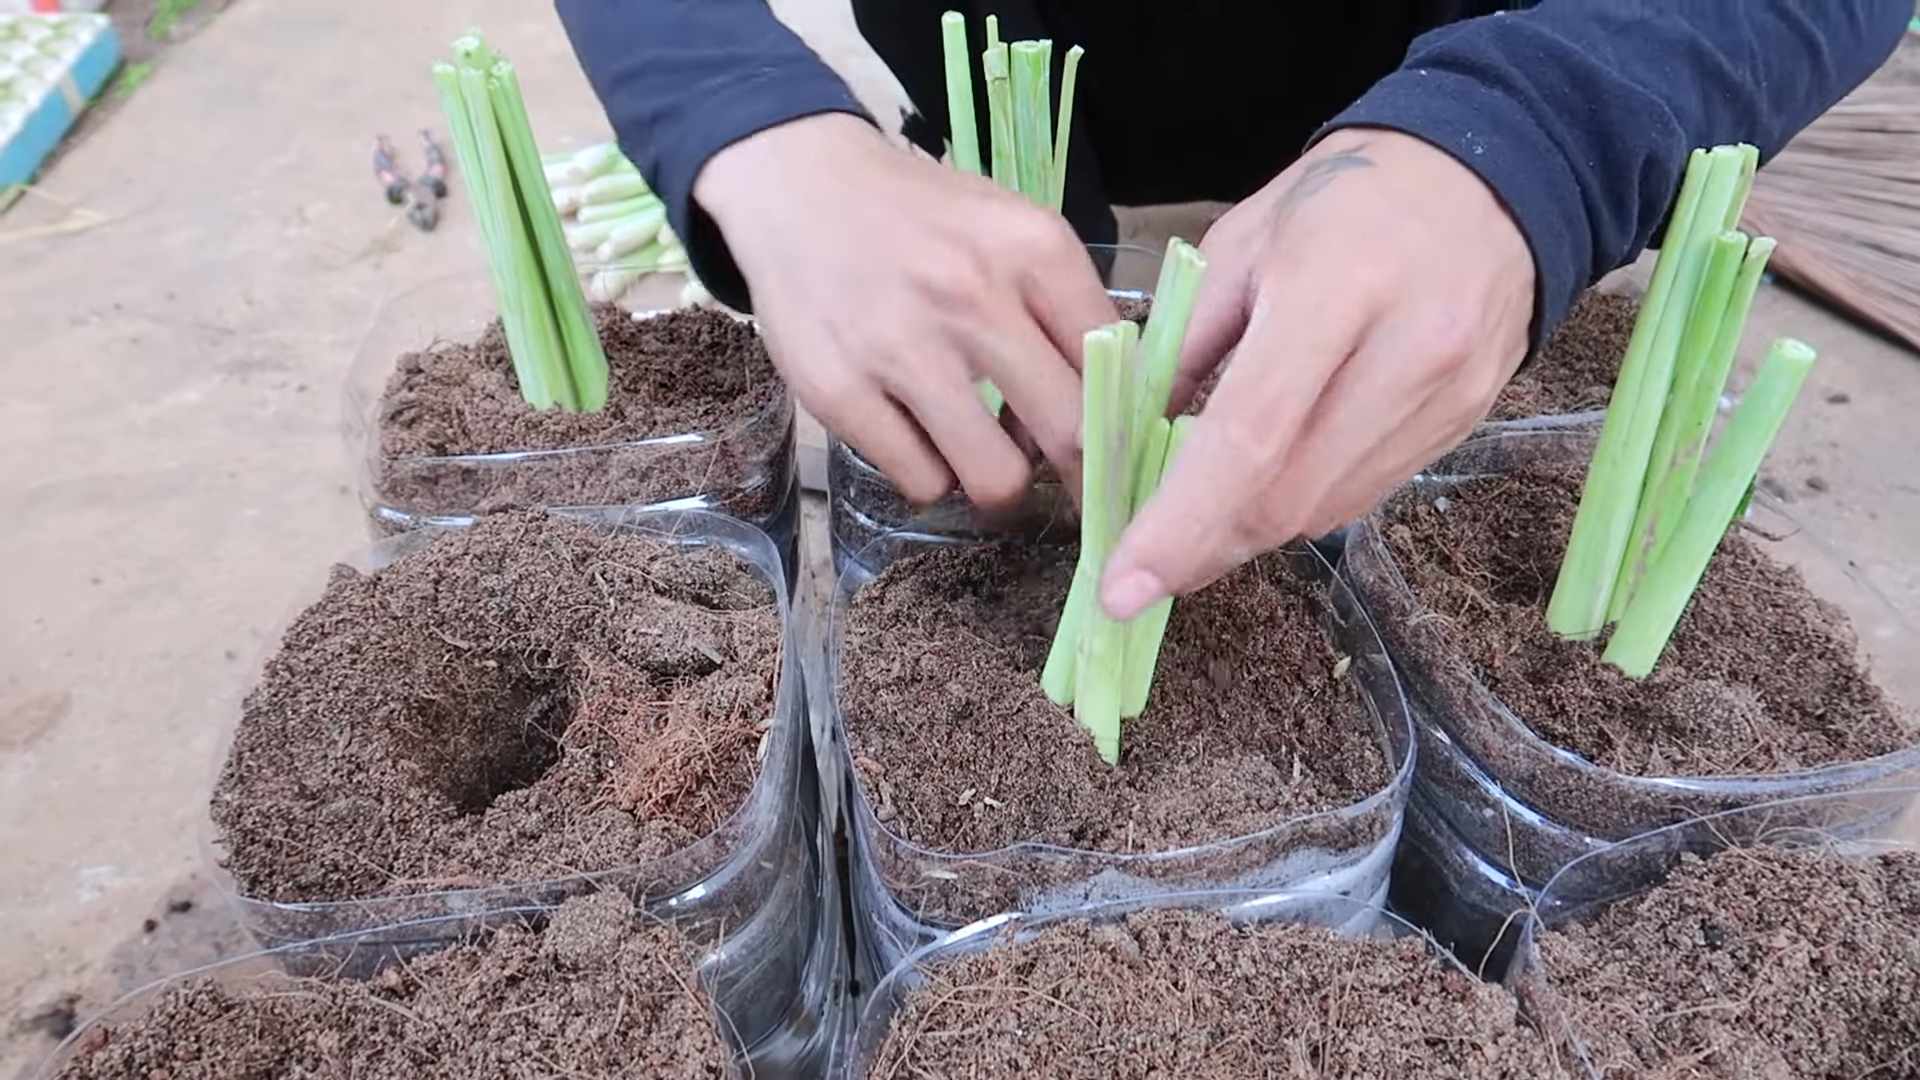
1. Prepare the Pot: Fill your pot with the well-draining potting mix, leaving about an inch of space at the top.
2. Create a Hole: Make a hole in the center of the soil large enough to accommodate the lemongrass roots.
3. Carefully Transplant: Gently remove the lemongrass stalk from the water and carefully place it in the hole. Spread the roots out as much as possible.
4. Fill and Firm: Fill the hole with soil, gently firming it around the base of the plant.
5. Water Thoroughly: Water the lemongrass thoroughly until water drains out of the bottom of the pot. This helps settle the soil and encourages root growth.
6. Choose the Right Location: Place the pot in a sunny location that receives at least 6 hours of sunlight per day. Lemongrass thrives in warm, sunny conditions.
7. Water Regularly: Keep the soil consistently moist, but not waterlogged. Water when the top inch of soil feels dry to the touch.
8. Fertilize (Optional): To encourage vigorous growth, you can fertilize your lemongrass every few weeks with a balanced liquid fertilizer. Follow the instructions on the fertilizer label.
Tips for Success and Troubleshooting
Even with the best methods, sometimes things don’t go exactly as planned. Here are some tips and solutions to common problems:
* Rotting Stalks: If you notice the base of the stalks turning brown or mushy, it’s likely due to rot. This can be caused by using dirty water or not changing the water frequently enough. Remove the affected stalks immediately and start with fresh water.
* Slow Root Growth: If your lemongrass isn’t rooting as quickly as you’d like, try moving it to a warmer location or adding a small amount of rooting hormone to the water.
* Yellowing Leaves: Yellowing leaves can be a sign of overwatering or underwatering. Adjust your watering schedule accordingly. It can also be a sign of nutrient deficiency, so consider fertilizing.
* Pest Problems: Lemongrass is generally pest-resistant, but occasionally it can be affected by aphids or spider mites. If you notice any pests, treat them with an insecticidal soap or neem oil.
* Overwintering: If you live in a cold climate, you’ll need to bring your lemongrass indoors during the winter. Place it in a sunny location and water it sparingly.
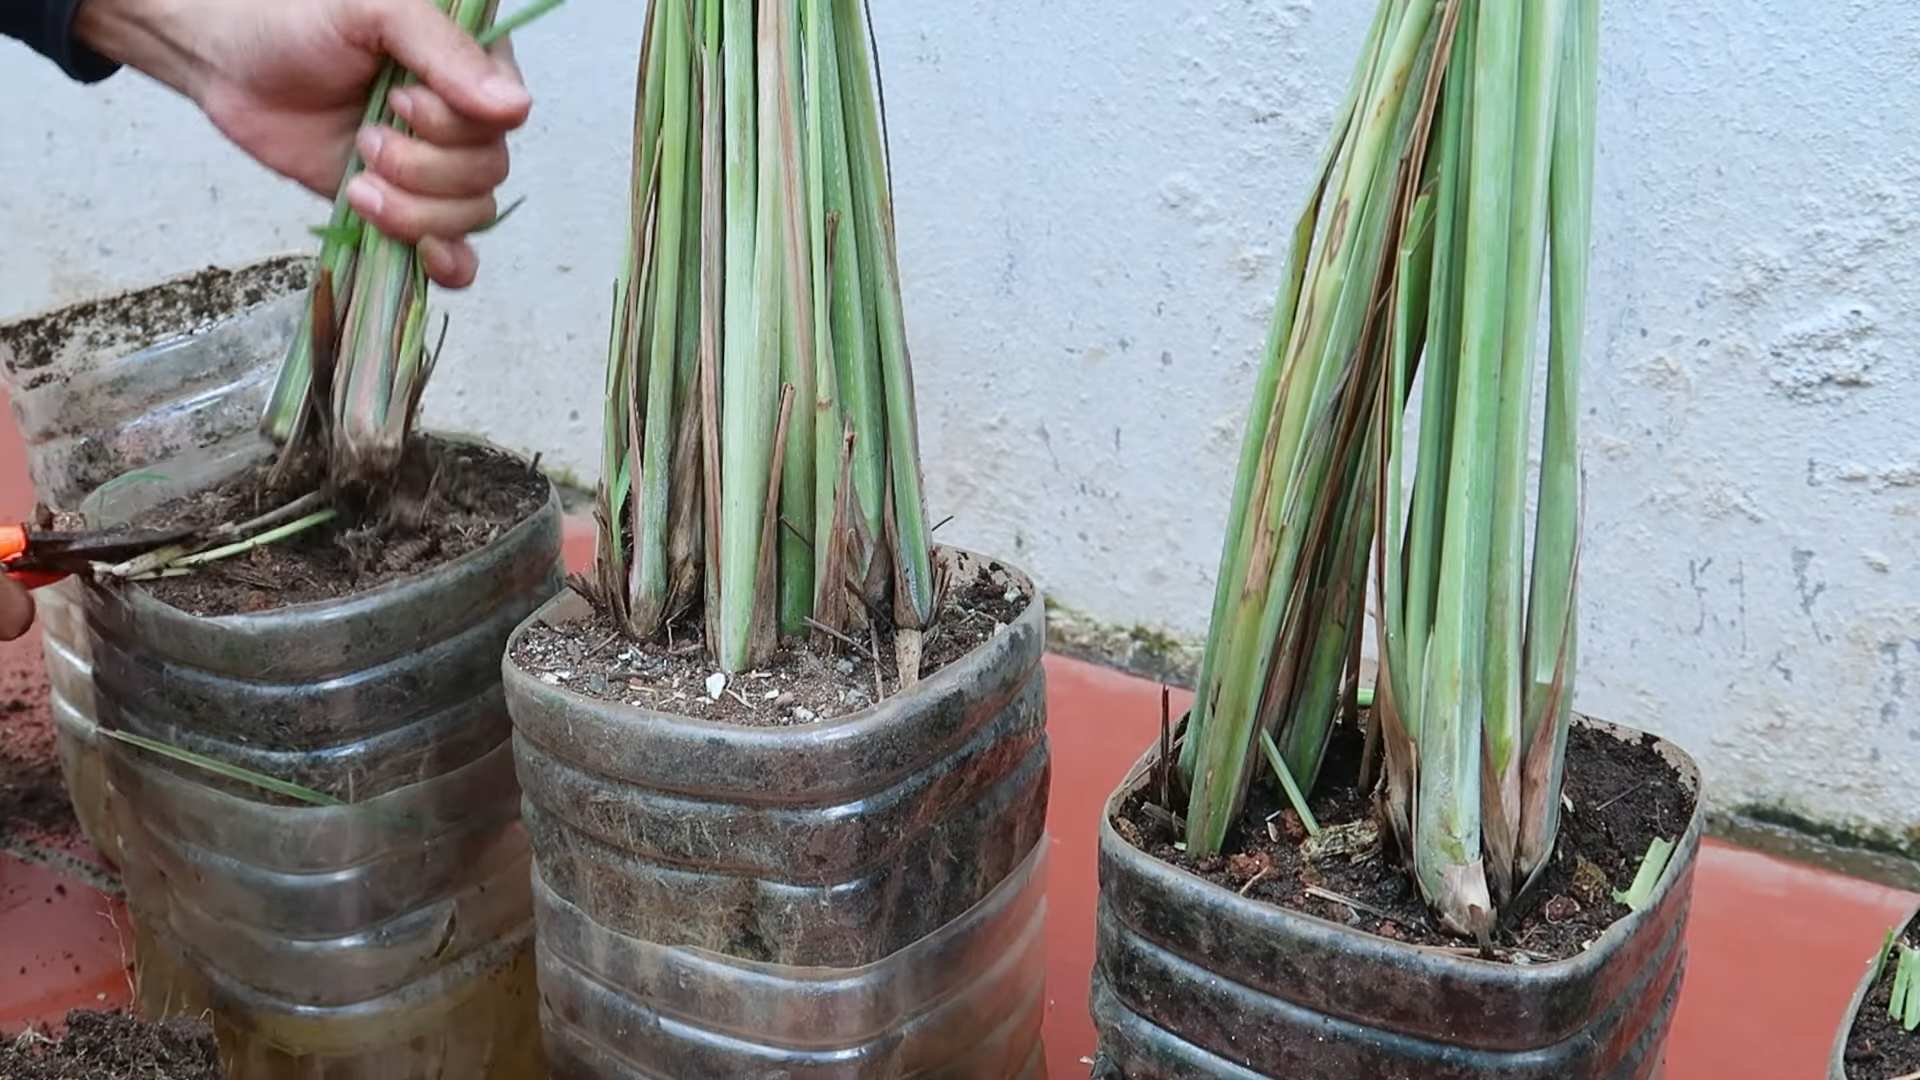
* Harvesting: You can start harvesting lemongrass once the stalks are at least 1/2 inch thick. Cut the stalks near the base of the plant. The plant will continue to grow and produce more stalks.
Propagating from Existing Plants
Once you have a thriving lemongrass plant, you can easily propagate it by dividing the clumps. This is a great way to expand your lemongrass supply or share it with friends and family.
1. Dig Up the Plant: Carefully dig up the entire lemongrass plant, being careful not to damage the roots.
2. Divide the Clumps: Gently separate the plant into smaller clumps, each with several stalks and a good root system.
3. Replant: Replant the clumps in individual pots or in the ground, following the same planting instructions as above.
Why Grow Your Own Lemongrass?
Besides the obvious benefit of having fresh lemongrass on hand, there are many other reasons to grow your own:
* Freshness: Store-bought lemongrass can often be dry and lacking in flavor. Homegrown lemongrass is always fresh and fragrant.
* Cost-Effective: Buying lemongrass regularly can add up. Growing your own is a much more economical option.
* Health Benefits: Lemongrass is packed with antioxidants and has anti-inflammatory properties. It’s a healthy and delicious addition to your diet.
* Aromatic: Lemongrass has a wonderful citrusy aroma that can fill your garden or home.
* Sustainable: Growing your own lemongrass reduces your reliance on commercially grown produce, which can have a negative impact on the environment.
So there you have it! My complete guide to growing lemongrass quickly and easily. With a little patience and care, you’ll be enjoying the fresh, vibrant flavor of homegrown lemongrass in no time. Happy growing!
Conclusion
So, there you have it! Growing lemongrass quickly doesn’t have to be a daunting task reserved for seasoned gardeners. With this simple, yet effective DIY trick, you can transform store-bought lemongrass stalks into a thriving, fragrant addition to your herb garden or even a sunny windowsill. We’ve walked you through the process, highlighting the key steps to ensure success, from selecting the right stalks to providing the optimal environment for root development.
Why is this a must-try? Because it’s economical, sustainable, and incredibly rewarding. Instead of constantly purchasing lemongrass from the grocery store, you can cultivate your own supply, ensuring freshness and reducing waste. Plus, there’s nothing quite like the satisfaction of nurturing a plant from a simple cutting to a flourishing herb.
But the fun doesn’t stop there! Feel free to experiment with variations. Try different types of containers – terracotta pots, repurposed jars, or even a dedicated herb garden bed. Consider using different types of rooting hormones, although we’ve found that plain water often works wonders. You can also adjust the amount of sunlight your lemongrass receives to see how it affects its growth. Some gardeners have even reported success using hydroponic systems for even faster growth!
This DIY method for growing lemongrass quickly is a game-changer for any home cook or gardening enthusiast. It’s a simple, cost-effective way to ensure you always have fresh lemongrass on hand for your favorite recipes. Imagine the vibrant flavors you can add to your Thai curries, Vietnamese pho, or even a refreshing lemongrass tea, all thanks to your own homegrown supply.
We wholeheartedly encourage you to give this DIY trick a try. It’s a fantastic project for beginners and experienced gardeners alike. And most importantly, we want to hear about your experience! Share your photos, tips, and any variations you’ve tried in the comments below. Let’s create a community of lemongrass growers and learn from each other’s successes (and occasional hiccups!). Your insights could help other readers achieve even better results. So, grab some lemongrass stalks, get your hands dirty, and embark on this exciting gardening adventure. Happy growing!
Frequently Asked Questions (FAQ)
What kind of lemongrass stalks should I use for propagation?
Look for lemongrass stalks that are firm, healthy, and have a bulbous base. Avoid stalks that are dry, shriveled, or show signs of rot. Ideally, purchase stalks from a reputable grocery store or Asian market where they are likely to be fresher. The fresher the stalk, the higher the chance of successful rooting. Make sure the base of the stalk is intact, as this is where the roots will emerge.
How long does it take for lemongrass to root using this method?
Generally, you should start seeing roots emerge within 1-3 weeks. However, the exact timeframe can vary depending on factors such as the temperature, humidity, and the quality of the lemongrass stalks. Be patient and continue to change the water regularly. If you don’t see any roots after three weeks, it might be worth trying a different batch of lemongrass stalks.
What type of water is best for rooting lemongrass?
Tap water is generally fine, but it’s best to let it sit out for 24 hours to allow chlorine to dissipate. Alternatively, you can use filtered water or rainwater. Avoid using distilled water, as it lacks the minerals that can benefit root development. Changing the water every 1-2 days is crucial to prevent bacterial growth and ensure the lemongrass has access to fresh oxygen.
How much sunlight does lemongrass need after it’s planted in soil?
Lemongrass thrives in full sun, meaning it needs at least 6-8 hours of direct sunlight per day. If you’re growing it indoors, place it near a sunny window, preferably one that faces south or west. If you don’t have enough natural light, you can supplement with a grow light. Insufficient sunlight can lead to leggy growth and reduced flavor.
What kind of soil is best for growing lemongrass?
Lemongrass prefers well-draining soil that is rich in organic matter. A good potting mix for herbs or vegetables will work well. You can also amend your garden soil with compost or aged manure to improve its fertility and drainage. Avoid heavy clay soils, as they can become waterlogged and lead to root rot.
How often should I water lemongrass after it’s planted in soil?
Water lemongrass regularly, especially during hot and dry weather. The soil should be kept consistently moist, but not waterlogged. Check the soil moisture by sticking your finger about an inch deep. If it feels dry, it’s time to water. Reduce watering during the cooler months.
Can I grow lemongrass in a container?
Yes, lemongrass grows very well in containers. Choose a pot that is at least 12 inches in diameter to allow for adequate root growth. Make sure the pot has drainage holes to prevent waterlogging. Container-grown lemongrass may need more frequent watering and fertilization than lemongrass grown in the ground.
How often should I fertilize lemongrass?
Fertilize lemongrass every 4-6 weeks during the growing season (spring and summer) with a balanced fertilizer. You can use a liquid fertilizer or a slow-release granular fertilizer. Follow the instructions on the fertilizer packaging. Avoid over-fertilizing, as this can lead to excessive foliage growth at the expense of flavor.
How do I harvest lemongrass?
To harvest lemongrass, simply cut off the stalks near the base of the plant. Use a sharp knife or pruning shears. You can harvest individual stalks as needed, or you can harvest the entire plant at the end of the growing season. The lower portion of the stalk, near the bulb, is the most flavorful.
Can I grow lemongrass indoors year-round?
Yes, you can grow lemongrass indoors year-round, provided you give it enough sunlight and warmth. Place it near a sunny window or use a grow light. Keep the soil consistently moist and fertilize regularly. You may need to repot it into a larger container as it grows.
Is lemongrass a perennial or an annual?
Lemongrass is a perennial in warm climates (USDA zones 9-11). In colder climates, it is typically grown as an annual, meaning it needs to be replanted each year. However, you can overwinter lemongrass indoors by bringing it inside before the first frost.
How do I overwinter lemongrass indoors?
Before the first frost, dig up your lemongrass plant and pot it in a container. Cut back the foliage to about 6 inches. Place the container in a cool, bright location, such as a sunroom or a room with a grow light. Water sparingly, only when the soil is dry to the touch. In the spring, gradually acclimate the plant to outdoor conditions before planting it back in the garden.
What are some common problems with growing lemongrass?
Some common problems with growing lemongrass include root rot (caused by overwatering), spider mites, and aphids. Root rot can be prevented by ensuring good drainage and avoiding overwatering. Spider mites and aphids can be controlled with insecticidal soap or neem oil.
Can I use lemongrass for anything other than cooking?
Yes, lemongrass has many other uses besides cooking. It can be used to make tea, essential oils, and natural insect repellent. It also has medicinal properties and is used in traditional medicine to treat various ailments. The fragrant leaves can also be used in potpourri or to add a pleasant scent to your home.

Leave a Comment