
Grow Carrots in Bags: Imagine harvesting a vibrant bunch of sweet, crunchy carrots right from your patio, balcony, or even your kitchen windowsill! No sprawling garden needed. Sounds too good to be true? It’s not! For centuries, humans have cultivated food in ingenious ways, adapting to limited spaces and resources. From ancient rooftop gardens in Babylon to the modern-day victory gardens of wartime, the desire to nurture life and provide for ourselves has always driven innovation.
In today’s fast-paced world, many of us lack the time or space for traditional gardening. That’s where this DIY trick comes in. Learning how to grow carrots in bags is a game-changer for urban dwellers, apartment residents, or anyone with limited outdoor space. It’s also a fantastic way to introduce children to the joys of gardening and teach them about where their food comes from. Plus, who doesn’t love the satisfaction of growing their own food?
This article will guide you through a simple, step-by-step process to successfully grow carrots in bags, ensuring a bountiful harvest of delicious, homegrown carrots. Say goodbye to store-bought carrots and hello to fresh, flavorful goodness right at your fingertips! Let’s get started!
Grow Carrots in Bags: A Gardener’s Guide
Hey there, fellow gardening enthusiasts! Are you dreaming of fresh, crunchy carrots but short on garden space? Or maybe your soil is just too rocky and compacted for those root veggies to thrive? Well, I’ve got a fantastic solution for you: growing carrots in bags! It’s easier than you think, and I’m going to walk you through every step. Trust me, once you taste a homegrown carrot pulled straight from your bag, you’ll be hooked!
Why Grow Carrots in Bags?
Before we dive in, let’s talk about why this method is so great.
* Space-Saving: Perfect for balconies, patios, or small yards. You can grow a surprising amount of carrots in a relatively small area.
* Soil Control: You get to choose the perfect soil mix, ensuring your carrots have the loose, well-draining environment they need. No more battling rocky or clay-heavy soil!
* Pest Control: Bags can help deter some soil-borne pests and make it easier to monitor your plants.
* Easy Harvesting: No more struggling to dig up carrots from hard-packed ground. Just tip the bag and gently pull them out!
* Portability: Need to move your carrots to a sunnier spot? No problem! Just pick up the bag and relocate it.
What You’ll Need
Alright, let’s gather our supplies. Here’s what you’ll need to get started:
* Bags: Choose sturdy bags that are at least 12 inches deep and 12 inches wide. I recommend using grow bags made of fabric, as they allow for better drainage and aeration. You can also use large plastic nursery pots or even repurposed burlap sacks. Just make sure whatever you choose has drainage holes.
* Potting Mix: This is crucial! Carrots need loose, well-draining soil. A mix of equal parts compost, peat moss (or coconut coir), and perlite or vermiculite works wonders. Avoid using garden soil, as it tends to be too heavy and can cause stunted or misshapen carrots.
* Carrot Seeds: Select a carrot variety that’s suitable for container growing. Shorter, rounder varieties like ‘Parisian’ or ‘Thumbelina’ are ideal, but you can also grow longer varieties like ‘Nantes’ if you have deeper bags.
* Watering Can or Hose: For keeping your carrots hydrated.
* Slow-Release Fertilizer (Optional): This can provide a steady supply of nutrients throughout the growing season.
* Trowel or Small Shovel: For filling the bags with soil.
* Gloves (Optional): To keep your hands clean.
Step-by-Step Instructions: Planting Your Carrots
Okay, let’s get our hands dirty! Here’s how to plant your carrot seeds in bags:
1. Prepare the Bags: If you’re using plastic bags or repurposed sacks, make sure they have plenty of drainage holes. You can poke holes in the bottom with a knife or scissors. If you’re using grow bags, they should already have adequate drainage.
2. Mix the Soil: In a large container or on a tarp, combine your compost, peat moss (or coconut coir), and perlite or vermiculite. Mix thoroughly until everything is evenly distributed. If you’re using slow-release fertilizer, mix it into the soil at this stage according to the package directions.
3. Fill the Bags: Carefully fill the bags with your prepared soil mix, leaving about an inch or two of space at the top. Gently pat down the soil to remove any air pockets.
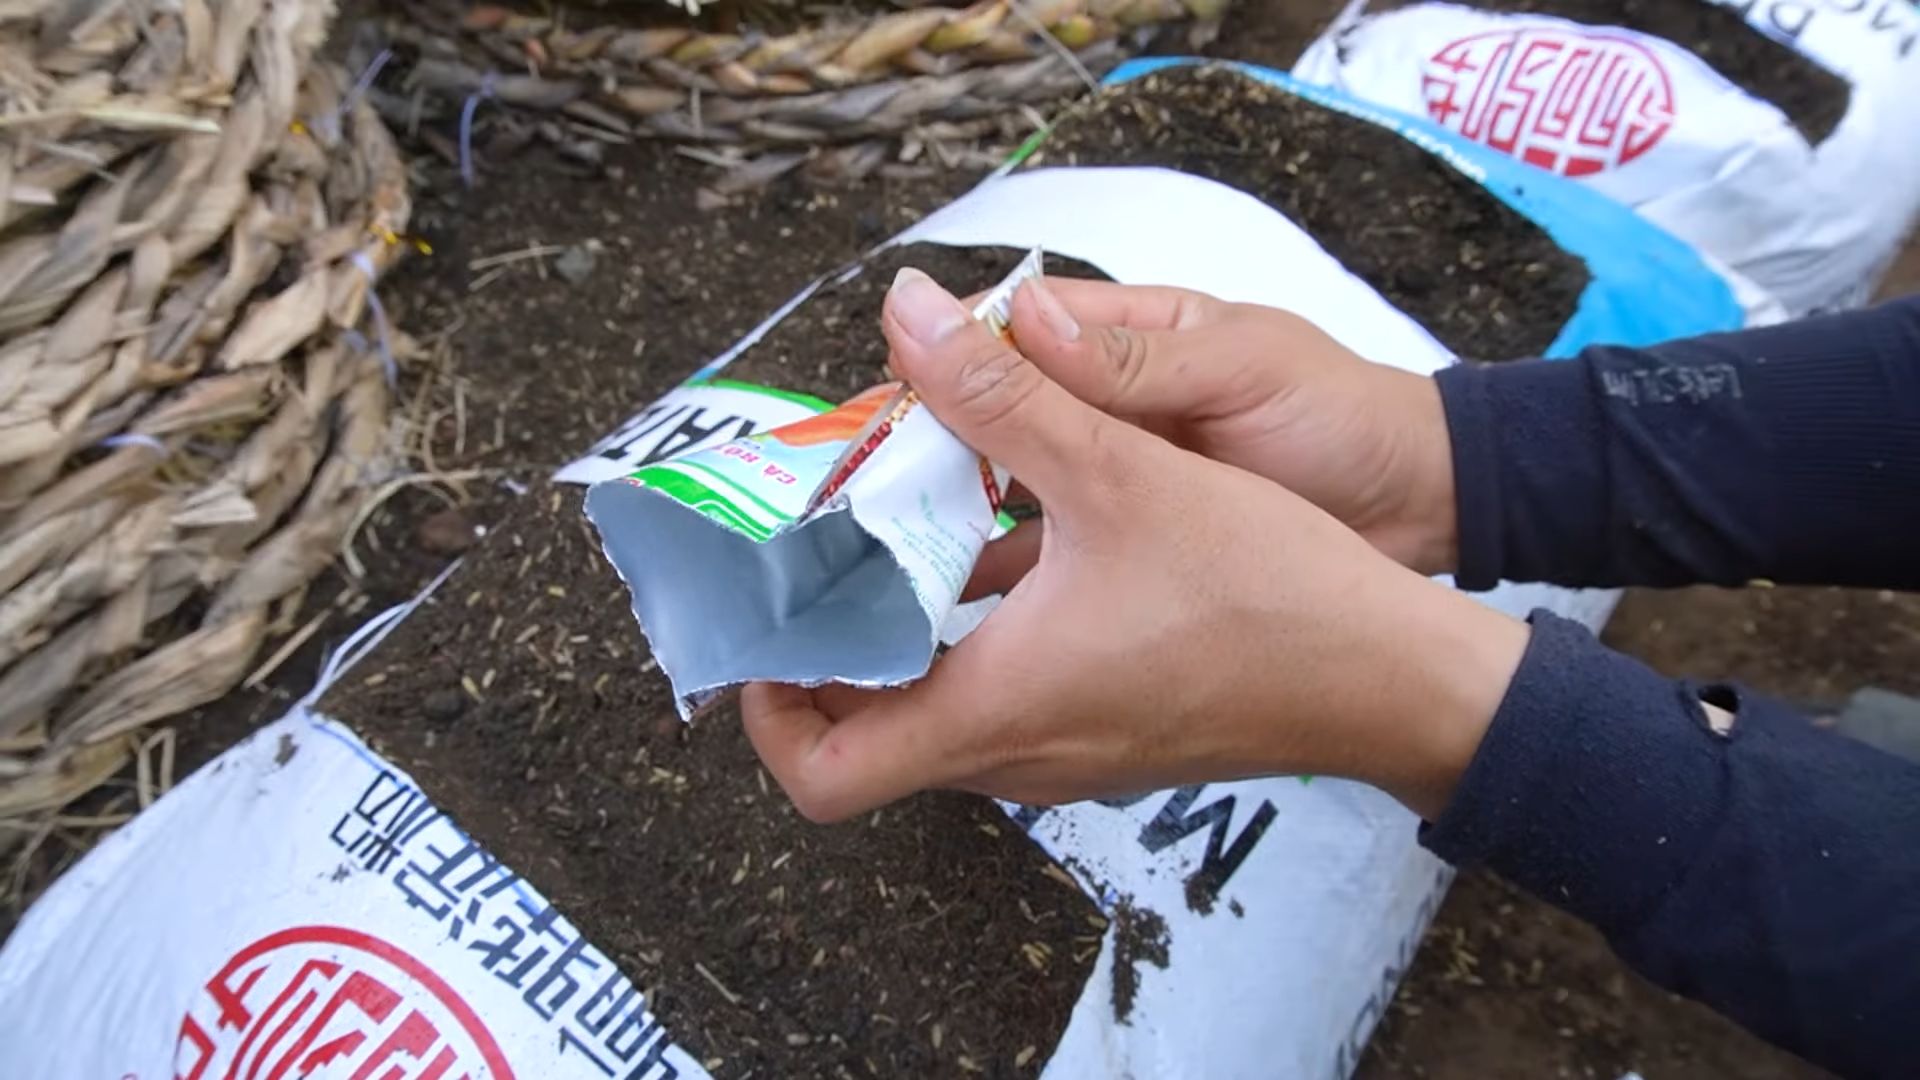
4. Sow the Seeds: Carrot seeds are tiny, so it’s easy to sow them too thickly. To avoid overcrowding, I like to mix the seeds with a bit of sand before sowing. This helps to space them out more evenly. Sprinkle the seeds thinly over the surface of the soil.
5. Cover the Seeds: Lightly cover the seeds with a thin layer of soil (about 1/4 inch). Gently pat down the soil again.
6. Water Thoroughly: Use a watering can or hose with a gentle spray nozzle to water the soil thoroughly. Make sure the water penetrates all the way to the bottom of the bag.
7. Label the Bags: Don’t forget to label your bags with the carrot variety and the date you planted them. This will help you keep track of your progress.
8. Choose a Sunny Location: Carrots need at least 6 hours of sunlight per day, so choose a sunny spot for your bags.
Caring for Your Carrots
Now that your carrots are planted, it’s time to provide them with the care they need to thrive.
1. Watering: Carrots need consistent moisture to grow properly. Water deeply whenever the top inch of soil feels dry to the touch. Avoid overwatering, as this can lead to root rot. I usually check the soil moisture every day or two, especially during hot, dry weather.
2. Thinning: Once your carrot seedlings emerge (usually in about 1-3 weeks), you’ll need to thin them out. This is important to prevent overcrowding and ensure that each carrot has enough space to develop. When the seedlings are about 1-2 inches tall, thin them to about 1-2 inches apart. You can use small scissors or tweezers to carefully snip off the unwanted seedlings at the soil line. Don’t pull them out, as this can disturb the roots of the remaining plants.
3. Fertilizing: If you didn’t use slow-release fertilizer, you’ll need to feed your carrots regularly with a balanced liquid fertilizer. Follow the package directions for application rates and frequency. I usually fertilize my carrots every 2-3 weeks.
4. Weeding: Keep the bags free of weeds, as they can compete with your carrots for nutrients and water. Gently pull out any weeds that appear, being careful not to disturb the carrot roots.
5. Sunlight: Make sure your carrots are getting enough sunlight. If you live in a particularly hot climate, you may need to provide some afternoon shade to prevent the soil from drying out too quickly.
6. Pest Control: Keep an eye out for pests like carrot rust flies or aphids. If you notice any signs of infestation, take action immediately. You can use organic pest control methods like insecticidal soap or neem oil to control these pests.
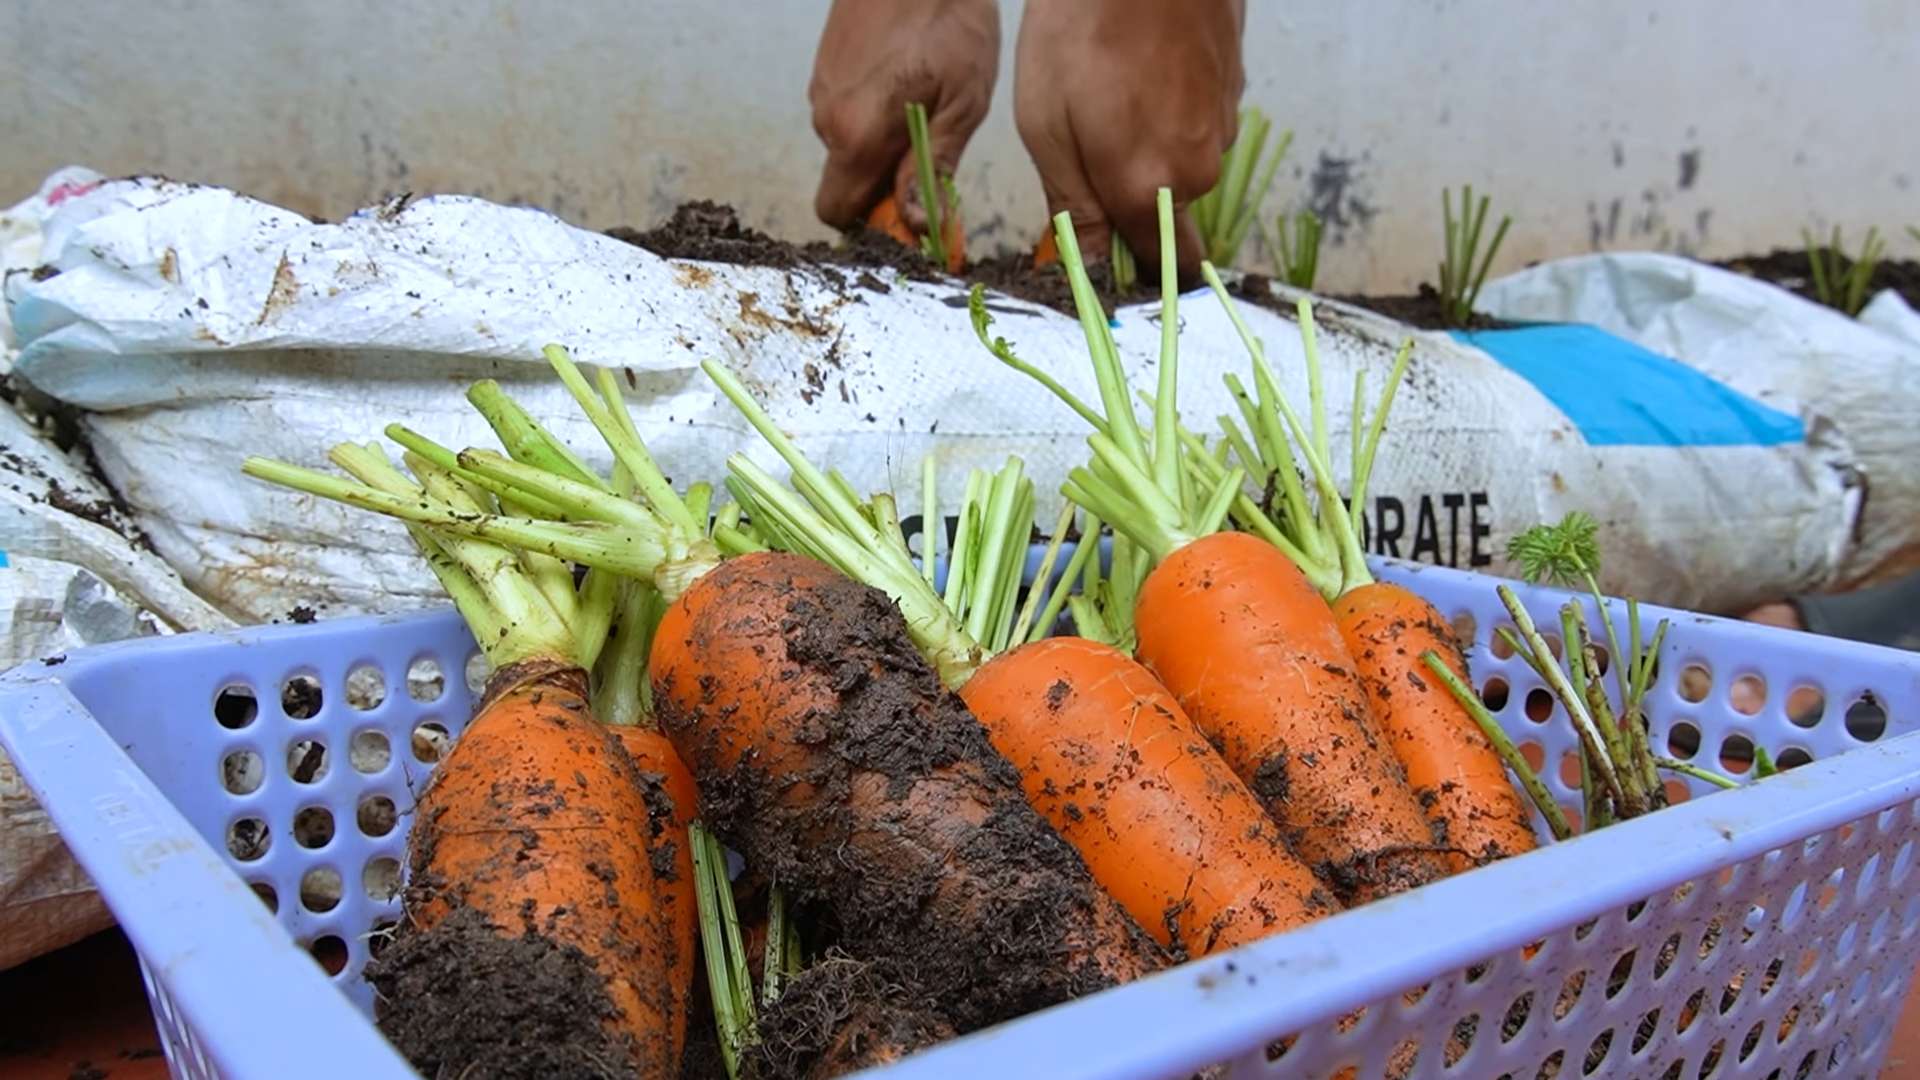
Harvesting Your Carrots
The moment we’ve all been waiting for! Harvesting your carrots is the most rewarding part of the process.
1. Check for Maturity: Carrots are typically ready to harvest when they reach the size and color specified for their variety. You can usually find this information on the seed packet. A good rule of thumb is to start checking for maturity about 60-75 days after planting.
2. Gently Loosen the Soil: Before pulling your carrots, gently loosen the soil around them with your fingers or a small trowel. This will make it easier to pull them out without breaking them.
3. Pull the Carrots: Grasp the carrot tops firmly and gently pull upwards. If the carrots are difficult to pull, try wiggling them back and forth to loosen them further.
4. Enjoy Your Harvest: Once you’ve harvested your carrots, brush off any excess soil and enjoy them fresh! Homegrown carrots taste so much sweeter and more flavorful than store-bought ones.
Troubleshooting
Hey there, fellow gardening enthusiasts! Are you dreaming of fresh, crunchy carrots but short on garden space? Or maybe your soil is just too rocky and compacted for those root veggies to thrive? Well, I’ve got a fantastic solution for you: growing carrots in bags! It’s easier than you think, and I’m going to walk you through every step. Trust me, once you taste a homegrown carrot pulled straight from your bag, you’ll be hooked!
Why Grow Carrots in Bags?
Before we dive in, let’s talk about why this method is so great.
* Space-Saving: Perfect for balconies, patios, or small yards. You can grow a surprising amount of carrots in a relatively small area.
* Soil Control: You get to choose the perfect soil mix, ensuring your carrots have the loose, well-draining environment they need. No more battling rocky or clay-heavy soil!
* Pest Control: Bags can help deter some soil-borne pests and make it easier to monitor your plants.
* Easy Harvesting: No more struggling to dig up carrots from hard-packed ground. Just tip the bag and gently pull them out!
* Portability: Need to move your carrots to a sunnier spot? No problem! Just pick up the bag and relocate it.
What You’ll Need
Alright, let’s gather our supplies. Here’s what you’ll need to get started:
* Bags: Choose sturdy bags that are at least 12 inches deep and 12 inches wide. I recommend using grow bags made of fabric, as they allow for better drainage and aeration. You can also use large plastic nursery pots or even repurposed burlap sacks. Just make sure whatever you choose has drainage holes.
* Potting Mix: This is crucial! Carrots need loose, well-draining soil. A mix of equal parts compost, peat moss (or coconut coir), and perlite or vermiculite works wonders. Avoid using garden soil, as it tends to be too heavy and can cause stunted or misshapen carrots.
* Carrot Seeds: Select a carrot variety that’s suitable for container growing. Shorter, rounder varieties like ‘Parisian’ or ‘Thumbelina’ are ideal, but you can also grow longer varieties like ‘Nantes’ if you have deeper bags.
* Watering Can or Hose: For keeping your carrots hydrated.
* Slow-Release Fertilizer (Optional): This can provide a steady supply of nutrients throughout the growing season.
* Trowel or Small Shovel: For filling the bags with soil.
* Gloves (Optional): To keep your hands clean.
Step-by-Step Instructions: Planting Your Carrots
Okay, let’s get our hands dirty! Here’s how to plant your carrot seeds in bags:
1. Prepare the Bags: If you’re using plastic bags or repurposed sacks, make sure they have plenty of drainage holes. You can poke holes in the bottom with a knife or scissors. If you’re using grow bags, they should already have adequate drainage.
2. Mix the Soil: In a large container or on a tarp, combine your compost, peat moss (or coconut coir), and perlite or vermiculite. Mix thoroughly until everything is evenly distributed. If you’re using slow-release fertilizer, mix it into the soil at this stage according to the package directions.
3. Fill the Bags: Carefully fill the bags with your prepared soil mix, leaving about an inch or two of space at the top. Gently pat down the soil to remove any air pockets.
4. Sow the Seeds: Carrot seeds are tiny, so it’s easy to sow them too thickly. To avoid overcrowding, I like to mix the seeds with a bit of sand before sowing. This helps to space them out more evenly. Sprinkle the seeds thinly over the surface of the soil.
5. Cover the Seeds: Lightly cover the seeds with a thin layer of soil (about 1/4 inch). Gently pat down the soil again.
6. Water Thoroughly: Use a watering can or hose with a gentle spray nozzle to water the soil thoroughly. Make sure the water penetrates all the way to the bottom of the bag.
7. Label the Bags: Don’t forget to label your bags with the carrot variety and the date you planted them. This will help you keep track of your progress.
8. Choose a Sunny Location: Carrots need at least 6 hours of sunlight per day, so choose a sunny spot for your bags.
Caring for Your Carrots
Now that your carrots are planted, it’s time to provide them with the care they need to thrive.
1. Watering: Carrots need consistent moisture to grow properly. Water deeply whenever the top inch of soil feels dry to the touch. Avoid overwatering, as this can lead to root rot. I usually check the soil moisture every day or two, especially during hot, dry weather.
2. Thinning: Once your carrot seedlings emerge (usually in about 1-3 weeks), you’ll need to thin them out. This is important to prevent overcrowding and ensure that each carrot has enough space to develop. When the seedlings are about 1-2 inches tall, thin them to about 1-2 inches apart. You can use small scissors or tweezers to carefully snip off the unwanted seedlings at the soil line. Don’t pull them out, as this can disturb the roots of the remaining plants.
3. Fertilizing: If you didn’t use slow-release fertilizer, you’ll need to feed your carrots regularly with a balanced liquid fertilizer. Follow the package directions for application rates and frequency. I usually fertilize my carrots every 2-3 weeks.
4. Weeding: Keep the bags free of weeds, as they can compete with your carrots for nutrients and water. Gently pull out any weeds that appear, being careful not to disturb the carrot roots.
5. Sunlight: Make sure your carrots are getting enough sunlight. If you live in a particularly hot climate, you may need to provide some afternoon shade to prevent the soil from drying out too quickly.
6. Pest Control: Keep an eye out for pests like carrot rust flies or aphids. If you notice any signs of infestation, take action immediately. You can use organic pest control methods like insecticidal soap or neem oil to control these pests.
Harvesting Your Carrots
The moment we’ve all been waiting for! Harvesting your carrots is the most rewarding part of the process.
1. Check for Maturity: Carrots are typically ready to harvest when they reach the size and color specified for their variety. You can usually find this information on the seed packet. A good rule of thumb is to start checking for maturity about 60-75 days after planting.
2. Gently Loosen the Soil: Before pulling your carrots, gently loosen the soil around them with your fingers or a small trowel. This will make it easier to pull them out without breaking them.
3. Pull the Carrots: Grasp the carrot tops firmly and gently pull upwards. If the carrots are difficult to pull, try wiggling them back and forth to loosen them further.
4. Enjoy Your Harvest: Once you’ve harvested your carrots, brush off any excess soil and enjoy them fresh! Homegrown carrots taste so much sweeter and more flavorful than store-bought ones.
Troubleshooting
Even with the best care, you might encounter a few challenges along the way. Here are some common problems and how to address them:
* Stunted Growth: This could be due to poor soil, lack of nutrients, or overcrowding. Make sure your soil is loose and well-draining, fertilize regularly, and thin your seedlings properly.
* Forked or Misshapen Carrots: This is often caused by rocky or compacted soil. Make sure your soil mix is free of rocks and debris, and avoid using garden soil.
* Pests: Keep an eye out for pests and take action immediately if you notice any signs of infestation.
* Bolting: Bolting (when the plant prematurely produces a flower stalk) can be caused by stress, such as extreme temperatures or inconsistent watering. Try to provide consistent moisture and protect your carrots from extreme heat.
Tips for Success
Here are a few extra tips to help you grow the best carrots possible in bags:
* Choose the Right Bag: Opt for fabric grow bags, as they provide excellent drainage and aeration.
* Use High-Quality Soil: Don’t skimp on the soil! A good potting mix is essential for healthy carrot growth.
* Water Consistently: Carrots need consistent moisture, so water regularly and deeply.
* Thin Early and Often: Thinning is crucial for preventing overcrowding and ensuring that each carrot has enough space to develop.
* Rotate Your Crops: If you’
Conclusion
So, there you have it! Growing carrots in bags is not just a gardening trend; it’s a game-changer, especially if you’re short on space, dealing with poor soil, or simply looking for a more controlled and convenient way to cultivate these vibrant root vegetables. We’ve explored the ins and outs of this method, from selecting the right bag and soil mix to nurturing your carrot seedlings and harvesting your bounty.
But why is this DIY trick a must-try? Let’s recap the compelling reasons. First and foremost, it’s incredibly accessible. You don’t need a sprawling garden or specialized equipment. A simple grow bag, readily available at most garden centers or online, is all you need to get started. This makes it perfect for apartment dwellers, balcony gardeners, or anyone with limited outdoor space.
Secondly, growing carrots in bags gives you unparalleled control over the growing environment. You can tailor the soil mix to provide the perfect drainage and nutrient balance that carrots crave. This minimizes the risk of common carrot problems like forking or stunted growth, which are often caused by compacted or rocky soil. Furthermore, you can easily move your bags to chase the sun or protect them from harsh weather conditions.
Thirdly, it’s a fantastic learning experience. Whether you’re a seasoned gardener or a complete novice, growing carrots in bags allows you to observe the entire growth process up close. You’ll gain a deeper understanding of plant needs, soil science, and the magic of turning a tiny seed into a delicious, nutritious vegetable.
Now, let’s talk about variations and suggestions to elevate your bag-growing experience. Consider experimenting with different carrot varieties. Nantes carrots, with their cylindrical shape, are particularly well-suited for container growing. You could also try growing baby carrots, which mature quickly and are perfect for snacking.
For an added boost, incorporate slow-release fertilizer into your soil mix. This will provide a steady stream of nutrients throughout the growing season. You can also add compost tea to your watering routine to further enrich the soil and promote healthy growth.
Another fun variation is to create a “carrot tower” by stacking multiple grow bags on top of each other. This maximizes vertical space and creates a visually stunning display. Just be sure to provide adequate support for the bags and ensure that each level receives sufficient sunlight.
Don’t be afraid to get creative with your bag selection. While standard grow bags are a great option, you can also repurpose old burlap sacks, laundry baskets lined with landscape fabric, or even large plastic storage containers with drainage holes. The key is to choose a container that is deep enough to accommodate the carrot roots and provides adequate drainage.
Finally, remember that growing carrots in bags is an ongoing experiment. Pay close attention to your plants, observe their growth patterns, and adjust your care routine as needed. Don’t be discouraged if you encounter challenges along the way. Every mistake is an opportunity to learn and improve your gardening skills.
We wholeheartedly encourage you to try this DIY trick and experience the joy of harvesting your own homegrown carrots. It’s a rewarding and fulfilling experience that will connect you with nature and provide you with a delicious and healthy addition to your meals.
Once you’ve given it a try, we’d love to hear about your experience! Share your photos, tips, and challenges in the comments section below. Let’s create a community of bag-growing enthusiasts and learn from each other. Happy gardening! Remember, successful **grow carrots in bags** is within your reach with a little patience and the right techniques.
Frequently Asked Questions (FAQ)
Q: What size bag is best for growing carrots?
A: The ideal bag size depends on the carrot variety you plan to grow. Generally, a bag that is at least 12 inches deep and 12 inches in diameter is recommended. For longer carrot varieties like Nantes, opt for a deeper bag, around 18 inches. The larger the bag, the more room the carrots have to grow, and the less frequently you’ll need to water. A 5-gallon bag is a good starting point for most varieties.
Q: What type of soil should I use for growing carrots in bags?
A: Carrots need loose, well-draining soil to thrive. Avoid heavy clay soils, as they can cause the roots to become stunted or forked. A good soil mix for growing carrots in bags consists of equal parts of the following:
* **Potting mix:** Provides good drainage and aeration.
* **Compost:** Adds nutrients and improves soil structure.
* **Sand or perlite:** Further enhances drainage.
You can also purchase a pre-made vegetable garden mix, but be sure to amend it with additional sand or perlite if it seems too heavy.
Q: How often should I water my carrots in bags?
A: The frequency of watering depends on the weather conditions and the type of bag you’re using. Generally, you should water your carrots whenever the top inch of soil feels dry to the touch. Avoid overwatering, as this can lead to root rot. Grow bags tend to dry out faster than traditional garden beds, so check the soil moisture regularly, especially during hot, sunny weather. A good rule of thumb is to water deeply and less frequently, rather than shallowly and often.
Q: How much sunlight do carrots need when grown in bags?
A: Carrots need at least 6 hours of direct sunlight per day to grow properly. Choose a location for your grow bags that receives plenty of sunlight. If you live in a particularly hot climate, you may need to provide some afternoon shade to prevent the soil from overheating.
Q: When should I thin my carrot seedlings?
A: Thinning is essential for ensuring that your carrots have enough space to grow. Once your seedlings are about 2 inches tall, thin them to about 1-2 inches apart. You can use small scissors to snip off the unwanted seedlings at the soil line. Be careful not to disturb the roots of the remaining seedlings. Thinning allows the remaining carrots to develop to their full potential.
Q: How do I prevent carrot rust flies from attacking my carrots in bags?
A: Carrot rust flies are a common pest that can damage carrot roots. To prevent them from attacking your carrots in bags, you can use the following methods:
* **Cover your bags with insect netting:** This will prevent the flies from laying their eggs near your carrots.
* **Rotate your crops:** Avoid planting carrots in the same location year after year.
* **Use companion planting:** Plant onions or garlic near your carrots, as these plants can repel carrot rust flies.
* **Apply diatomaceous earth:** This natural powder can kill the larvae of carrot rust flies.
Q: How do I know when my carrots are ready to harvest?
A: Carrots are typically ready to harvest 60-80 days after planting, depending on the variety. You can check the size of the carrots by gently digging around the top of the bag. If they are the size you desire, you can harvest them. You can also harvest carrots at any stage of growth, depending on your preference. Baby carrots can be harvested earlier, while larger carrots can be left in the ground for longer.
Q: Can I reuse the soil from my grow bags after harvesting carrots?
A: Yes, you can reuse the soil from your grow bags, but it’s important to replenish the nutrients that have been used by the carrots. Amend the soil with compost, aged manure, or a slow-release fertilizer before planting your next crop. You may also want to consider sterilizing the soil to kill any potential pests or diseases.
Q: What are some common problems when growing carrots in bags and how can I fix them?
A: Some common problems include:
* **Forked roots:** Caused by compacted or rocky soil. Use a loose, well-draining soil mix.
* **Stunted growth:** Caused by lack of nutrients or sunlight. Fertilize regularly and ensure adequate sunlight.
* **Root rot:** Caused by overwatering. Water less frequently and ensure good drainage.
* **Pest infestations:** Use insect netting or other pest control methods.
By addressing these issues promptly, you can ensure a successful carrot harvest.
Leave a Comment