
Grow Spinach Indoors Quickly and enjoy fresh, nutritious greens all year round! Imagine stepping into your kitchen and harvesting vibrant, leafy spinach, even when the snow is falling outside. No more relying on wilted, overpriced spinach from the grocery store. This DIY guide unlocks the secrets to cultivating your own thriving spinach patch right inside your home.
For centuries, spinach has been a staple in diets around the world, prized for its health benefits and versatility. From Popeye’s legendary strength to its use in countless culinary creations, spinach boasts a rich history. But what if I told you that you don’t need a sprawling garden to enjoy this leafy green?
In today’s busy world, finding time for traditional gardening can be a challenge. That’s where this DIY trick comes in! Learning how to grow spinach indoors quickly is perfect for apartment dwellers, busy professionals, or anyone who wants a convenient and sustainable source of fresh produce. I’m going to show you simple, effective methods to bypass the limitations of outdoor gardening and create a thriving indoor spinach garden. Get ready to ditch the store-bought greens and embrace the joy of homegrown goodness!
Grow Spinach Indoors Quickly: A DIY Guide
Growing your own spinach indoors is easier than you might think! Imagine fresh, vibrant spinach leaves ready for your salads, smoothies, or sautéed dishes, all grown right in your home. I’m going to walk you through a simple, step-by-step guide to get you harvesting your own delicious spinach in no time.
Choosing the Right Spinach Variety
Not all spinach varieties are created equal, especially when it comes to indoor growing. Some are better suited for containers and indoor environments. Here are a few of my favorites:
* Baby’s Leaf Hybrid: This is a popular choice because it matures quickly, producing tender, small leaves perfect for salads.
* Bloomsdale Long Standing: This variety is known for its heat tolerance and resistance to bolting (going to seed), which is crucial for indoor environments where temperatures can fluctuate.
* Tyee Hybrid: Another excellent choice for its disease resistance and ability to produce large, flavorful leaves.
Gathering Your Supplies
Before we dive into the planting process, let’s make sure you have everything you need. This will save you time and frustration later on.
* Spinach Seeds: Choose a variety that suits your taste and indoor growing conditions.
* Containers: You’ll need containers that are at least 6 inches deep. I prefer using plastic pots with drainage holes. You can also use recycled containers like yogurt tubs or plastic bins, just make sure to add drainage holes.
* Potting Mix: Use a high-quality potting mix that’s well-draining. Avoid using garden soil, as it can compact and hinder drainage.
* Grow Lights: Spinach needs plenty of light to thrive indoors. A fluorescent or LED grow light is essential.
* Watering Can or Spray Bottle: For gentle watering.
* Optional: Seed Starting Tray: If you prefer to start your seeds indoors before transplanting.
* Optional: Heat Mat: To speed up germination.
Step-by-Step Planting Guide
Now for the fun part! Let’s get those spinach seeds in the soil.
1. Prepare Your Containers: Fill your containers with the potting mix, leaving about an inch of space at the top. Gently pat down the soil to remove any air pockets.
2. Sow the Seeds: Sow the spinach seeds about ½ inch deep and 1 inch apart. You can sow multiple seeds per container, but be sure to thin them out later if they all germinate.
3. Water Gently: Water the soil gently using a watering can or spray bottle. The soil should be moist but not waterlogged.
4. Provide Light and Warmth: Place the containers under your grow lights. If you’re using a heat mat, place the containers on the mat to speed up germination. Spinach seeds germinate best at temperatures between 60-70°F (15-21°C).
5. Maintain Moisture: Keep the soil consistently moist but not soggy. Check the soil moisture daily and water as needed.
6. Germination: Spinach seeds typically germinate within 5-10 days. Once the seedlings emerge, remove the heat mat if you’re using one.
Caring for Your Indoor Spinach
Once your spinach seedlings have sprouted, it’s time to focus on providing them with the care they need to grow into healthy, productive plants.
1. Light: Spinach needs at least 6-8 hours of light per day. If you’re using grow lights, keep them on for 14-16 hours per day. Adjust the height of the lights as the plants grow to ensure they’re getting adequate light. I usually keep my lights about 2-4 inches above the plants.
2. Watering: Water your spinach plants regularly, keeping the soil consistently moist but not waterlogged. Overwatering can lead to root rot, so be sure to let the top inch of soil dry out slightly between waterings.
3. Fertilizing: Spinach is a heavy feeder, so it’s important to fertilize your plants regularly. Use a balanced liquid fertilizer diluted to half strength every 2-3 weeks. You can also use a slow-release fertilizer at planting time.
4. Temperature: Spinach prefers cool temperatures between 60-70°F (15-21°C). Avoid placing your plants near heat sources, such as radiators or vents.
5. Air Circulation: Good air circulation is important for preventing fungal diseases. You can improve air circulation by placing a small fan near your plants or by opening a window for a few hours each day.
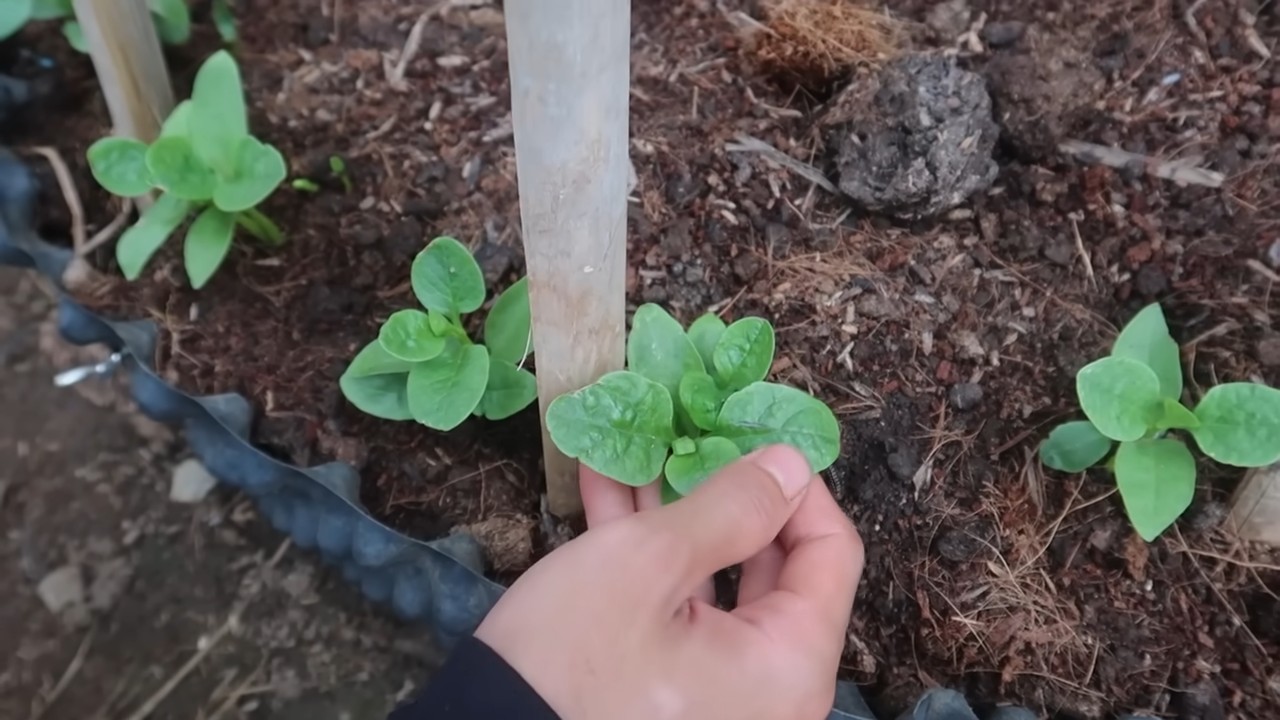
6. Thinning: Once your spinach seedlings have developed a few true leaves, thin them out so that they’re spaced about 3-4 inches apart. This will give them enough room to grow and prevent overcrowding. Don’t throw away the thinned seedlings! You can add them to your salads or smoothies.
Dealing with Pests and Diseases
Even indoors, your spinach plants can be susceptible to pests and diseases. Here are a few common problems and how to deal with them:
* Aphids: These tiny insects can suck the sap from your plants, causing them to become weak and stunted. You can control aphids by spraying your plants with insecticidal soap or neem oil. I’ve also had success simply wiping them off with a damp cloth.
* Spider Mites: These tiny pests create webs on your plants and can cause the leaves to become yellow and speckled. You can control spider mites by spraying your plants with insecticidal soap or neem oil. Increasing humidity can also help to deter spider mites.
* Downy Mildew: This fungal disease causes yellow spots on the leaves, which eventually turn brown and die. You can prevent downy mildew by providing good air circulation and avoiding overwatering. If your plants develop downy mildew, remove the affected leaves and spray the plants with a fungicide.
* Root Rot: This fungal disease is caused by overwatering and poor drainage. It can cause the roots to rot and the plants to wilt and die. You can prevent root rot by using well-draining potting mix and avoiding overwatering. If your plants develop root rot, remove the affected plants and repot the remaining plants in fresh potting mix.
Harvesting Your Spinach
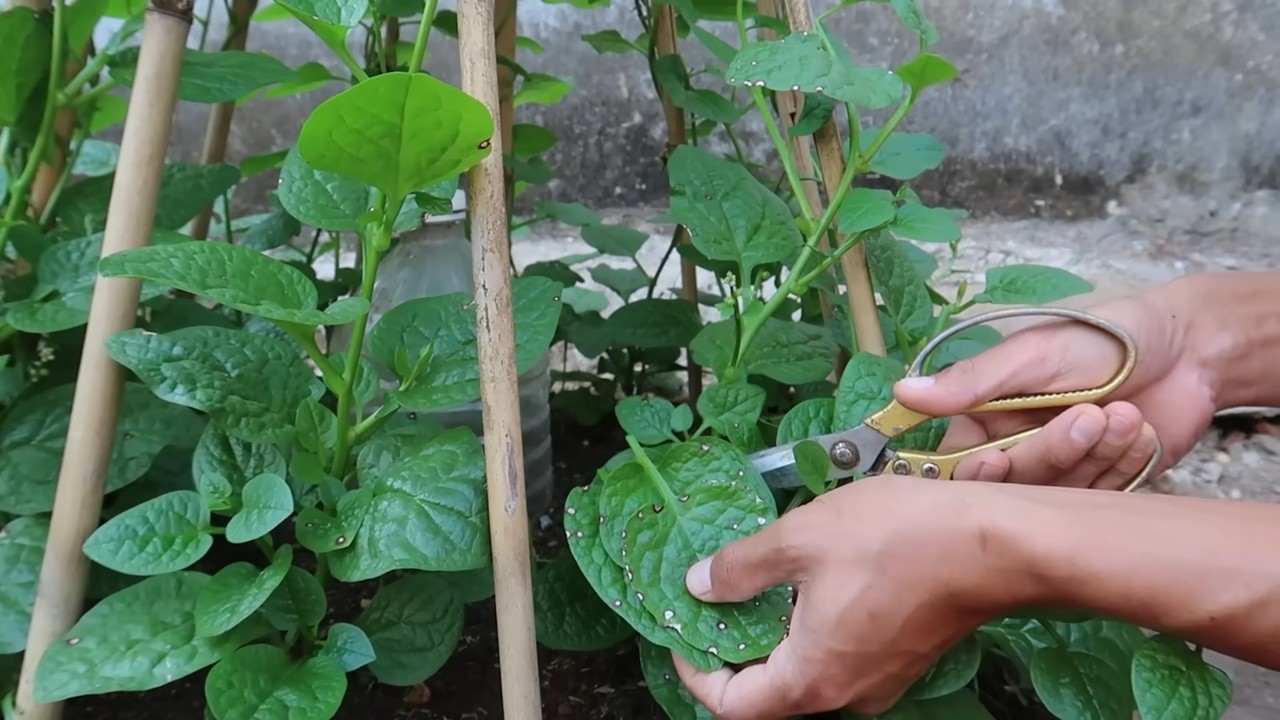
The best part of growing your own spinach is harvesting it! You can start harvesting your spinach leaves when they’re about 4-6 inches long.
1. Cut the Outer Leaves: Use scissors or a sharp knife to cut the outer leaves of the plant, leaving the inner leaves to continue growing. This is known as “cut and come again” harvesting, and it allows you to harvest spinach from the same plant multiple times.
2. Harvest Regularly: Harvest your spinach regularly to encourage new growth. The more you harvest, the more spinach your plants will produce.
3. Wash and Store: Wash your harvested spinach leaves thoroughly and store them in the refrigerator in a plastic bag or container. Spinach is best used within a few days of harvesting.
Troubleshooting Tips
Even with the best care, you might encounter some challenges when growing spinach indoors. Here are a few troubleshooting tips to help you out:
* Yellowing Leaves: This can be caused by a number of factors, including overwatering, underwatering, nutrient deficiencies, or pests. Check the soil moisture and adjust your watering accordingly. Fertilize your plants regularly and inspect them for pests.
* Leggy Growth: This is usually caused by insufficient light. Make sure your plants are getting enough light, either from grow lights or a sunny window.
* Slow Growth: This can be caused by a number of factors, including cool temperatures, nutrient deficiencies, or poor soil. Make sure your plants are getting enough warmth and nutrients. Use a high-quality potting mix and fertilize your plants regularly.
* Bolting (Going to Seed): This is when the plant starts to produce flowers and seeds, which can make the leaves bitter. Bolting is usually caused by high temperatures or long days. Choose heat-tolerant varieties and keep your plants in a cool location.
Enjoying Your Homegrown Spinach
Now that you’ve harvested your own delicious spinach, it’s time to enjoy it! Here are a few ideas:
* Salads: Add fresh spinach leaves to your salads for a boost of nutrients and flavor.
* Smoothies: Blend spinach into your smoothies for a healthy and delicious drink.
* Sautéed Dishes: Sauté spinach with garlic and olive oil for a simple and flavorful side dish.
* Soups and Stews: Add spinach to your soups and stews for added nutrients and flavor.
* Omelets and Frittatas: Add spinach to your omelets and frittatas for a healthy and delicious breakfast.
Growing spinach indoors is a rewarding experience that allows you to enjoy fresh, healthy greens year-round. With a little bit of care and attention, you can have a thriving indoor spinach garden that provides you with a constant supply of delicious leaves. Happy growing!
Conclusion
So, there you have it! Growing spinach indoors quickly isn’t just a pipe dream; it’s an achievable reality with a little know-how and a few simple steps. We’ve walked you through the process, from selecting the right container and soil to providing the optimal light and watering conditions. But why should you bother with this DIY project in the first place?
The answer is multifaceted. First and foremost, fresh, homegrown spinach is simply superior to store-bought. The taste is brighter, the texture is crisper, and you have the satisfaction of knowing exactly where your food came from and what went into its cultivation. No pesticides, no long-distance transportation, just pure, unadulterated spinach goodness.
Beyond the superior flavor and quality, growing spinach indoors quickly offers a level of convenience that’s hard to beat. Imagine having a ready supply of fresh greens just steps away from your kitchen, ready to be added to salads, smoothies, omelets, or any other dish that calls for a healthy dose of spinach. No more last-minute trips to the grocery store or settling for wilted, less-than-fresh leaves.
Furthermore, this project is incredibly rewarding. There’s something deeply satisfying about nurturing a plant from seed to harvest, witnessing its growth, and ultimately enjoying the fruits (or rather, leaves) of your labor. It’s a connection to nature that can be especially valuable in our increasingly urbanized lives.
But the benefits don’t stop there. Growing spinach indoors quickly is also a sustainable practice. By reducing your reliance on commercially grown spinach, you’re minimizing your carbon footprint and supporting a more localized food system. Plus, it’s a great way to reduce food waste, as you can harvest only what you need, when you need it.
Now, let’s talk about variations. While we’ve outlined a basic method, there’s plenty of room for experimentation. Consider trying different varieties of spinach, such as baby spinach, savoy spinach, or semi-savoy spinach, to see which one you prefer. You can also experiment with different types of grow lights to optimize your spinach’s growth. Some gardeners even add companion plants, such as basil or chamomile, to their indoor spinach gardens to deter pests and improve flavor.
Don’t be afraid to get creative and personalize your indoor spinach garden to suit your own preferences and needs. The most important thing is to start!
We encourage you to give this DIY trick a try. It’s easier than you might think, and the rewards are well worth the effort. Once you’ve harvested your first batch of homegrown spinach, we’d love to hear about your experience. Share your tips, tricks, and photos in the comments below. Let’s build a community of indoor spinach growers and inspire others to embrace the joys of homegrown food.
So, what are you waiting for? Grab your seeds, soil, and containers, and get ready to enjoy the freshest, most delicious spinach you’ve ever tasted. Happy growing!
Frequently Asked Questions (FAQ)
What is the best type of spinach to grow indoors?
While you can technically grow any type of spinach indoors, some varieties are better suited for container gardening than others. Baby spinach is a popular choice because it matures quickly and produces tender, flavorful leaves. Other good options include savoy spinach, which has crinkled leaves and a slightly stronger flavor, and semi-savoy spinach, which is a good compromise between the two. Ultimately, the best type of spinach to grow indoors depends on your personal preferences. Experiment with different varieties to see which one you like best.
How much light does indoor spinach need?
Spinach requires a significant amount of light to thrive. Ideally, it needs at least 6-8 hours of direct sunlight per day. However, if you don’t have a sunny windowsill, you can supplement with artificial grow lights. Fluorescent or LED grow lights are both good options. Position the lights about 6-12 inches above the spinach plants and keep them on for 12-16 hours per day. Monitor your plants closely and adjust the light as needed. If the leaves are pale or leggy, they may not be getting enough light.
What kind of soil should I use for growing spinach indoors?
Spinach prefers well-draining soil that is rich in organic matter. A good potting mix for indoor spinach should contain a blend of peat moss, perlite, and vermiculite. You can also add compost or other organic amendments to improve the soil’s fertility and drainage. Avoid using garden soil, as it can be too heavy and compacted for container gardening.
How often should I water my indoor spinach plants?
Water your spinach plants regularly, keeping the soil consistently moist but not waterlogged. Check the soil moisture level daily and water when the top inch feels dry to the touch. Avoid overwatering, as this can lead to root rot. When watering, be sure to water the soil directly, avoiding the leaves. This will help prevent fungal diseases.
How do I harvest spinach leaves?
You can begin harvesting spinach leaves when they are about 4-6 inches long. Simply snip off the outer leaves with scissors or a knife, leaving the inner leaves to continue growing. This cut-and-come-again harvesting method allows you to enjoy a continuous supply of fresh spinach over several weeks. Avoid harvesting more than one-third of the plant at a time, as this can stress the plant and reduce its yield.
What are some common pests and diseases that affect indoor spinach?
While indoor spinach is generally less susceptible to pests and diseases than outdoor spinach, it can still be affected by certain problems. Common pests include aphids, spider mites, and whiteflies. These pests can be controlled with insecticidal soap or neem oil. Common diseases include powdery mildew and downy mildew. These diseases can be prevented by providing good air circulation and avoiding overwatering. If you notice any signs of pests or diseases, take action immediately to prevent them from spreading.
Can I grow spinach indoors year-round?
Yes, you can grow spinach indoors year-round, provided you have the right conditions. Spinach prefers cool temperatures, so you may need to adjust the temperature in your home during the summer months. You can also use air conditioning or fans to keep the plants cool. With proper care, you can enjoy fresh, homegrown spinach all year long.
How long does it take for spinach to grow indoors?
Spinach is a relatively fast-growing crop. From seed to harvest, it typically takes about 4-6 weeks to grow spinach indoors. However, the exact time will depend on the variety of spinach, the growing conditions, and your harvesting practices. Baby spinach can be harvested sooner than savoy spinach, and plants grown under optimal conditions will mature more quickly.
What are some tips for maximizing my spinach yield?
To maximize your spinach yield, be sure to provide your plants with plenty of light, water, and nutrients. Fertilize regularly with a balanced fertilizer, following the instructions on the label. You can also prune your plants to encourage bushier growth and more leaf production. Finally, be sure to harvest your spinach leaves regularly to prevent the plants from bolting (going to seed).
Is growing spinach indoors quickly worth the effort?
Absolutely! Growing spinach indoors quickly is a rewarding and convenient way to enjoy fresh, healthy greens all year long. It’s a relatively easy project that can be done in a small space, and the benefits are well worth the effort. From the superior flavor and quality of homegrown spinach to the convenience of having a ready supply of greens at your fingertips, there are many reasons to give this DIY trick a try. Plus, it’s a sustainable and environmentally friendly way to add more greens to your diet.


Leave a Comment