
Grow Taro Organically at Home? Absolutely! Imagine harvesting your own creamy, nutty-flavored taro root, knowing exactly where it came from and how it was grown. It’s not just a dream; it’s a delicious reality you can achieve with a few simple tricks and a little DIY spirit. For centuries, taro has been a staple in many cultures, particularly in the Pacific Islands and Asia, where it’s revered not only as a food source but also as a symbol of sustenance and connection to the land.
But why bother growing your own taro? Well, for starters, you get to bypass the grocery store and enjoy the freshest possible produce. More importantly, you have complete control over the growing process, ensuring that your taro is free from harmful pesticides and chemicals. Plus, let’s be honest, there’s something incredibly satisfying about nurturing a plant from start to finish and then enjoying the fruits (or in this case, the root!) of your labor. I’m going to show you some easy-to-follow DIY methods to grow taro organically at home, even if you don’t have a sprawling garden. Get ready to get your hands dirty and unlock the secrets to a bountiful taro harvest!
Grow Taro Organically at Home: A Beginner’s Guide
Hey there, fellow plant enthusiasts! Ever thought about growing your own taro? It’s surprisingly easy and rewarding, plus you get to enjoy fresh, organically grown taro right from your backyard (or even your balcony!). I’m going to walk you through the whole process, from choosing the right taro variety to harvesting your delicious crop. Let’s get started!
Choosing Your Taro Variety
First things first, you need to decide which taro variety you want to grow. There are many different types, each with its own unique characteristics. Some are better suited for certain climates, while others have different flavors and textures. Here are a few popular options:
* Bun Long: This is a common variety known for its large corms and mild flavor. It’s a good choice for beginners.
* Lehua: This variety has a reddish hue and a slightly sweeter taste. It’s often used in Hawaiian cuisine.
* Chinese Taro: This type is smaller and more compact, making it a good option for container gardening.
* Dasheen: This variety is known for its large, starchy corms and is often used in soups and stews.
Do a little research to see which variety thrives in your area and appeals to your taste buds. Local nurseries are a great resource for finding the right taro for your region.
Preparing for Planting
Before you can plant your taro, you need to get everything ready. This includes choosing the right location, preparing the soil, and gathering your supplies.
* Location, Location, Location: Taro loves sunlight! Choose a spot in your garden that gets at least 6 hours of direct sunlight each day. It also needs consistently moist soil, so a location near a water source is ideal. If you’re growing taro in containers, make sure you can easily water them.
* Soil Preparation is Key: Taro thrives in rich, well-draining soil. Amend your soil with plenty of organic matter, such as compost, aged manure, or leaf mold. This will improve drainage, aeration, and nutrient content. Aim for a slightly acidic to neutral pH (around 6.0 to 7.0).
* Gather Your Supplies: You’ll need a few basic supplies to get started:
* Taro corms or huli (the top portion of the taro plant with the leaves)
* Gardening gloves
* A shovel or trowel
* Organic fertilizer (optional)
* Watering can or hose
* Mulch (optional)
* Containers (if growing in pots)
Planting Your Taro
Now for the fun part – planting your taro! Here’s a step-by-step guide:
1. Prepare the Planting Hole: Dig a hole that’s about twice as wide and as deep as the taro corm or huli.
2. Amend the Soil (Again!): Mix some compost or other organic matter into the soil you removed from the hole. This will give your taro a nutrient boost right from the start.
3. Plant the Corm or Huli: Place the taro corm or huli in the hole, making sure the top of the corm or the base of the huli is level with the soil surface. If you’re planting a huli, make sure the leaves are pointing upwards.
4. Backfill the Hole: Gently backfill the hole with the amended soil, making sure to avoid damaging the corm or huli.
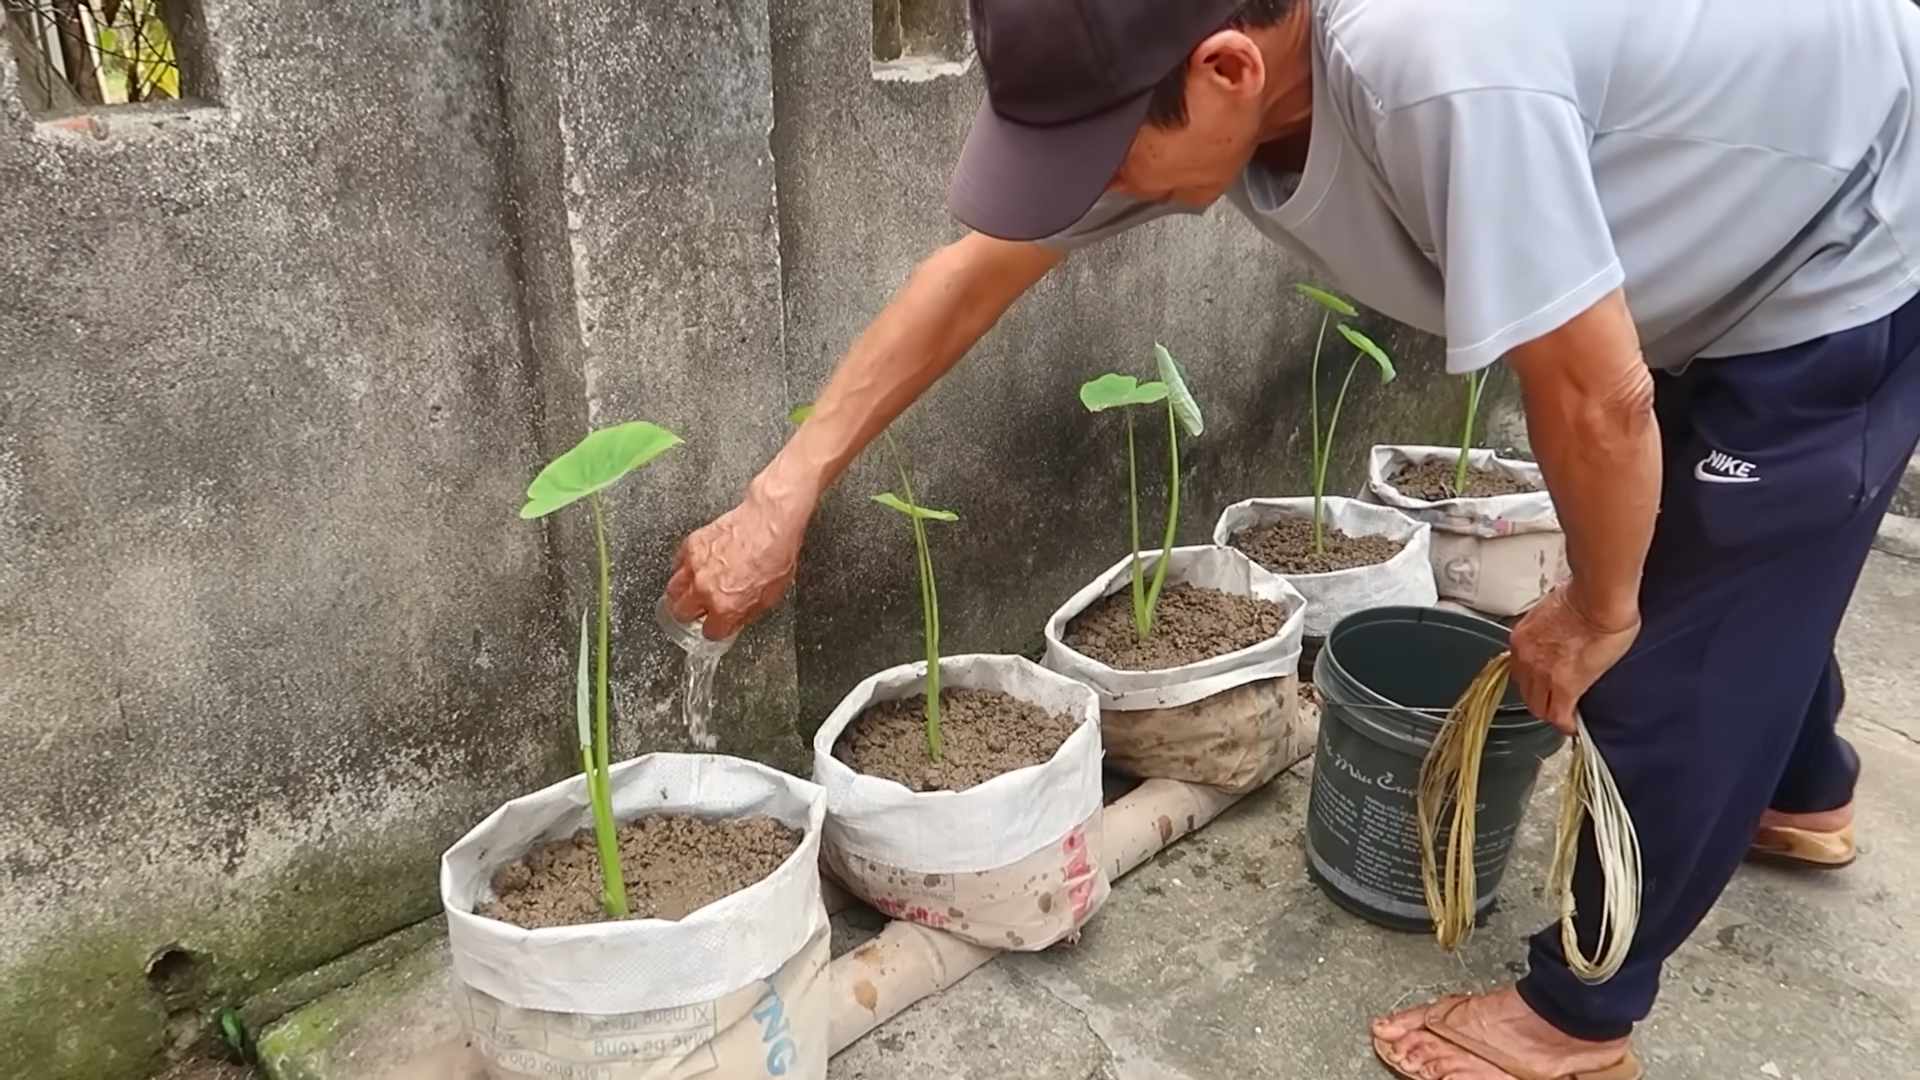
5. Water Thoroughly: Water the newly planted taro thoroughly to help settle the soil and encourage root growth.
6. Mulch (Optional): Apply a layer of organic mulch around the base of the plant to help retain moisture, suppress weeds, and regulate soil temperature. Straw, wood chips, or shredded leaves work well.
Caring for Your Taro Plants
Once your taro is planted, it’s important to provide it with the care it needs to thrive. Here’s what you need to do:
* Watering: Taro needs consistently moist soil, so water regularly, especially during dry periods. Aim to keep the soil moist but not waterlogged. Check the soil moisture by sticking your finger into the soil – if it feels dry an inch or two below the surface, it’s time to water.
* Fertilizing: Taro is a heavy feeder, so it benefits from regular fertilization. Use an organic fertilizer that’s rich in nitrogen, phosphorus, and potassium. Follow the instructions on the fertilizer label for application rates. I like to use compost tea as a gentle, natural fertilizer.
* Weeding: Keep the area around your taro plants free of weeds. Weeds compete with taro for nutrients and water, so it’s important to remove them regularly. Hand-pulling weeds is the best option, as it avoids damaging the taro roots.
* Pest and Disease Control: Taro is generally resistant to pests and diseases, but it can be susceptible to certain problems, such as aphids, spider mites, and fungal diseases. Inspect your plants regularly for signs of pests or diseases. If you spot any problems, treat them promptly with an organic insecticide or fungicide. Neem oil is a great all-purpose organic solution.
* Protecting from Cold: Taro is a tropical plant and is sensitive to frost. If you live in an area with cold winters, you’ll need to protect your taro plants from frost. You can do this by covering them with a frost blanket or moving them indoors. If you’re growing taro in containers, simply bring the containers indoors before the first frost.
Harvesting Your Taro
After several months of care, your taro will be ready to harvest! Here’s how to tell when it’s time:
* Timing is Everything: Taro typically takes 7-12 months to mature, depending on the variety and growing conditions. The leaves will start to turn yellow and die back when the corms are ready to harvest.
* Digging Up the Corms: Carefully dig around the base of the plant with a shovel or trowel. Gently lift the corm out of the ground, being careful not to damage it.
* Cleaning and Curing: Once you’ve harvested the corms, clean them thoroughly with water to remove any dirt or debris. Allow the corms to cure for a few days in a cool, dry place. This will help them develop a thicker skin and improve their storage life.
Enjoying Your Homegrown Taro
Now that you’ve harvested your taro, it’s time to enjoy the fruits (or rather, the corms!) of your labor. Taro can be cooked in a variety of ways, including boiling, steaming, baking, and frying. It’s a versatile ingredient that can be used in soups, stews, curries, and even desserts.
Important Note: Raw taro contains calcium oxalate crystals, which can cause irritation to the mouth and throat. It’s important to cook taro thoroughly to break down these crystals.
Here are a few ideas for using your homegrown taro:
* Poi: This is a traditional Hawaiian dish made from pounded taro corms.
* Taro Chips: Slice the taro corms thinly and fry them until crispy.
* Taro Curry: Add diced taro to your favorite curry recipe.
* Taro Soup: Use taro as a thickening agent in soups and stews.
* Taro Cake: Grate the taro corms and use them to make a delicious cake.
Troubleshooting Common Taro Problems
Even with the best care, you might encounter some problems while growing taro. Here are a few common issues and how to address them:
* Yellowing Leaves: This can be caused by a variety of factors, including nutrient deficiencies, overwatering, or underwatering. Check the soil moisture and nutrient levels and adjust your watering and fertilizing accordingly.
* Stunted Growth: This can be caused by poor soil, lack of sunlight, or pest infestations. Make sure your taro is planted in rich, well-draining soil and gets plenty of sunlight. Inspect your plants regularly for pests and treat them promptly if necessary.
* Root Rot: This is a fungal disease that can occur in waterlogged soil. Make sure your soil is well-draining and avoid overwatering. If you suspect root rot, remove the affected plants and replant them in fresh soil.
* Pest Infestations: Aphids, spider mites, and other pests can attack taro plants. Inspect your plants regularly for signs of pests and treat them promptly with an organic insecticide.
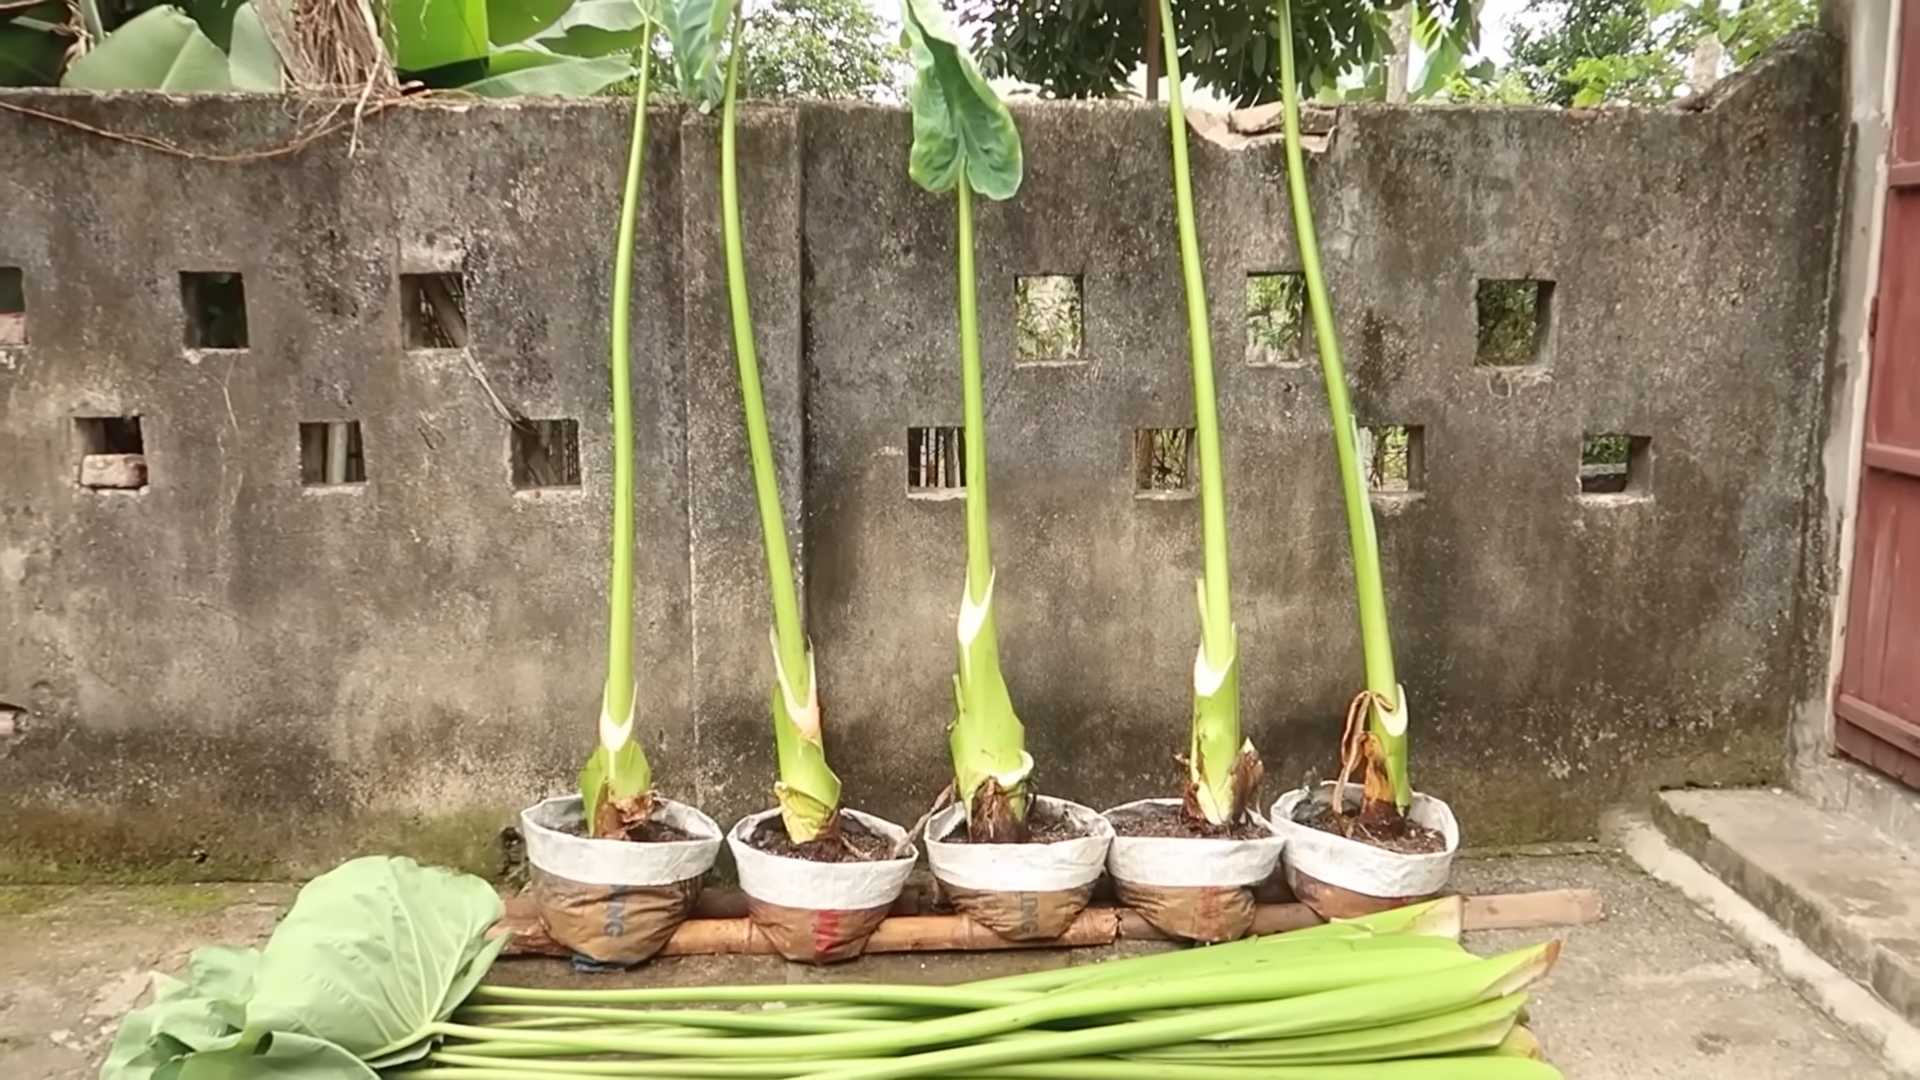
Growing Taro in Containers
If you don’t have a garden, you can still grow taro in containers. Here are a few tips for growing taro in pots:
* Choose the Right Container: Select a large container that’s at least 12 inches in diameter and 12 inches deep. Make sure the container has drainage holes.
*
Conclusion
Growing taro organically at home is not just a gardening project; it’s an investment in your health, your connection to nature, and a step towards sustainable living. This simple DIY trick unlocks the potential to cultivate this nutritious and versatile root vegetable right in your own backyard, balcony, or even indoors with the right setup. Forget relying solely on store-bought options, often laden with pesticides and questionable farming practices. With this method, you control every aspect of the growing process, ensuring a truly organic and wholesome harvest.
The beauty of this approach lies in its adaptability. While we’ve outlined a straightforward method, feel free to experiment with variations to suit your specific environment and preferences. For instance, if you live in a cooler climate, consider starting your taro indoors in containers before transplanting them outdoors during the warmer months. You can also explore different soil amendments to enhance drainage and nutrient availability. Adding compost tea regularly can provide a boost of beneficial microbes, further enriching the soil and promoting healthy growth.
Another exciting variation is to explore different taro varieties. While the common taro (Colocasia esculenta) is widely available, there are numerous cultivars with varying leaf colors, corm sizes, and flavor profiles. Research local nurseries or online seed suppliers to discover unique taro varieties that thrive in your region. Imagine the satisfaction of harvesting a rainbow of taro, each with its own distinct characteristics!
Beyond the practical benefits, growing taro organically at home offers a unique opportunity to connect with the earth and appreciate the miracle of plant growth. It’s a therapeutic activity that can reduce stress, improve your mood, and foster a sense of accomplishment. Watching your taro plants thrive under your care is a rewarding experience that will deepen your appreciation for the natural world.
So, what are you waiting for? Embrace the challenge, get your hands dirty, and embark on your own taro-growing adventure. This DIY trick is more than just a method; it’s a gateway to a healthier, more sustainable, and more fulfilling lifestyle. We are confident that you will find the process both enjoyable and rewarding.
We encourage you to try this method for growing taro organically and share your experiences with us. Post photos of your taro plants, share your tips and tricks, and let us know what challenges you encountered and how you overcame them. Your feedback will help us refine this guide and inspire others to embark on their own taro-growing journeys. Together, we can create a community of passionate gardeners who are committed to growing healthy, sustainable food.
Frequently Asked Questions (FAQ)
What exactly is taro, and why should I grow it organically?
Taro (Colocasia esculenta) is a starchy root vegetable that is a staple food in many cultures around the world, particularly in the Pacific Islands, Asia, and Africa. It’s a highly nutritious food, rich in carbohydrates, fiber, vitamins (especially vitamin C and vitamin B6), and minerals (such as potassium, manganese, and copper). Growing taro organically ensures that you are consuming a product free from harmful pesticides, herbicides, and synthetic fertilizers. This is especially important for root vegetables, as they directly absorb nutrients from the soil. Organic growing practices also promote soil health and biodiversity, contributing to a more sustainable food system. Furthermore, growing your own taro allows you to control the variety and freshness of the product, ensuring the best possible flavor and nutritional value.
What are the ideal growing conditions for taro?
Taro thrives in warm, humid environments with plenty of sunlight. Ideally, it needs at least 6-8 hours of direct sunlight per day. The soil should be rich, well-draining, and slightly acidic to neutral (pH 6.0-7.0). Taro also requires consistent moisture, so regular watering is essential, especially during dry periods. While taro can tolerate some shade, especially during the hottest part of the day, insufficient sunlight can lead to stunted growth and reduced yields. If you live in a cooler climate, consider growing taro in containers that can be moved indoors during the winter months. You can also use row covers or greenhouses to extend the growing season.
How long does it take to grow taro from start to finish?
The time it takes to grow taro from start to finish can vary depending on the variety, growing conditions, and starting material. Generally, it takes about 7-12 months to harvest mature taro corms. If you are starting from corms or cormels (small side shoots), you can expect to harvest in about 7-9 months. If you are starting from seeds, it may take longer, as the plants need to establish themselves before producing significant corm growth. Be patient and monitor your plants regularly, providing them with the necessary care and attention. The reward of harvesting your own homegrown taro is well worth the wait.
What are some common pests and diseases that affect taro, and how can I prevent them organically?
Taro can be susceptible to various pests and diseases, including aphids, spider mites, taro leaf blight, and root rot. To prevent these problems organically, start by choosing disease-resistant varieties and ensuring proper soil drainage. Regularly inspect your plants for signs of pests or diseases, and take action promptly if you notice any problems.
For aphids and spider mites, you can use insecticidal soap or neem oil. These are natural and effective treatments that won’t harm beneficial insects. Taro leaf blight is a fungal disease that can cause significant damage to taro plants. To prevent it, ensure good air circulation around your plants and avoid overhead watering. If you notice symptoms of leaf blight, remove and destroy the affected leaves. Root rot is another common problem, especially in poorly drained soils. To prevent it, ensure that your soil is well-draining and avoid overwatering. You can also add beneficial microbes to the soil to help suppress fungal pathogens.
Can I grow taro in containers? What size container should I use?
Yes, you can definitely grow taro in containers, which is a great option if you have limited space or live in a cooler climate. Choose a large container, at least 15-20 gallons in size, to provide ample room for the corms to develop. The container should have drainage holes to prevent waterlogging. Use a well-draining potting mix that is rich in organic matter. Water regularly, keeping the soil consistently moist but not soggy. You may also need to fertilize your taro plants regularly, especially during the growing season. Use an organic fertilizer that is specifically formulated for root vegetables.
How do I know when my taro is ready to harvest?
There are several signs that indicate your taro is ready to harvest. The leaves will start to turn yellow and die back, and the plant will begin to slow down its growth. You can also gently dig around the base of the plant to check the size of the corms. The corms should be firm and well-developed. To harvest, carefully dig up the entire plant, being careful not to damage the corms. Remove the leaves and stems, leaving about an inch or two attached to the corms. Wash the corms thoroughly and store them in a cool, dry place.
Is taro poisonous if eaten raw? How do I prepare it safely?
Yes, taro contains calcium oxalate crystals, which can cause irritation and a burning sensation in the mouth and throat if eaten raw. Therefore, it’s essential to cook taro thoroughly before consuming it. The cooking process breaks down the calcium oxalate crystals, making the taro safe to eat. There are several ways to prepare taro, including boiling, steaming, baking, and frying. Boiling is the most common method. Simply peel the taro corms, cut them into pieces, and boil them in water until they are tender. You can then use the cooked taro in various dishes, such as stews, soups, and curries.
Can I eat the taro leaves?
Yes, the leaves of some taro varieties are also edible, but they must be cooked thoroughly to remove the calcium oxalate crystals. The leaves are often used in dishes such as laulau (a traditional Hawaiian dish) and callaloo (a Caribbean dish). When cooking taro leaves, it’s important to use plenty of water and cook them for a longer period of time than the corms. This will ensure that the calcium oxalate crystals are completely broken down.
How do I store taro after harvesting?
After harvesting, store taro corms in a cool, dry, and well-ventilated place. Avoid storing them in the refrigerator, as this can cause them to become mushy. Properly stored taro corms can last for several weeks or even months. You can also freeze cooked taro for longer storage. Simply cook the taro as desired, let it cool completely, and then freeze it in airtight containers or freezer bags.
What are some creative ways to use taro in cooking?
Taro is a versatile ingredient that can be used in a wide variety of dishes. In addition to traditional preparations like poi (a Hawaiian staple made from pounded taro) and taro chips, you can use taro in stews, soups, curries, and even desserts. Taro flour can be used to make gluten-free breads, cakes, and pastries. You can also use taro leaves in salads, stir-fries, and soups. Experiment with different flavors and textures to discover your favorite ways to enjoy taro.
Leave a Comment