
Container Gardening Okra: Ever dreamed of harvesting your own juicy okra right from your patio? I know I have! There’s something incredibly satisfying about growing your own food, and it’s easier than you might think, even if you don’t have a sprawling backyard. This DIY guide is your ticket to fresh, homegrown okra, no matter how limited your space might be.
Okra, also known as “lady’s fingers,” has a rich history, tracing back to ancient Ethiopia. From there, it spread throughout North Africa, the Middle East, and eventually made its way to the Americas with the transatlantic slave trade. It’s a resilient and versatile plant, deeply ingrained in Southern cuisine and cultures around the world.
But why should you bother with container gardening okra? Well, for starters, fresh okra from the garden tastes infinitely better than anything you’ll find at the grocery store. Plus, growing your own food is a fantastic way to connect with nature, reduce your carbon footprint, and save money. And let’s be honest, who wouldn’t want to impress their friends and family with their green thumb? This guide will walk you through every step, from choosing the right container and soil to harvesting your delicious, homegrown okra. Let’s get started!
Growing Asparagus at Home: A Beginner’s Guide
Asparagus! Just the word conjures up images of spring, fresh flavors, and maybe even a fancy brunch. And guess what? You don’t need a sprawling farm to enjoy homegrown asparagus. With a little patience and the right approach, you can cultivate this delicious perennial right in your own backyard. I’m going to walk you through everything you need to know, from choosing the right spot to harvesting those tender spears. Let’s get started!
Choosing the Right Asparagus Variety
Before we even think about digging, let’s talk varieties. Different asparagus cultivars have different strengths, so picking the right one for your climate and preferences is key.
* ‘Jersey Knight’: This is a popular choice for a reason. It’s a male hybrid, meaning it produces fewer seeds and more spears. It’s also known for its disease resistance and high yields. I’ve had great success with ‘Jersey Knight’ in my garden.
* ‘Mary Washington’: An heirloom variety that’s been around for ages. It’s reliable and produces good-quality spears, but it’s more susceptible to rust disease than some of the newer hybrids.
* ‘Purple Passion’: If you want something a little different, ‘Purple Passion’ is a great option. The spears are a beautiful deep purple color and have a slightly sweeter flavor than green varieties. They turn green when cooked, though!
* ‘Millennium’: Another excellent hybrid known for its vigor and high yields. It’s also resistant to several common asparagus diseases.
Consider your local climate and soil conditions when making your choice. Your local nursery or agricultural extension office can offer valuable advice on the best varieties for your area.
Preparing the Asparagus Bed: Location, Location, Location!
Asparagus is a long-term commitment. These plants can live for 15-20 years, so choosing the right location is crucial.
* Sunlight: Asparagus needs at least 6-8 hours of sunlight per day. The more sun, the better!
* Soil: Well-drained soil is essential. Asparagus doesn’t like to sit in soggy soil. A slightly sandy loam is ideal.
* Space: Give your asparagus plants plenty of room to spread out. Each plant needs about 18 inches of space. Rows should be at least 4 feet apart.
* Avoid Shady Areas: Don’t plant asparagus near trees or shrubs that will compete for sunlight and nutrients.
Step-by-Step Planting Guide
Okay, now for the fun part: getting those asparagus crowns in the ground!
1. Prepare the Soil: This is the most important step! Asparagus needs a deep, rich bed to thrive. Start by removing any weeds, rocks, or debris from the planting area. Then, dig a trench that is about 12-18 inches wide and 6-8 inches deep.
2. Amend the Soil: Asparagus loves well-drained, fertile soil. Mix in plenty of compost, well-rotted manure, or other organic matter into the soil you removed from the trench. This will improve drainage, add nutrients, and help the soil retain moisture. I usually add a generous amount of bone meal as well, as asparagus are heavy feeders.
3. Create a Ridge: In the bottom of the trench, create a small ridge of soil down the center. This ridge will support the asparagus crowns and help them drain properly.
4. Plant the Crowns: Place the asparagus crowns on top of the ridge, spacing them about 12-18 inches apart. Gently spread out the roots around the crown.
5. Cover the Crowns: Cover the crowns with about 2-3 inches of soil. Water thoroughly.
6. Gradually Fill the Trench: As the asparagus spears emerge, gradually fill in the trench with more soil. This will encourage the plants to develop a strong root system. Continue filling the trench until it is level with the surrounding ground.
7. Mulch: Apply a layer of mulch around the asparagus plants to help retain moisture, suppress weeds, and regulate soil temperature. I like to use straw, wood chips, or shredded leaves.
Caring for Your Asparagus Patch: Watering, Weeding, and Feeding
Once your asparagus is planted, it’s important to provide proper care to ensure healthy growth and abundant harvests.
* Watering: Asparagus needs consistent moisture, especially during dry periods. Water deeply and regularly, especially during the first year. Aim for about 1 inch of water per week.
* Weeding: Keep the asparagus bed free of weeds. Weeds compete with asparagus for nutrients and water. Hand-pull weeds regularly or use a hoe to cultivate the soil. Be careful not to damage the asparagus spears or roots.
* Fertilizing: Asparagus is a heavy feeder. Fertilize your asparagus plants in early spring and again after the harvest season. Use a balanced fertilizer or a fertilizer specifically formulated for vegetables. I like to use a slow-release fertilizer to provide a steady supply of nutrients.
* Cutting Back Ferns: In the fall, after the ferns have turned yellow or brown, cut them back to the ground. This will help prevent disease and pests from overwintering in the asparagus bed. Don’t be tempted to cut them back too early, as the ferns are essential for storing energy in the roots for the following year’s growth.
Pest and Disease Control
Asparagus is relatively pest-resistant, but there are a few common problems to watch out for.
* Asparagus Beetles: These small, colorful beetles can damage asparagus spears and ferns. Handpick beetles and larvae or use an insecticidal soap.
* Asparagus Rust: This fungal disease causes orange or brown pustules on the ferns. Choose rust-resistant varieties and ensure good air circulation to prevent rust.
* Fusarium Crown and Root Rot: This soilborne disease can cause the plants to wilt and die. Improve soil drainage and avoid overwatering to prevent Fusarium.
Regularly inspect your asparagus plants for signs of pests or diseases. Early detection and treatment can prevent serious problems.
Harvesting Your Asparagus: Patience is a Virtue
This is where the patience comes in! Don’t harvest any spears during the first two years after planting. This allows the plants to establish a strong root system.
* Year 3: You can harvest spears for a short period, about 2-3 weeks.
* Year 4 and Beyond: You can harvest spears for a longer period, about 6-8 weeks.
To harvest asparagus, snap off the spears at ground level when they are about 6-8 inches tall. The spears should be thick and tender. Avoid harvesting spears that are thin or spindly, as this can weaken the plants.
Harvest asparagus spears every day or two during the harvest season. The more you harvest, the more spears the plants will produce.
Preparing and Storing Asparagus
Freshly harvested asparagus is best, but you can store it for a few days in the refrigerator.
* To Store: Wrap the asparagus spears in a damp paper towel and place them in a plastic bag in the refrigerator.
* To Prepare: Wash the asparagus spears and snap off the tough ends. You can steam, grill, roast, or saut茅 asparagus. It’s delicious in salads, soups, and stir-fries.
Troubleshooting Common Asparagus Problems
Even with the best care, you might encounter some challenges. Here are a few common problems and how to address them:
* Thin Spears: This could be due to a lack of nutrients, water, or sunlight. Make sure your asparagus plants are getting enough of all three. Fertilize regularly and water deeply during dry periods.
* Yellowing Ferns: This could be a sign of disease, pests, or nutrient deficiency. Inspect the plants for signs of pests or diseases and treat accordingly. Fertilize with a balanced fertilizer.
* Poor Spear Production: This could be due to a variety of factors, including poor soil, lack of sunlight, or overharvesting. Improve soil drainage, ensure adequate sunlight, and avoid overharvesting.
Extending the Asparagus Season
Want to enjoy asparagus for even longer? Here are a few tips:
* Succession Planting: Plant different varieties of asparagus that mature at different times.
* Cold Frames: Use cold frames to protect asparagus spears from frost and extend the harvest season.
* Forcing Asparagus: You can force asparagus indoors during the winter months. This involves digging up mature asparagus crowns and replanting them in containers in a cool, dark place.
Enjoying Your Homegrown Asparagus
Growing your own asparagus is a rewarding experience. There’s nothing quite like the taste of freshly harvested asparagus, and you’ll have the satisfaction of knowing that you grew it yourself. So, get out there, prepare your asparagus bed, and start growing! You’ll be enjoying delicious, homegrown asparagus for years
Conclusion
So, there you have it! Growing okra in containers isn’t just possible; it’s surprisingly rewarding. We’ve walked through the steps, from selecting the right container and soil to nurturing your plants and harvesting those delicious pods. But why should you bother with this DIY project?
Simply put, container gardening okra offers a unique blend of convenience, control, and fresh, homegrown goodness. Whether you’re limited by space, want to keep a closer eye on your plants, or simply enjoy the satisfaction of growing your own food, this method is a game-changer. Imagine stepping onto your balcony or patio and picking fresh okra for your gumbo, stew, or even a quick saut茅. The flavor is unmatched, and the pride in knowing you grew it yourself is immeasurable.
But the beauty of container gardening lies in its adaptability. Feel free to experiment with different okra varieties. Clemson Spineless is a classic choice, but why not try Burgundy okra for a splash of color in your garden? Or perhaps try a dwarf variety specifically bred for containers if space is truly at a premium.
Consider companion planting as well. Marigolds can help deter pests, while basil can enhance the flavor of your okra. The possibilities are endless! You can also adjust the soil mix to suit your specific climate and growing conditions. If you live in a particularly hot and dry area, adding more moisture-retentive materials like coco coir can be beneficial. Conversely, if you live in a region with heavy rainfall, ensure excellent drainage to prevent root rot.
Don’t be afraid to get creative with your container choices, either. While a standard plastic pot works perfectly well, you could also repurpose old buckets, barrels, or even grow bags. Just make sure whatever you choose has adequate drainage holes.
The key to success with container gardening okra is consistent care. Regular watering, fertilization, and pest control are essential. But don’t let that intimidate you. With a little attention and effort, you’ll be rewarded with a bountiful harvest.
We wholeheartedly encourage you to give this DIY trick a try. It’s a fun, educational, and ultimately delicious experience. And once you’ve tasted homegrown okra, you’ll never want to go back to the store-bought variety.
But don’t just take our word for it. We want to hear about your experiences! Share your photos, tips, and challenges in the comments below. Let’s create a community of container gardening okra enthusiasts and learn from each other. What variety did you choose? What challenges did you face? What successes did you celebrate? Your insights can help others embark on their own okra-growing adventures. So, grab your seeds, your soil, and your container, and let’s get growing! We can’t wait to see what you create.
Frequently Asked Questions (FAQ)
1. What is the best size container for growing okra?
A container that is at least 10-12 inches in diameter and 12 inches deep is recommended for growing okra. Okra plants have a taproot system, so they need enough space to develop properly. Larger containers, such as 5-gallon buckets or larger, are even better as they provide more room for root growth and help retain moisture. If you are planting multiple okra plants in one container, ensure that the container is large enough to accommodate all of them with adequate spacing (at least 12 inches apart).
2. What type of soil is best for container gardening okra?
Okra thrives in well-draining, fertile soil. A good potting mix for container gardening okra should be a blend of:
* **Potting Soil:** Provides a base for the mix.
* **Compost:** Adds nutrients and improves soil structure.
* **Perlite or Vermiculite:** Enhances drainage and aeration.
Avoid using garden soil directly in containers, as it can become compacted and poorly drained. A slightly acidic to neutral pH (around 6.0 to 7.0) is ideal. You can amend the soil with lime if it is too acidic or sulfur if it is too alkaline.
3. How often should I water my container okra plants?
Water your container okra plants regularly, especially during hot and dry weather. The frequency of watering will depend on factors such as the size of the container, the weather, and the type of soil. Generally, you should water when the top inch of soil feels dry to the touch. Water deeply until water drains out of the bottom of the container. Avoid overwatering, as this can lead to root rot. Mulching around the base of the plants can help retain moisture and reduce the need for frequent watering.
4. How much sunlight does okra need when grown in containers?
Okra requires at least 6-8 hours of direct sunlight per day to thrive. Choose a location for your container okra plants that receives plenty of sunlight throughout the day. If you live in a particularly hot climate, providing some afternoon shade can help prevent the plants from overheating. If you don’t have a sunny spot, you can supplement with grow lights.
5. What are some common pests and diseases that affect container okra, and how can I control them?
Common pests that can affect container okra include aphids, spider mites, and okra worms. You can control these pests by:
* **Regularly inspecting your plants:** Look for signs of infestation, such as webbing, discoloration, or holes in the leaves.
* **Handpicking pests:** Remove pests by hand and dispose of them.
* **Using insecticidal soap or neem oil:** These are natural and effective ways to control many common pests.
* **Introducing beneficial insects:** Ladybugs and lacewings can help control aphids and other pests.
Common diseases that can affect container okra include powdery mildew and root rot. You can prevent these diseases by:
* **Providing good air circulation:** Space your plants adequately to allow for good airflow.
* **Avoiding overwatering:** Ensure that your soil is well-draining and avoid watering too frequently.
* **Using a fungicide:** If you notice signs of disease, you can use a fungicide to control it.
6. How often should I fertilize my container okra plants?
Okra plants are heavy feeders and benefit from regular fertilization. Start fertilizing your plants about two weeks after transplanting them into their containers. Use a balanced fertilizer (e.g., 10-10-10) every 2-3 weeks. You can also supplement with a liquid fertilizer every week. Avoid over-fertilizing, as this can lead to excessive foliage growth and reduced pod production.
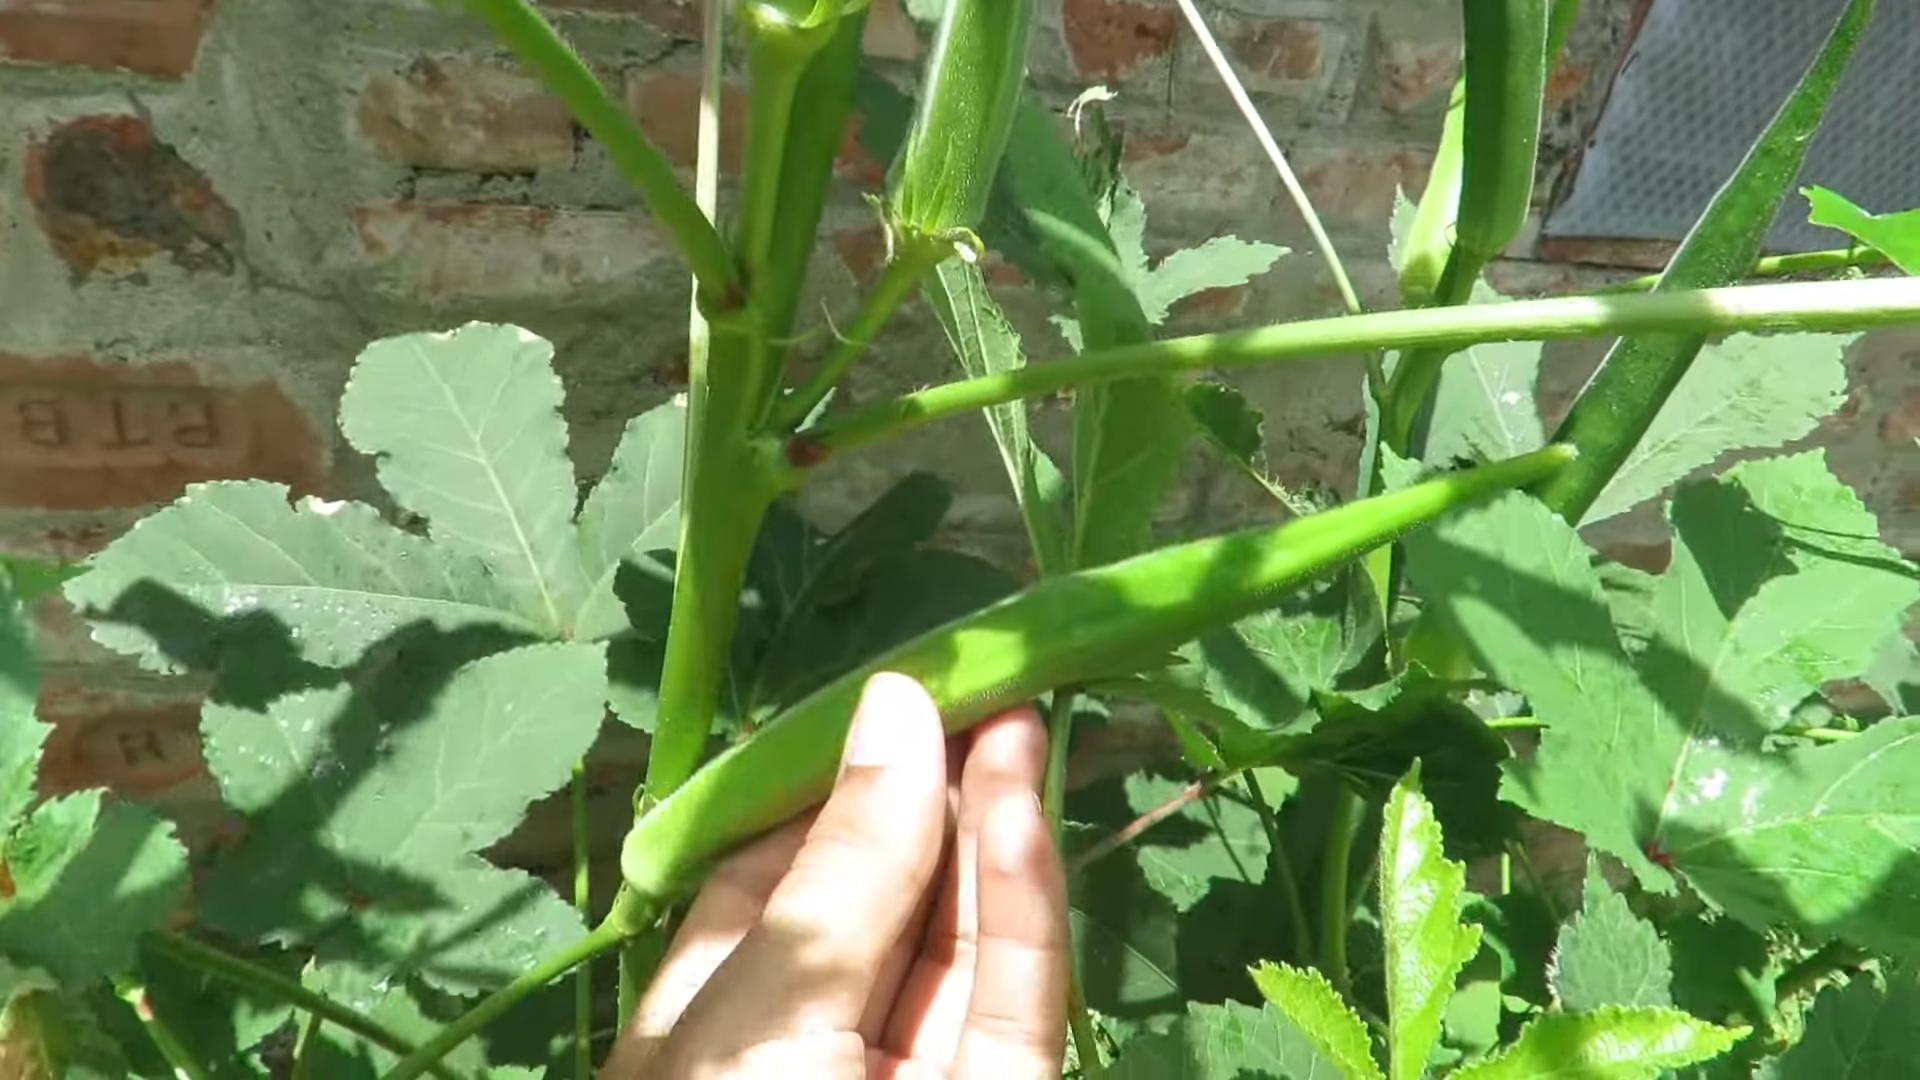
7. When and how should I harvest my container okra pods?
Okra pods are typically ready to harvest about 50-60 days after planting. Harvest the pods when they are 2-4 inches long and still tender. Use a sharp knife or pruners to cut the pods from the plant. Harvest regularly, every 1-2 days, to encourage continued production. If the pods are allowed to grow too large, they will become tough and fibrous.
8. Can I grow okra indoors in containers?
While it’s possible to grow okra indoors in containers, it can be challenging. Okra requires a lot of sunlight, so you’ll need to provide supplemental lighting with grow lights. You’ll also need to ensure that the plants have adequate air circulation and are pollinated properly. Hand-pollination may be necessary. Overall, growing okra outdoors in containers is generally easier and more successful.
9. What are some good companion plants for container okra?
Companion planting can benefit okra by attracting beneficial insects, repelling pests, and improving soil health. Some good companion plants for container okra include:
* **Marigolds:** Repel nematodes and other pests.
* **Basil:** Repels aphids and other pests.
* **Peppers:** Can help deter certain pests.
* **Lettuce:** Can provide ground cover and help retain moisture.
* **Radishes:** Can help break up the soil and improve drainage.
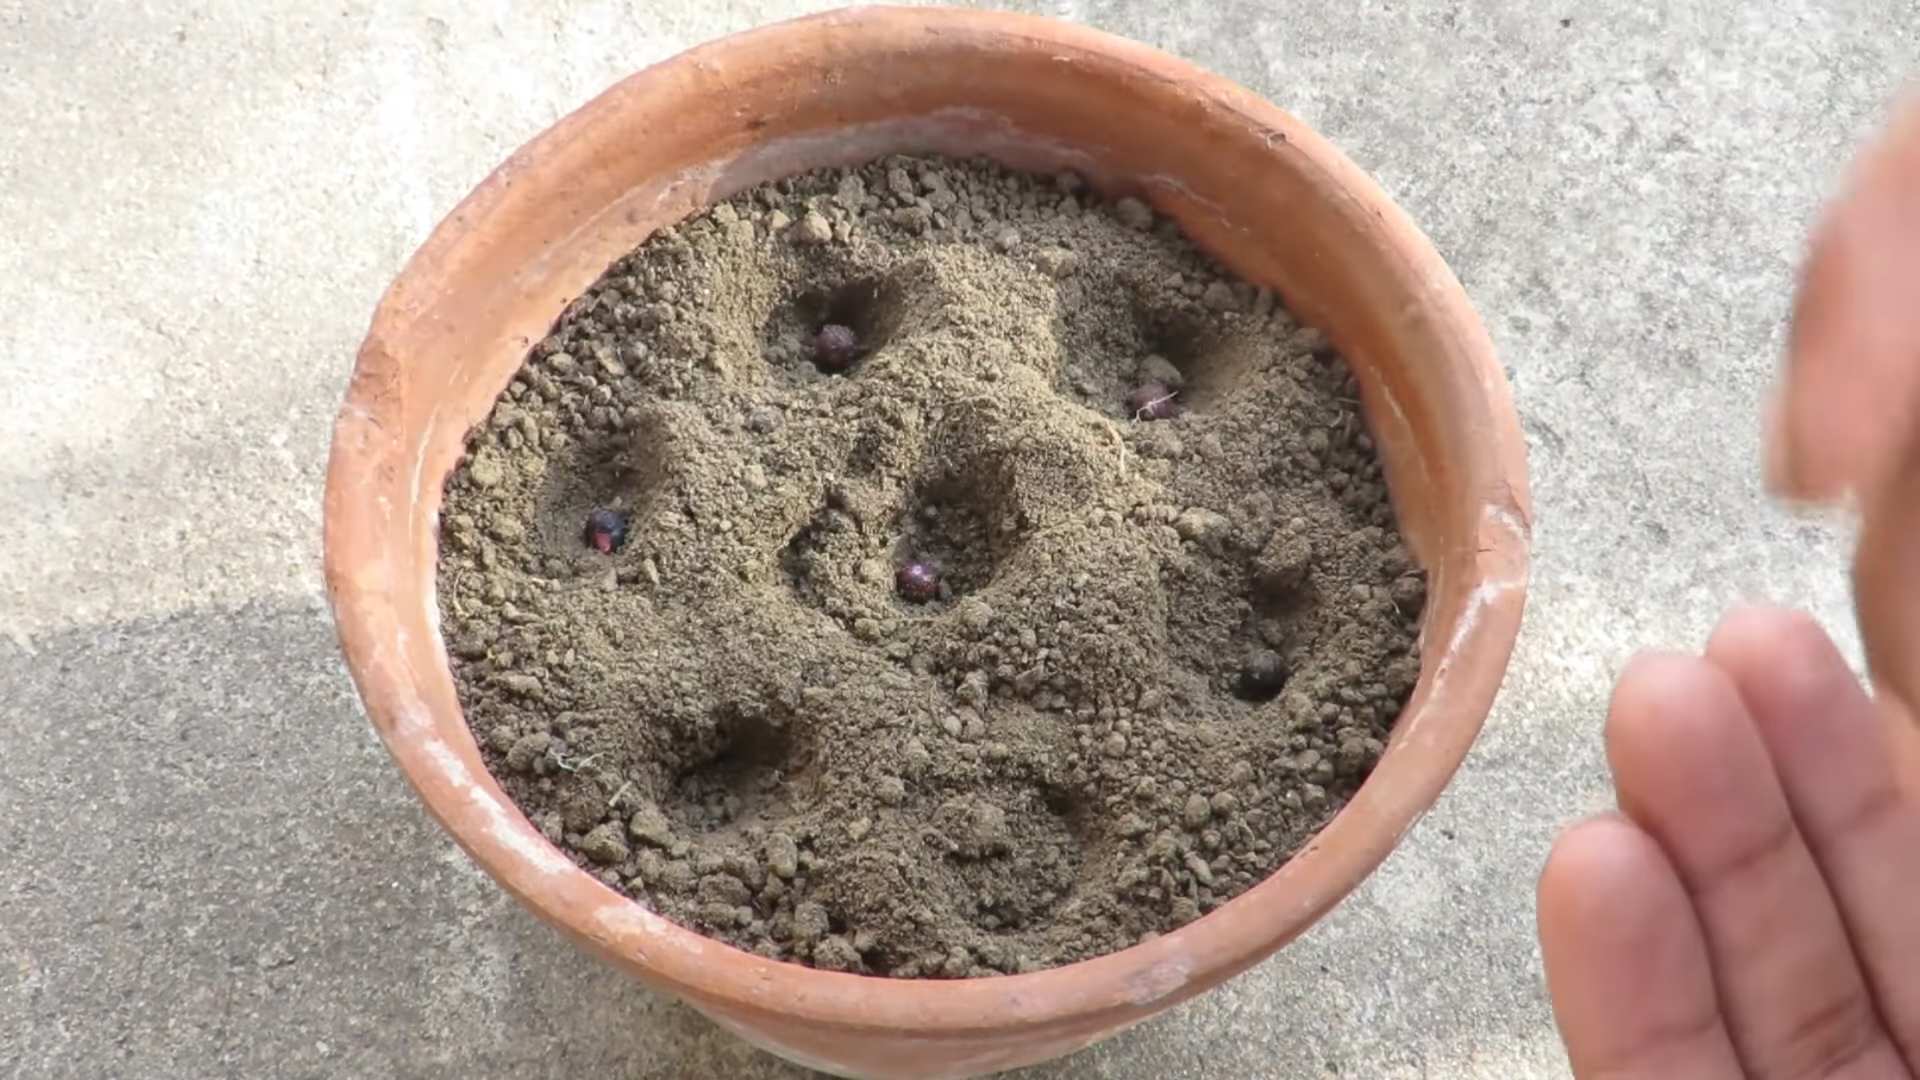
10. Can I save seeds from my container okra plants for next year?
Yes, you can save seeds from your container okra plants for next year. Allow a few pods to mature fully on the plant. The pods will become dry and brown. Once the pods are completely dry, harvest them and remove the seeds. Store the seeds in a cool, dry place until next planting season. Keep in mind that if you grew a hybrid variety of okra, the seeds may not produce plants that are true to type.
Leave a Comment