
Grow Watermelons Successfully, even if you think you don’t have a green thumb! Have you ever dreamed of biting into a juicy, homegrown watermelon on a hot summer day? I know I have! There’s just something incredibly satisfying about nurturing a tiny seed into a sprawling vine that yields such a delicious reward. For centuries, watermelons have been a symbol of summer, abundance, and community gatherings, tracing back to ancient Africa where they were first cultivated.
But let’s be honest, the thought of growing these giants can be a little intimidating. That’s where these DIY tricks and hacks come in! Many people struggle with getting their watermelons to thrive, facing issues like blossom end rot, pests, or simply not enough space. I’m here to tell you that with a few clever strategies, you can grow watermelons successfully, no matter the size of your garden.
This article is packed with easy-to-follow tips and DIY solutions that will help you overcome common challenges and enjoy a bountiful harvest. From choosing the right variety to creating the perfect soil conditions, I’ll guide you through every step of the process. Get ready to impress your friends and family with your watermelon-growing prowess!
Growing Watermelons: A DIY Guide to Sweet Success!
Hey there, fellow gardening enthusiasts! I’m so excited to share my tried-and-true method for growing juicy, delicious watermelons right in your own backyard. It might seem daunting, but trust me, with a little planning and effort, you’ll be enjoying homegrown watermelon all summer long. Let’s dive in!
Choosing the Right Watermelon Variety
Before we even think about planting, it’s crucial to pick the right watermelon variety for your climate and garden size. Some varieties are better suited for shorter growing seasons, while others need plenty of space to sprawl. Here’s a quick rundown of some popular choices:
* Sugar Baby: A classic, compact variety that matures quickly (around 75 days). Perfect for smaller gardens.
* Crimson Sweet: A larger, oblong watermelon with a sweet, red flesh. Requires a longer growing season (around 85 days).
* Jubilee: A very large, elongated watermelon, known for its disease resistance. Needs ample space and a long growing season (around 95 days).
* Yellow Doll: A unique variety with yellow flesh that’s incredibly sweet. Matures in about 70 days.
* Icebox Watermelons: These are smaller varieties, perfect for smaller families or individuals. They mature quickly and are easy to store in the refrigerator.
My Recommendation: If you’re a beginner, I highly recommend starting with Sugar Baby. It’s relatively easy to grow and produces delicious, manageable-sized watermelons.
Preparing Your Garden Bed
Watermelons are heavy feeders, meaning they need a lot of nutrients to thrive. Proper soil preparation is key to a successful harvest.
* Sunlight: Watermelons need at least 6-8 hours of direct sunlight per day. Choose a location in your garden that gets plenty of sun.
* Soil: Watermelons prefer well-drained, sandy loam soil with a pH between 6.0 and 6.8.
* Nutrients: Amend your soil with plenty of organic matter, such as compost or well-rotted manure. This will improve drainage, fertility, and water retention.
Step-by-Step Soil Preparation:
1. Clear the Area: Remove any weeds, rocks, or debris from the planting area.
2. Till the Soil: Till the soil to a depth of at least 12 inches. This will loosen the soil and make it easier for the watermelon roots to grow.
3. Amend the Soil: Spread a 2-3 inch layer of compost or well-rotted manure over the tilled soil.
4. Incorporate the Amendments: Use a garden fork or tiller to incorporate the compost or manure into the soil.
5. Create Mounds or Rows: Watermelons grow best on slightly raised mounds or rows. This helps with drainage and warms the soil faster. Create mounds that are about 12 inches high and 3-4 feet apart. If you prefer rows, space them about 6-8 feet apart.
Starting Watermelon Seeds (Optional)
While you can directly sow watermelon seeds into the garden, starting them indoors gives them a head start, especially in areas with shorter growing seasons.
* Timing: Start seeds indoors about 4-6 weeks before the last expected frost.
* Containers: Use peat pots or biodegradable containers to avoid disturbing the roots when transplanting.
* Soil: Use a seed-starting mix that is light and well-draining.
* Temperature: Watermelon seeds need warm temperatures (70-85°F) to germinate. Use a heat mat to provide consistent warmth.
Step-by-Step Seed Starting:
1. Fill the Containers: Fill the peat pots or biodegradable containers with seed-starting mix.
2. Sow the Seeds: Plant 2-3 seeds per container, about 1 inch deep.
3. Water Gently: Water the soil gently to moisten it.
4. Provide Warmth: Place the containers on a heat mat and cover them with a plastic dome or plastic wrap to create a humid environment.
5. Provide Light: Once the seeds germinate, remove the plastic dome or plastic wrap and place the seedlings under a grow light or in a sunny window.
6. Thin the Seedlings: Once the seedlings have developed their first true leaves, thin them to one seedling per container. Choose the strongest, healthiest seedling.
Planting Watermelon Seedlings or Seeds
Once the danger of frost has passed and the soil has warmed up to at least 70°F, it’s time to plant your watermelon seedlings or seeds.
* Hardening Off Seedlings: If you started your seeds indoors, you’ll need to harden them off before transplanting them into the garden. This means gradually exposing them to outdoor conditions over a period of 7-10 days. Start by placing them in a sheltered location for a few hours each day, gradually increasing the amount of time they spend outdoors.
* Spacing: Space watermelon seedlings or seeds according to the variety you’re growing. Sugar Baby watermelons can be spaced about 2-3 feet apart, while larger varieties may need 4-6 feet of space.
* Watering: Water the seedlings or seeds thoroughly after planting.
Step-by-Step Planting:
1. Prepare the Planting Hole: Dig a hole that is slightly larger than the root ball of the seedling or the size of the seed.
2. Plant the Seedling or Seed: Gently remove the seedling from its container and place it in the hole. If you’re planting seeds, sow them about 1 inch deep.
3. Backfill the Hole: Backfill the hole with soil and gently firm it around the seedling or seed.
4. Water Thoroughly: Water the seedling or seed thoroughly to settle the soil.
5. Mulch: Apply a layer of mulch around the plants to help retain moisture, suppress weeds, and regulate soil temperature. I like to use straw or shredded leaves.
Caring for Your Watermelon Plants
Watermelons need consistent care to thrive. Here’s what you need to do:
* Watering: Watermelons need plenty of water, especially during hot, dry weather. Water deeply and regularly, aiming for about 1-2 inches of water per week. Avoid overhead watering, as this can lead to fungal diseases. Drip irrigation or soaker hoses are ideal.
* Fertilizing: Fertilize your watermelon plants every 2-3 weeks with a balanced fertilizer. Look for a fertilizer that is high in phosphorus and potassium, which are essential for fruit development. I like to use a liquid fertilizer diluted according to the package instructions.
* Weeding: Keep the area around your watermelon plants free of weeds. Weeds compete with watermelons for nutrients and water.
* Pest Control: Watermelons can be susceptible to pests such as aphids, squash bugs, and cucumber beetles. Inspect your plants regularly for signs of pests and take action if necessary. Insecticidal soap or neem oil can be effective for controlling many common pests.
* Pollination: Watermelons need to be pollinated to produce fruit. If you’re not seeing any fruit developing, you may need to hand-pollinate the flowers. To hand-pollinate, use a small paintbrush to transfer pollen from the male flowers to the female flowers. Female flowers have a small fruit at the base of the flower, while male flowers do not.
Protecting Your Watermelons
As your watermelons grow, you’ll need to protect them from pests, diseases, and the elements.
* Pest Protection: Use row covers to protect young plants from pests. Once the plants start to flower, remove the row covers to allow for pollination.
* Disease Prevention: Practice good sanitation to prevent diseases. Remove any diseased leaves or fruit from the garden. Avoid overhead watering and ensure good air circulation.
* Sun Protection: In very hot climates, watermelons can get sunburned. Protect them from the sun by covering them with shade cloth or straw.
* Ground Protection: Place a piece of cardboard or straw under each watermelon to prevent it from rotting on the ground.
Harvesting Your Watermelons
Knowing when to harvest your watermelons is crucial for getting the best flavor. Here are a few signs that your watermelons are ripe:
* The Tendril: The tendril closest to the watermelon stem will turn brown and dry.
* The Ground Spot: The spot where the watermelon rests on the ground will turn from white to yellow.
* The Sound: When you thump the watermelon, it should sound hollow.
* Days to Maturity: Check the seed packet or plant tag for the days to maturity. This is a good estimate of when your watermelons will be ripe
Conclusion
So, there you have it! Successfully growing watermelons doesn’t have to be a daunting task reserved for seasoned gardeners. By implementing these simple yet effective DIY tricks, you can transform your backyard into a watermelon wonderland. We’ve covered everything from seed starting and soil preparation to pollination assistance and pest control, all designed to maximize your yield and ensure juicy, delicious watermelons.
The beauty of this approach lies in its adaptability. Feel free to experiment with different varieties of watermelons to find your personal favorite. Perhaps you’re drawn to the classic Crimson Sweet, or maybe you’re intrigued by the smaller, personal-sized Sugar Baby. Don’t be afraid to try growing yellow or orange fleshed varieties for a unique twist.
Consider variations in your growing methods as well. If you live in a cooler climate, starting your seeds indoors is absolutely crucial. You might even want to explore using raised beds or containers to provide better drainage and warmer soil temperatures. For those in warmer regions, direct sowing might be a viable option, but remember to protect your seedlings from harsh sunlight and pests.
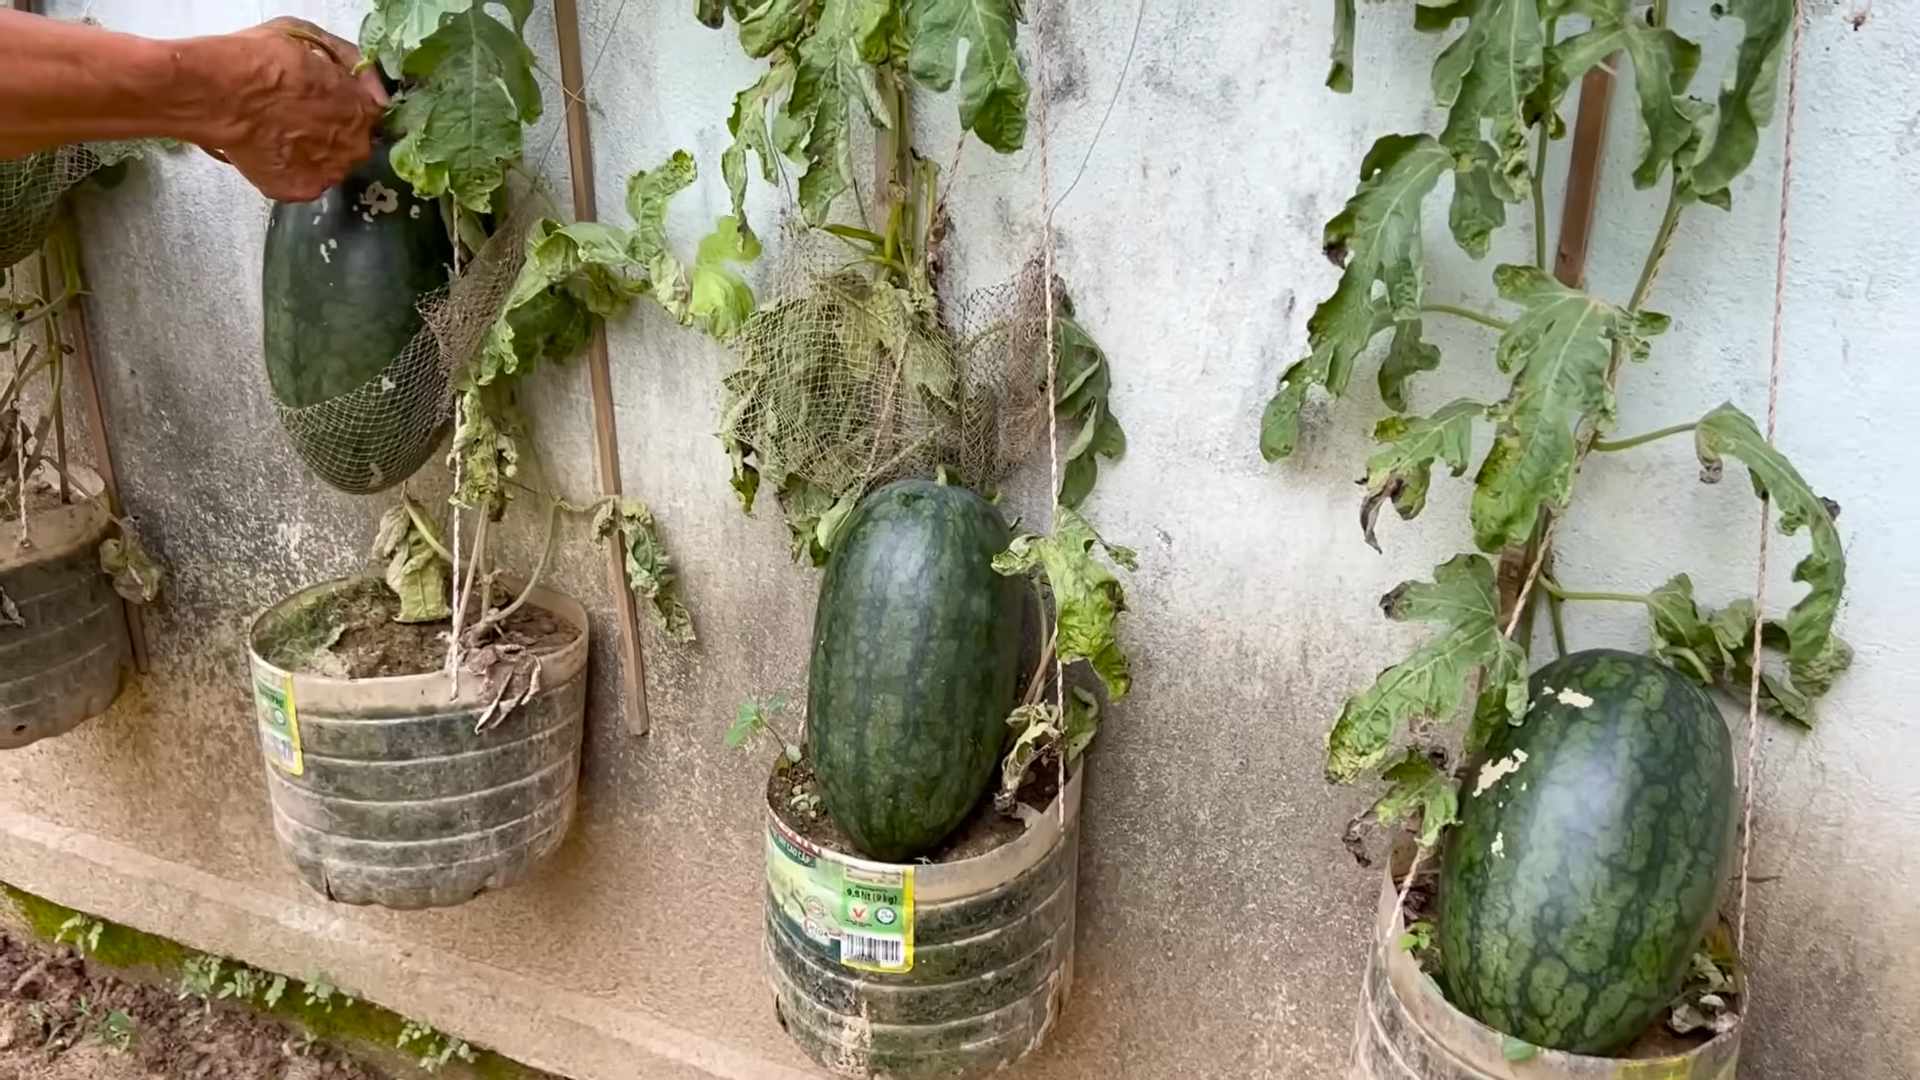
Another exciting variation is exploring different trellising techniques. While watermelons are traditionally grown sprawling on the ground, trellising can save space, improve air circulation, and reduce the risk of fruit rot. Just be sure to provide adequate support for the heavy fruits as they develop. You can use slings made from old t-shirts or pantyhose to cradle the watermelons and prevent them from breaking off the vine.
Remember, the key to successfully grow watermelons is consistent care and attention. Regularly monitor your plants for signs of pests or diseases, and address any issues promptly. Water deeply and consistently, especially during hot, dry periods. And don’t forget to fertilize your plants regularly with a balanced fertilizer to provide them with the nutrients they need to thrive.
But more than anything, growing watermelons should be an enjoyable experience. It’s a chance to connect with nature, learn new skills, and reap the rewards of your hard work. Imagine the satisfaction of biting into a perfectly ripe, homegrown watermelon on a hot summer day. It’s a taste of pure bliss that you simply can’t find in store-bought varieties.
We wholeheartedly encourage you to give these DIY tricks a try. We’re confident that you’ll be amazed at the results. And once you’ve harvested your first crop of homegrown watermelons, we’d love to hear about your experience! Share your photos, tips, and stories with us in the comments section below. Let’s create a community of watermelon enthusiasts who are passionate about growing their own delicious fruit. Happy gardening!
Frequently Asked Questions (FAQ)
Q: How much space do watermelons need to grow?
A: Watermelons are sprawling plants that require a significant amount of space. Ideally, you should allocate at least 4-6 feet between plants and 8-10 feet between rows. If you’re growing watermelons in containers, choose a large container that is at least 24 inches in diameter and 18 inches deep. Trellising can help save space, but you’ll still need to provide adequate support for the heavy fruits. Remember to consider the specific variety you’re growing, as some varieties are more compact than others.
Q: What kind of soil is best for growing watermelons?
A: Watermelons thrive in well-drained, sandy loam soil that is rich in organic matter. The soil should have a pH between 6.0 and 6.8. Before planting, amend your soil with compost or well-rotted manure to improve drainage and fertility. Avoid heavy clay soils, as they can become waterlogged and inhibit root growth. If you have clay soil, consider growing your watermelons in raised beds or containers.
Q: How often should I water my watermelon plants?
A: Watermelons need consistent moisture, especially during hot, dry periods. Water deeply and regularly, aiming to keep the soil consistently moist but not waterlogged. A good rule of thumb is to water when the top inch of soil feels dry to the touch. During fruit development, watermelons require even more water. Consider using a soaker hose or drip irrigation to deliver water directly to the roots and minimize water loss through evaporation. Reduce watering as the fruits ripen to prevent them from cracking.
Q: How do I know when my watermelons are ripe?
A: Determining when a watermelon is ripe can be tricky, but there are several indicators to look for. First, check the tendril closest to the fruit. When this tendril turns brown and dries out, it’s a good sign that the watermelon is nearing ripeness. Second, examine the underside of the watermelon where it rests on the ground. This spot, known as the ground spot, should turn from white to a creamy yellow color. Finally, give the watermelon a gentle thump. A ripe watermelon will sound hollow and deep, while an unripe watermelon will sound dull and solid. With practice, you’ll develop a knack for identifying ripe watermelons.
Q: What are some common pests and diseases that affect watermelons?
A: Watermelons are susceptible to a variety of pests and diseases, including aphids, squash bugs, cucumber beetles, vine borers, powdery mildew, and fusarium wilt. Regularly inspect your plants for signs of infestation or disease, and take action promptly to prevent problems from escalating. Use organic pest control methods whenever possible, such as insecticidal soap, neem oil, or diatomaceous earth. To prevent diseases, ensure good air circulation around your plants, avoid overhead watering, and practice crop rotation. Choose disease-resistant varieties whenever possible.
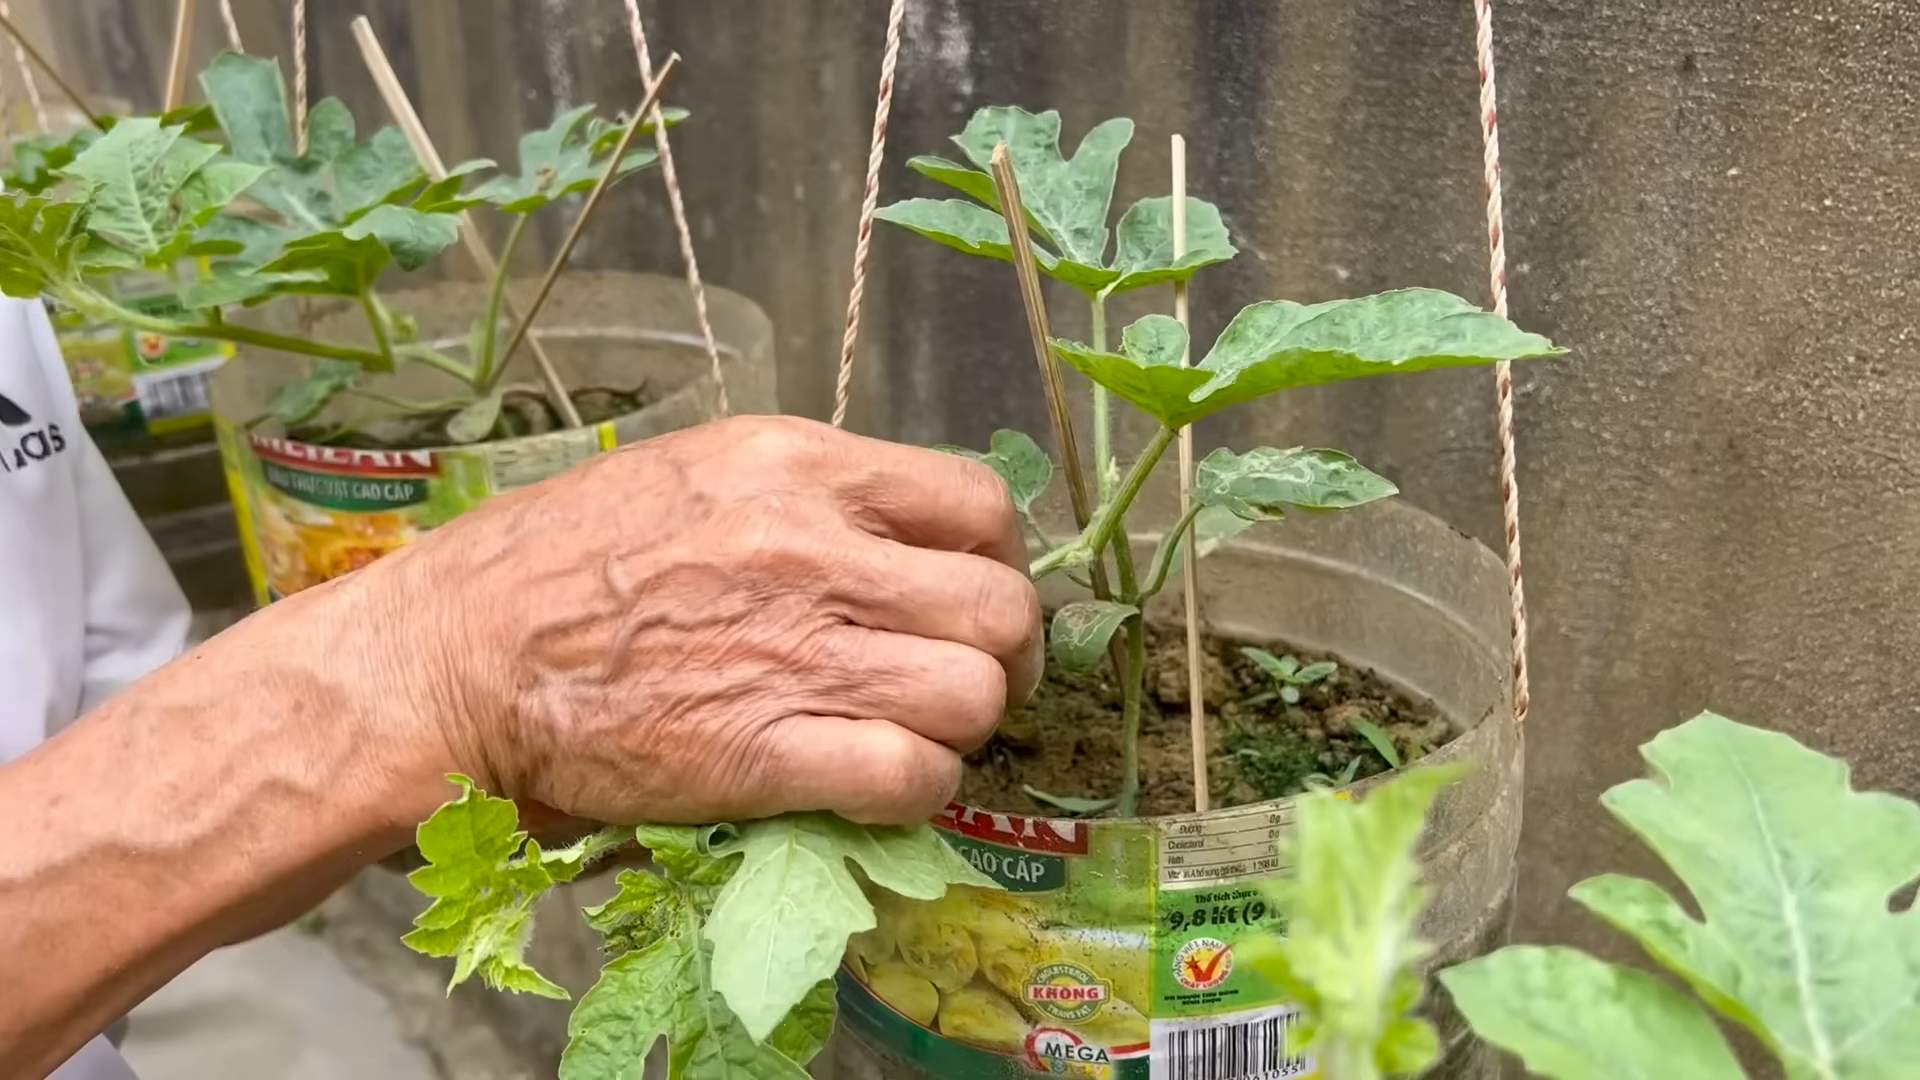
Q: Can I grow watermelons in containers?
A: Yes, you can successfully grow watermelons in containers, but it requires careful planning and attention. Choose a large container that is at least 24 inches in diameter and 18 inches deep. Use a high-quality potting mix that is well-draining and rich in organic matter. Select a compact or bush-type watermelon variety that is well-suited for container growing. Provide adequate support for the vines and fruits, as they can become quite heavy. Water regularly and fertilize frequently, as container-grown plants tend to dry out and deplete nutrients more quickly than those grown in the ground.
Q: How can I improve pollination for my watermelon plants?
A: Watermelons require pollination to set fruit. If you’re not seeing many bees or other pollinators in your garden, you may need to hand-pollinate your plants. To hand-pollinate, use a small paintbrush to transfer pollen from the male flowers to the female flowers. Male flowers have a long, slender stem, while female flowers have a small, immature watermelon at the base. Pollinate your plants in the morning, when the pollen is most viable. You can also attract more pollinators to your garden by planting flowers that are rich in nectar and pollen, such as sunflowers, zinnias, and lavender.
Q: What kind of fertilizer should I use for my watermelon plants?
A: Watermelons benefit from regular fertilization throughout the growing season. Start with a balanced fertilizer (e.g., 10-10-10) when planting, and then switch to a fertilizer that is higher in phosphorus and potassium as the plants begin to flower and set fruit. Avoid fertilizers that are too high in nitrogen, as they can promote excessive foliage growth at the expense of fruit production. You can also supplement with organic fertilizers, such as compost tea or fish emulsion. Follow the instructions on the fertilizer label carefully, and avoid over-fertilizing, as this can damage your plants.
Q: How do I prevent my watermelons from cracking?
A: Watermelon cracking is often caused by inconsistent watering, especially after a period of drought. To prevent cracking, water your plants deeply and regularly, especially during hot, dry periods. Avoid allowing the soil to dry out completely, and then suddenly saturating it. Mulching around your plants can help to retain moisture and prevent fluctuations in soil moisture levels. Also, reduce watering as the fruits ripen, as this can help to prevent them from absorbing too much water and cracking.
Leave a Comment