
Growing Bok Choy at Home can seem daunting, but trust me, it’s easier than you think! Imagine stepping outside your back door and harvesting fresh, crisp bok choy for your stir-fries or salads. No more trips to the grocery store or wondering about the freshness of your vegetables. This DIY guide will unlock the secrets to successfully cultivating this nutritious and delicious leafy green right in your own backyard – or even on your balcony!
Bok choy, also known as pak choi, has a rich history deeply rooted in Chinese cuisine and culture. For centuries, it has been a staple ingredient, celebrated not only for its flavor but also for its health benefits. From humble family meals to elaborate banquets, bok choy has consistently held a place of honor on the table. Now, you can bring that tradition to your own home.
Why should you learn this DIY trick? Well, in today’s world, knowing where your food comes from is more important than ever. Growing your own bok choy allows you to control the quality of your produce, ensuring it’s free from harmful pesticides and packed with nutrients. Plus, it’s incredibly rewarding to nurture a plant from seed to harvest. I’m excited to share my favorite tips and tricks for growing bok choy at home, so you can enjoy fresh, healthy greens all season long!

Growing Bok Choy at Home: A Beginner’s Guide
Hey there, fellow gardening enthusiasts! I’m so excited to share my experience with growing bok choy at home. It’s surprisingly easy, even if you’re a complete newbie like I was when I started. Bok choy, also known as pak choi, is a delicious and nutritious leafy green that’s perfect for stir-fries, soups, and salads. Plus, it grows relatively quickly, so you’ll be enjoying your homegrown harvest in no time!
Choosing the Right Bok Choy Variety
Before we dive into the nitty-gritty, let’s talk about choosing the right variety. There are several types of bok choy, each with its own unique characteristics. Here are a few popular options:
* Shanghai Bok Choy: This variety has light green stems and spoon-shaped leaves. It’s known for its mild flavor and tender texture. I personally love this one for its versatility.
* Baby Bok Choy: As the name suggests, this is a smaller version of regular bok choy. It’s perfect for single servings and has a slightly sweeter taste.
* Canton Bok Choy: This variety has dark green leaves and thick, white stems. It has a more robust flavor than Shanghai bok choy.
* Purple Lady Bok Choy: If you want to add a pop of color to your garden, this is the variety for you! It has beautiful purple leaves and a slightly peppery flavor.
I recommend starting with Shanghai or Baby Bok Choy if you’re a beginner. They’re both relatively easy to grow and have a mild flavor that most people enjoy.
Getting Started: Seeds vs. Seedlings
You have two options when it comes to starting your bok choy: seeds or seedlings.
* Seeds: Starting from seeds is more economical and gives you more control over the growing process. However, it requires a bit more patience and attention.
* Seedlings: Buying seedlings from a nursery is a quicker and easier option. You’ll skip the germination stage and get a head start on your harvest.
I’ve tried both methods, and I personally prefer starting from seeds. It’s just so rewarding to watch those tiny seeds sprout and grow into beautiful bok choy plants!
Step-by-Step Guide to Growing Bok Choy from Seeds
Alright, let’s get down to business! Here’s my step-by-step guide to growing bok choy from seeds:
1. Gather Your Supplies:
* Bok choy seeds
* Seed starting trays or small pots
* Seed starting mix or potting soil
* Watering can or spray bottle
* Grow lights (optional, but recommended if you’re starting seeds indoors)
* Fertilizer (optional, but can help boost growth)
2. Sow the Seeds:
* Fill your seed starting trays or pots with seed starting mix or potting soil.
* Moisten the soil with water.
* Sow the seeds about ¼ inch deep and 1 inch apart.
* Gently cover the seeds with soil.
* Water the soil again.
3. Provide Light and Warmth:
* Place the seed starting trays or pots in a warm location with plenty of light.
* If you’re starting seeds indoors, use grow lights to provide 12-16 hours of light per day.
* The ideal temperature for germination is between 60-70°F (15-21°C).
4. Keep the Soil Moist:
* Water the soil regularly to keep it moist but not soggy.
* Use a spray bottle to gently mist the soil surface.
* Avoid overwatering, as this can lead to fungal diseases.
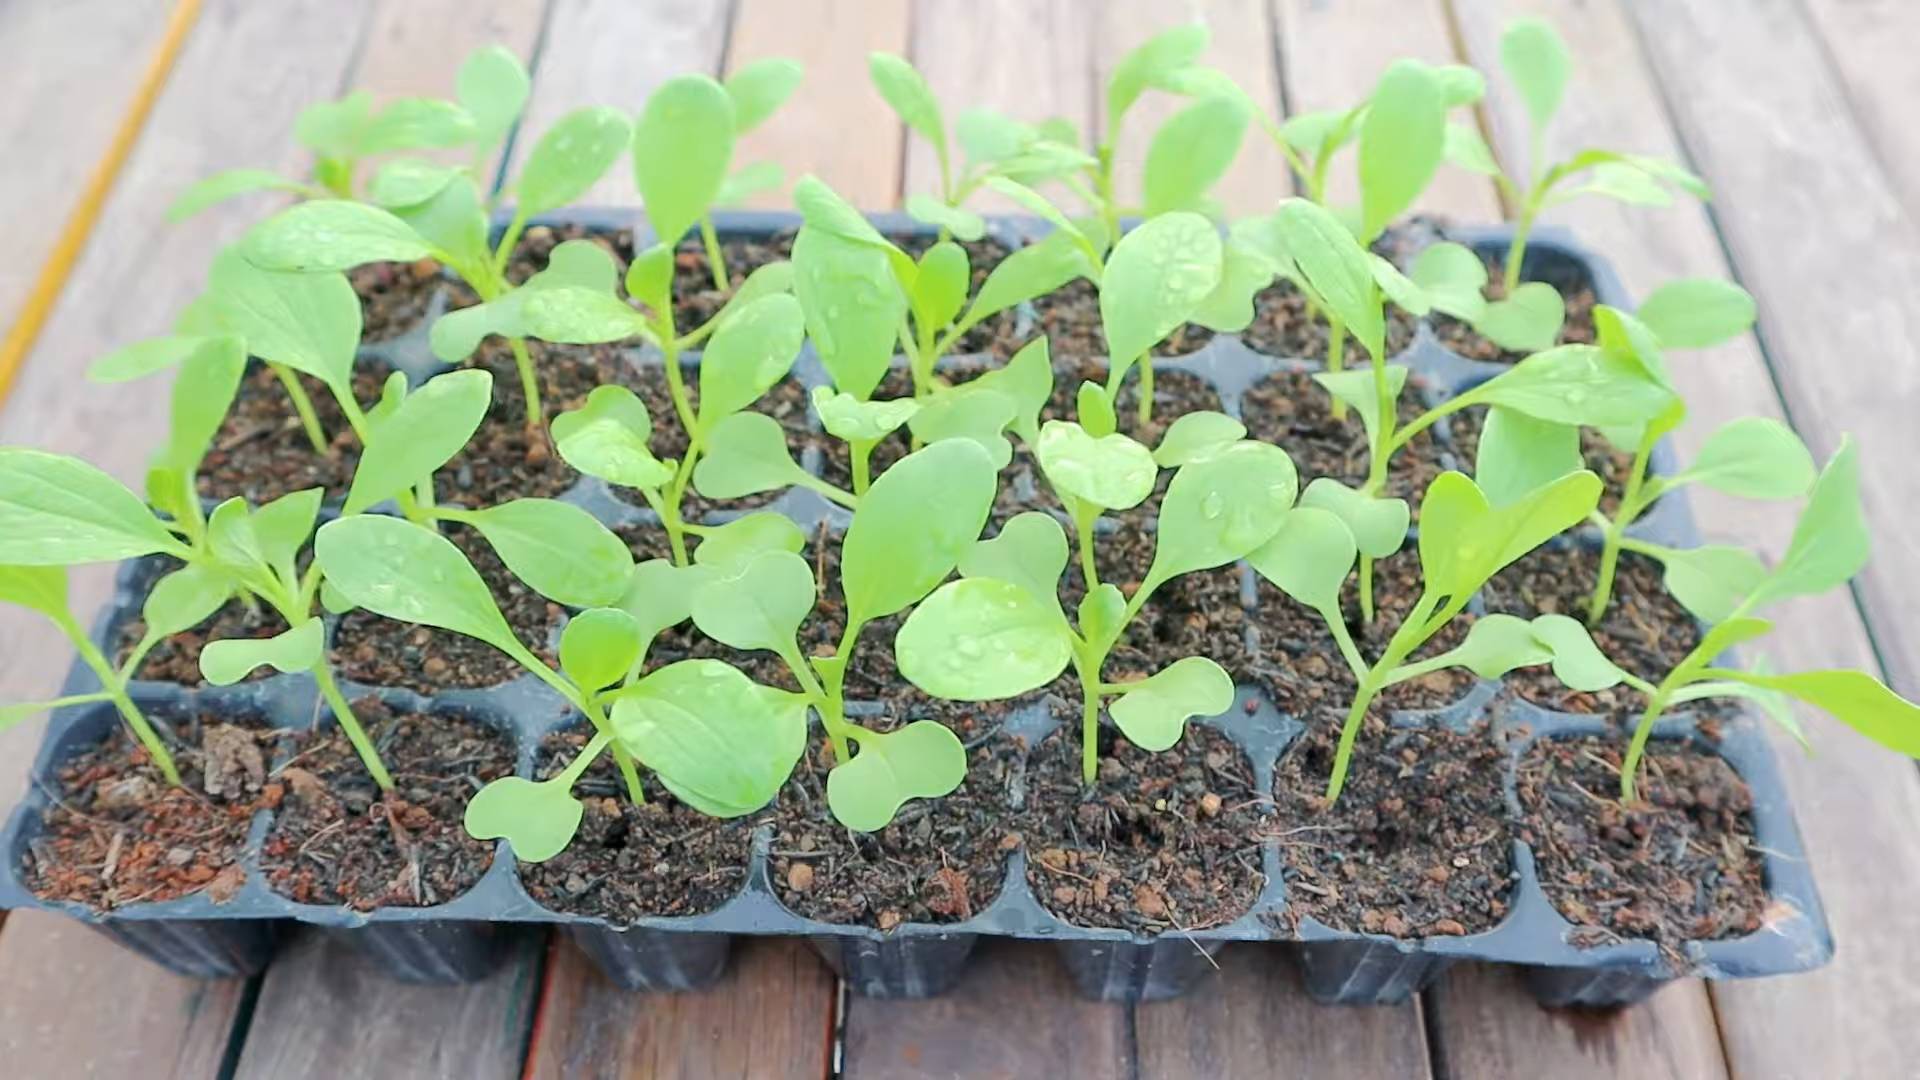
5. Thin the Seedlings:
* Once the seedlings have developed their first true leaves (the second set of leaves), thin them out so that they are about 2-3 inches apart.
* To thin the seedlings, carefully snip off the weaker ones at the soil line.
6. Transplant the Seedlings (if starting indoors):
* Once the seedlings are about 4-6 inches tall, they’re ready to be transplanted into your garden or larger containers.
* Choose a location that receives at least 4-6 hours of sunlight per day.
* Prepare the soil by adding compost or other organic matter.
* Dig holes that are slightly larger than the root balls of the seedlings.
* Gently remove the seedlings from their trays or pots and place them in the holes.
* Backfill the holes with soil and water thoroughly.
* Space the seedlings about 6-12 inches apart, depending on the variety.
Growing Bok Choy in Containers
If you don’t have a garden, don’t worry! You can easily grow bok choy in containers. Here’s what you need to know:
* Choose the Right Container: Select a container that is at least 6-8 inches deep and wide. Make sure it has drainage holes to prevent waterlogging.
* Use High-Quality Potting Soil: Avoid using garden soil in containers, as it can become compacted and drain poorly. Use a high-quality potting soil that is well-draining and rich in nutrients.
* Provide Adequate Sunlight: Place the container in a location that receives at least 4-6 hours of sunlight per day.
* Water Regularly: Water the container regularly to keep the soil moist but not soggy. Check the soil moisture level daily and water when the top inch of soil feels dry.
* Fertilize Regularly: Bok choy is a heavy feeder, so it’s important to fertilize it regularly. Use a balanced fertilizer according to the package directions.
Caring for Your Bok Choy Plants
Once your bok choy plants are established, here are a few tips for keeping them healthy and productive:
* Watering: Water your bok choy plants regularly, especially during hot, dry weather. Aim to keep the soil consistently moist but not waterlogged.
* Fertilizing: Fertilize your bok choy plants every 2-3 weeks with a balanced fertilizer. This will help promote healthy growth and abundant yields.
* Weeding: Keep the area around your bok choy plants free of weeds. Weeds can compete with your plants for nutrients and water.
* Pest Control: Bok choy can be susceptible to pests such as aphids, cabbage worms, and flea beetles. Inspect your plants regularly for signs of pests and take action if necessary. I’ve found that insecticidal soap works well for controlling aphids. For cabbage worms, you can handpick them off the plants or use Bacillus thuringiensis (Bt), a natural insecticide.
* Bolting: Bolting is when a plant prematurely flowers and goes to seed. This can happen when bok choy is exposed to hot weather or stress. To prevent bolting, try to grow your bok choy in a cool, shady location during the summer months. You can also choose bolt-resistant varieties.
Harvesting Your Bok Choy
The best part about growing bok choy is, of course, the harvest! You can start harvesting your bok choy when the leaves are about 6-8 inches long.
* Harvesting Individual Leaves: You can harvest individual leaves as needed by cutting them off at the base of the plant. This will allow the plant to continue producing new leaves.
* Harvesting the Entire Plant: You can also harvest the entire plant by cutting it off at the base. This is a good option if you want to use the entire plant at once.
I usually harvest individual leaves so I can enjoy fresh bok choy over a longer period.
Troubleshooting Common Problems
Even with the best care, you might encounter some problems while growing bok choy. Here are a few common issues and how to address them:
* Yellowing Leaves: Yellowing leaves can be a sign of nutrient deficiency, overwatering, or underwatering. Check the soil moisture level and fertilize your plants if necessary.
* Holes in Leaves: Holes in leaves are often caused by pests such as cabbage worms or flea beetles. Inspect your plants regularly for signs of pests and take action if necessary.
* Bolting: As mentioned earlier, bolting can happen when bok choy is exposed to hot weather or stress. Try to grow your bok choy in a cool, shady location during the summer months.
Enjoying Your Homegrown Bok Choy
Now that you’ve harvested your homegrown bok choy, it’s time to enjoy it! Bok choy is incredibly versatile and can be used in a variety of dishes. Here are a few of my favorite ways to use it:
* Stir-fries: Bok choy is a classic ingredient in stir-fries. It adds a delicious crunch and a boost of nutrients.
Conclusion
So, there you have it! Growing your own bok choy at home is not only surprisingly simple, but it’s also incredibly rewarding. Imagine stepping out into your garden or onto your balcony and harvesting fresh, crisp bok choy whenever you need it. No more last-minute trips to the grocery store or settling for wilted greens. This DIY trick transforms your kitchen into a source of fresh, healthy ingredients.
Why is this a must-try? Because it puts you in control. You control the quality of the soil, the amount of sunlight, and the absence of harmful pesticides. You get bok choy that’s bursting with flavor and nutrients, far superior to anything you can buy in a store. Plus, it’s a fantastic way to connect with nature, even if you only have a small space.
But the beauty of growing bok choy at home lies in its versatility. Feel free to experiment! Try different varieties of bok choy, such as Shanghai bok choy with its pale green stalks or the vibrant purple bok choy for a pop of color in your stir-fries. You can also adjust the growing conditions to suit your climate. If you live in a particularly hot area, provide some afternoon shade to prevent bolting. If you’re short on space, consider growing bok choy in containers on a sunny windowsill.
Consider companion planting to maximize your yield and deter pests. Marigolds, nasturtiums, and garlic are all excellent companions for bok choy. They help to repel common pests like aphids and cabbage worms, allowing your bok choy to thrive.
Don’t be afraid to get creative with your harvest, either. Bok choy is incredibly versatile in the kitchen. Use it in stir-fries, soups, salads, or even grill it for a smoky flavor. The possibilities are endless!
We wholeheartedly encourage you to give this DIY trick a try. It’s a fun, educational, and delicious way to enhance your cooking and connect with nature. And most importantly, it allows you to enjoy the freshest, most flavorful bok choy imaginable.
Once you’ve experienced the joy of harvesting your own homegrown bok choy, we’re confident you’ll be hooked. So, grab some seeds or seedlings, find a sunny spot, and get ready to embark on a rewarding gardening adventure.
We’d love to hear about your experiences! Share your tips, tricks, and photos of your homegrown bok choy in the comments below. Let’s create a community of bok choy enthusiasts and inspire others to discover the joys of growing their own food. What are you waiting for? Start growing your own bok choy today!
Frequently Asked Questions (FAQ)
What kind of soil is best for growing bok choy?
Bok choy thrives in well-draining, fertile soil that is rich in organic matter. A slightly acidic to neutral pH (around 6.0 to 7.0) is ideal. Amend your soil with compost or well-rotted manure before planting to improve its fertility and drainage. If you’re growing in containers, use a high-quality potting mix specifically formulated for vegetables. Avoid heavy clay soils, as they can retain too much moisture and lead to root rot.
How much sunlight does bok choy need?
Bok choy needs at least 4-6 hours of sunlight per day to grow properly. However, in hotter climates, providing some afternoon shade can help prevent bolting (premature flowering), which can make the leaves bitter. If you’re growing indoors, place your bok choy near a sunny window or use grow lights to supplement natural light.
How often should I water my bok choy?
Bok choy needs consistent moisture to thrive. Water deeply whenever the top inch of soil feels dry to the touch. Avoid overwatering, as this can lead to root rot. During hot, dry weather, you may need to water more frequently. Mulching around your bok choy plants can help retain moisture in the soil.
How do I prevent bok choy from bolting?
Bolting is a common problem with bok choy, especially in hot weather. To prevent bolting, choose bolt-resistant varieties, provide afternoon shade, and water regularly to keep the soil cool and moist. Harvesting the outer leaves regularly can also help delay bolting. If your bok choy does start to bolt, you can still harvest the leaves, but they may have a slightly bitter taste.
What are some common pests and diseases that affect bok choy?
Bok choy can be susceptible to several pests and diseases, including aphids, cabbage worms, flea beetles, and downy mildew. To prevent pest and disease problems, practice good garden hygiene, such as removing weeds and debris from around your plants. You can also use row covers to protect your bok choy from pests. If you do encounter pests or diseases, treat them promptly with organic pesticides or fungicides.
When is the best time to harvest bok choy?
Bok choy can be harvested at any stage of growth, depending on your preference. For baby bok choy, harvest when the leaves are about 4-6 inches long. For mature bok choy, harvest when the heads are firm and compact, typically about 30-45 days after planting. To harvest, simply cut the entire head of bok choy at the base of the plant. You can also harvest individual leaves as needed, starting with the outer leaves.
Can I grow bok choy in containers?
Yes, bok choy grows well in containers. Choose a container that is at least 6-8 inches deep and wide. Use a high-quality potting mix and make sure the container has drainage holes. Place the container in a sunny location and water regularly. You may need to fertilize your bok choy more frequently when growing in containers, as nutrients can leach out of the soil more quickly.
How do I fertilize my bok choy?
Bok choy is a heavy feeder and benefits from regular fertilization. Apply a balanced fertilizer (such as 10-10-10) at planting time and then again every 2-3 weeks during the growing season. You can also use organic fertilizers, such as compost tea or fish emulsion. Avoid over-fertilizing, as this can lead to excessive leaf growth and reduced flavor.
Can I save seeds from my bok choy?
Yes, you can save seeds from your bok choy, but it’s important to note that bok choy is cross-pollinated, so the seeds may not be true to type if you’re growing multiple varieties. To save seeds, allow a few plants to bolt and flower. Once the seed pods are dry and brown, harvest them and extract the seeds. Store the seeds in a cool, dry place until you’re ready to plant them.
Is bok choy good for you? What are the health benefits?
Absolutely! Bok choy is a nutritional powerhouse. It’s low in calories and high in vitamins A, C, and K, as well as folate, calcium, and potassium. Bok choy is also a good source of fiber and antioxidants. Eating bok choy can help boost your immune system, improve bone health, and protect against chronic diseases. It’s a delicious and healthy addition to any diet.
Leave a Comment