
Growing Bottle Gourds Easily is something I’m incredibly excited to share with you! Have you ever dreamed of harvesting your own unique, sculptural gourds right from your backyard? Imagine crafting whimsical birdhouses, rustic bowls, or even musical instruments from something you nurtured from a tiny seed. It’s not just a gardening project; it’s an artistic adventure!
Bottle gourds, also known as calabash, boast a rich history, dating back thousands of years. Evidence suggests they were among the first cultivated plants, predating even pottery! Across cultures, they’ve served as essential tools for carrying water, storing food, and even as ceremonial objects. This deep connection to human history makes growing bottle gourds easily all the more fascinating.
But why should *you* try growing them? Well, beyond the historical significance and artistic potential, bottle gourds are surprisingly easy to cultivate with the right know-how. Many people struggle with getting the right shape, size, or even getting their gourds to mature properly. That’s where these DIY tricks and hacks come in! I’m going to walk you through simple, effective techniques to ensure a bountiful harvest of beautiful, healthy bottle gourds. Get ready to unlock the secrets to successful gourd growing and add a touch of rustic charm to your home and garden!

Growing Bottle Gourds: A Beginner’s Guide to a Bountiful Harvest
Hey there, fellow gardening enthusiasts! I’m so excited to share my experience and guide you through the wonderful world of growing bottle gourds. These fascinating plants, also known as calabash gourds, are not only fun to cultivate but also incredibly versatile. You can use the dried gourds for crafting, making birdhouses, or even creating unique musical instruments. So, let’s dive in and learn how to grow these beauties with ease!
Choosing the Right Variety and Starting Seeds
First things first, you need to decide which bottle gourd variety you want to grow. There are many different shapes and sizes available, from the classic bowling pin shape to long, snake-like varieties. Consider your available space and what you plan to use the gourds for when making your selection.
Here’s how to get your bottle gourd journey started:
* Selecting Seeds: Purchase high-quality seeds from a reputable source. Look for seeds that are specifically labeled for bottle gourds (Lagenaria siceraria).
* Seed Starting Time: Bottle gourds need a long growing season, so it’s best to start seeds indoors about 6-8 weeks before the last expected frost in your area.
* Soaking the Seeds: To improve germination rates, soak the seeds in warm water for 24-48 hours before planting. This helps soften the hard outer shell.
* Planting Indoors: Fill small pots or seed trays with a well-draining seed-starting mix. Plant the seeds about 1 inch deep.
* Creating the Right Environment: Keep the soil consistently moist but not waterlogged. Place the pots in a warm location, ideally between 70-80°F (21-27°C). A heat mat can be very helpful.
* Providing Light: Once the seedlings emerge, provide them with plenty of light. A sunny windowsill or grow lights will work well.
* Hardening Off: Before transplanting the seedlings outdoors, gradually acclimate them to outdoor conditions. This process, called “hardening off,” involves exposing them to increasing amounts of sunlight and fresh air over a period of 7-10 days.
Preparing the Garden Bed and Transplanting Seedlings
Bottle gourds are vigorous growers and need plenty of space and rich soil to thrive. Proper bed preparation is crucial for a successful harvest.
* Choosing a Location: Select a sunny location that receives at least 6-8 hours of direct sunlight per day.
* Soil Preparation: Bottle gourds prefer well-drained soil that is rich in organic matter. Amend the soil with compost, aged manure, or other organic materials to improve fertility and drainage.
* Building a Support Structure: Bottle gourds are vines and need a strong support structure to climb on. A sturdy trellis, fence, or pergola will work well. Make sure the structure is tall enough to accommodate the mature vines, which can grow up to 20 feet long.
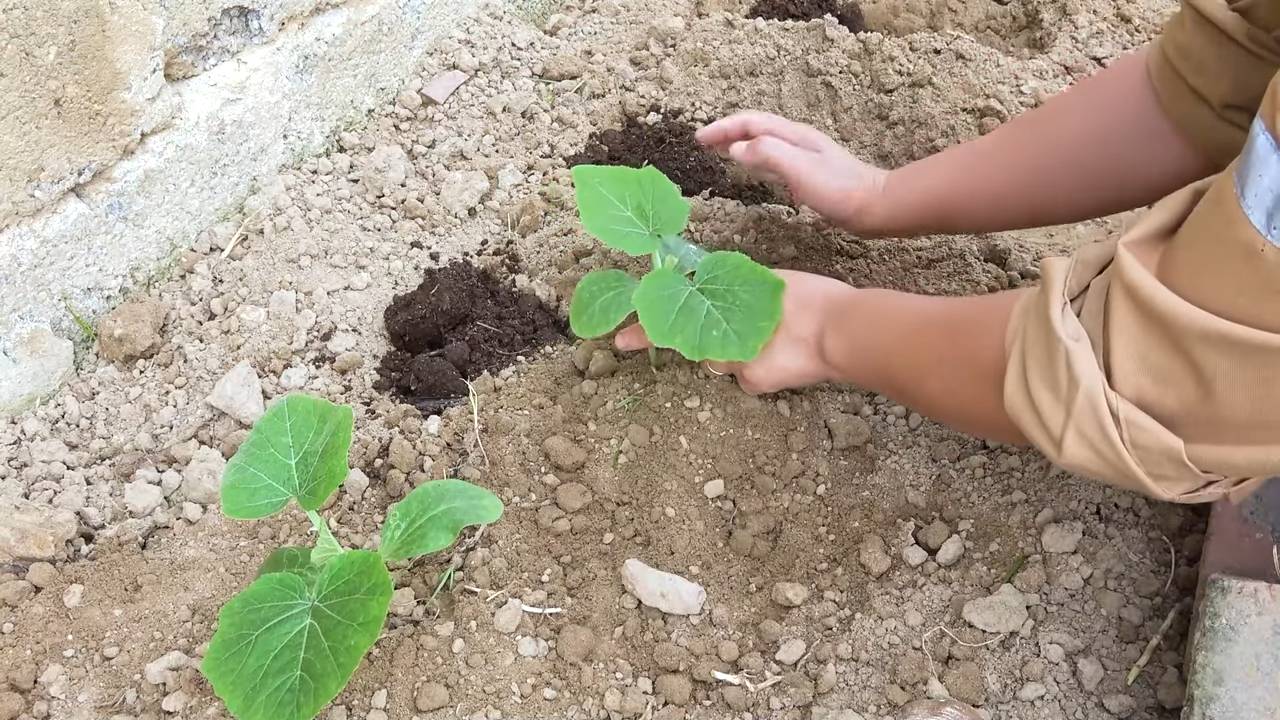
* Transplanting Seedlings: Once the danger of frost has passed and the soil has warmed up, it’s time to transplant your seedlings outdoors. Space the plants about 3-4 feet apart.
* Planting Technique: Dig a hole slightly larger than the root ball of the seedling. Gently remove the seedling from the pot and place it in the hole. Backfill with soil and water thoroughly.
* Mulching: Apply a layer of mulch around the base of the plants to help retain moisture, suppress weeds, and regulate soil temperature.
Caring for Your Bottle Gourd Plants
Once your bottle gourd plants are established, it’s important to provide them with the proper care to ensure a healthy and productive harvest.
1. Watering: Bottle gourds need consistent moisture, especially during hot, dry weather. Water deeply and regularly, aiming to keep the soil consistently moist but not waterlogged. Drip irrigation is an excellent way to deliver water directly to the roots.
2. Fertilizing: Feed your bottle gourd plants with a balanced fertilizer every 2-3 weeks. Look for a fertilizer that is high in phosphorus and potassium, which are essential for fruit development. You can also use organic fertilizers such as compost tea or fish emulsion.
3. Pruning: Pruning can help improve air circulation and encourage fruit production. Remove any dead or diseased leaves and stems. You can also pinch back the tips of the vines to encourage branching.
4. Pollination: Bottle gourds produce separate male and female flowers. The female flowers need to be pollinated in order to produce fruit. If you notice that your plants are not producing fruit, you may need to hand-pollinate the flowers. To do this, use a small paintbrush to transfer pollen from the male flowers to the female flowers. The female flowers have a small immature gourd at the base of the flower.
5. Pest and Disease Control: Bottle gourds are generally resistant to pests and diseases, but they can be susceptible to problems such as squash bugs, aphids, and powdery mildew. Inspect your plants regularly for signs of pests or diseases and take appropriate action if necessary. Insecticidal soap or neem oil can be used to control many common pests. For powdery mildew, improve air circulation and apply a fungicide if necessary.
Harvesting and Curing Your Bottle Gourds
Harvesting and curing are crucial steps in preparing your bottle gourds for long-term use.
1. Harvesting Time: Bottle gourds are typically ready to harvest in the fall, after the vines have died back and the gourds have turned brown and hard. The exact timing will depend on the variety and your local climate.
2. Harvesting Technique: Use a sharp knife or pruning shears to cut the gourds from the vine, leaving a few inches of stem attached.
3. Washing: Gently wash the gourds with mild soap and water to remove any dirt or debris.
4. Curing Process: The curing process is essential for drying out the gourds and preventing them from rotting.
* Choose a Location: Select a well-ventilated, dry location that is protected from direct sunlight and rain. A shed, garage, or attic will work well.
* Elevate the Gourds: Place the gourds on a wire rack or wooden pallets to allow air to circulate around them.
* Monitor Regularly: Check the gourds regularly for signs of mold or rot. If you see any, remove the affected gourds immediately to prevent the spread of disease.
* Curing Time: The curing process can take several weeks or even months, depending on the size and thickness of the gourds. The gourds are fully cured when they are lightweight and the seeds rattle inside.
5. Cleaning the Cured Gourds: Once the gourds are fully cured, you can clean them by soaking them in warm water for a few hours to soften the outer skin. Then, use a scrub brush or steel wool to remove the outer layer.
Creative Uses for Your Bottle Gourds
Now that you’ve successfully grown, harvested, and cured your bottle gourds, it’s time to get creative! Here are just a few ideas to get you started:
* Birdhouses: Bottle gourds make excellent birdhouses. Simply drill a hole in the side of the gourd and add a perch.
* Crafts: Bottle gourds can be painted, carved, or decorated to create a variety of crafts, such as bowls, vases, and ornaments.
* Musical Instruments: Bottle gourds can be used to make a variety of musical instruments, such as maracas, drums, and shekeres.
* Containers: Use them as unique and rustic containers for plants or other items.
* Art Projects: Let your imagination run wild and create unique art pieces using your homegrown gourds.
Troubleshooting Common Problems
Even with the best care, you might encounter some challenges along the way. Here are a few common problems and how to address them:
* Poor Germination: If your seeds aren’t germinating, make sure the soil is warm enough and consistently moist. Soaking the seeds beforehand can also help.
* Lack of Fruit Production: This could be due to poor pollination. Try hand-pollinating the flowers, as described earlier.
* Pest Infestations: Regularly inspect your plants and treat any infestations promptly with appropriate organic or chemical controls.
* Disease Issues: Ensure good air circulation and avoid overwatering to prevent fungal diseases. Use fungicides if necessary.
* Gourd Rot: Make sure the gourds are properly cured in a well-ventilated area to prevent rot.
Final Thoughts
Growing bottle gourds is a rewarding and enjoyable experience. With a little patience and care, you can harvest a bountiful crop of these fascinating plants and use them for a variety of creative projects. So, get out there and start growing! Happy gardening!
Conclusion
So, there you have it! Growing bottle gourds doesn’t have to be an intimidating endeavor. With a little planning, the right setup, and consistent care, you can cultivate these fascinating and versatile vegetables right in your own backyard. This DIY approach, focusing on maximizing space and providing optimal growing conditions, is a must-try for any gardener, whether you’re a seasoned pro or just starting out.
The beauty of this method lies in its adaptability. Feel free to experiment with different trellis designs to suit your space and aesthetic preferences. Consider companion planting with beneficial herbs and flowers to attract pollinators and deter pests naturally. You could even try different varieties of bottle gourds, each with its unique shape and size, to add visual interest to your garden and culinary possibilities to your kitchen.
Don’t be afraid to get creative with your bottle gourd harvest, too! Beyond the traditional uses in crafting and cooking, explore new ways to incorporate them into your daily life. From creating unique birdhouses to crafting eco-friendly containers, the possibilities are truly endless.
We wholeheartedly encourage you to embark on this rewarding journey of growing bottle gourds. It’s not just about the harvest; it’s about connecting with nature, learning new skills, and enjoying the satisfaction of nurturing something from seed to fruition.
And remember, the best way to learn is by doing! So, get your hands dirty, embrace the challenges, and celebrate the successes. We’re confident that you’ll be amazed by what you can achieve.
We’d love to hear about your experiences! Share your photos, tips, and stories in the comments below. Let’s create a community of bottle gourd enthusiasts and inspire others to discover the joys of growing their own food and crafting with nature’s bounty. Let us know if this DIY trick worked for you!
Frequently Asked Questions (FAQs)
What is the best time of year to start growing bottle gourds?
Bottle gourds are warm-season crops, so the best time to start them is in late spring or early summer, after the last frost has passed. The soil temperature should be at least 65°F (18°C) for optimal germination. If you live in a region with a short growing season, you can start the seeds indoors 4-6 weeks before the last expected frost and then transplant them outdoors once the weather warms up.
How much space do bottle gourds need to grow?
Bottle gourds are vigorous climbers and require ample space to spread. Each plant needs at least 6-8 feet of space in all directions. A sturdy trellis or support structure is essential to accommodate their growth. Consider the mature size of the gourd variety you’re growing when planning your garden layout. If you are using containers, make sure they are large enough to support the root system of the mature plant. A minimum of 20 gallons is recommended.
What kind of soil is best for bottle gourds?
Bottle gourds thrive in well-drained, fertile soil that is rich in organic matter. Amend your soil with compost or well-rotted manure before planting to improve its structure and nutrient content. The ideal soil pH is between 6.0 and 7.0. Conduct a soil test to determine the pH level and adjust it accordingly with lime or sulfur if necessary.
How often should I water bottle gourds?
Bottle gourds need consistent moisture, especially during hot weather and fruit development. Water deeply and regularly, aiming to keep the soil consistently moist but not waterlogged. Check the soil moisture level regularly and adjust your watering schedule based on the weather conditions. Mulching around the plants can help retain moisture and suppress weeds.
What are some common pests and diseases that affect bottle gourds?
Common pests that can affect bottle gourds include aphids, squash bugs, and vine borers. Regularly inspect your plants for signs of infestation and take appropriate action, such as hand-picking pests, using insecticidal soap, or applying neem oil. Diseases that can affect bottle gourds include powdery mildew and downy mildew. Ensure good air circulation around the plants and avoid overhead watering to prevent these diseases. Apply a fungicide if necessary, following the manufacturer’s instructions.
How long does it take for bottle gourds to mature?
The time it takes for bottle gourds to mature depends on the variety and growing conditions. Generally, it takes about 90-120 days from planting to harvest. The gourds are ready to harvest when the skin is hard and the stem is dry and brown.
Can I eat bottle gourds?
Yes, some varieties of bottle gourds are edible when young and tender. However, it’s important to note that some bottle gourds can contain cucurbitacins, which are bitter-tasting compounds that can cause stomach upset. Always taste a small piece of the gourd before cooking to ensure it is not bitter. If it is bitter, discard it.
How do I cure bottle gourds for crafting?
To cure bottle gourds for crafting, harvest them when they are fully mature and the stem is dry and brown. Wash the gourds with soapy water and dry them thoroughly. Place them in a well-ventilated area, such as a garage or shed, and allow them to dry for several months. The gourds are cured when they are lightweight and the seeds rattle inside.
What are some creative ways to use bottle gourds?
Bottle gourds can be used in a variety of creative ways, including crafting birdhouses, bowls, musical instruments, and decorative items. They can also be used as containers for plants or as molds for casting concrete or plaster. Let your imagination run wild and explore the endless possibilities!
How can I improve pollination for my bottle gourds?
Bottle gourds have separate male and female flowers, and pollination is essential for fruit development. Attract pollinators to your garden by planting flowers that attract bees and other beneficial insects. You can also hand-pollinate the flowers by transferring pollen from the male flowers to the female flowers using a small brush.
What if my bottle gourd plant is growing well but not producing fruit?
Several factors can contribute to a lack of fruit production in bottle gourds. Insufficient pollination, lack of nutrients, and stress from pests or diseases can all play a role. Ensure that your plants are receiving adequate sunlight, water, and nutrients. Hand-pollinate the flowers if necessary and address any pest or disease issues promptly.
Can I save seeds from my bottle gourds to plant next year?
Yes, you can save seeds from your bottle gourds to plant next year. Allow the gourds to fully mature on the vine and then harvest them. Cut open the gourds and remove the seeds. Wash the seeds and dry them thoroughly. Store the seeds in an airtight container in a cool, dry place.

Leave a Comment