
Growing cantaloupes in barrels might sound a little unconventional, but trust me, it’s a game-changer for home gardeners like us! Have you ever dreamed of biting into a juicy, homegrown cantaloupe, bursting with flavor, but thought you didn’t have the space? Well, this DIY trick is your answer! For centuries, resourceful gardeners have been finding innovative ways to cultivate delicious produce, even in limited spaces. Think of the hanging gardens of Babylon – a testament to human ingenuity in the face of spatial constraints. While we’re not building architectural wonders, we *are* adapting ancient principles to modern gardening.
Why should you try growing cantaloupes in barrels? Because it’s efficient, space-saving, and frankly, pretty darn cool! Many of us struggle with small yards, poor soil, or even just the desire to keep our precious cantaloupes safe from pests. This method addresses all of those concerns. Plus, the elevated barrel warms the soil faster, giving your cantaloupes a head start on the growing season. I’m going to show you how to create the perfect environment for your cantaloupes to thrive, right in the comfort of a barrel. Get ready to impress your friends and family with your bountiful harvest – and all thanks to the magic of growing cantaloupes in barrels!
Growing Cantaloupes in Barrels: A Sweet DIY Project
Okay, so you want to grow cantaloupes, but you’re short on space? Or maybe you just want to try something a little different? Well, you’ve come to the right place! I’m going to walk you through how to grow delicious, juicy cantaloupes in barrels. It’s easier than you think, and the results are incredibly rewarding. Trust me, there’s nothing quite like biting into a homegrown cantaloupe you nurtured yourself!
Why Barrels?
Before we dive in, let’s talk about why barrels are a great option for cantaloupes.
* Space Saving: Barrels take up less ground space than a traditional garden patch, making them perfect for patios, balconies, or small yards.
* Better Drainage: Proper drainage is crucial for cantaloupes. Barrels, with a little modification, offer excellent drainage, preventing root rot.
* Soil Control: You have complete control over the soil composition in your barrel, ensuring your cantaloupes get the nutrients they need.
* Warmth: The dark color of the barrel absorbs heat, which cantaloupes love! This can give you a head start on the growing season, especially in cooler climates.
* Aesthetic Appeal: Let’s be honest, a barrel overflowing with lush cantaloupe vines is just plain pretty!
What You’ll Need
Here’s a list of everything you’ll need to get started. Don’t worry, most of it is readily available at your local garden center or hardware store.
* A Large Barrel: A half-barrel (approximately 25-30 gallons) is ideal. You can find these at garden centers, nurseries, or even online. Make sure it’s clean and free of any harmful chemicals if it was previously used for something else.
* Drill and Drill Bits: For creating drainage holes.
* Gravel or Rocks: For drainage at the bottom of the barrel.
* Landscape Fabric: To prevent soil from washing away through the drainage holes.
* High-Quality Potting Mix: A well-draining mix is essential. Look for one specifically formulated for vegetables.
* Compost: To enrich the soil and provide nutrients.
* Cantaloupe Seeds or Seedlings: Choose a variety that’s well-suited to your climate. Bush varieties are often a good choice for containers.
* Trellis or Support System: Cantaloupe vines can get heavy, so you’ll need something to support them. A tomato cage, trellis, or even sturdy stakes will work.
* Watering Can or Hose: For watering your cantaloupes.
* Fertilizer: A balanced fertilizer formulated for vegetables.
* Gardening Gloves: To protect your hands.
* Optional: Mulch: To help retain moisture and suppress weeds.
Step-by-Step Instructions: Setting Up Your Cantaloupe Barrel
Okay, let’s get our hands dirty! Here’s how to set up your cantaloupe barrel for success.
1. Prepare the Barrel: If your barrel doesn’t already have drainage holes, you’ll need to drill some. Drill several holes (about ½ inch in diameter) in the bottom of the barrel. This is super important to prevent waterlogging.
2. Add Drainage Layer: Pour a layer of gravel or rocks (about 3-4 inches deep) into the bottom of the barrel. This will further improve drainage.
3. Line with Landscape Fabric: Cut a piece of landscape fabric slightly larger than the bottom of the barrel. Place it over the gravel layer. This will prevent the potting mix from washing away through the drainage holes.
4. Prepare the Soil Mix: In a large container or wheelbarrow, mix together your potting mix and compost. A good ratio is about 2 parts potting mix to 1 part compost. This will create a rich, well-draining soil that your cantaloupes will love.
5. Fill the Barrel: Fill the barrel with the soil mix, leaving about 4-6 inches of space at the top. This will prevent the soil from overflowing when you water.
6. Install Trellis or Support: Now’s the time to install your trellis or support system. Make sure it’s sturdy enough to support the weight of the cantaloupe vines and developing fruits. Position it in the center of the barrel.
Planting Your Cantaloupe
Now for the fun part – planting your cantaloupe!
1. Starting from Seed: If you’re starting from seed, sow the seeds directly into the barrel about ½ inch deep. Plant 2-3 seeds per spot, and thin them out to the strongest seedling once they emerge. Keep the soil consistently moist until the seeds germinate, which usually takes about 7-10 days.
2. Transplanting Seedlings: If you’re using seedlings, gently remove them from their containers. Dig a hole in the soil large enough to accommodate the root ball. Place the seedling in the hole and backfill with soil, gently firming it around the base of the plant. Space the seedlings about 12-18 inches apart.
3. Water Thoroughly: After planting, water the cantaloupe thoroughly to help settle the soil and encourage root growth.
Caring for Your Cantaloupe Plants
Okay, you’ve got your cantaloupe planted. Now it’s time to nurture them and watch them grow!
1. Watering: Cantaloupes need consistent moisture, especially during hot weather. Water deeply whenever the top inch of soil feels dry to the touch. Avoid overhead watering, as this can lead to fungal diseases. Aim for watering at the base of the plant.
2. Fertilizing: Feed your cantaloupe plants with a balanced fertilizer every 2-3 weeks. Follow the instructions on the fertilizer package. You can also use a liquid seaweed fertilizer for an extra boost.
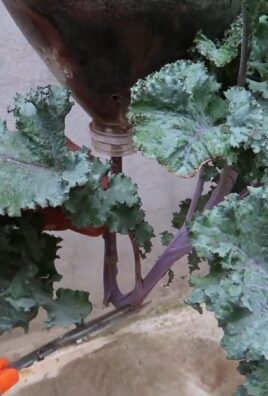
3. Pruning: Pruning isn’t strictly necessary, but it can help improve air circulation and encourage fruit production. Remove any yellowing or dead leaves. You can also pinch off the tips of the vines to encourage branching.
4. Pollination: Cantaloupes need to be pollinated in order to produce fruit. If you’re not seeing any fruit developing, you may need to hand-pollinate the flowers. To do this, use a small paintbrush to transfer pollen from the male flowers (which have a long, thin stem) to the female flowers (which have a small fruit at the base).
5. Support the Fruit: As the cantaloupes grow, they can become quite heavy. If they’re not adequately supported by the trellis, you may need to provide additional support. You can use slings made from pantyhose or netting to support the fruit.
6. Pest and Disease Control: Keep an eye out for pests like aphids, squash bugs, and cucumber beetles. You can control these pests with insecticidal soap or neem oil. Also, watch out for fungal diseases like powdery mildew. Improve air circulation and avoid overhead watering to prevent these diseases. If you do see signs of disease, treat with a fungicide.
Harvesting Your Cantaloupes
This is the moment you’ve been waiting for! Harvesting your homegrown cantaloupes.
1. When to Harvest: Cantaloupes are usually ready to harvest about 80-90 days after planting. The best way to tell if a cantaloupe is ripe is to check the stem. When the stem starts to crack and separate easily from the fruit, it’s ready to pick. You should also be able to smell a sweet, musky aroma.
2. How to Harvest: Gently twist the cantaloupe from the vine. If it’s ripe, it should come off easily. If it doesn’t, it’s not quite ready yet.
3. Enjoy! Once you’ve harvested your cantaloupe, let it sit at room temperature for a few days to ripen fully. Then, slice it open and enjoy the sweet, juicy flavor of your homegrown cantaloupe!
Troubleshooting
Even with the best planning, things can sometimes go wrong. Here are a few common problems you might encounter and how to fix them.
* Yellowing Leaves: This could be a sign of overwatering, underwatering, or nutrient deficiency. Check the soil moisture and adjust your watering schedule accordingly. Fertilize with a balanced fertilizer.
* No Fruit Production: This could be due to lack of pollination. Try hand-pollinating the flowers.
* Powdery Mildew: This is a fungal disease that appears as a white, powdery coating on the leaves. Improve air circulation and treat with a fungicide.
* Pests: Inspect your plants regularly for pests. Treat with insecticidal soap or neem oil.
Choosing the Right Cantaloupe Variety
Conclusion
So, there you have it! Growing cantaloupes in barrels isn’t just a quirky gardening experiment; it’s a game-changer for anyone with limited space, challenging soil, or simply a desire for a more controlled and rewarding gardening experience. We’ve walked through the steps, from selecting the right barrel and preparing the soil to nurturing your cantaloupe vines and harvesting those sweet, juicy fruits.
Why is this DIY trick a must-try? Because it democratizes cantaloupe cultivation! No longer do you need acres of land to enjoy the taste of homegrown cantaloupe. Barrels offer a contained environment, allowing you to optimize soil conditions, manage watering and fertilization with precision, and even protect your precious plants from pests and diseases more effectively. Imagine the satisfaction of biting into a perfectly ripe cantaloupe, knowing you nurtured it from seed to fruit, all within the confines of a simple barrel.
But the beauty of this method lies in its adaptability. Feel free to experiment! Try different cantaloupe varieties to discover your personal favorite. Consider adding companion plants like marigolds or basil around the base of your barrel to deter pests and attract beneficial insects. You could even explore vertical gardening techniques, training your cantaloupe vines up a trellis or support structure to maximize space and create a stunning visual display. For those in colder climates, using dark-colored barrels can help absorb heat and extend the growing season. And if you’re feeling particularly adventurous, why not try a self-watering barrel system to minimize maintenance and ensure consistent moisture levels?
The possibilities are truly endless. The key is to embrace the learning process, observe your plants closely, and adapt your approach as needed. Remember, gardening is a journey, not a destination.
We are confident that you will find this method of growing cantaloupes in barrels to be both rewarding and productive. It’s a fantastic way to enjoy fresh, homegrown cantaloupe, even if you’re short on space.
Now, it’s your turn! We wholeheartedly encourage you to give this DIY trick a try. Don’t be intimidated – even if you’re a beginner gardener, the steps are straightforward and the rewards are well worth the effort. And most importantly, we want to hear about your experience! Share your photos, tips, and challenges in the comments below. Let’s create a community of barrel-grown cantaloupe enthusiasts and learn from each other’s successes and failures. Together, we can unlock the full potential of this innovative gardening technique and enjoy a bountiful harvest of delicious, homegrown cantaloupes. So, grab a barrel, some soil, and a packet of cantaloupe seeds, and get ready to embark on a gardening adventure! Happy growing!
Frequently Asked Questions (FAQ)
What size barrel is best for growing cantaloupes?
A half-barrel (approximately 25-30 gallons) is generally considered the minimum size for growing a single cantaloupe plant. Larger barrels (40-55 gallons) are even better, as they provide more room for root development and help retain moisture. The larger the barrel, the more stable the growing environment will be, which is especially beneficial in hot or windy climates. Make sure the barrel has adequate drainage holes to prevent waterlogging.
What type of soil should I use in my cantaloupe barrel?
Cantaloupes thrive in well-draining, nutrient-rich soil with a slightly acidic to neutral pH (around 6.0-7.0). A good mix would include equal parts of high-quality potting soil, compost, and perlite or vermiculite. The potting soil provides a base for the plants, the compost adds essential nutrients and improves soil structure, and the perlite or vermiculite enhances drainage and aeration. Avoid using garden soil directly in the barrel, as it can be too heavy and compacted, hindering root growth. You can also amend the soil with slow-release fertilizer to provide a steady supply of nutrients throughout the growing season.
How often should I water my cantaloupe plants in a barrel?
Watering frequency depends on several factors, including the weather, the size of the barrel, and the stage of plant growth. Generally, you should water deeply whenever the top inch of soil feels dry to the touch. During hot, dry periods, you may need to water daily or even twice a day. Avoid overwatering, as this can lead to root rot. A good rule of thumb is to water thoroughly until you see water draining from the bottom of the barrel. Mulching around the base of the plant can help retain moisture and reduce the need for frequent watering.
How much sunlight do cantaloupes need when grown in barrels?
Cantaloupes are sun-loving plants and require at least 6-8 hours of direct sunlight per day to thrive. Choose a location for your barrel that receives ample sunlight throughout the day. If you live in a particularly hot climate, providing some afternoon shade can help prevent the plants from overheating. If you don’t have a sunny spot, you might consider using grow lights to supplement the natural sunlight.
How do I fertilize cantaloupe plants in barrels?
Cantaloupes are heavy feeders and benefit from regular fertilization. Start with a balanced fertilizer (e.g., 10-10-10) at planting time, following the instructions on the package. Once the plants start to flower, switch to a fertilizer with a higher phosphorus content (e.g., 5-10-5) to promote fruit development. You can also supplement with liquid seaweed or fish emulsion every few weeks to provide micronutrients. Avoid over-fertilizing, as this can lead to excessive foliage growth at the expense of fruit production.
How do I prevent pests and diseases when growing cantaloupes in barrels?
Growing cantaloupes in barrels can actually help reduce pest and disease problems compared to growing them in the ground. However, it’s still important to take preventative measures. Inspect your plants regularly for signs of pests or diseases. Common pests include aphids, squash bugs, and cucumber beetles. You can control these pests with insecticidal soap, neem oil, or by handpicking them off the plants. Common diseases include powdery mildew and fusarium wilt. To prevent these diseases, ensure good air circulation around the plants, avoid overhead watering, and use disease-resistant cantaloupe varieties.
How do I know when my cantaloupe is ripe?
Knowing when to harvest your cantaloupe is crucial for enjoying its full flavor and sweetness. There are several indicators of ripeness:
* **Color:** The skin of the cantaloupe will change from green to a tan or yellowish color.
* **Aroma:** A ripe cantaloupe will have a sweet, musky aroma, especially near the stem end.
* **Stem:** The stem will begin to crack and separate easily from the fruit. This is known as “slipping.”
* **Sound:** When you tap on the cantaloupe, it should sound hollow.
Once the cantaloupe is ripe, gently twist it from the vine. If it doesn’t come off easily, it’s not quite ready.
Can I grow more than one cantaloupe plant in a single barrel?
While it’s technically possible to grow more than one cantaloupe plant in a large barrel, it’s generally not recommended. Cantaloupe plants need ample space for their roots to develop and their vines to spread. Crowding the plants can lead to reduced fruit size, increased susceptibility to pests and diseases, and overall lower yields. If you want to grow multiple cantaloupe plants, it’s best to use separate barrels for each plant.
What are some good cantaloupe varieties to grow in barrels?
Several cantaloupe varieties are well-suited for growing in containers, including:
* **Sugar Cube:** A small, sweet cantaloupe that matures quickly.
* **Minnesota Midget:** Another compact variety that is ideal for small spaces.
* **Bush Star:** A bush-type cantaloupe that doesn’t require as much vining space.
* **Jenny Lind:** An heirloom variety with a unique turban shape and sweet flavor.
When choosing a variety, consider your local climate, the size of your barrel, and your personal taste preferences.
Can I overwinter my cantaloupe plants in the barrel?
Cantaloupes are annual plants, meaning they complete their life cycle in one growing season and do not survive the winter. Once the growing season is over, you’ll need to remove the plants from the barrel and dispose of them. You can then clean the barrel and prepare it for the next growing season.
Leave a Comment